

 TL;DR:
Exporting from Adobe Premiere Pro achieves the optimal quality-to-size ratio when using the H.264 format with VBR 2-pass encoding and AAC audio at 320 kbps, provided your system has the processing power to handle the rendering load.
● Precise technical parameters depend heavily on your target resolution, requiring a High profile set to Level 4.2 for standard 1080p uploads on platforms like YouTube, and Level 5.2 for 4K video projects.
● Premiere Pro's rendering process mandates strict hardware prerequisites, specifically a dedicated NVIDIA or AMD GPU and a minimum of 16 GB of RAM, to prevent system lag and extended export durations during complex projects.
● Wondershare Filmora serves as a direct alternative for beginners and social media creators operating on average computers, replacing complex manual configurations with one-click export presets optimized for specific aspect ratios on TikTok, Instagram, and YouTube.
Ask AI for a summary
 ChatGPT
 Perplexity
 Gemini
 Claude
 Grok
Grok
Adobe Premiere Pro is still a favorite for many professionals, but not every creator has the time or patience for its complex workflow. Tasks like exporting from Premiere Pro can be confusing and time-consuming, especially with detailed settings and long rendering times.
What you need is the right guidance and a tool that makes exporting simple. In this article, we will guide you on how to export from Premiere Pro in the best settings, and take a look at user-friendly tools that offer great performance without a steep learning curve.

Part 1. Best Export Settings for Premiere Pro
One of the biggest strengths of Adobe Premiere Pro is its flexibility. It supports a wide range of export settings, where you can customize your video and audio output based on your platform, audience, or technical needs.
However, exporting from Premiere Pro can feel overwhelming, especially with so many settings to choose from. It's not always clear which options will give you the best balance of quality and file size.
To make things easier, we've put together a quick guide on the ideal export settings in Premiere Pro so you can have the best results for your creation.
Video Export Settings
When exporting your video, these are the key settings to consider:
- Format: H.264 is the most widely used format for social platforms and general sharing due to its balance of quality and file size.
- Resolution: Use 1920x1080 (Full HD) for most platforms. For higher quality or large displays, 4K (3840x2160) is also an option.
- Frame Rate: Match the frame rate of your original footage (typically 24, 30, or 60 fps).
- Bitrate Encoding: Use "VBR, 2 pass" for higher quality. Adjust target and maximum bitrate depending on platform (e.g., 10-20 Mbps for HD).
- Profile: Set to "High" for the best quality.
- Level: Use 4.2 for 1080p and 5.2 for 4K video.
Audio Export Settings
To ensure your audio sounds as clean and clear as your video looks, check these settings:
- Audio Codec: AAC (Advanced Audio Codec) is standard and widely supported.
- Bitrate: 320 kbps provides the best quality for most professional needs.
- Sample Rate: Use 48 kHz, which is standard for video production.
Part 2. How to Export a Video from Premiere Pro
Once your editing is complete, the final step is exporting your project so it's ready to share. For those of you posting to LinkedIn, uploading to YouTube, or saving a local copy, Premiere Pro gives you full control over the export process.
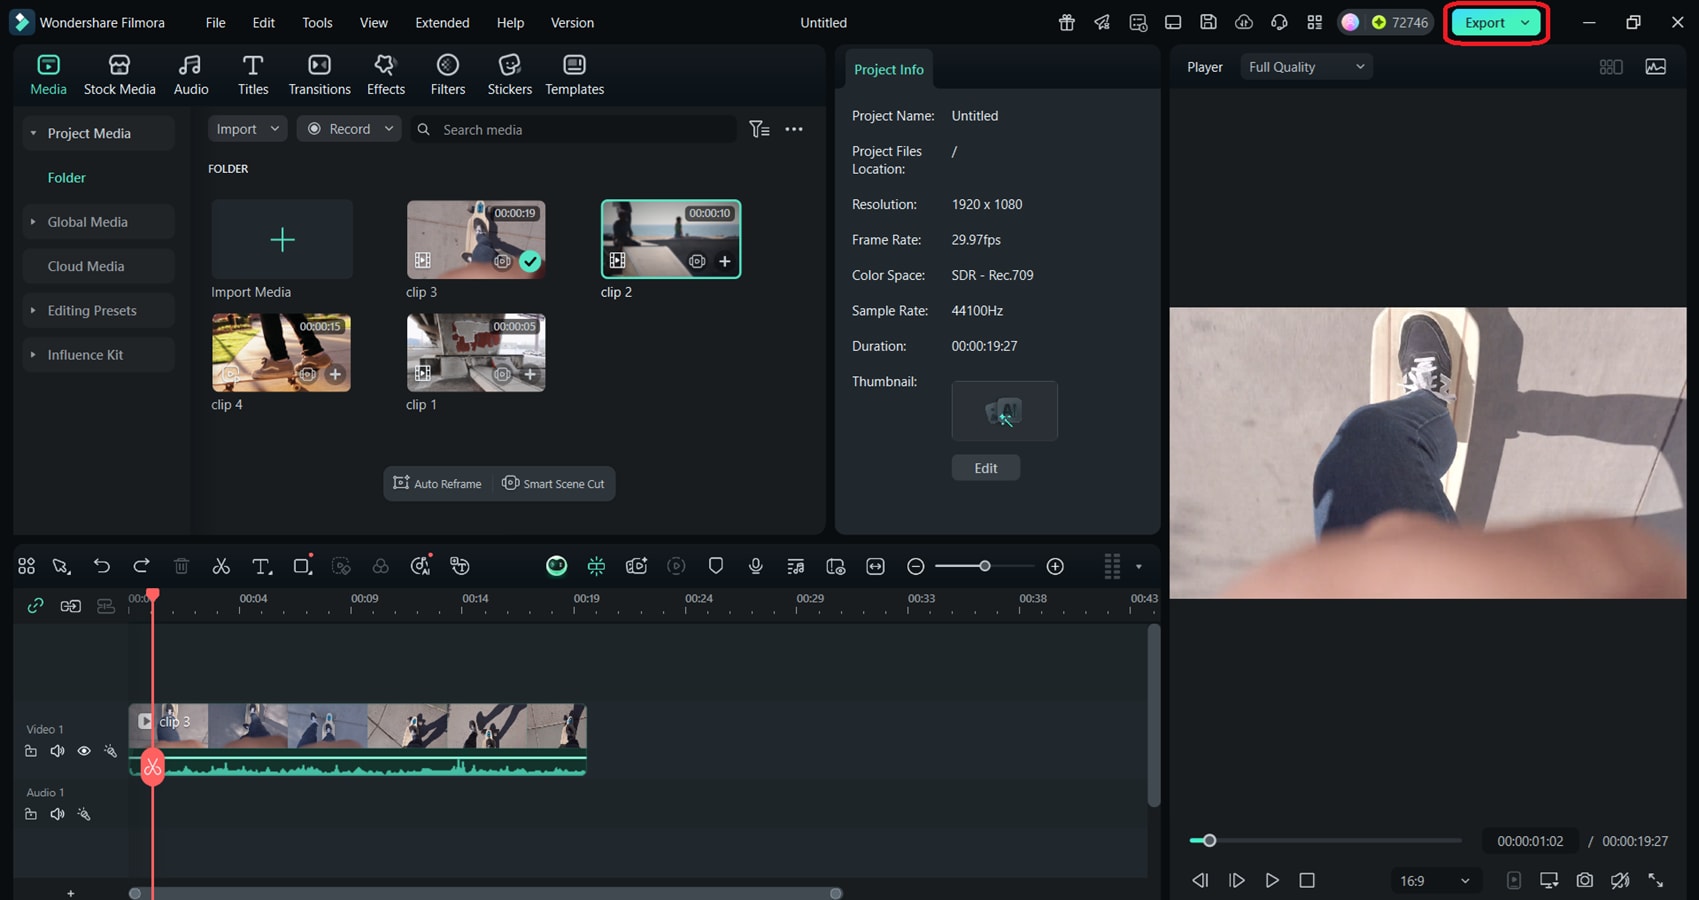
Follow these steps to export a video from Premiere Pro smoothly:
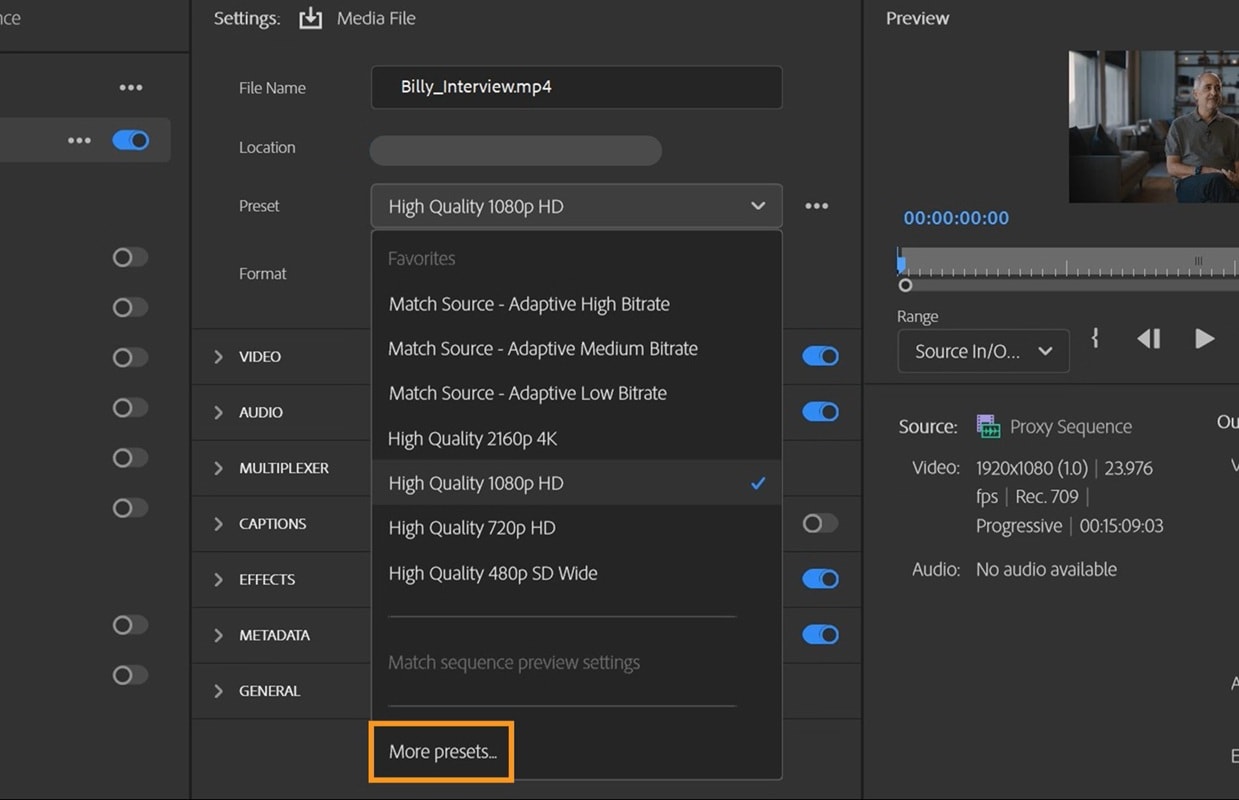
Step-by-step Tutorial:
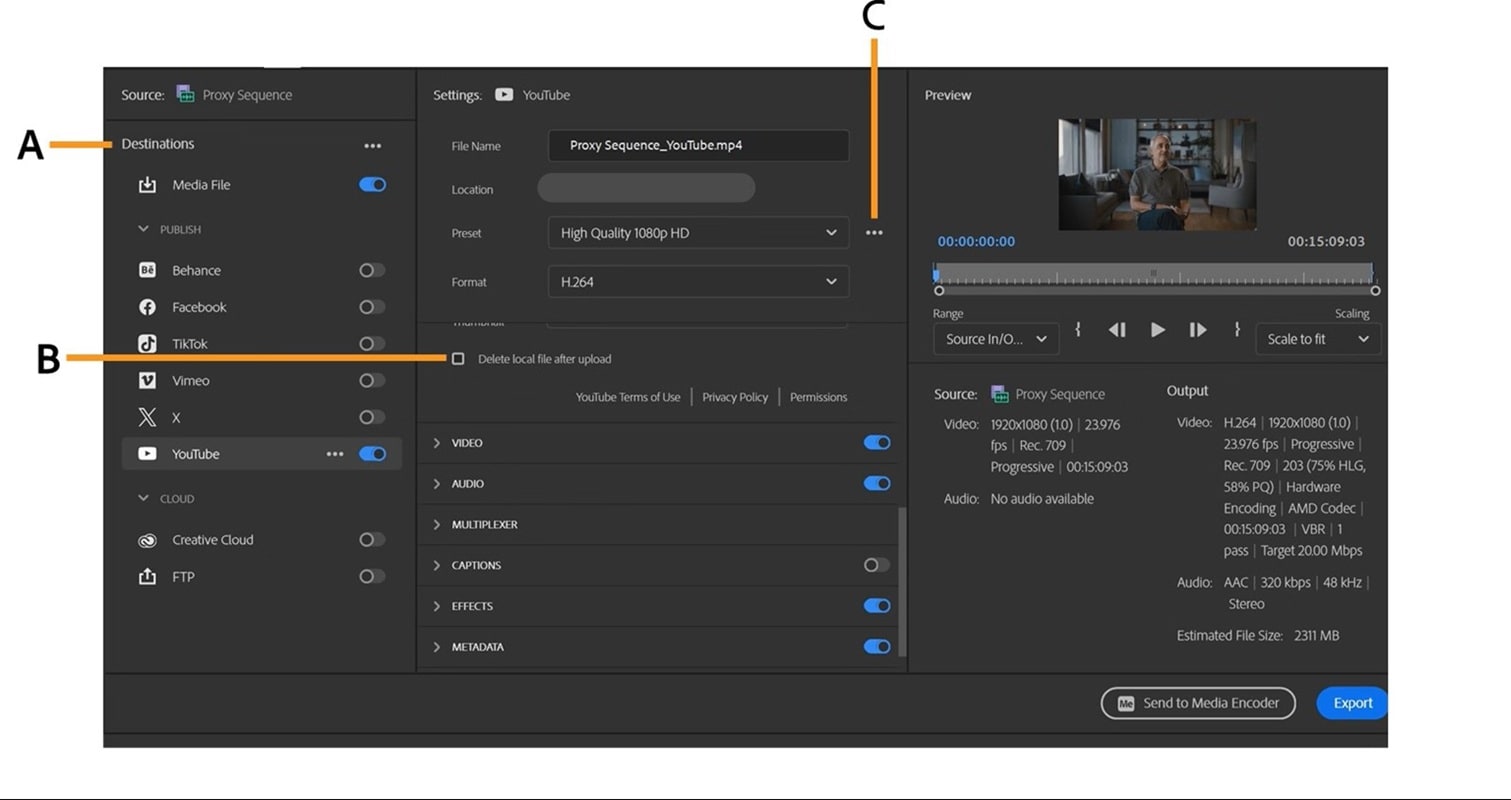
Notes: A. Choose export destinations. B. Access output settings. C. Customize export preset
Part 3. Premiere Pro Export Performance Review
Exporting from Premiere Pro is known for its professional-level control, but how does it perform when it comes to speed, file size, and system requirements? Here's a breakdown of what to expect during the export process:
Speed and file size
Premiere Pro offers high-quality exports, but the speed depends heavily on your system specs and export settings. If you're working with 4K footage, high bitrates, or complex effects, rendering can take a while. Using hardware encoding can help speed things up, but even then, export times can feel longer compared to lightweight editors.
File sizes also vary based on your settings. While H.264 helps keep things manageable, high-quality or multi-pass exports can still produce large files that may require compression for easier sharing.
Hardware Requirements
To get the most out of Premiere Pro's exporting performance, a powerful system is recommended. Systems with a fast CPU, a dedicated GPU (like NVIDIA or AMD), and a large amount of RAM (16 GB or more) will handle rendering faster. Without this setup, exports may be slow, and you may experience lag during the process.
Pros and Cons of the Export Process
- Full control over every export detail
- Presets for different platforms and formats
- Supports high-resolution, broadcast-quality output
- Integration with Adobe Media Encoder for batch exporting
- Long export times, especially for large or complex projects
- Steeper learning curve for beginners
- Heavily reliant on hardware performance
- Can result in large file sizes unless carefully optimized
Part 4. A Simpler Alternative - Wondershare Filmora
While many professionals rely on Adobe's tools, not everyone has the time or technical experience to export from Premiere efficiently. For creators looking for a more intuitive and efficient editing experience, Wondershare Filmora is a great alternative.
Filmora is built for creators who want high-quality results without a steep learning curve. It offers powerful features like High Precision Audio, one-click export presets, and a clean interface to simplify the process, especially for those producing content consistently across platforms.

Why Consider Filmora Instead:
- High Precision Audio: Helps enhance voiceovers, dialogue, and background music without advanced editing.
- Fast Export Speeds: Export times are shorter, even on average computers.
- User-Friendly Interface: Streamlined tools and templates make editing and exporting simple for all skill levels.
- One-Click Presets: Quickly export for platforms like YouTube, TikTok, Instagram, and more.
- Lightweight on Hardware: Runs smoothly even without a high-end GPU or processor.
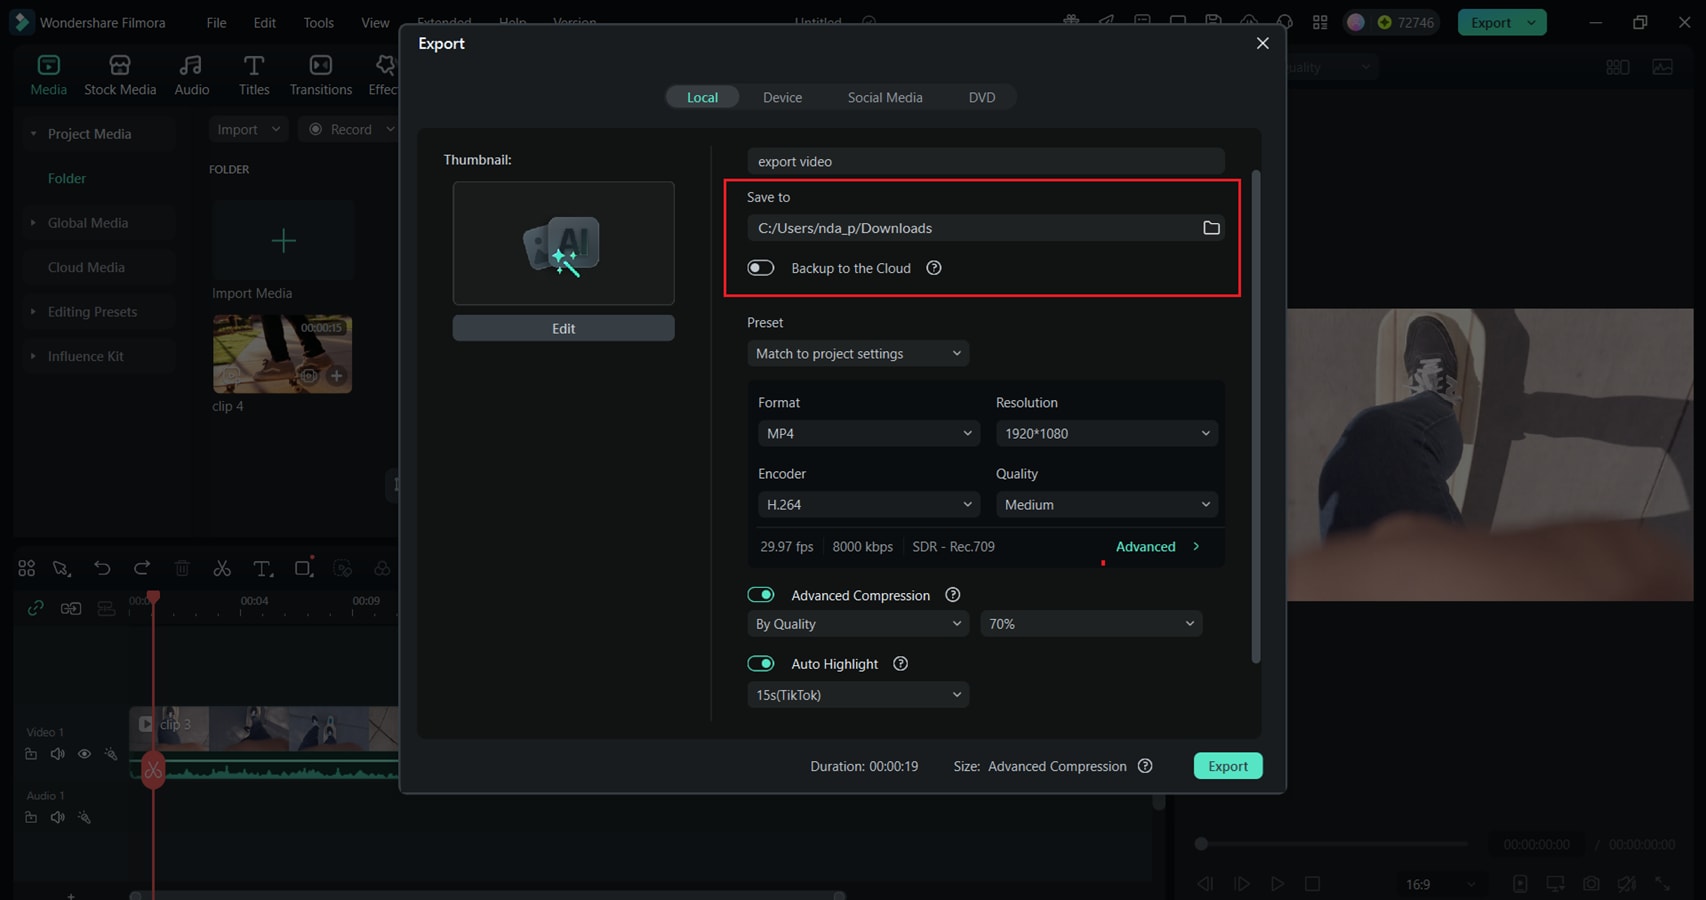
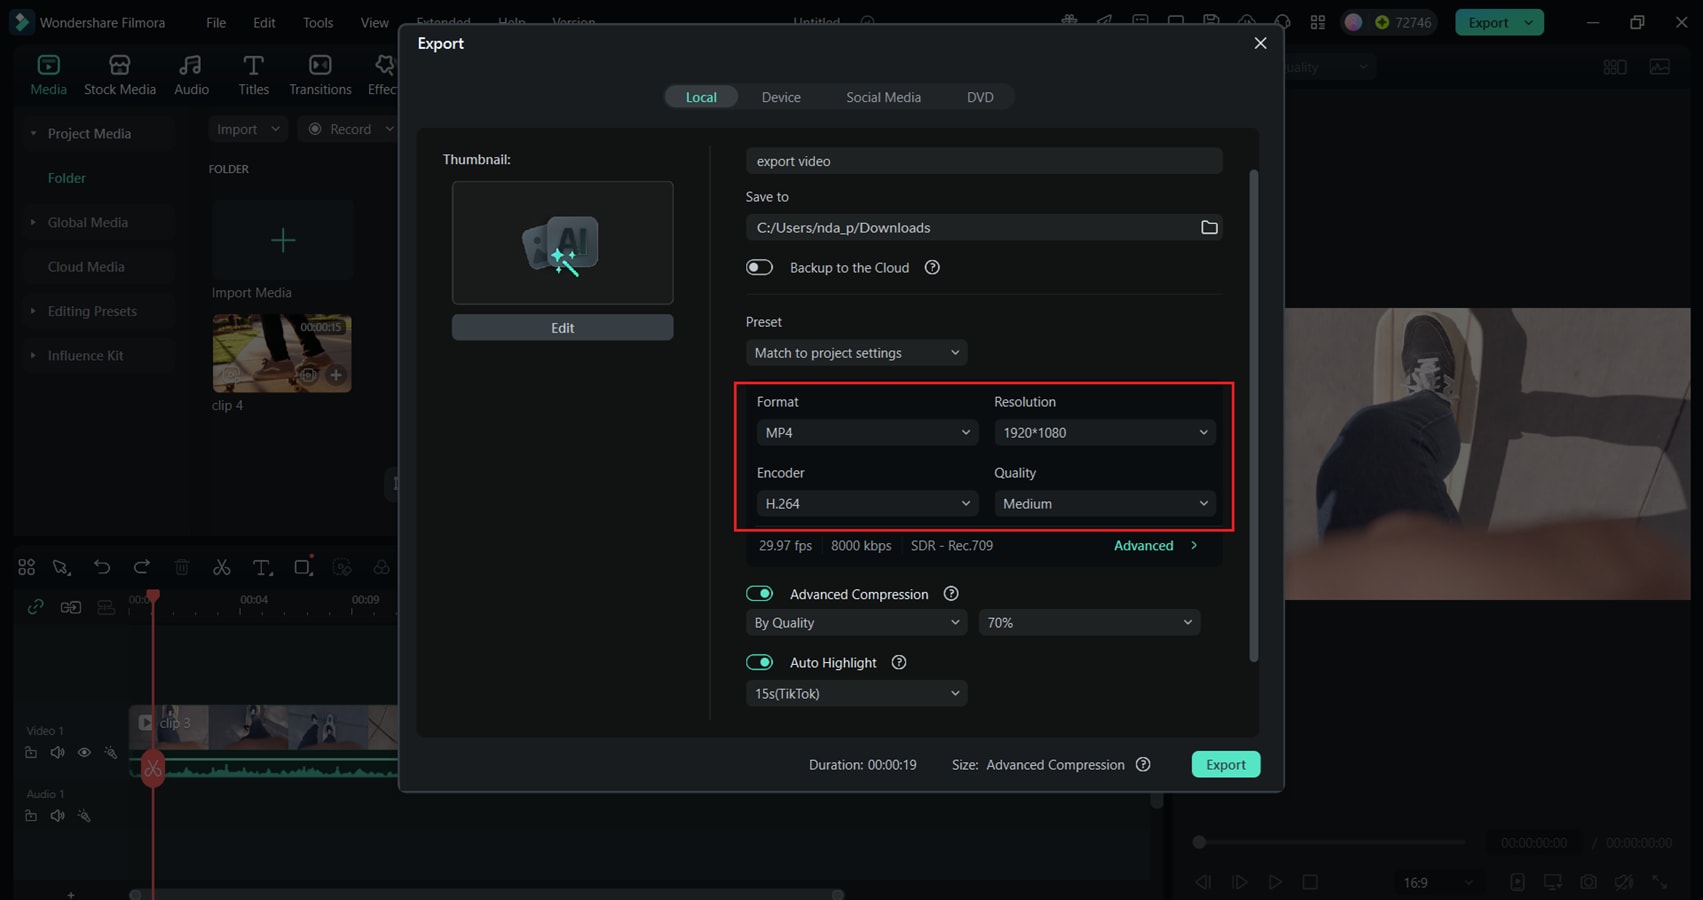
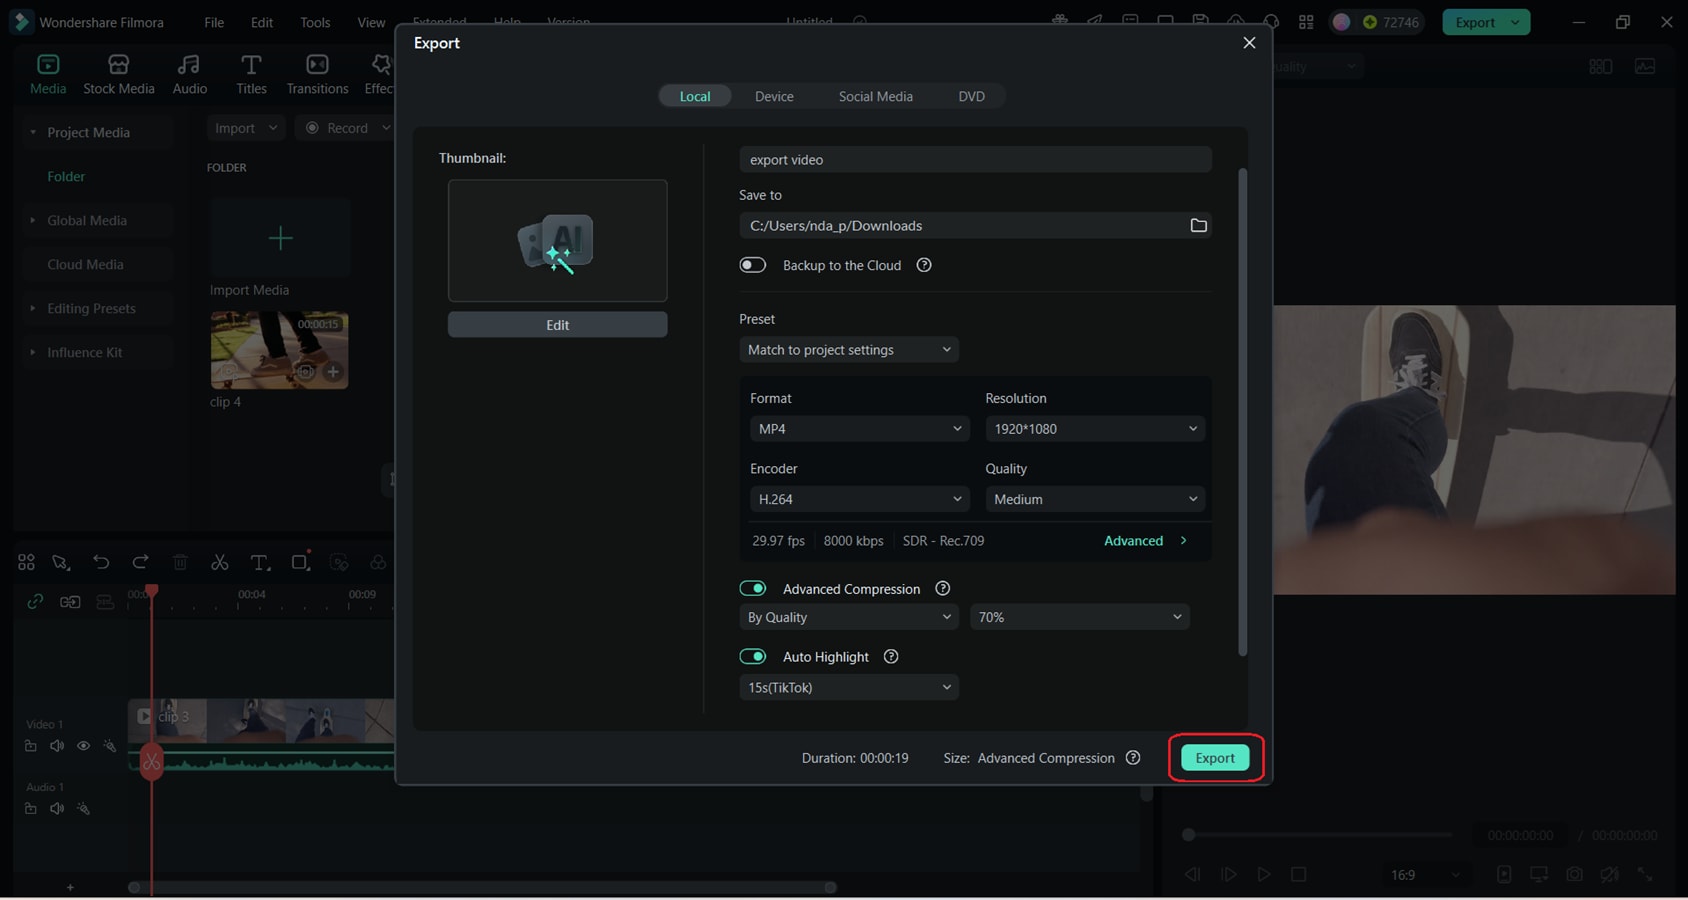
Quick Export Steps in Filmora:
Exporting Video

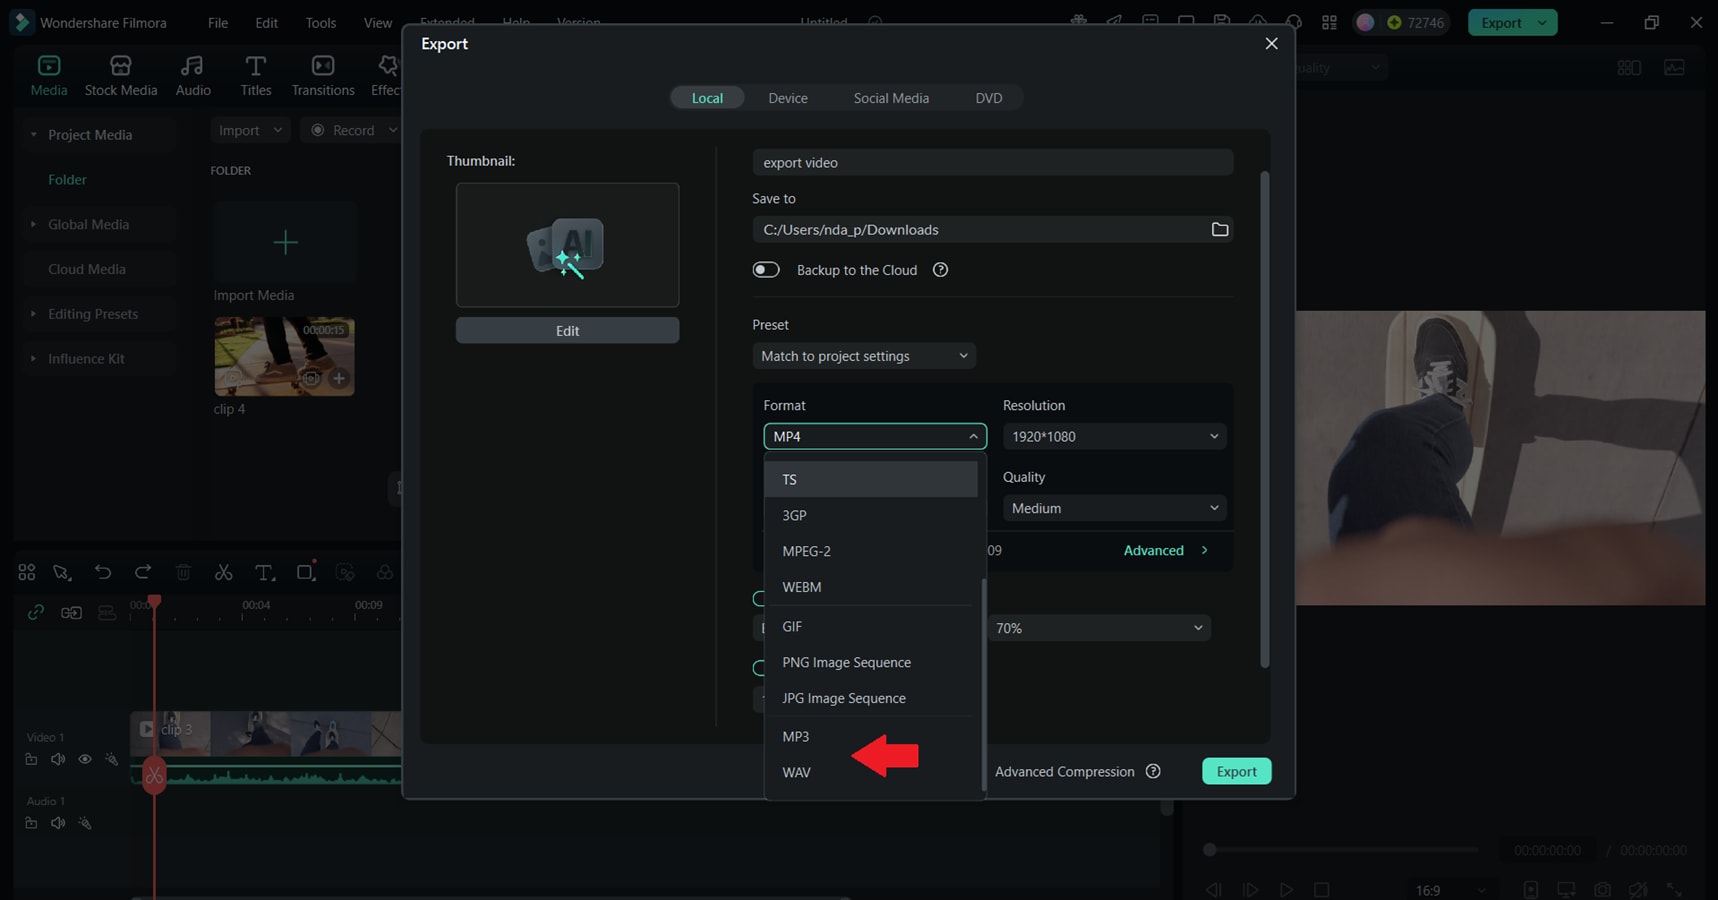
Exporting Audio
- When ready, click Export.
- Under the Format tab, select MP3, WAV, or another audio format. Set the file name and destination folder.
- Click Export to save the audio file only.
Summary of Recommended Export Settings for Different Platforms

Export to YouTube
YouTube supports high-quality videos, so use a higher bitrate and resolution if possible. For regular uploads, 1080p is often the most efficient balance between quality and file size.
- Format: MP4 (H.264)
- Resolution: 1080p or 4K
- Audio: AAC
Export to Instagram
Instagram prefers vertical and square formats. Keep file sizes small for faster uploads, and ensure your content is optimized for mobile viewing.
- Format: MP4
- Resolution: 1080x1080 (square) or 1080x1920 (vertical for Stories/Reels)
- Length: Short-form videos perform best
Export to TikTok
TikTok is all about vertical, small-sized content. Keep videos under one minute and optimized for mobile with clear visuals and sound.
- Format: MP4
- Resolution: 1080x1920 (vertical 9:16)
- Length: Up to 60 seconds
Export to Facebook
Facebook supports a range of formats, but 1080p ensures smooth playback. Square and horizontal formats work well, depending on your post style.
- Format: MP4
- Resolution: 720p or 1080p
- Audio: AAC
Conclusion
Exporting from Premiere Pro can feel like a project on its own. Between the settings, render times, and format choices, it's easy to feel overwhelmed. But it doesn't have to be perfect every time. Whether you continue with Premiere Pro or try a simpler option like Filmora, the most important thing is finding a process that works for you.
With the help of this article and a bit of practice, editing and exporting will start to feel much easier.
