
 100% Security Verified | No Subscription Required | No Malware


 ChatGPT
 Perplexity
 Gemini
 Claude
 Grok
Grok
I have some valuable videos and older movies. But they're not quite fit for watching: the quality is bad, the image is blurry, and the video is dark. How can I improve the quality of them?
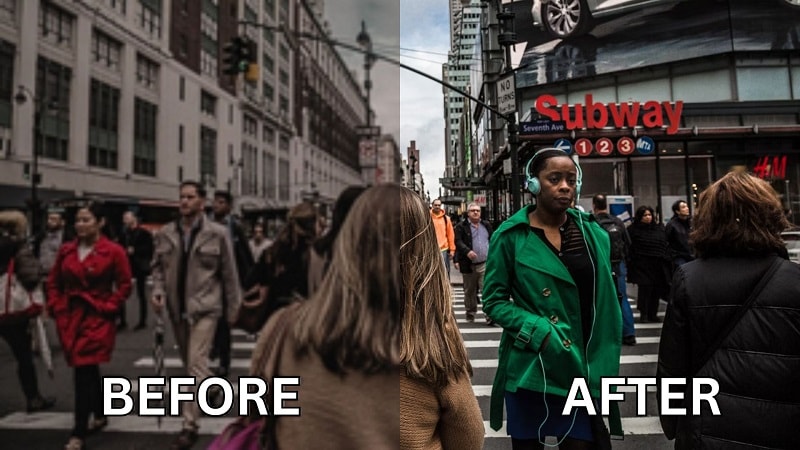
Is your video looking blurry, shaky, or just not as clear as you expected? Don't rush to delete it just yet. There are several simple ways to enhance video quality and give your footage a second chance.
Even with a high-end camera or phone, little things like bad lighting or the wrong settings can mess with your results. What you need is a combination of smart recording habits and easy post-editing tools that help you fix and enhance your video, even old blurry videos.
The guide below covers everything you need. We'll start by breaking down the key factors that affect video quality so you can understand what went wrong. Then, move on to practical tips to enhance video quality step by step.
In this article
Part 1. Technical Factors That Impact Video Quality
Sometimes you might not notice it until you play the footage back. Turns out, your video looks blurry, grainy, or just off. These issues often come down to a few key technical factors:
- Bitrate: Bitrate controls how much data is used to display your video. A higher bitrate generally means better quality, but it also increases file size. Too low, and your video may look pixelated or choppy.
- Lighting: Good lighting makes a huge difference. Poor lighting can cause grainy or dull footage because your camera struggles to capture enough detail in dark areas.
- Resolution: Resolution is the number of pixels in each frame of your video. Therefore, the higher the resolution, the more detail your video can show. If your resolution is too low, your video may look soft or blurry, especially on larger screens.
- Compression: When a video is compressed too much, it can lose detail and become blurry. This often happens when uploading to platforms like YouTube or sending files through messaging apps.
- Camera Settings: Frame rate, ISO, white balance, and focus settings all play a role in the final output. There's nothing wrong with auto settings, but they don't always adjust accurately for your scene.
Because of these technical factors, even a well-shot scene can end up looking low quality if something is off. But the good news is, you can still take steps to improve it afterward. For the videos you've already recorded, you can boost the video quality by using the methods in the next section.
Part 2. How to Improve Video Quality: 5 Easy Fixes
Now that you know what affects video quality, let's talk about how do you improve the quality of a video. First, you need the right tool to help you out. One of the best tools that most users use is Wondershare Filmora. This video editor provides several easy solutions to enhance your video, depending on the problem you are facing, and make sure it looks clean and sharp.
Start by installing and opening Filmora on your computer. Click on New Project and select Import Media to bring in the video you want to fix. After that, follow the method below that best matches your situation.
Improve Video Quality with AI Video Enhancer
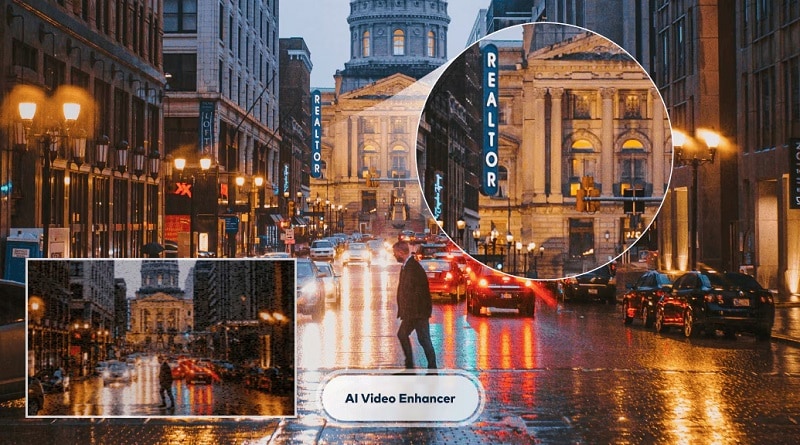
If you're dealing with a video that looks dull, blurry, or lacks detail, you can use Filmora's AI Video Enhancer to increase video quality. This tool analyzes your footage and automatically adjusts brightness, contrast, and sharpness to improve clarity.
To use the AI Video Enhancer, follow the steps below:
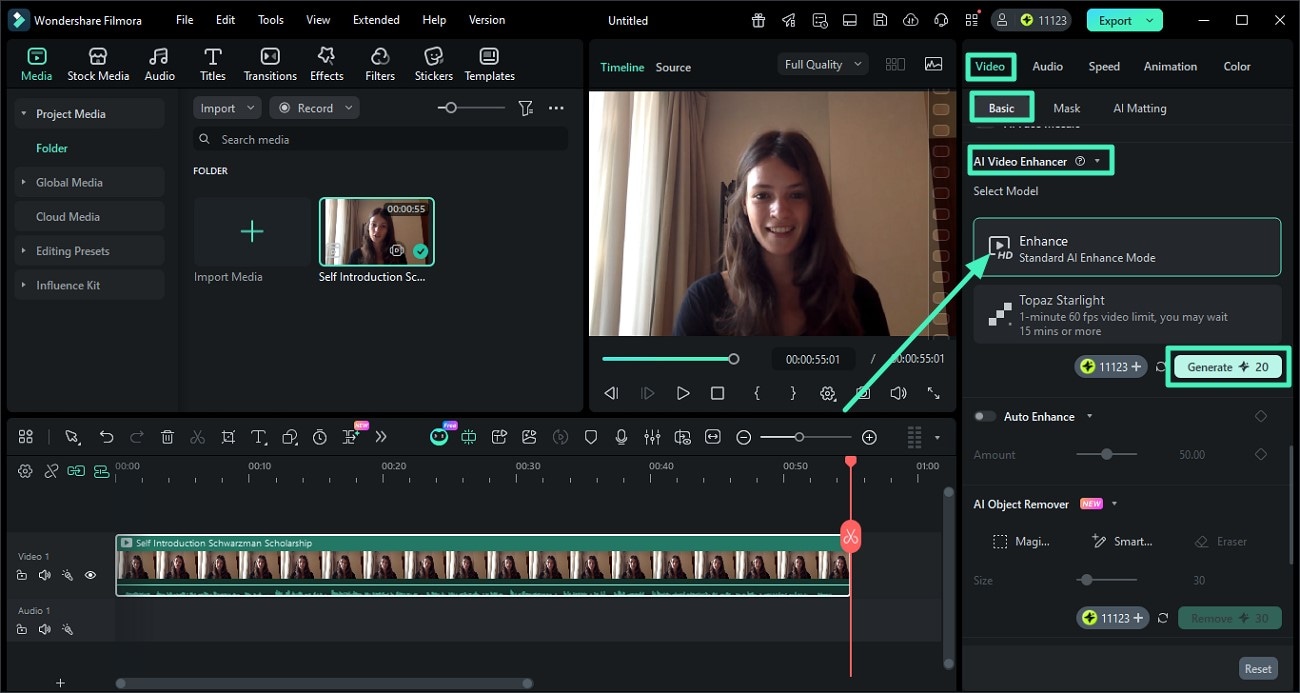
- Click on the clip on the timeline. Head over to the Video section and open the Basic tab.
- Choose "Enhance" to apply the standard AI enhance mode. Filmora will automatically adjust things like clarity, brightness, and sharpness. Click Generate to begin improving your video quality.


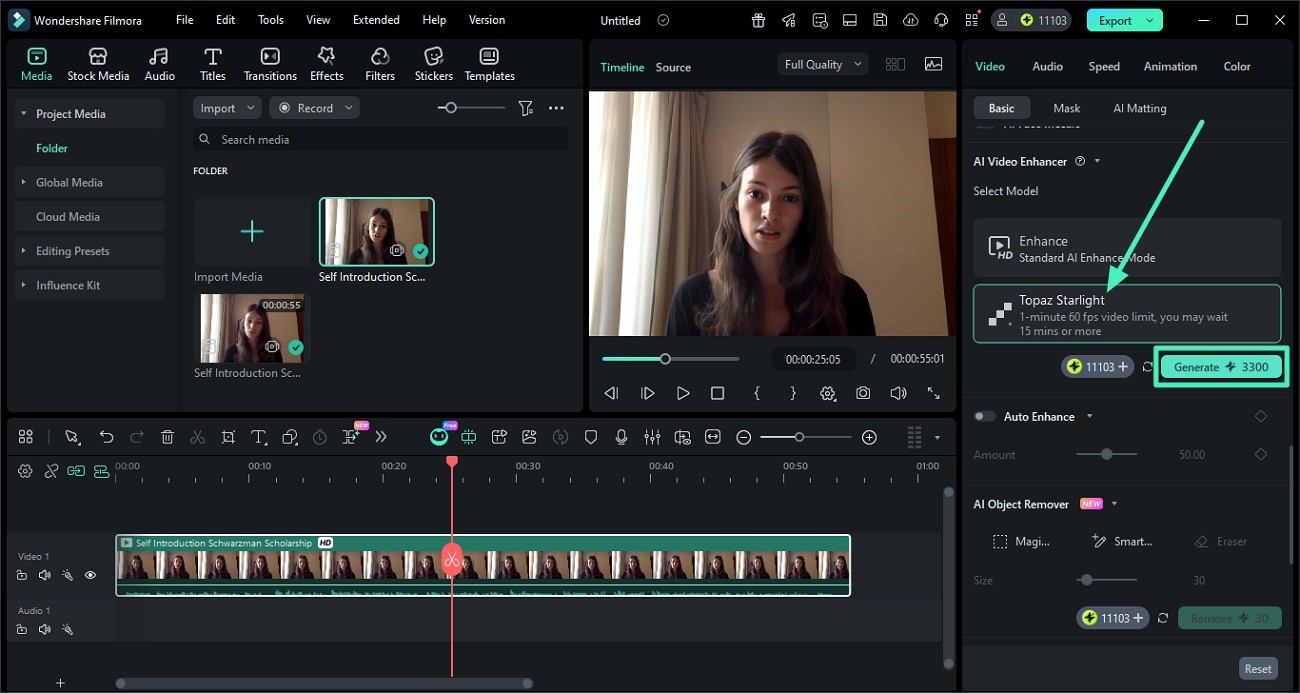
Upscale Video with Topaz Starlight Model

For professional-grade results, Filmora integrates the Topaz Starlight model. This deep super-resolution technology reconstructs fine details with superior edge clarity and noise control, allowing you to achieve commercial-level quality directly within your workflow.
To use the Topaz Starlight model, follow the steps below:
- After locating the AI Video Enhancer.
- Select Topaz Starlight for maximum detail recovery.
- Click Generate to begin improving your video quality.
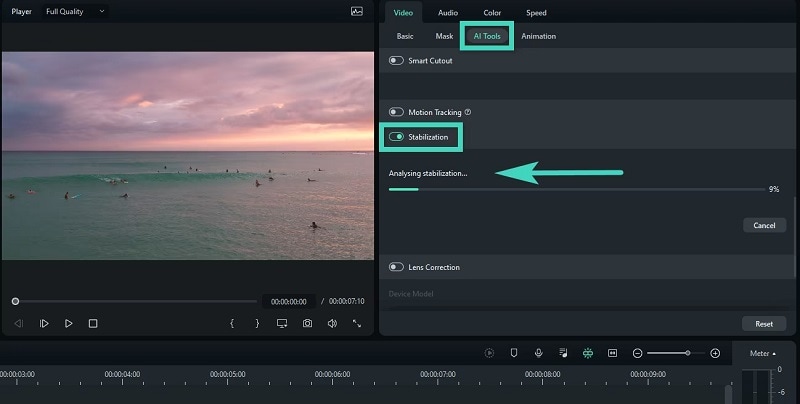
Video Stabilization
Does your video look bad because it's too shaky? If you're using a camera or smartphone that doesn't have built-in stabilization, it's common to end up with wobbly footage.
The good news is, you can increase the quality of the video in just a few steps using Filmora's Video Stabilization feature.
- In the editing panel, go to the Video > Basic tab.
- Scroll down to find Stabilization. Turn it on, and Filmora will automatically analyze your clip and reduce the shake.
Adjust Color Settings
If your video looks off because of strange colors or lighting, how do you enhance the video quality? The easiest solution is to fix it with Filmora's color correction tools. You can adjust brightness, contrast, saturation, temperature, and more to make your video look better.
First, select your clip on the timeline and head over to the Color tab. You'll see several options:
- Basic: Adjust the overall look of your video with simple controls like brightness, contrast, saturation, temperature, and tint. Great for quick fixes.
- HSL: Fine-tune individual colors by adjusting their hue, saturation, and luminance. This gives you more control over specific shades in your video.
- Curves: Use curve adjustments to control highlights, midtones, and shadows. It's a more advanced tool, but super helpful for creating a stylized look.
- Color Wheels: Perfect for balancing the tones in your shadows, midtones, and highlights. You can use this to give your video a cinematic or color-graded feel.
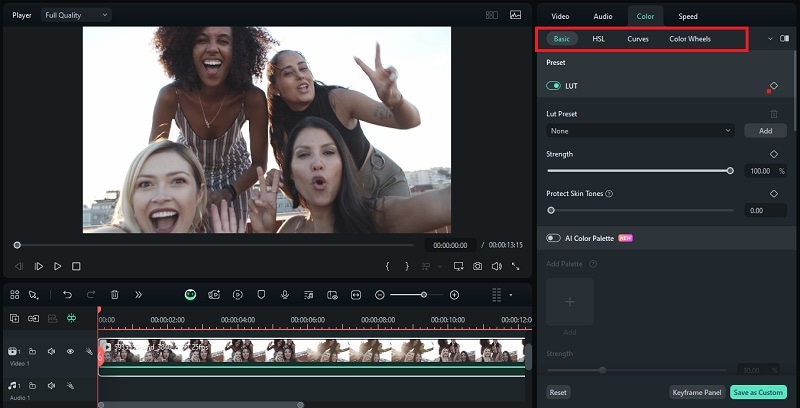
If you're unsure where to start, try Filmora's built-in LUT presets under the Basic tab. Just one click can make your footage look much more eye-catching.
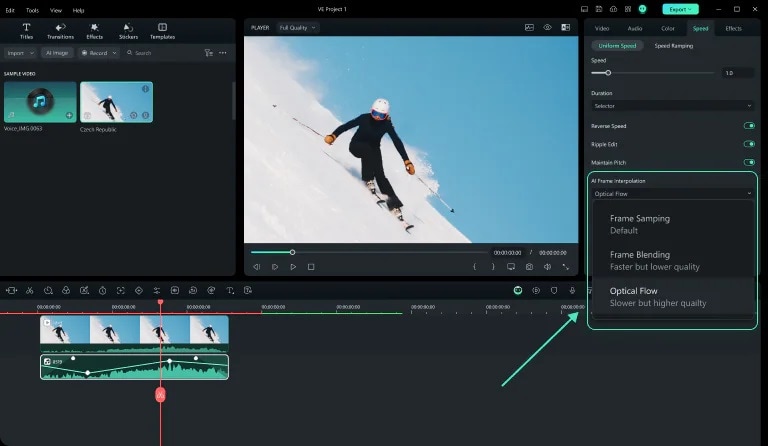
Frame Interpolation
Next, if your video looks choppy or too fast, especially during slow-motion scenes or low frame rate recordings, frame interpolation can help improve your video quality by smoothing things out. This technique works by generating new frames between the original ones to create a more fluid motion.
How to enhance video quality with frame interpolation in Filmora:
- Click on the video in the timeline to select it
- Go to the top toolbar and choose "Speed" > "Uniform Speed" to adjust how fast or slow your video plays.
- Scroll down and expand the "AI Frame Interpolation" section.
- Select "Optical Flow" from the available options. This setting uses advanced AI to generate extra frames.
Part 3. How to Enhance Video Quality Online for Free
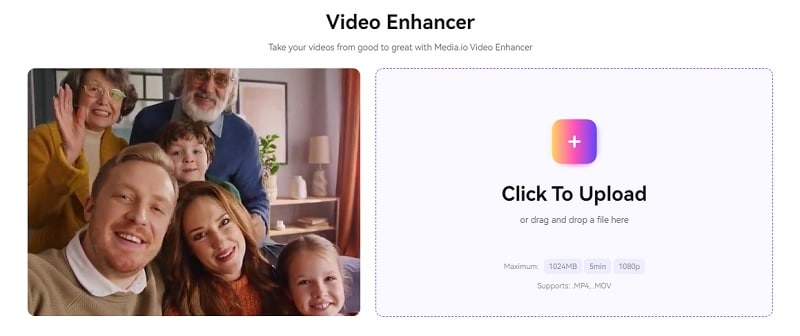
For those who prefer to enhance their video quality online, one platform worth trying is Media.io Video Enhancer. It works directly from your browser and uses AI to sharpen blurry footage, upscale resolution, reduce noise, and more. This AI video enhancer is perfect for beginners or anyone looking for a quick fix.
But before you start, there are a few things to keep in mind if you are going to use Media.io to increase the quality of your video online:
- Max file size: 1024MB
- Max duration: 5 minutes
- Max resolution: 1080p
- Supported formats: .mov and .mp4
Once you're ready, follow the steps below.
How to Improve Video Quality Online For Free
Step 1: Visit Media.io Video Enhancer in your browser and click “Enhance Video Online.”
Step 2: Next, hit the “Click to Upload” button to import the video file you want to improve. Wait for it to upload completely.
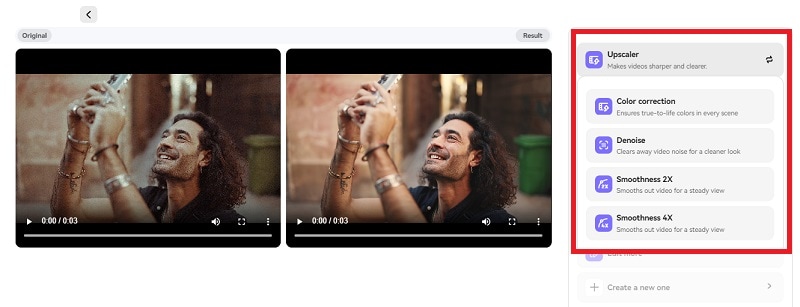
Step 3: Once your video is uploaded, the tool will automatically improve the low-quality video and show you a preview. If you want, you can also choose the type of enhancement you want, including:
- Upscale Resolution (up to 4K)
- Color Correction
- Denoise (clears video noise)
- Smoothness 2X
- Smoothness 4X
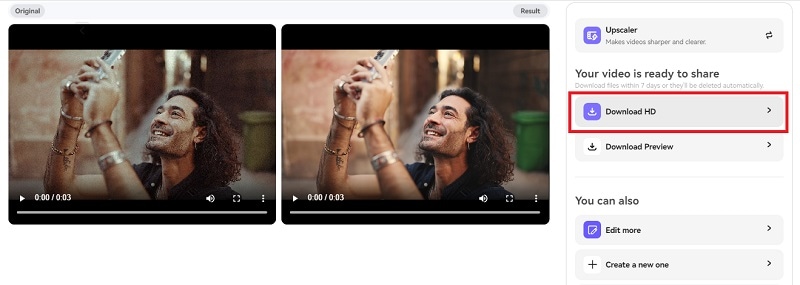
Step 4: If you are satisfied with the result, click Download to save the enhanced video.
Part 4. Tips for Achieving Better Video Quality Before Recording
Fixing video quality in editing is great, but starting with good footage makes everything easier. Besides providing you with solutions to fix low-quality footage, we also have some simple but effective tips that can make your video quality better right from the start:
1. Keep your footage steady by using a tripod or handheld stabilizer.
Shaky footage can ruin even the best content. Use a tripod or handheld stabilizer to keep your shots steady and smooth.
2. Clean your camera lens before recording.
It sounds obvious, but a smudged lens can make your video look blurry or hazy. Give it a quick wipe with a clean cloth before you hit record.
3. Record in good lighting (natural light is best).
Lighting is everything. Natural light (like filming near a window or outside during golden hour) often gives the best results. If indoors, use soft lights and avoid harsh shadows.
4. Switch to manual mode to gain more control over your exposure and focus settings.
Auto mode can be hit or miss. If your camera or phone allows it, switch to manual mode so you can control focus, exposure, and white balance for more consistent results.
5. Avoid digital zoom - move closer or crop later instead.
Digital zoom reduces quality by stretching pixels. Instead, move closer to your subject or crop your video during editing to keep it sharp.
Moreover, before recording, make sure you're filming in the recommended video settings. This gives you high-quality footage to work with later.
| Video Setting | Recommended Value |
| Resolution | 1920x1080 (Full HD) or 3840x2160 (4K) |
| Frame Rate | 24fps (cinematic), 30fps (standard), or 60fps (smooth motion) |
| Bitrate | 8–12 Mbps for 1080p, 35–45 Mbps for 4. |
| Video Format | MP4 (H.264 codec), MOV, or MKV |
Taking a few extra seconds to prep before filming can save you a lot of editing headaches—and your videos will look better right from the start.
Bonus: How to Keep Video Quality High While Reducing File Size
One common challenge with high-quality video is the large file size that comes with it. This can make uploading, sharing, or storing your videos more difficult, especially on platforms with size limits like TikTok, Instagram, and the like.
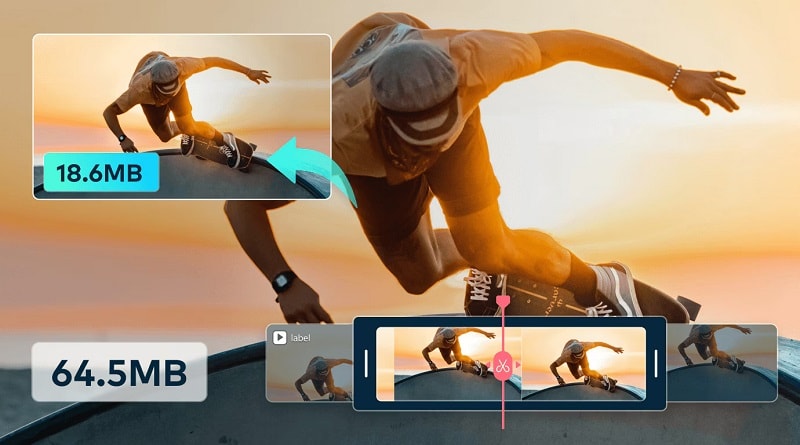
To solve this, Filmora offers an Advanced Compression feature that helps reduce file size without a noticeable loss in quality. After improving the video quality, you can still optimize the size by enabling advanced compression while exporting.
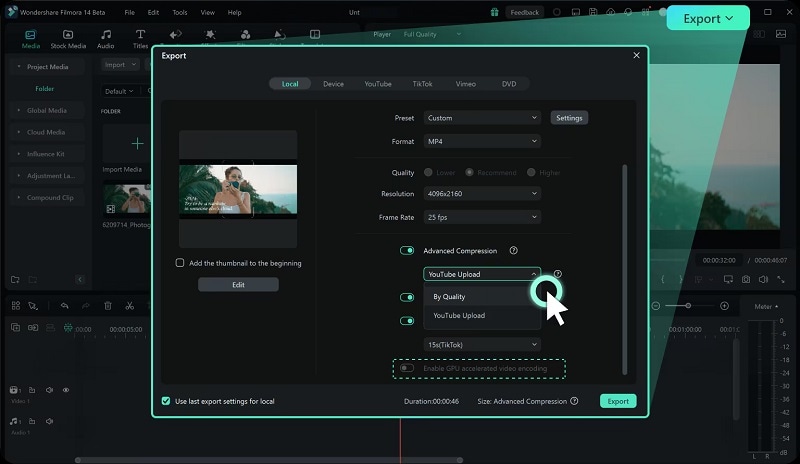
Filmora's Advanced Compression feature gives you two smart options to reduce your video file size without sacrificing too much quality:
- By Quality: Choose a custom quality level (from 10% to 90%) to control how much your video is compressed. The higher the percentage, the better the quality, but also a slightly larger file size.
- YouTube Upload: This option automatically compresses your video using the recommended bitrate for YouTube. It helps maintain your video's clarity and prevents extra blurriness caused by YouTube's own compression during upload.
Conclusion
With the guide above, you know how to enhance your low-quality video, no matter what the issue is. Whether it's blurry footage, shaky clips, low resolution, or off-color tones, all of these issues can be easily fixed using the tools available in Filmora.
Filmora is an all-in-one video editor that's perfect for beginners and casual creators. Professional features like the Topaz-integrated AI Video Enhancer, Stabilization, Color Correction, Frame Interpolation, and Advanced Compression in Filmora are designed to help you clean up your footage and make a better-quality video with minimal effort.
