Transcript
Preparation: You need to choose a room for shooting the video of your subject jumping around. There should not be more than one window so that you can control the lighting and keep it uniform throughout.
The room must have enough free space so that the subject can jump around. Place the camera on the tripod, and the video frame will stay fixed through the video shooting.
First, you need to capture an empty shot of the room without the actor. Then you need to capture video of the actor jumping around a few times. Once you have these two video shots, you can use Wondershare Filmora to create the desired effect.
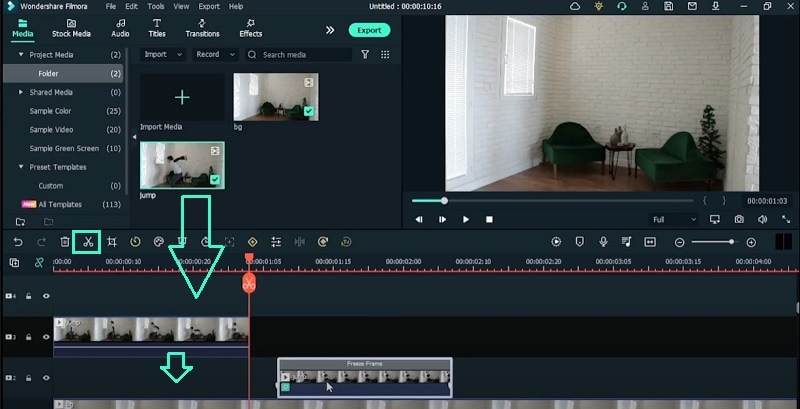
Drag your empty shot onto the first video track, and we are going to top it off with the footage of the actor jumping in the air. Now, we will place the marker to the point in the video where our actor is the smallest.
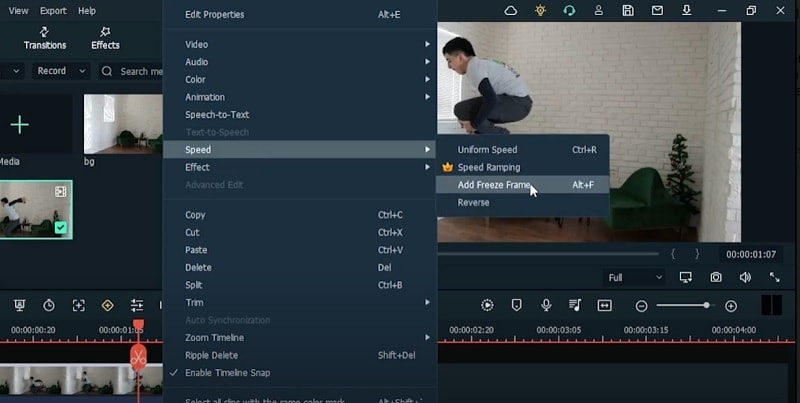
Select the video and go to Speed and click on Add Freeze Frame option. Make the cut in the video footage and delete the first part of the footage. Use right arrow key to go to one frame to the right of the footage.
We are going to make a cut again. Then get rid of the rest of the video footage. Now you have only one freeze frame video, and we are going to mask our subject.
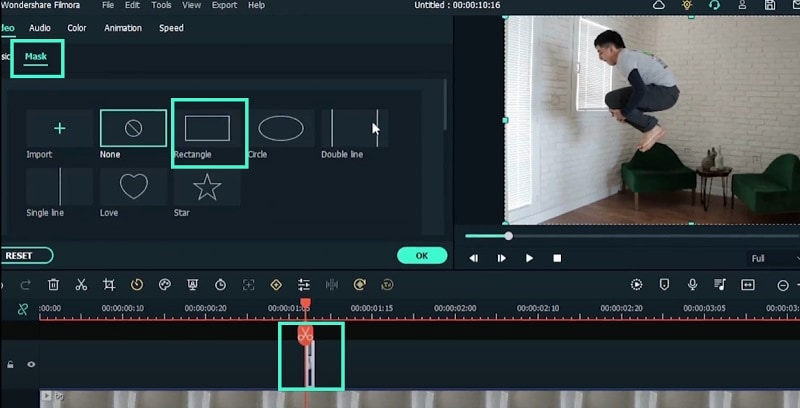
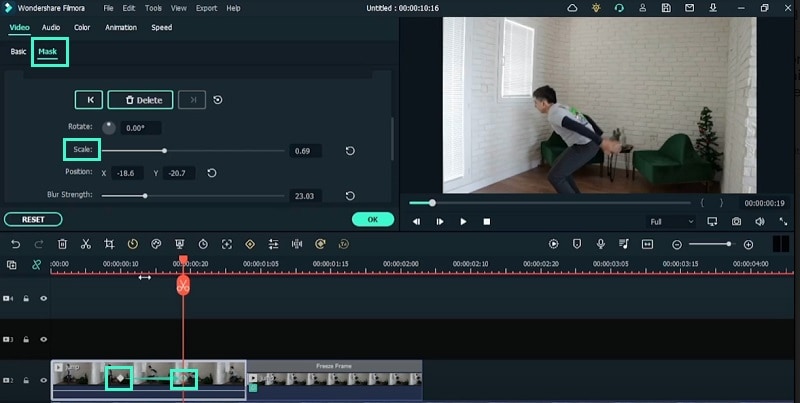
Double-click on the footage and go to Mask and choose the best fit shape. Adjust the shape in the viewer and blur the edges from Blur Strength.
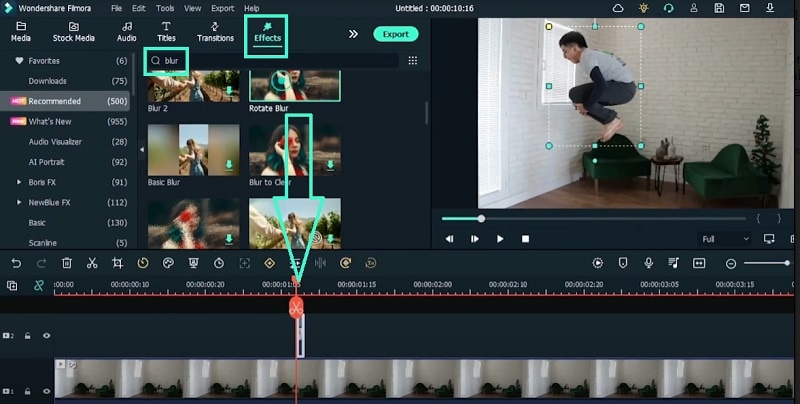
Go to Effects and type in “blur” and drag Rotate Blur onto the freeze frame. Double-click on the video and go to Effects and adjust the sliders for better outcome.
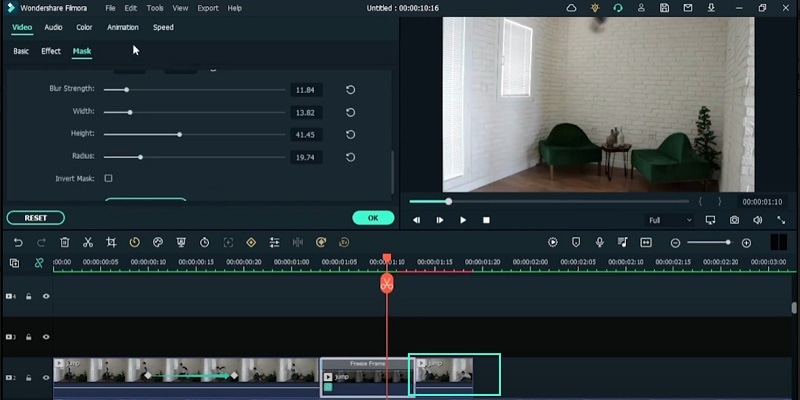
Drag Rotate Blur effect onto freeze frame again. Double-click on the video and adjust the sliders for the second blur effect. Go to Mask and adjust the width and height to make the subject smaller like an almond shape.
Stretch the freeze frame and bring in the jumping clip one more time and place it on top. Place the marker where the subject is in the air jumping off the floor. Cut the clip there and delete the later part.
Bring in the newly cut clip in the same track as the freeze frame clip and place them right next to each other. Double-click the first video and put a rectangle mask.
Place the marker where the subject is bringing his hand back and put a keyframe there. Now add a keyframe to the freeze frame at the beginning and the next frame and change the subject’s position around the room.
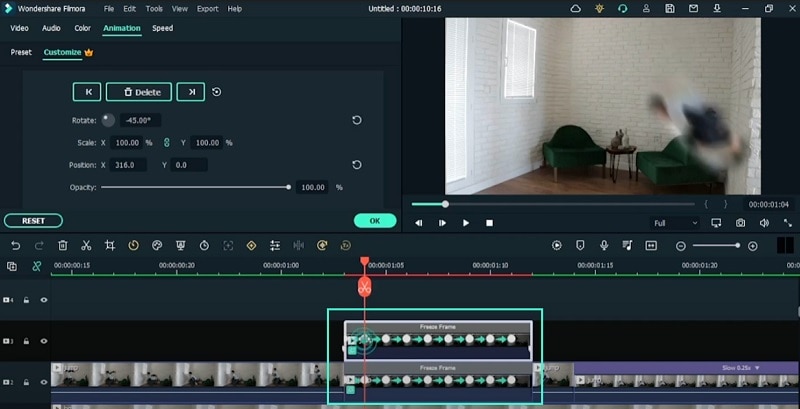
Move one more frame and add a keyframe and change the position of your character. You can also scale out your character for different sizes. The character will seem to move from one part of the room to another.
Add another keyframe to the next frame so that the character comes towards the camera and bounce off the camera by adjusting his position. Keep doing this for as many frames as you want.
We are going to split the freeze frame one frame from the last keyframe. Grab the first clip and place it on top of the existing footage. Put the marker where the character lands. Split the video and delete the previous part.
Put the cut out clip right next to the freeze frame video and select the video and add a mask. Go back to Animation for the freeze frame and add a keyframe to make the person appear in the same place again.
We are now going to slow down the ending by 0.25x so that we can have a dramatic ending for our anime character. Copy the freeze frame and paste it into another location and place it above the original freeze frame.
Edit the keyframe in the copied freeze frame and edit the position. Do this with all the duplicate keyframes. Now, you have multiple clone characters and the jumps are going to be all over the room, and finally, the character lands.
Go to the Effects menu and go to LUT section. Use Cool Pop effect and place it on top of all videos. Add Manga Pack Vol 2 Overlay 03 and place it below Cool Pop effect track. Make sure the effect shows up at the beginning of jumping.
We are now finished with the effect where the character’s epic movement is emphasized by these really cool flairs at the edge of the video.
Create Anime Inspired God Speed Video Effect
What you need to prepare:
- Your computer (Windows or macOS)
- Video clip with the subject giving angry expressions
- Wondershare Filmora video editor
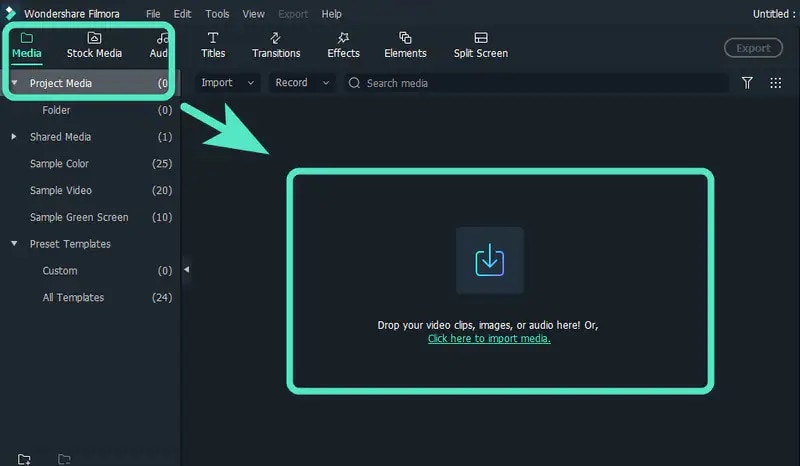
Install Filmora on your computer and launch the application. Click on New Project from the welcome screen. Drag and drop your video clips of empty room as well as the subject jumping around the room from your hard drive to Project media folder.
Drag and drop both clips onto the timeline. Find the point where the character is the smallest. Right-click on the video and go to Speed> Add Freeze frame. Cut the clip and get rid of the first part. Move one frame and cut the video clip and get rid of the rest.
Double-click on the freeze frame and go to mask and choose Rectangle. Scroll down and blur the edges by adjusting Blur Strength and click on Ok button.
Go to Effects menu and search for Rotate Blur and drag it onto the freeze frame. Double-click and go to Video> Effect and change parameters. Add Rotate Blur again on the freeze frame and adjust parameters for more blurry effect. Stretch the freeze frame duration.
Add the jumping video clip on top of the timeline. Cut the clip where the character is in the air. Delete the later part and place it in the same trace as the freeze frame right to its left side. Double-click the first video and go to Mask and add Rectangle mask.
Add a keyframe from Mask section where the subject is bringing his arms back. Add another keyframe at some distance and scale the mask. You should add keyframe to the jumping video from Animation section. Add multiple keyframes by one frame each and use Position X and Y to move the character across the room.
Add the original jumping clip onto the timeline and look for the part where the subject lands. Cut the clip and get rid of the former part. Bring the clip to the left of the freeze frame and add a mask. Slow down the ending from Time icon> Slow> 0.25x for a dramatic ending.
Finally, copy and paste the freeze frame and put the duplicate one on top of the original. Change the parameters for all parameters so that there are multiple characters jumping around the room. Add Cool Pop and Manga Pack Volume 2 to enhance the effect. We are done and play the video to watch the God Speed effect.
What you’ve learned:
- How to use masking to isolate, scale, and rotate the subject
- How to use keyframe to move the subject around the room
- How to speed up and slow down clips and add dramatic ending


Speak Your Mind