Transcript
The demo of the scene where you need to record the videos for the VFX effect. You need two shots where the first one is for the space and the second one with the character performing different actions.
Get started with Filmora and import the footage to the timeline. Here, you can adjust the length of the videos as per the required duration or in lieu of the background. Whatever the adjustment, you can extend the content duration hassle-free.
Select the background video and speed up the video duration. Then select the frame of the highest point and cut the frame. Use the right row key to shift the frames of the video.
Look for the part where the character has fully landed and make a cut. Also, use the right arrow key for this frame as well. You can then make a cut using the split function from the go.
Grab a few frames after the character has landed completely and get rid of the rest video from the timeline. Shift to the next video and make a cut where the character is at the highest point and separate the frame from the others.
Now look for the landed frame and make a cut from that point. Move four frames using the right arrow and make the cut from there as well. You can then drag this video to the previous one and join them within the timeline.
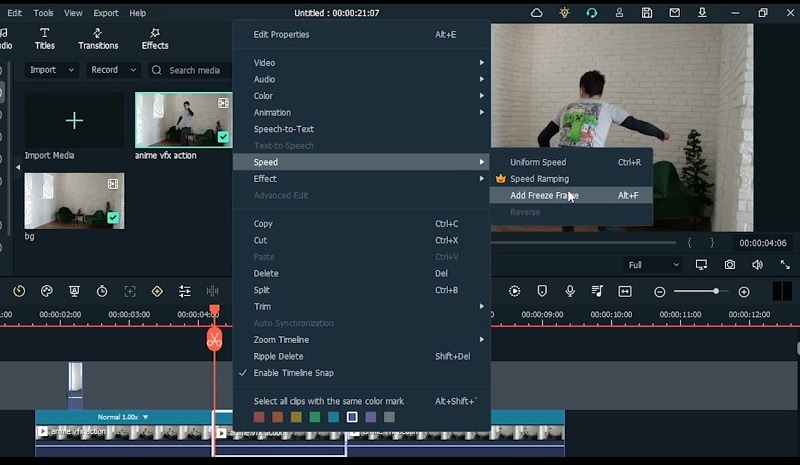
After that, find out the part where the character is starting to move and make the frame freeze till there. Right-click on the video and select Speed and Freeze Frame in order to do that.
To the frame where you have frozen the frame, move five frames to the right and cut there. Then, make a cut to the point where he started the motion again and delete the in-between clip from the timeline.
Look for when he is about to move and make a cut, then look for another finished position and freeze the frame from there. Split the freeze frame after the five frames and get rid of the extra part.
Now you will get the four separate tracks where a separate track for the clones as appeared when he is jumping, a track for the normal videos, one for the speed-up videos, and another for the background video.
Mask out the subject in the freeze frame videos and double click the mask and gab the rectangular mask and make sure to blur the edges. Hit the Ok button afterward.
Keyframe the position from the first location to the second location of the subject. Open up the customization window and lower the opacity before the addition of the keyframes.
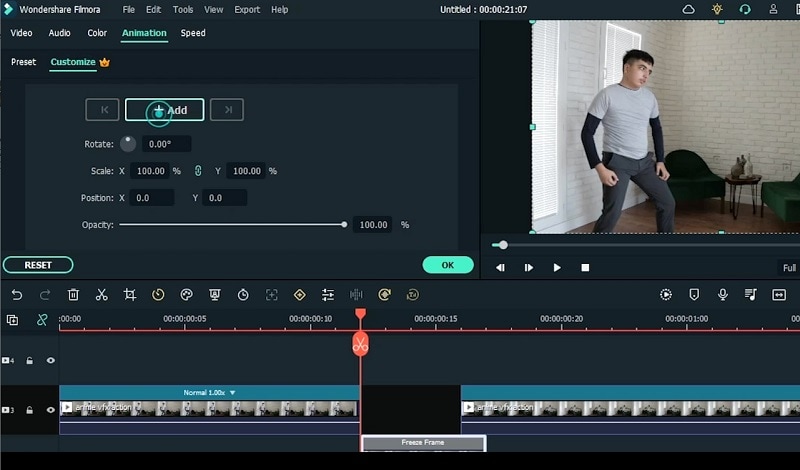
Double click on the freeze frame and add animation to add the keyframe now. Position the character using X and Y position sliders within the animation window.
To make it faster and epic reduce the number of frames and get rid of the similar ones within the timeline. Make sure the videos do not overlap to a much extent as the character will be faded out otherwise.
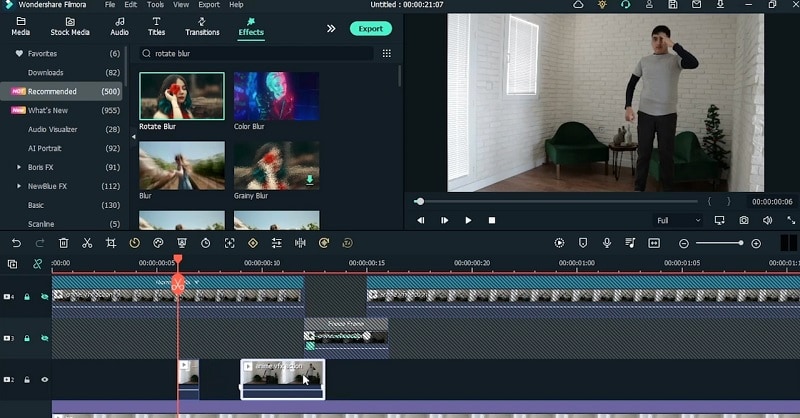
Go to the effects menu for the Motion blur in order to give the character movement the realistic look. Edit the motion blur effect by opening the freeze frame window and squeezing the character so the motion will get smoother. Add the same number of positions for both keyframes.
Before adding the clone effect, shift the top-most track video clips underneath the normal video track. Now lock the other tracks so these tracks’ videos remain intact to their actual position.
Now adjust the clone video frames and add the Freeze frame to the clips. After then, add the Mask effect and scale it to make it squeeze further.
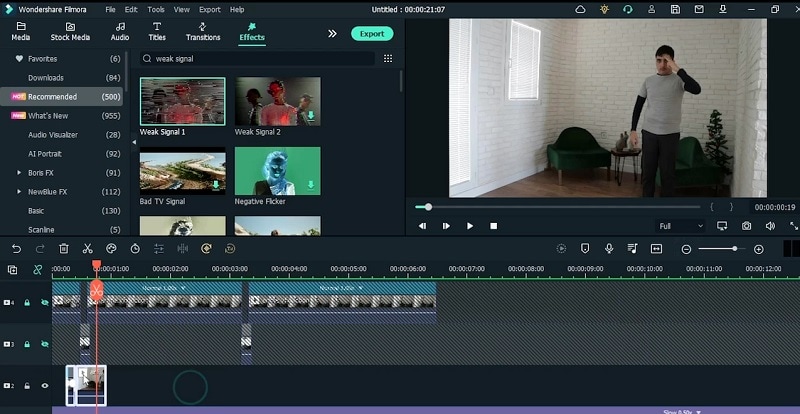
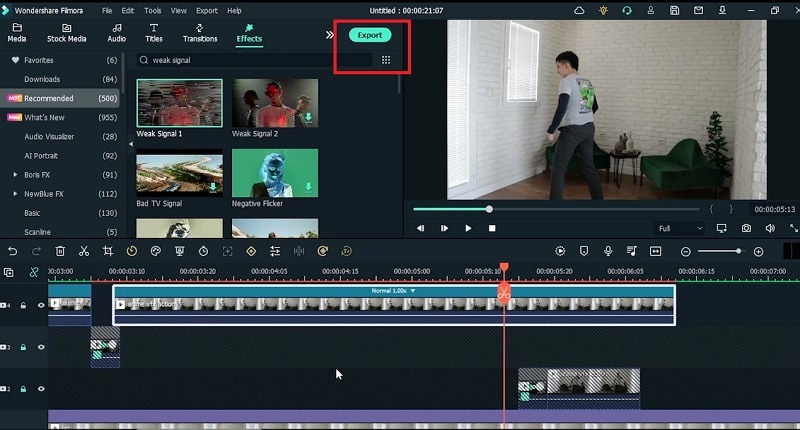
From the Effects menu, add the Weak signal effect to the freeze video by typing the weak signal in the effect search box. Adjust the effect by moving the sliders. Copy and paste this effect editing to the other part of the video as well.
Mask out the subject from the normal speed videos. Click on the video and mask out from the other videos and also add animation keyframes. Make sure to add blur strength to the mask and activate the mask. Repeat this with the other speed videos as well.
Now preview the video after the finishing and check out if there is any ambiguity to this superpower effect on the character. You can always add as many effects to the video to make it more epic and classical.
How to Make Anime VFX Video
What you need to prepare:
- A computer (Windows or macOS)
- Your video materials.
- Filmora video editor
Pre-Record the Videos
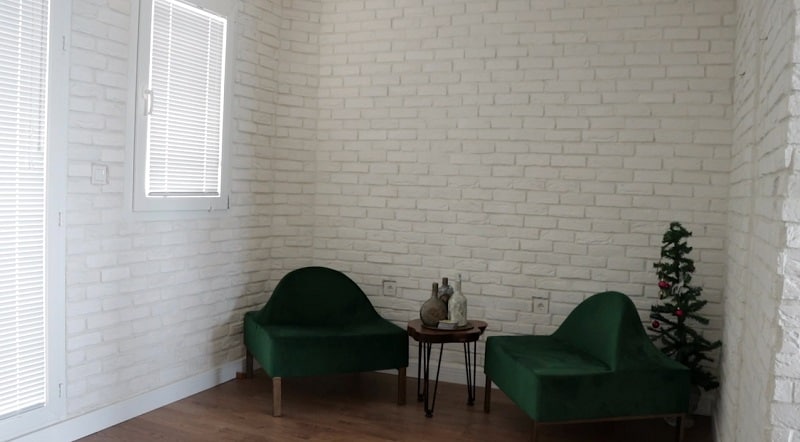
To create this superpower effect, you need a decent space where the lighting is not so obvious and also with a minimal number of windows as shown below. Afterward, record the footage of the character performing various actions in different scenes featuring the same space.
Download and open Filmora
Now you need Filmora to take the lead from here. With Filmora, creating this effect is a handy task because of its user-friendly design and many Anime effects with customizable functions. It also offers a list of cool features that are necessary for contemporary VFX Anime effect videos. From the links below, you can free download this program. Visit the necessary area at your leisure for the Windows or Mac version.
Add Videos to Filmora and Drag them to Timeline
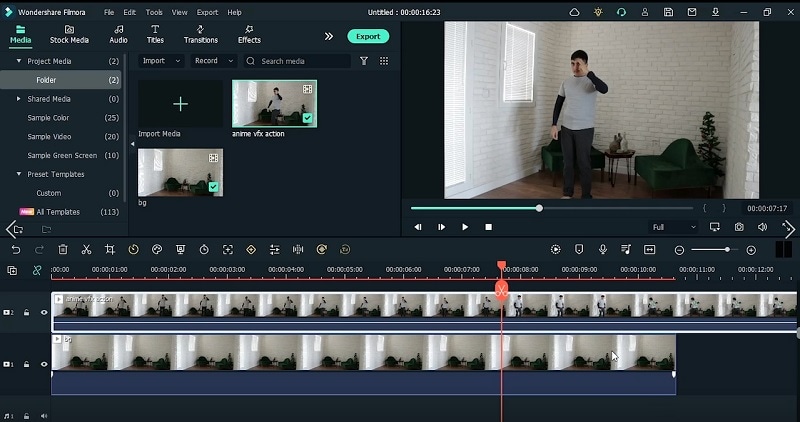
Start by launching the Filmora and importing the recorded footage to the software using the Import Button. After the successful import, drag the footage to the timeline and make sure you place the background footage to the video track 1 and the character footage above the background video track as shown here:
Align the Scene Videos
In the next step, make some necessary changes to the added footage to the timeline. This includes increasing the background video duration to the overall extent of the project and locking the video track so it won’t get affected later on. Go for the frame where the character is in positions like the highest, the stable, and the landing frame. Make these cuts to the character video within the timeline.
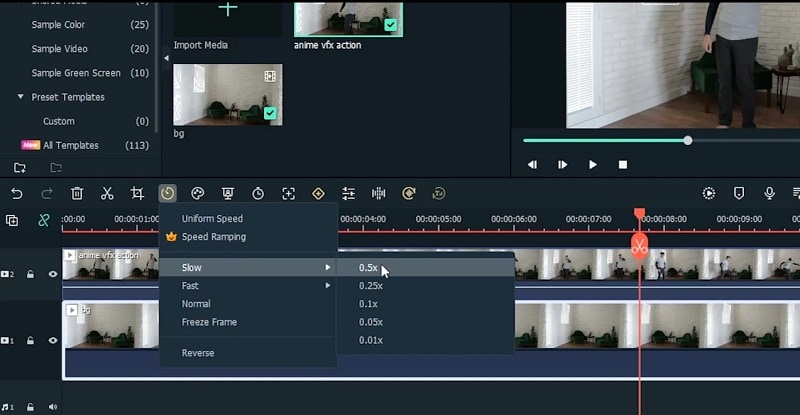
Add Freeze Frame to Sequence Action Clips
Now jump to the different scenes of the main video and add Freeze frames to extend the duration of the frames for the required scene. Drag the video clips to different video tracks such as adding the clone video clips to the top track and then arranging the normal speed beneath, and then the background video clip at the bottom track.
Mask the video clips
After making the necessary adjustments to your movie in the timeline, but the primary video there and use the Mask effect to layer it over the background footage. You may utilize the Masking effect's Rectangle Shape, where you can resize the masking area to your needs. You can use the Blur Strength slider to adjust the blur level of the edges to your character's movement.

Add Animation Key Frames
After the masking, now is the time to add keyframes to animate the freeze frames. Double-click on the video and refer to the Animation tab to customize the keyframes. Render the effects after you've completed adding the multiple keyframes to the anime video so that everything is in its proper spot. Your Anime movie will be ready in a few minutes if you click the Render button on the timeline.
Add Blur Effects to the Videos
Additionally, you may add additional blur effects and tailor the clone videos. The aim is for the Anime video to appear spectacular, and Filmora contains everything you could need. Refer to the Effects menu and select Rotate Blur to add it to your VFX clips within the timeline. Make the adjustments to the clips to re-create the effect as shown here:
Make Adjustments to the Videos
Afterward, add the effects to your videos and make them customized according to the scene requirements. For instance, you can use the Weak Signal effect at the fast motion frame to make it look outstanding. This will also re-create the final touch of the VFX effect to your footage.
Preview and Save the Final Video
Export your anime in the format of your choosing, and then. From the format list, you may choose any format. If you wish to post it to the YouTube channel, there is also the MOV option, which is just for videos with online material.
With this guide, you have learned how to create your VFX effect by using the pre-recorded footage of your character. To sum up the process, Filmora provides the fast and smooth rendering of this anime effect re-creation journey. So, download the software and start making the VFX effect on the go.