Create Cinematic Explosion in Video
Cinematic Explosions are challenging to create, and most people avoid doing them due to the difficulty it poses. However, if you use the right tool like Filmora, creating cinematic explosions is much easier than you think. Filmora has a great collection of explosion clips and effects that allows you to create amazing cinematic explosions in videos.
Tool
Assets


Transcript
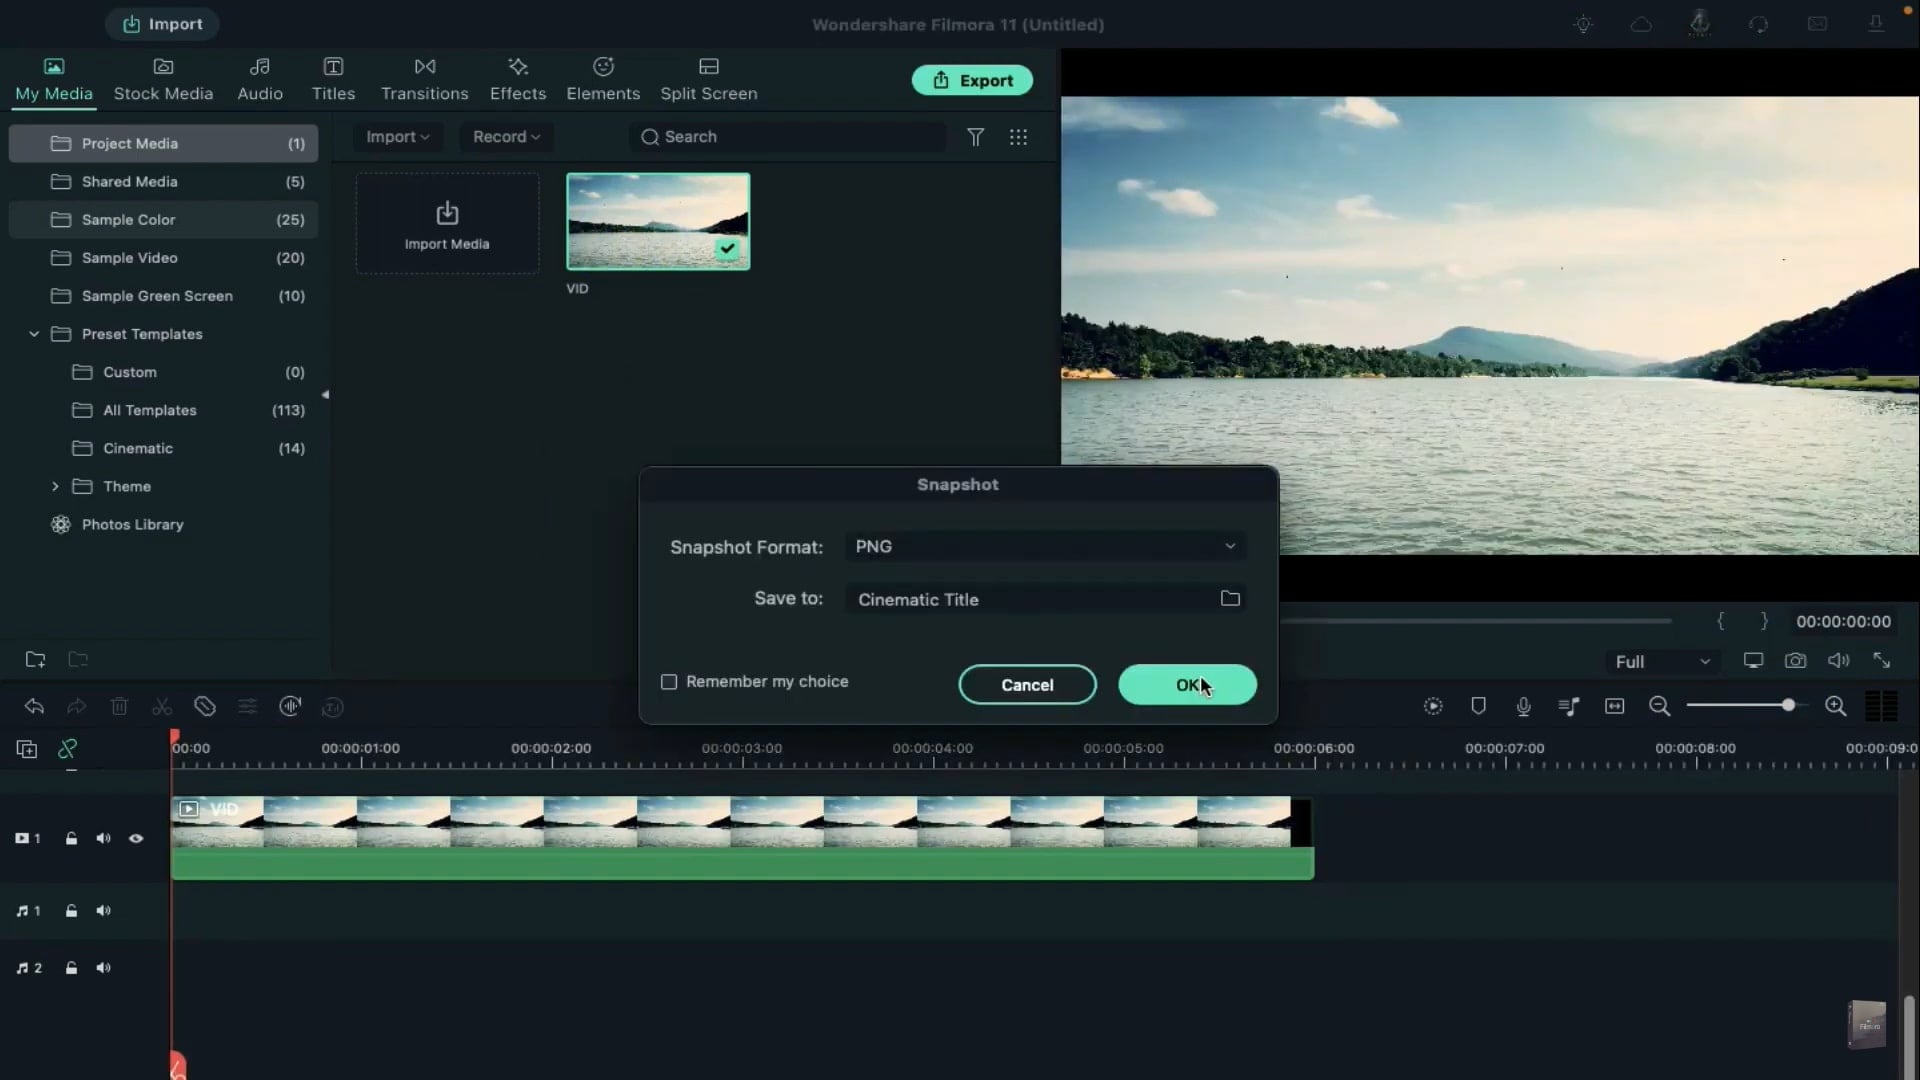
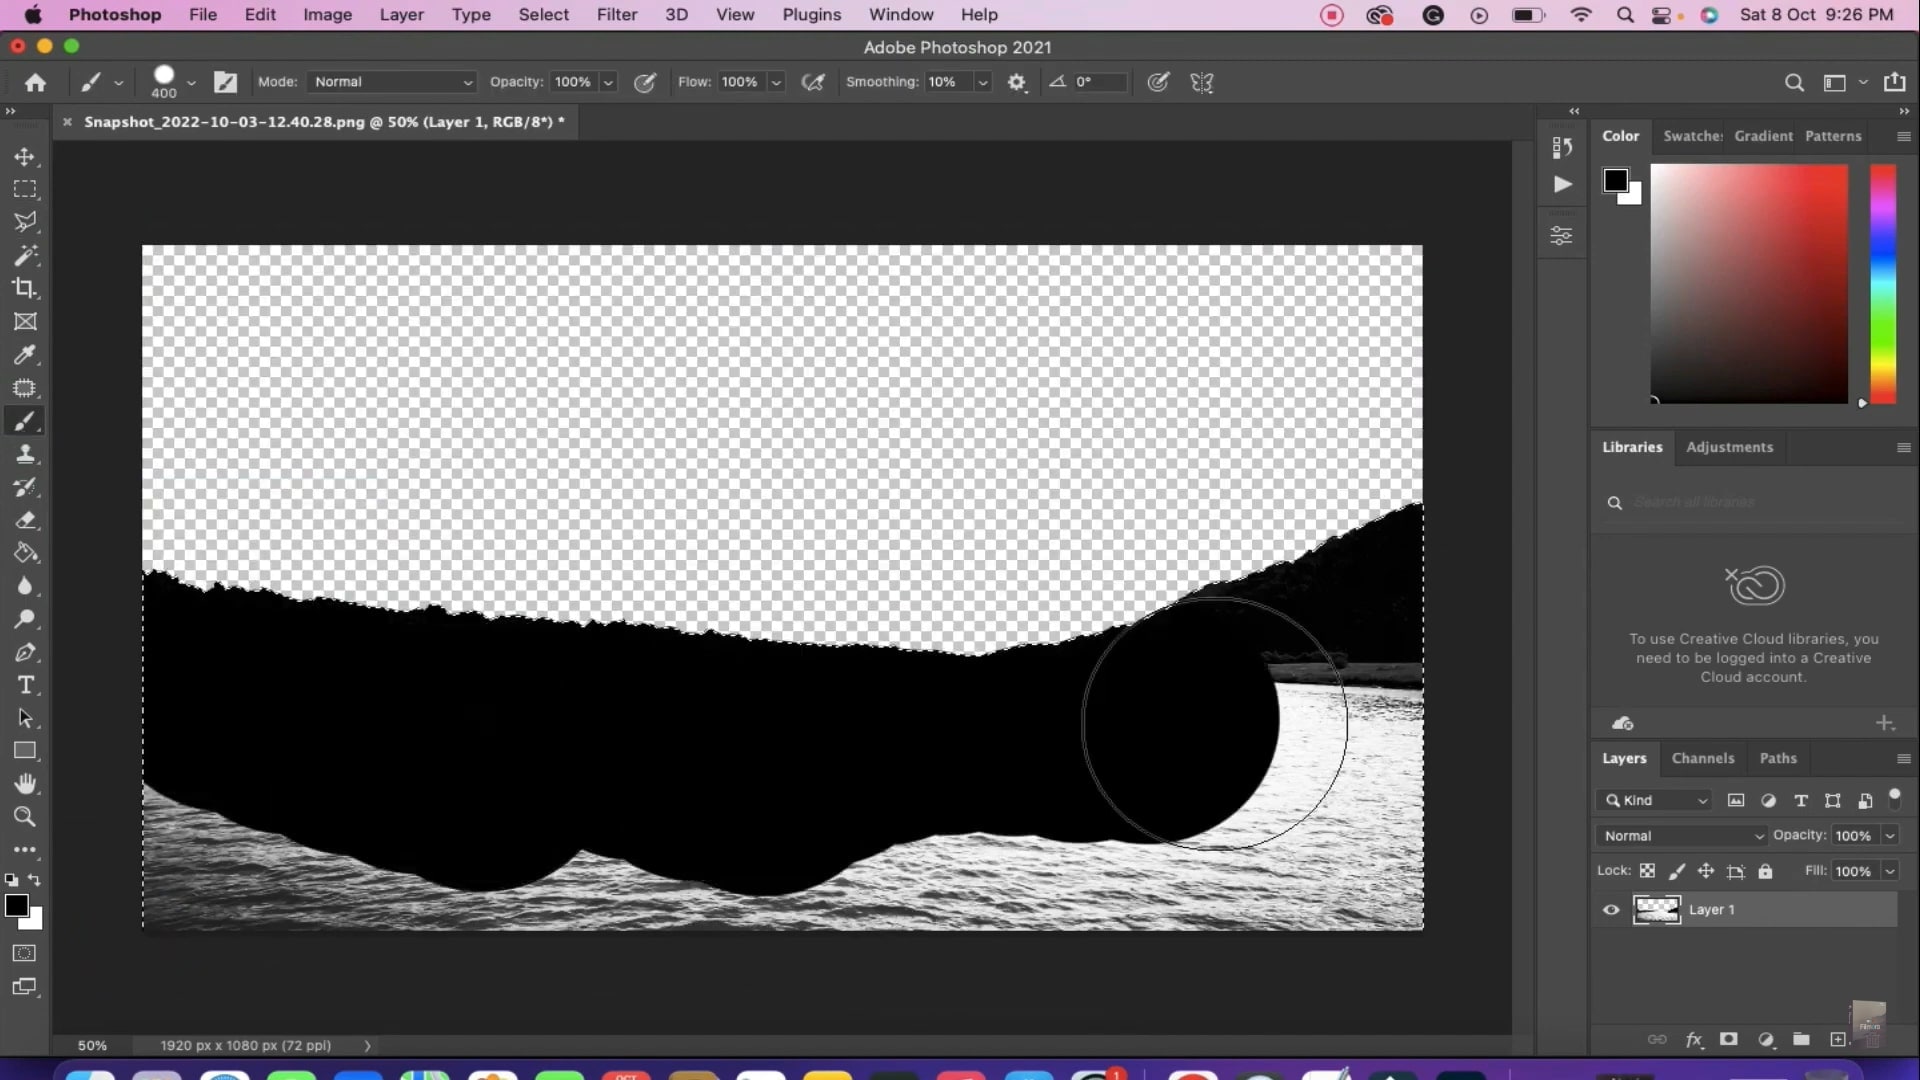
First, drop your video on the timeline and take a snapshot. Next, we need to customize the mask in Photoshop. Import the snapshot and use the lasso tool to outline the part we need. Remove the rest of the part. Fill it in black color and save it.
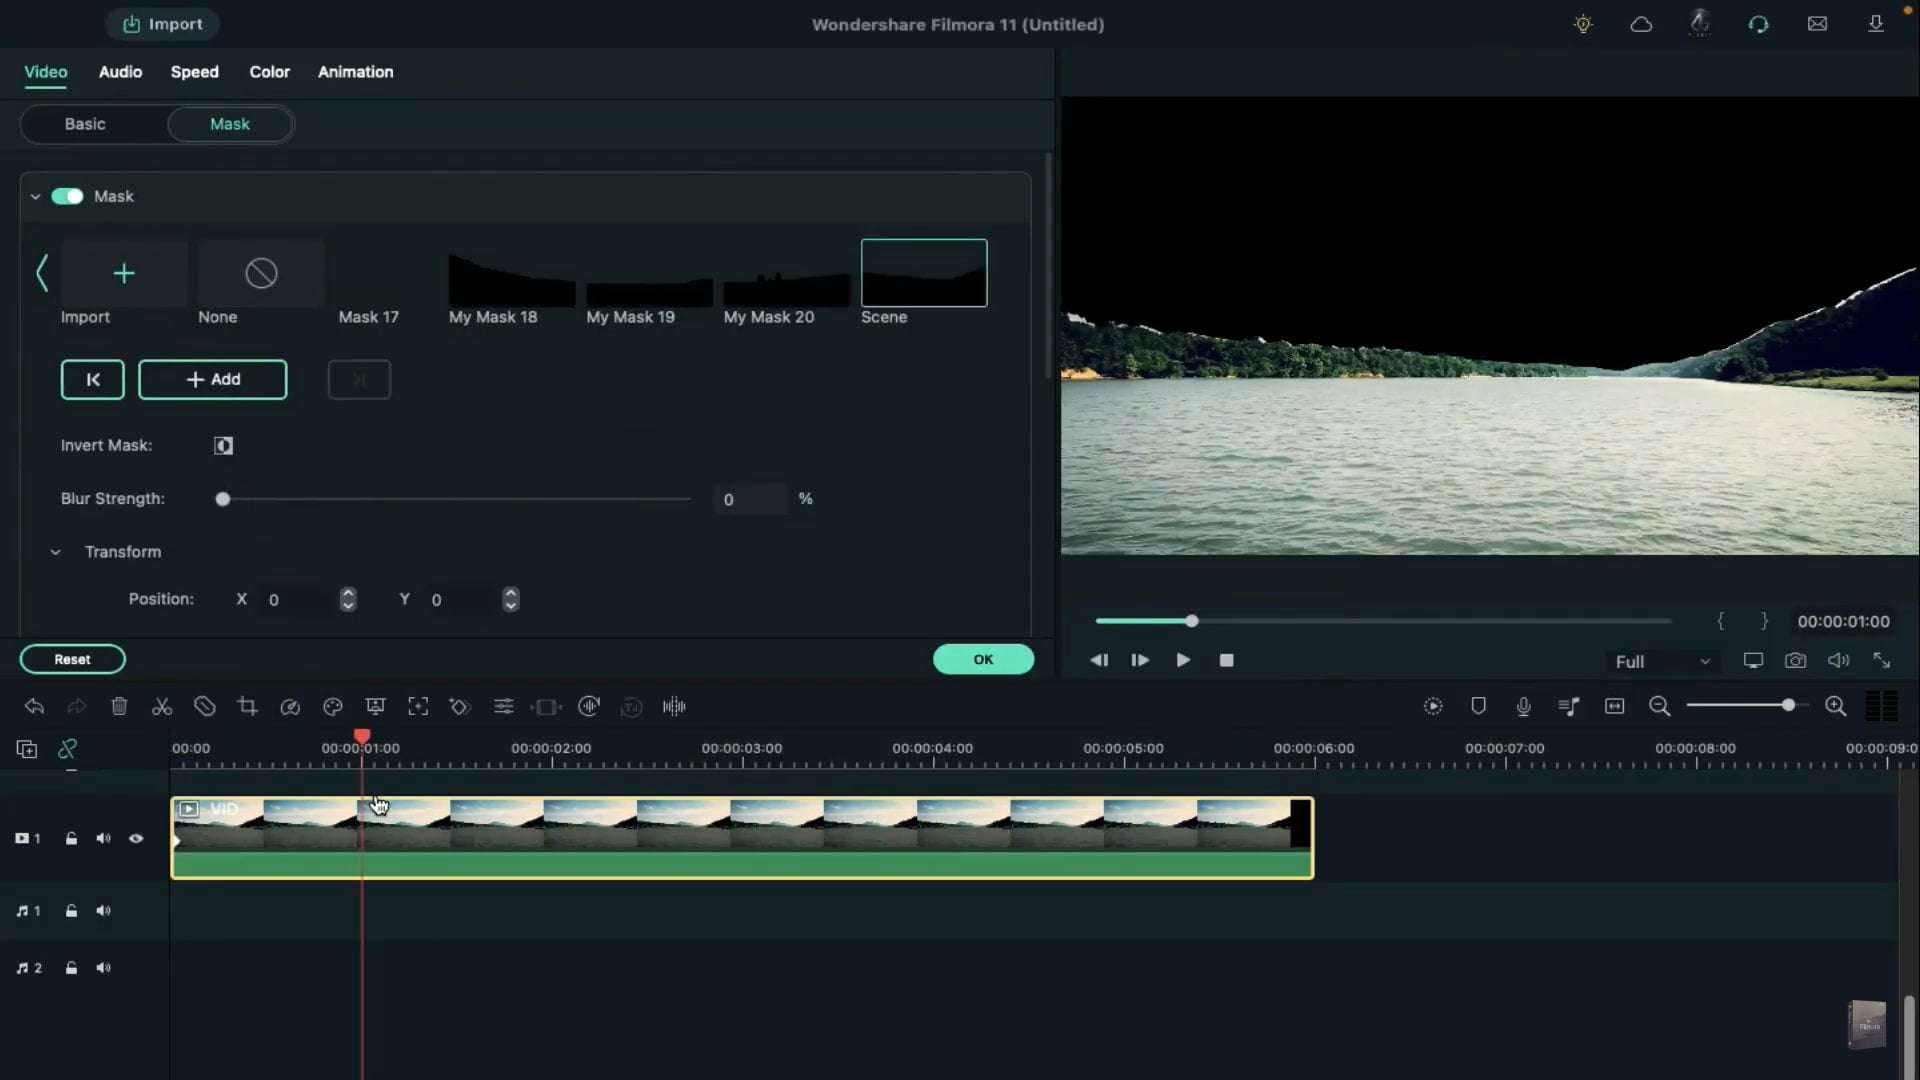
Then, go back to Filmora. Double-click on your clip, go to the video mask section. Import the mask we have just created.
Add mask keyframe at the beginning of the clip then go to one second and change horizontal to 103. Move to 3 seconds and change horizontal to 106.
Copy this clip and paste it on track 4. Select the first clip and turn on Invert Mask.
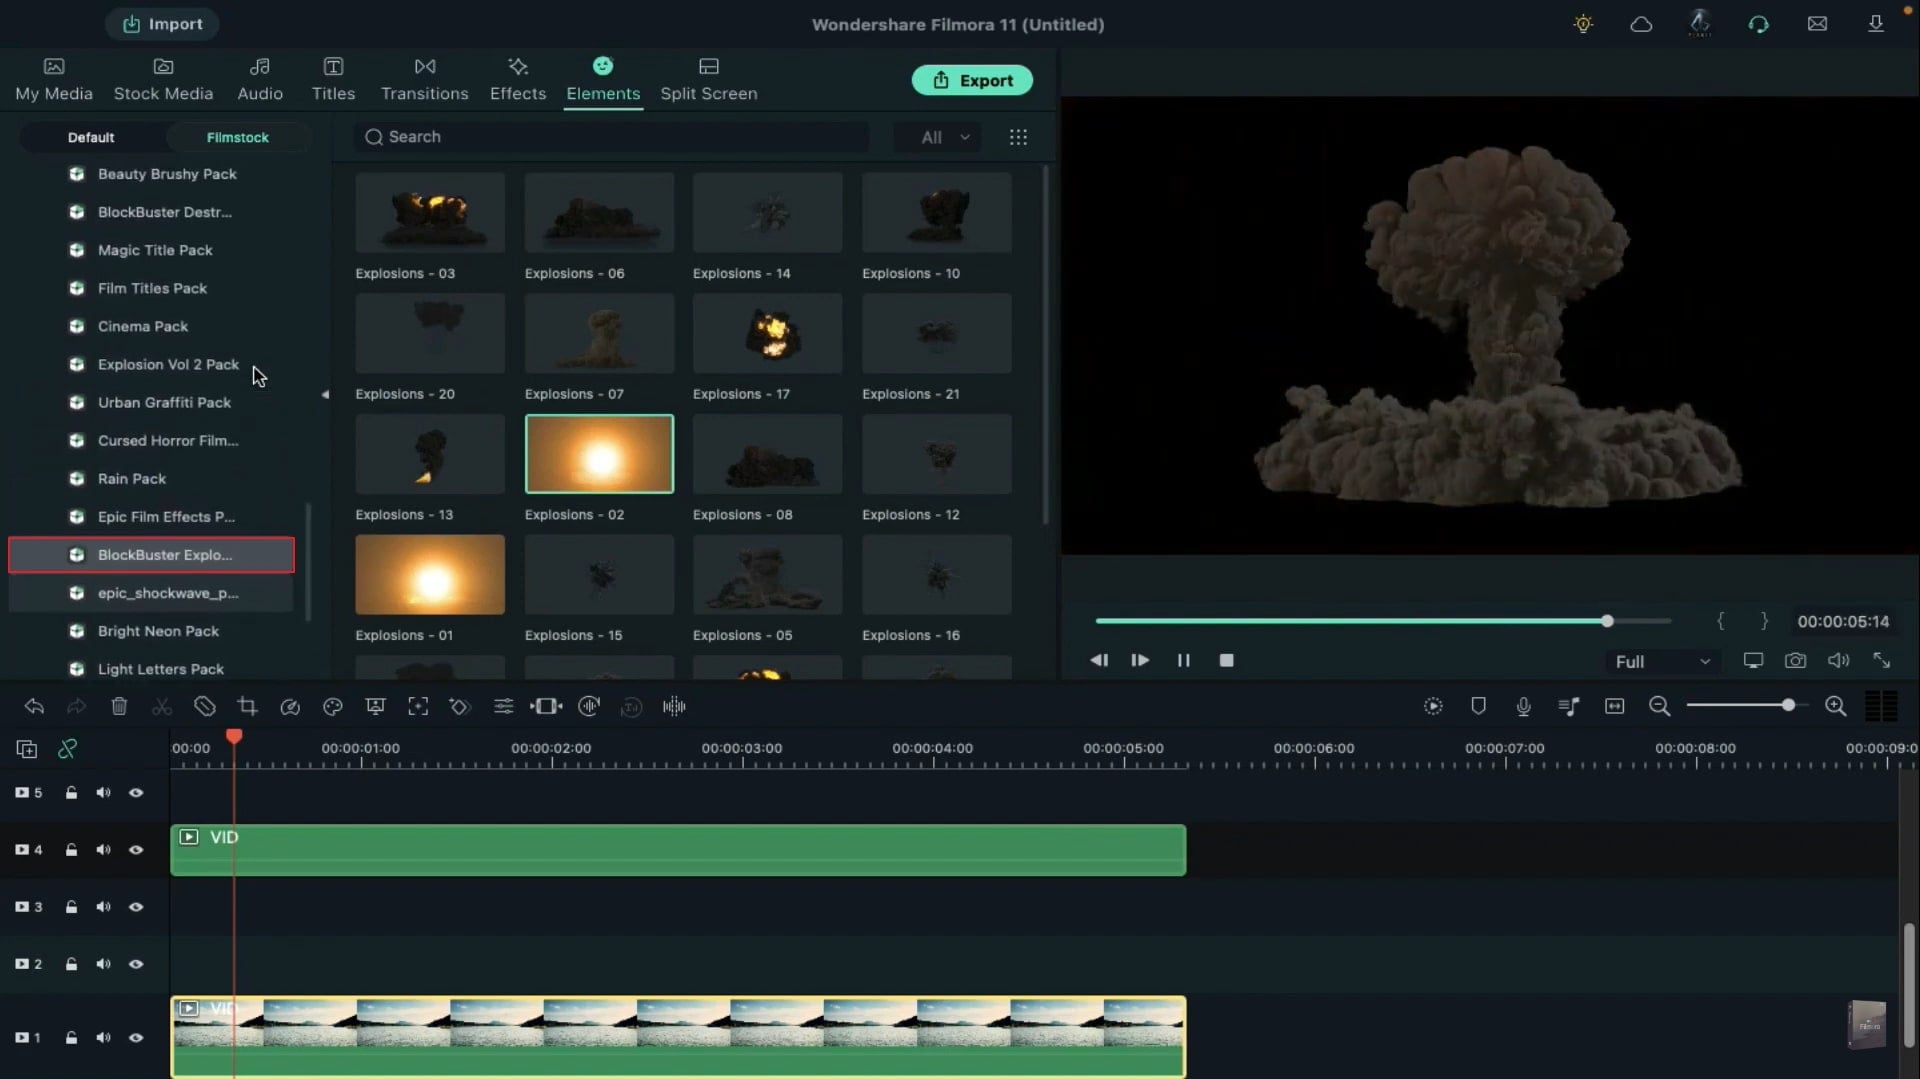
Now, let's shrink both clips to 5 seconds and 10th frame. Find Blockbuster Explosion and Explosion Volume 2 under Elements.
Drop Explosion 35 at the 10th Frame. Keep it as long as the video clip.
Now, we drop another small explosion clip on track 2 at one second position. Reduce its duration. Double-click on it and adjust its position. Then, go to the Color. Click on Advanced and apply the fantasy effects.
To make the explosion vision more real, we need to create a reflection in the water.
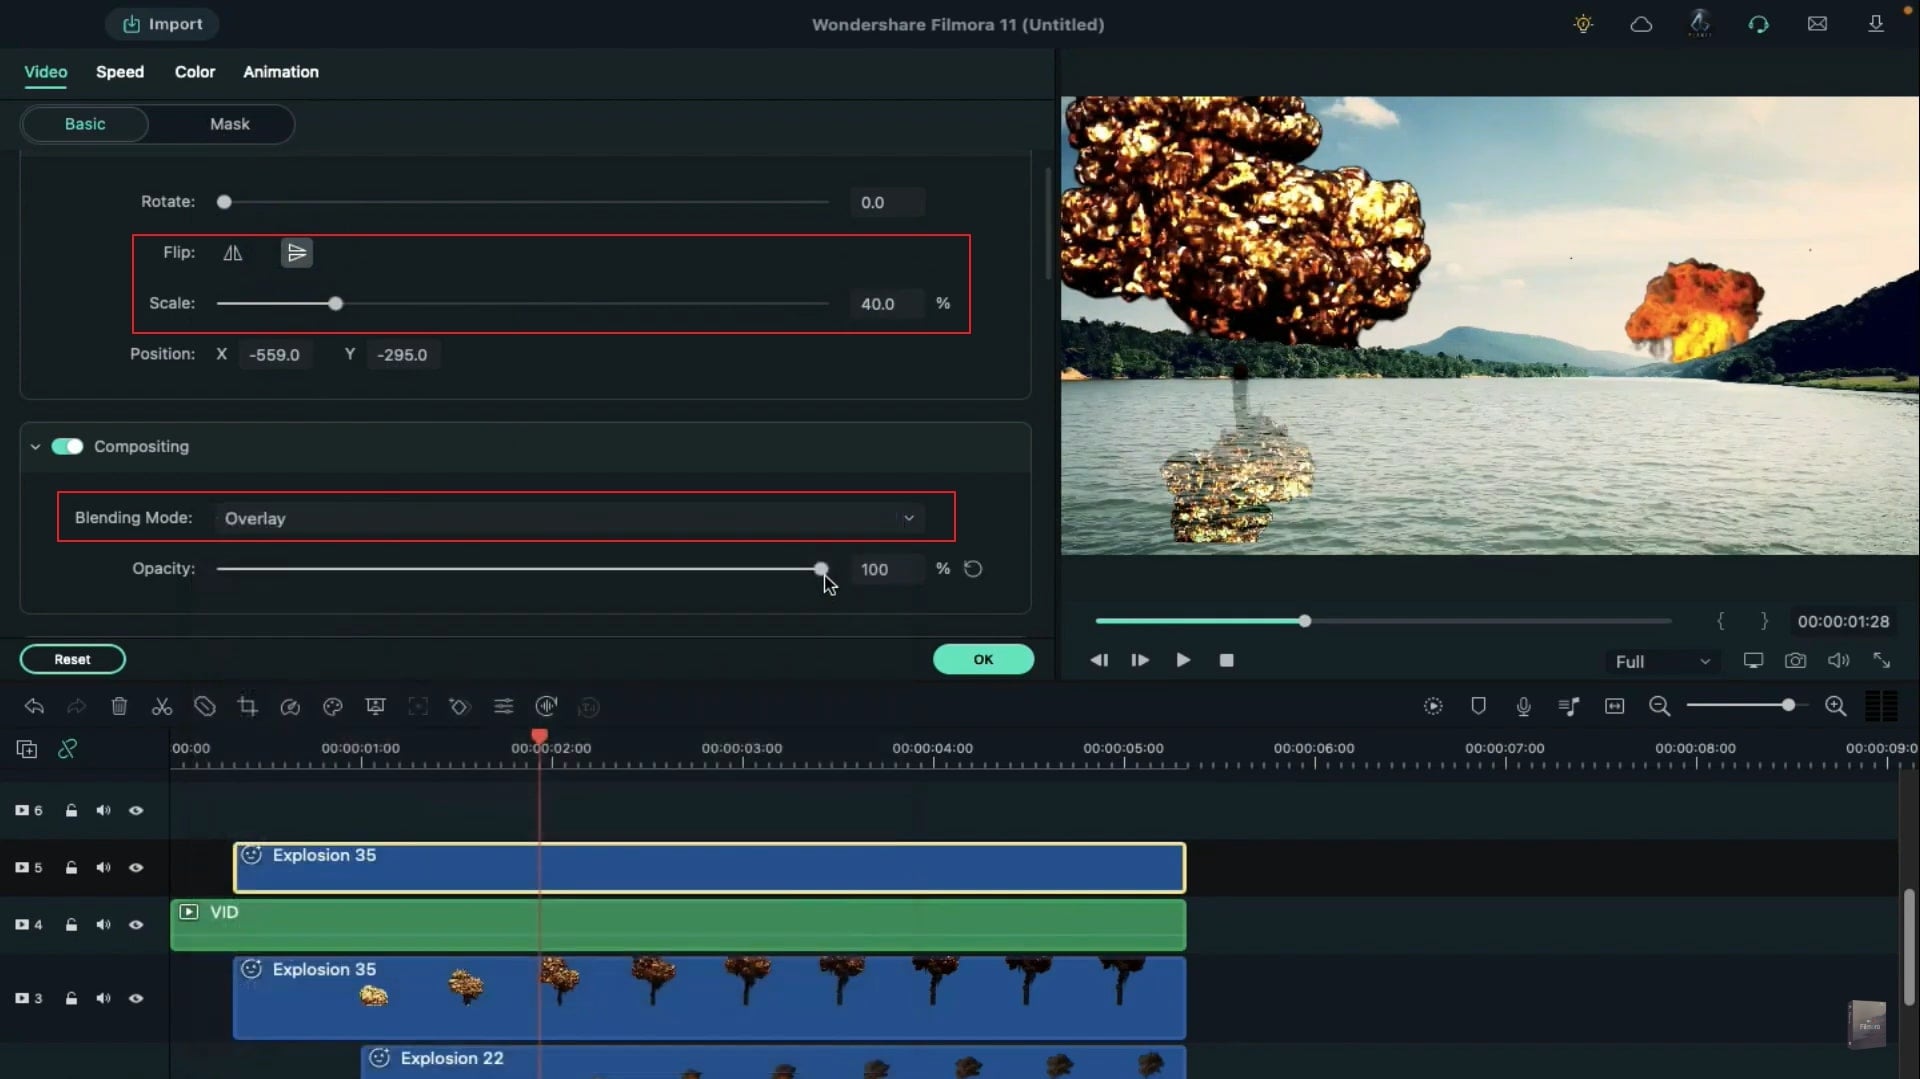
Copy the track 3 clip and paste it on track 5 at the 10th Frame. Go to the video and flip vertically. Decrease the Scale, move its Position to match the explosion and change the blending mode to Overlay. Meanwhile, reduce the Opacity to 55.
Copy track 2 clip and paste it on track 6 at one second. Then, right-click on it and select paste effects and adjust its Position.
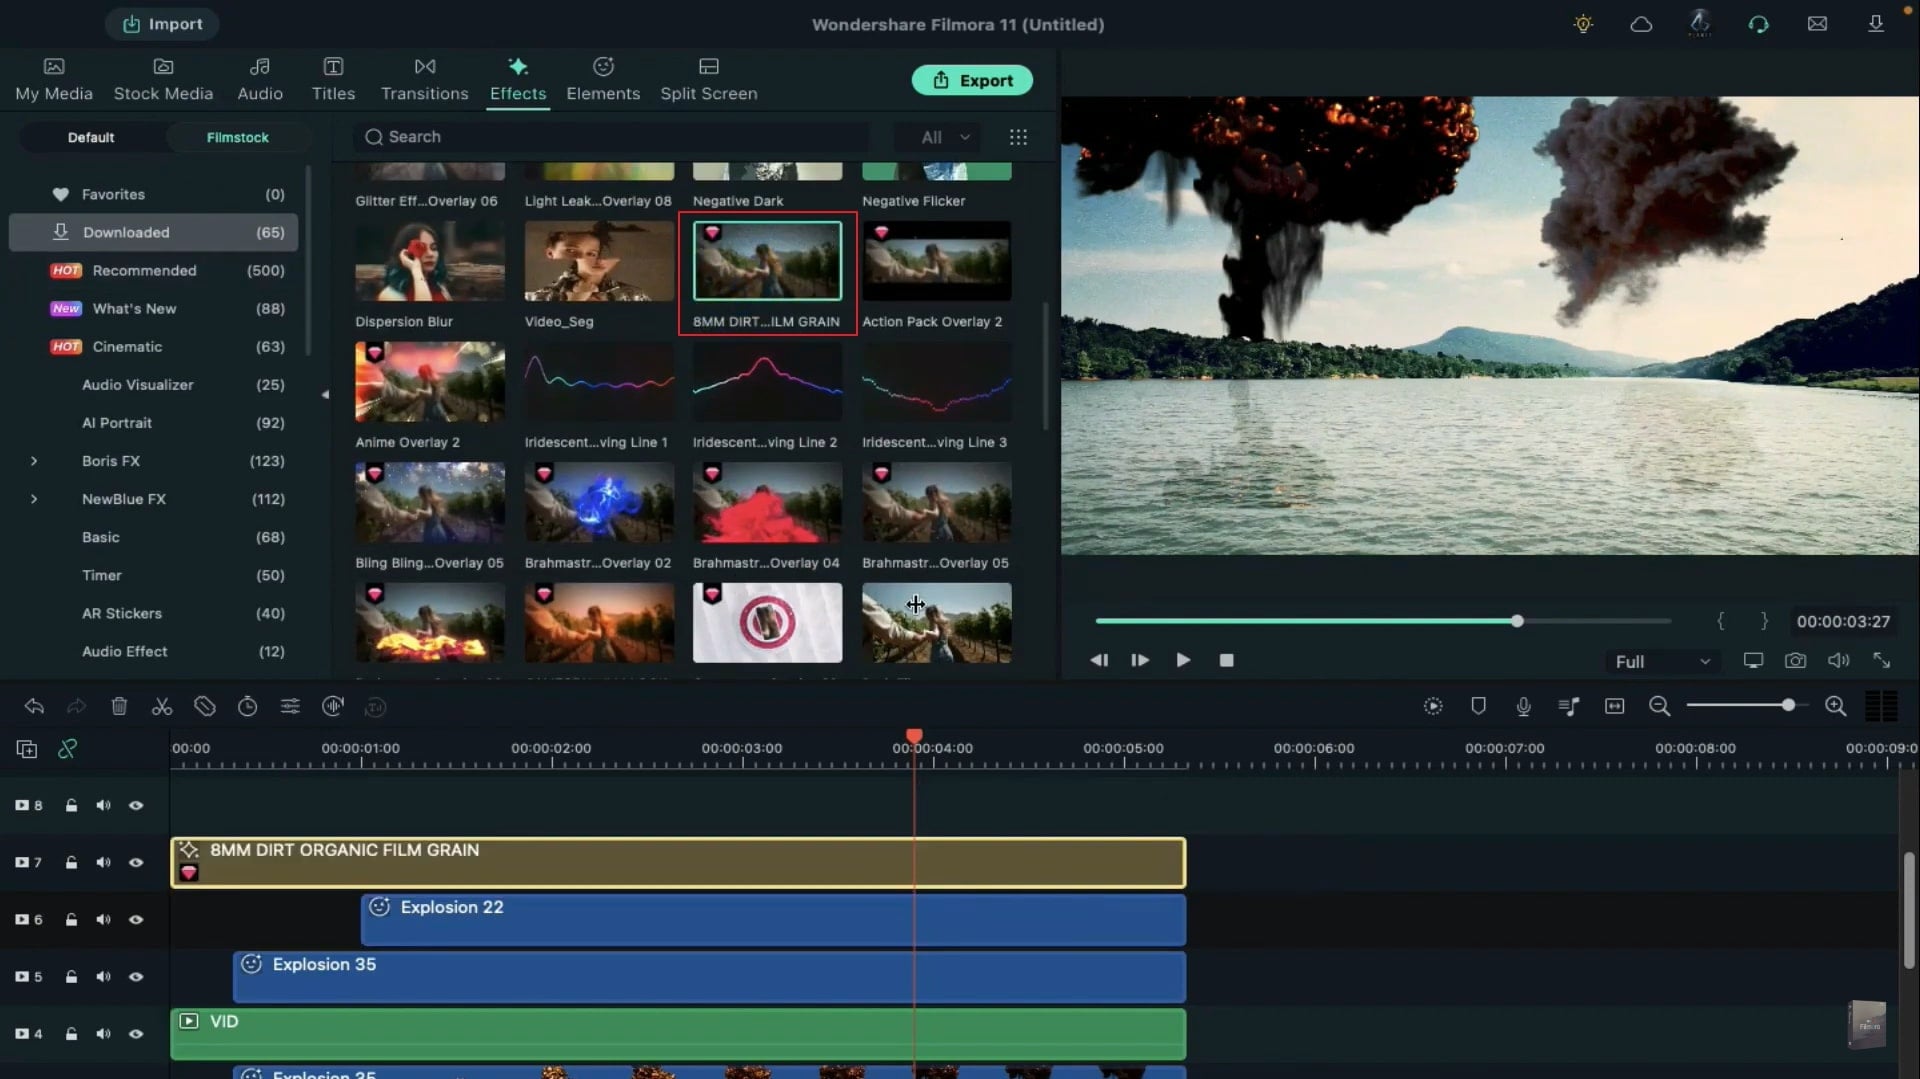
Use 8MM Dirt Organic Film Grain effect and Dark Film effect on track 7 and 8. Shaking effect helps the vision more complete.
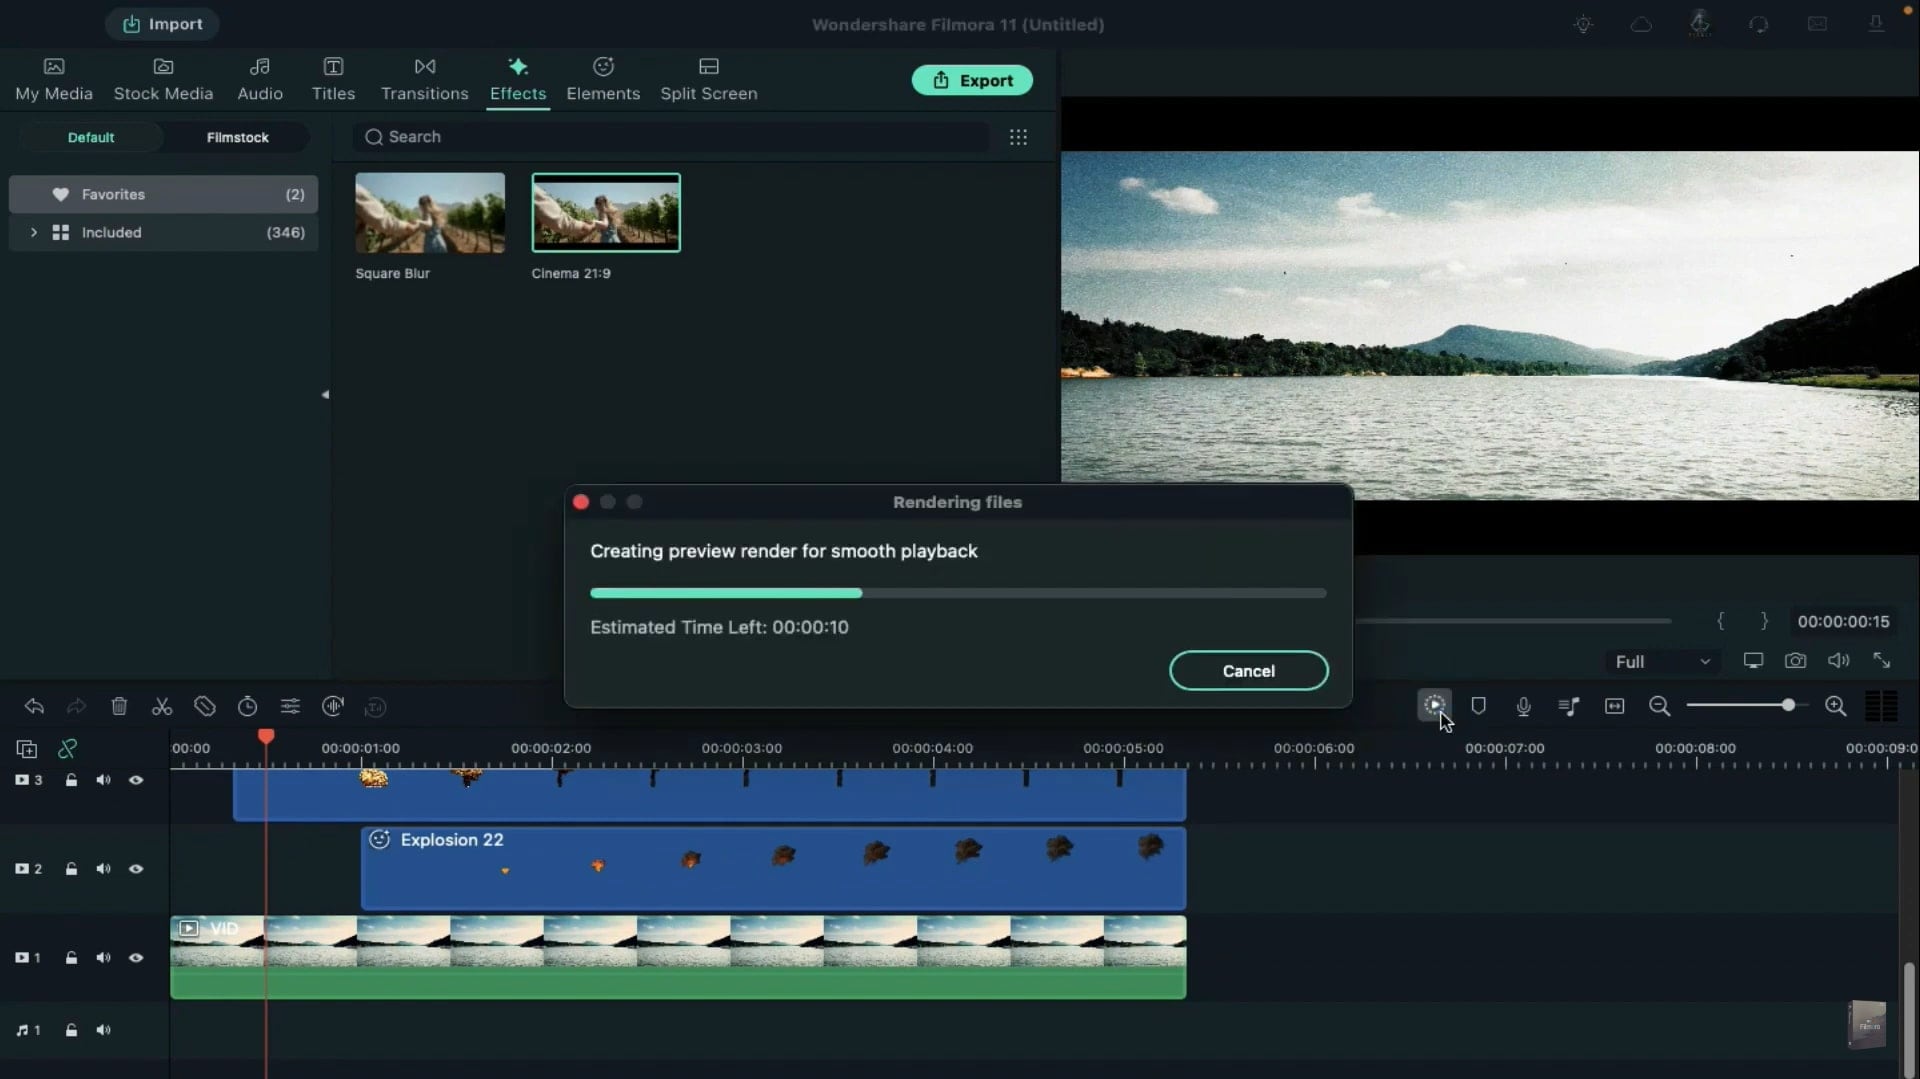
So, we drop the Extreme shake effect at the 15th frame and keep the effect 2 seconds long. Double-click on it and change the frequency to 10. Finally, apply the Cinematic bars.
How to Create Cinematic Explosion in Video
What you need to prepare:
- A computer (Windows or macOS)
- Your video materials.
- Filmora video editor
Run the Filmora app on your computer. If you haven't downloaded it yet, you can do it by visiting Filmora's official website.
Add the video file you want to add the explosion effect to in Filmora and drop it on the timeline at track 1. Select the video and take a snapshot.
You will need to create a mask using the snapshot to move further in the process. Use Adobe Photoshop to customize the mask. Open the snapshot in Photoshop and choose the Lasso Tool to select the area you need to use. Remove the rest of the part, fill it with black color, and save it.
Now you need to import the mask created on Photoshop in Filmora. To do that, select your video in Filmora, go to the Video tab and import the newly created mask using the Mask option. Add the mask keyframe at the start of the clip. Now go to one second and change horizontal to 103. Next, move to 3 seconds and set horizontal to 106. Copy this clip and paste it on track 4. Select the first clip and turn on the Invert Mask option. Reduce the length of both clips to 5 seconds and 10 frames.
Download the Blockbuster Explosion Pack and Explosion Vol 2 Pack from the Filmstock under the Elements tab. Choose and drop your desired explosion on track 3 at 10 frames. Keep the explosion clip as long as your video clip. Now you can go to the video to adjust its position according to your needs. You can also add effects to the explosion file you have selected by choosing a preset from the Advanced Panel of Color section. Select another explosion clip and drop it on track 2 at the one-second position. Now, double-click on the clip to adjust its length and position. Choose a preset from the Advanced panel for it too.
To make the explosion more real, we need to add its reflection. For it, copy the track 3 clip and paste it on track 5 at 10 frames position. Go to the Video to flip it vertically and decrease its scale. Move its position to match the explosion and change the blending mode to overlay. Also, reduce its opacity to 55. Here you need to use a mask on its reflection and copy the effects by right-clicking on it. Now copy the clip from track 2 and paste it on track 6 at the one-second position. Right-click on it and paste the effects copied from track 5. Adjust its position to align with clips.
Different effects are needed to be applied so that all clips can look the same. Add the 8mm Dirt Organic Film Grain effect on track 7 and Dark Film effect on track 8. To make the clip more realistic, add the Extreme Shake effect on track 9 at 15 frames for 2 seconds. Change the frequency of the Extreme Shake effect to 10 by double-clicking on it.
Finally, add the cinematic bar on track 10 and use the render preview for a smooth playback experience. With that, the process of adding Explosion VFX effects to videos using Filmora is completed and a cinematic video is finished.
What you've learned:
- You can change any background in video with green screen.
- Use transitions in video to make it more smoothly.
- Filmora comes with many types of background, including social, busiess, sports and more.
