Transcript
In this video, we will show you this spaceship flying visual effect in Wondershare Filmora. First, download the "Neon Grid" PNG from Google. These are free to use along with this spaceship. Drop this street footage on track 1, keep it till 6 seconds and 20 frames, and duplicate it on track 2.
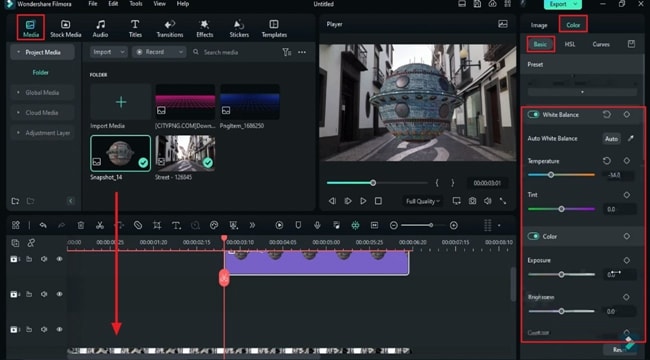
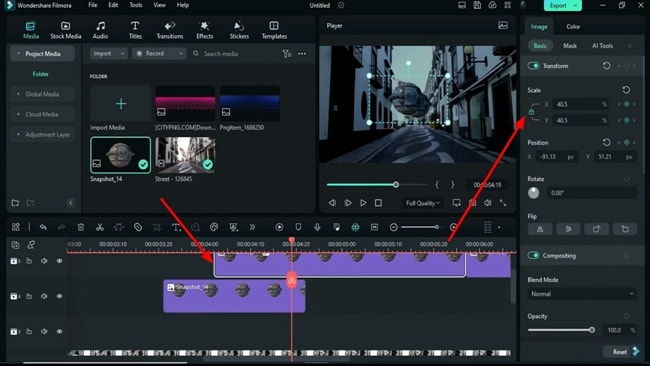
Drop spaceship PNG at 5 seconds and the first frame on track 3, and make it as long as street footage. Move it to track 5, then make some color adjustments towards bluish, change "Exposure" to -14, and change the "Contrast" to 100. Select street footage and adjust the color to make it blend with the spaceship.
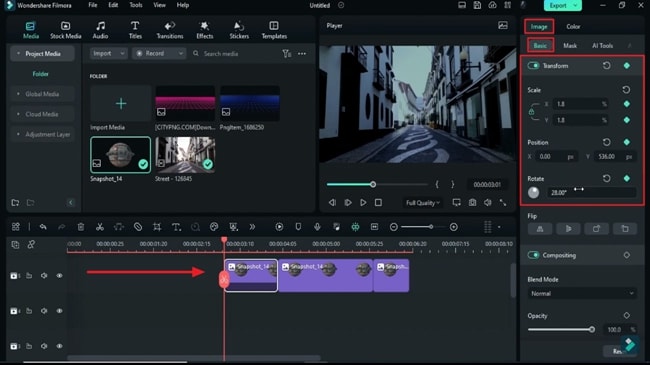
Now select the spaceship clip, split it after 1 second, then split again after 2 seconds. Select the first split part, add "Transform" keyframes at the start, and change the "Scale" to 1.8 and the Y position to 535. Rotate it by 28 degrees, go after 15 frames, change "Scale" to 23.4, Y position to -3, and "Rotation" to 0. Go to the last frame and change the "Scale" to 33.0. Turn on the "Drop Shadow” effect, change the "Angle" to 181, "Distance" to 69, and "Opacity" to 60.
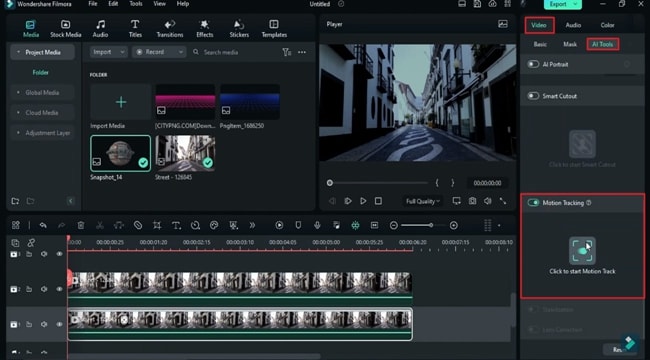
Now add shadow to the rest 2 parts. Then select track 1 clip for the first frame; go to "AI Tools," turn on "Motion Tracking," hide track 2, set the sky as the target, and start tracking.
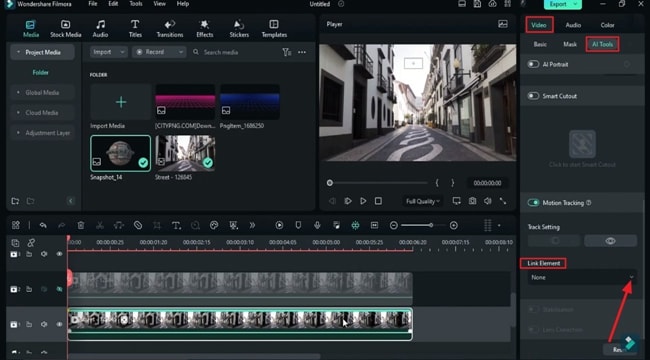
Choose the spaceship snapshot and "Link Element" option. Unhide track 2 clip; now you can see our middle clip is linked to "Motion Tracking." Drag the first split spaceship clip below as a reference clip to adjust the "Scale" and "Position" of the spaceship in the second split clip. We do it in the preview screen because if you change the value in transform, it will change the value for that particular frame as well.
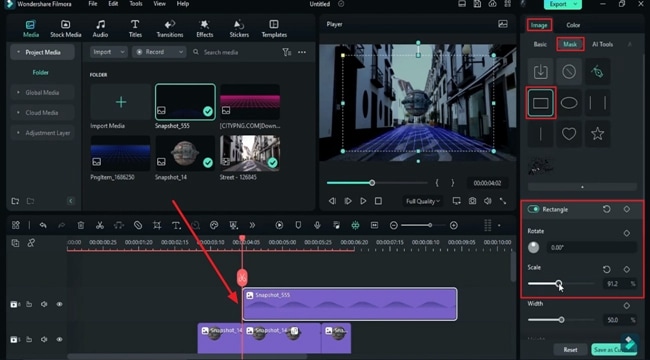
Once you're done, shift split 1 clip back to its position. Let's select the last split clip and change the "Scale" to 33. Drop the blue neon grid on track 6 in this position. Place it on the ground. Now go to the "Mask,” select “Pen Tool” to create a mask for covering the floor. Take a snapshot of the endpoint and replace this neon clip with the snapshot.
Do some color adjustments to make it brighter. Then go to the "Mask" and select "Rectangle" mask. Increase the "Scale" like this, and set "Blur Strength" to 17.2.
Here, we need to create a grid showing up effect. Let's turn on the "Position" keyframe, place the mask over the grid area, then go after 1 second, drag the mask down towards the ground, and take it out of the screen. Let's check whether the effect is all right. If you feel the effect duration is too long, just move the second keyframe to the left a bit.
Shrink the blue neon PNG clip. Now drop the second grid PNG on track 4 and rotate it by - 90. Adjust its "Position" to place it on the right side of the wall. Increase its "Scale," unlock the scale, and decrease the Y scale. Then, decrease the X scale to 71.5 and Y to 209.4. Adjust the "Position" by the X-axis.
Now, create a mask around it; use the wall as a reference. Then, take a snapshot and replace the track 4 clip with it. Go to the start point, select the "Double Line" mask, lock tracks 5 and 6, increase "Blur Strength" to 18.8, and adjust its "Position."
Then turn on the "Position" keyframe, go about 1 second further, and change mask position towards the right side until out of the screen. Drop the same snapshot on track 3, lock track 4, flip it vertically, adjust "Position" and "Scale."
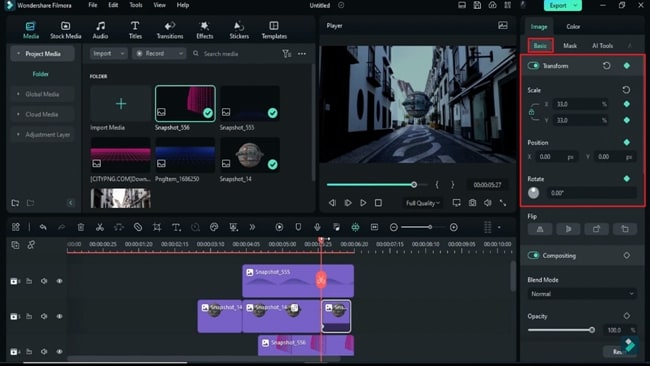
Make a mask animation the same as track 4, but this time, make the mask travel toward the left side. Unhide all the clips. Select the last split part of the spaceship, go to the "Basic," add "Transform" keyframes, then place the Playhead one frame before the end. Increase "Scale" to 357. Rotate it by - 28 degrees, change X position, and make the spaceship travel out. Now, let’s render it to see the final preview.
Step-By-Step Guide to Create Ray Fire Effect
What you need to prepare:
- A computer (Windows or macOS)
- Your video materials.
- Filmora video editor
Launch and Import Files in Filmora
Launch Wondershare Filmora and import your video footage to the timeline. Adjust its length as needed, duplicate the video by pressing "Ctrl + D," and place the duplicated video in another track.
After that, import the spaceship or similar-looking element PNG file to another track and adjust its duration to match the original video footage. Click the recently updated track and make color adjustments, if necessary, from the "Color" panel.
Make Adjustments to Split Layer
After importing and adjusting your media files in the timeline track, split the spaceship track clip into three different durations. Add keyframes for the "Transform" section at the start of the first split part. Moreover, adjust the "Scale," "Position," and "Rotate" values to create movement and rotation effects according to your requirements. Add a shadow effect to the first split part and adjust its settings as desired. Repeat the same process for the other two split parts.
Active Motion Tracking For Video Clip
Enable "Motion Tracking" for the first clip in the timeline track by accessing the "AI Tools" and locating the option. Hide the 2nd spaceship clip that is likely to be in the second track by clicking the "Eye" icon. Set the motion tracking target from the Preview window.
After that, link it to the element clip by accessing the "Link Element" option from the right settings panel.
Adjust the Element Using Reference Layer
Unhide the second spaceship clip in the timeline and place the first split clip in another track as a reference clip for adjusting the "Scale" and "Position" of the spaceship in the second split clip. Bring the first split layer back to its track and adjust the "Scale" value of these clips.
Make Adjustments to the Neon Grid PNG Files
Import the neon grid PNG file to the latest timeline track and create a mask around the video using the "Rectangle" mask. Next, increase the "Blur Strength" for a grid showing up effect from the right side settings panel. Click the "Snapshot" button in the preview window, and replace the first neon grid PNG file with the snapshot.
Repeat the process for the second neon grid PNG file in the timeline and take a snapshot of it to replace it with its PNG in the timeline. Adjust as needed.
Add Keyframes and Final Touch Up
Unhide all the clips and select the last split part of the element or spaceship. Add "Transform" keyframes and animate the "Scale," "Rotate," and "Position" values to make the element travel out from the screen, creating the Ray Fire effect.
Ray Fire effect is an amazing animation that takes you to the future. With this spaceship effect, you can add a different perspective to your video, especially in terms of sci-fi. Moreover, once you learn this Ray Fire effect, you can create similar-looking animated effects in a go.


Speak Your Mind