- Home
- DIY Special Effects
- Fixed: How to Do Motion Graphics for a Video?
Transcript
First, let's go to the titles tag. Drop a default title on track 3 and keep it 4 seconds long. Then, double-click on the label and change the font to Bankir-Retro.
Adjust its size to 100, type your words, and change the text spacing. Finally, take a snapshot of this frame.
Next, make another snapshot. Double-click on the default title, change the text colour, and take a snapshot.
Bring out the advanced panel, click Add Shape and select the rectangle shape. Meanwhile, switch off the Text Fill.
Change the shape fill color to white. Adjust its shape, rotate it, and move its position. Then delete the text layer and go to the animation tab. Select round zooms out.
Locate the main editing window at the 5th frame and make it the start point of the default title clip.
Move the play head 3 frames further and drag the first snapshot clip on Track 1 at the play head position. Keep the snapshot clip 30 minutes and 20 seconds long.
Go to the sample color, select the black color, drop it on Track 2, and smaller the size of the sample color. Rotate it and align it to create a mask for half snapshot. Decrease the duration to fix the clip.
Locate at the start of the snapshot clip. Change the X-axis position to make the text slide into the line and black color.
Place the play head 10 frames further and reset the position values.
Go ahead to the position of 3 seconds and the 10th frame. To add another keyframe, place the play head at the end of the snapshot clip. Change the X-axis position.
Go back to the first frame and reduce the opacity to zero percent. This will create a sliding effect from right to left.
Export this clip at a higher rate. Select all pins on the timeline and move them to one track above. Meanwhile, drop the second snapshot on Track 2 and adjust its duration.
Select the black color clip and change the black color position from right to left. As the first snapshot, hide the clip-on Track 2 but make it slide from right to left.
Export this at a higher rate.
Drop the music clip on Track 1, then drops zero one clip on Track 2 and make it four seconds long only. Then, change the duration of the background clip to four seconds.
Now change the blending mode of zero one clip to lighten.
Copy it and take the play head further. Finally, paste the elements and align their position as per the line effect; to see the final preview click on the render preview.
How to Do Motion Graphics in Filmora
What you need to prepare:
- A computer (Windows or macOS)
- Your video materials.
- Filmora motion graphics video editor
Download Filmora. Install the program and wait for it to Run. Then, click on New Project.
Go to File → Project Settings and set the FPS to 60. Also, ensure that the project is in Full Resolution (1920x1080). Click OK.

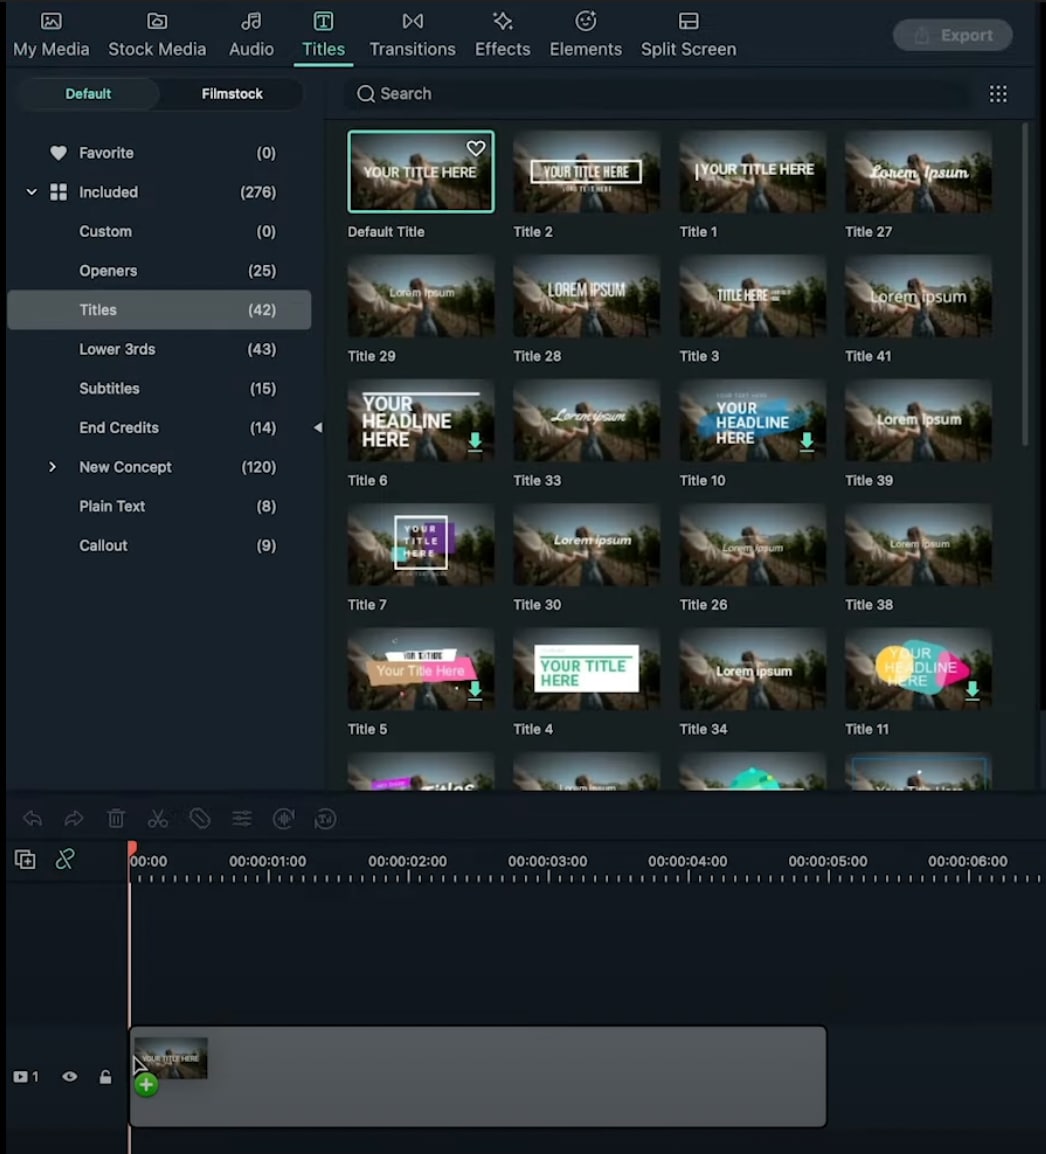
Open the Titles tab and drag the Default Title to the Timeline. Then, double-click on the Default Title and click on ADVANCED.
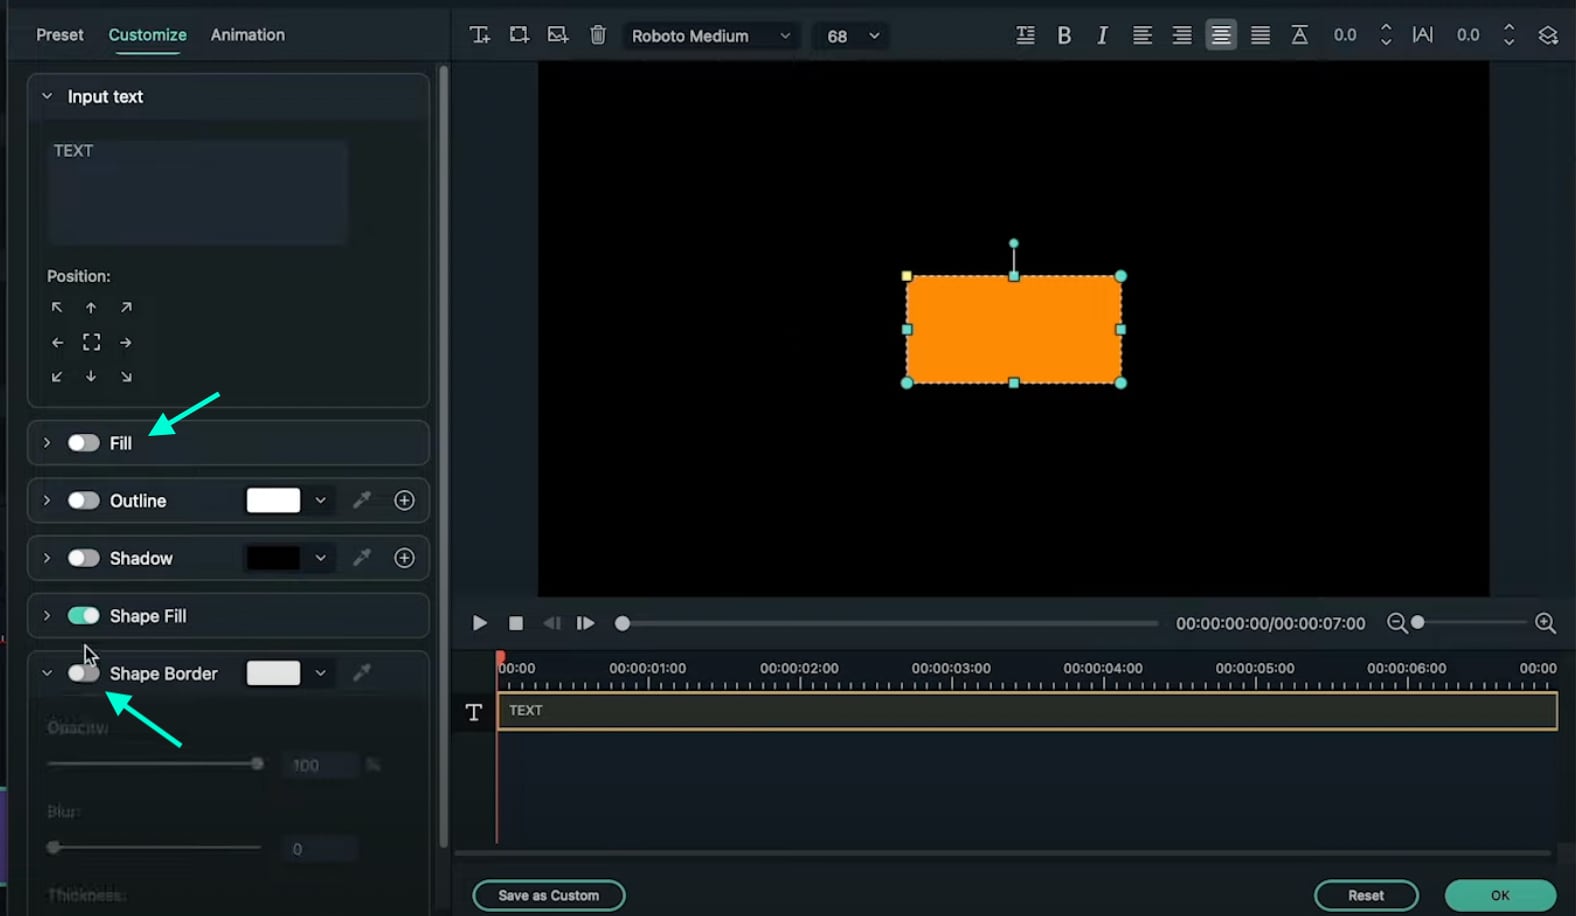
From the Advanced settings panel, delete the existing text and add a Rectangle shape.

Disable the Text Fill and the Shape Border options from the panel on the left side.
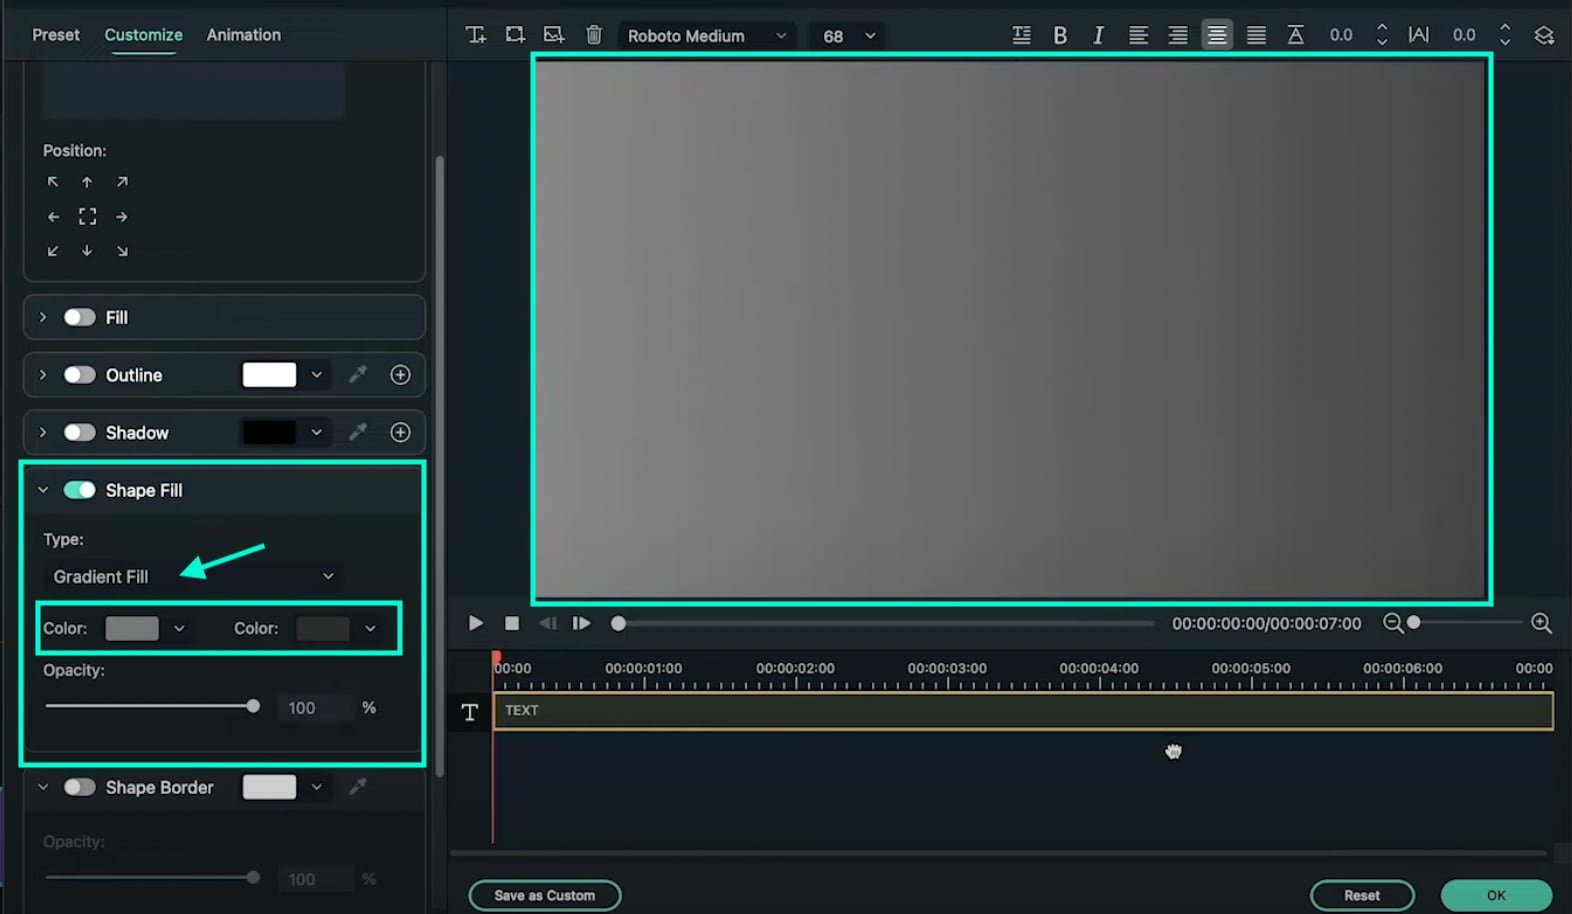
Click the drop-down arrow on the Shape Fill option and change the Type to Gradient Fill. Then, adjust the two color pallets from lighter to darker to create a gradient effect. Finally, adjust the rectangle to fit the entire screen. Click OK.
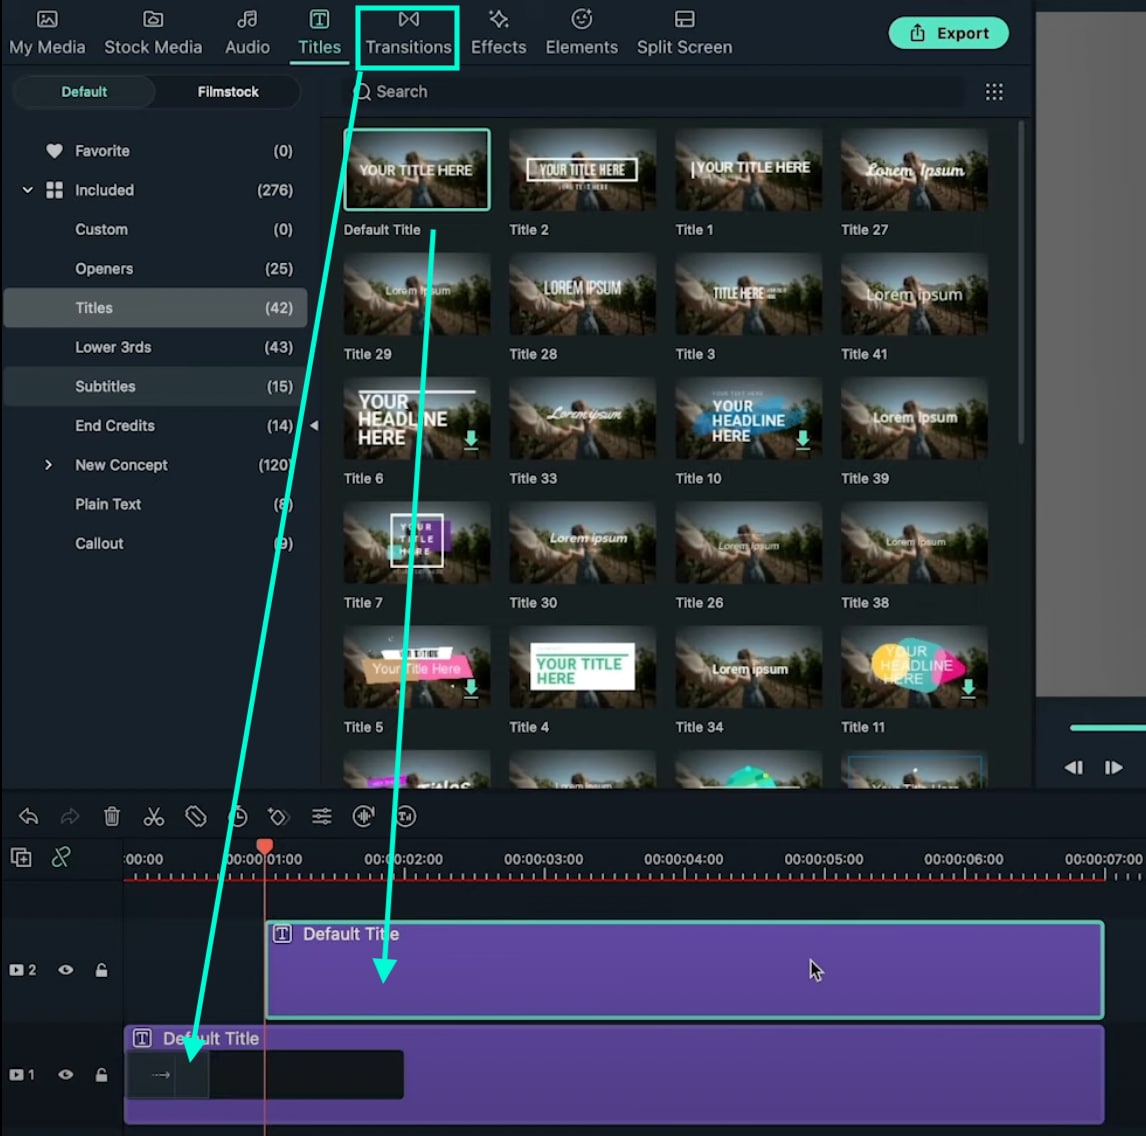
Go to the Transitions tab → search for “Push” → drag the Push transition to the Default Title in the Timeline. Then, move the Playhead to the 1-second marker and drag another Default Title to that point from the Titles tab.
Double-click on the new Default Title → go to Advanced. Delete the default text and add a Circle shape this time instead of a Rectangle. Disable the Text Fill and Shape Fill options this time.
Scroll down to Shape Border and increase the Thickness bar all the way up. Then, change the circle’s color to match your background as closely as possible. Click OK.
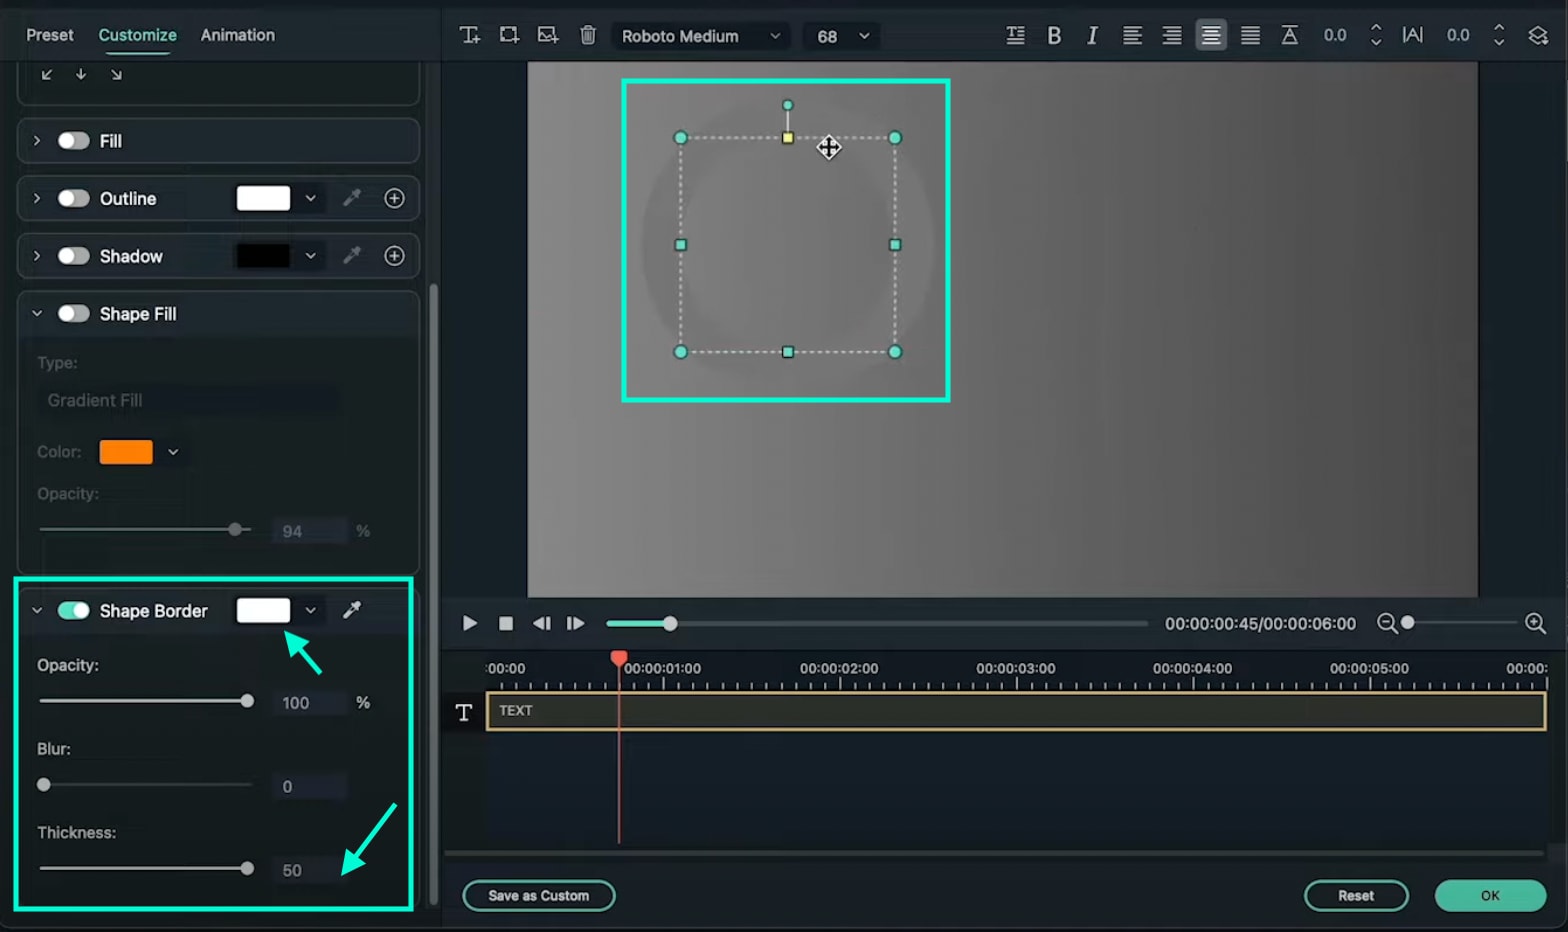
Copy the Title you just edited and paste it into the above layer. Then, double-click on the copied Title and go to its Advanced settings panel.

In the Advanced panel, copy the circle and paste it somewhere else on the screen. Change its size if you want, and change the shade of its color to match the background once more. You can add as many new copies of the Default Titles and copy as many circles as you want. Click OK.
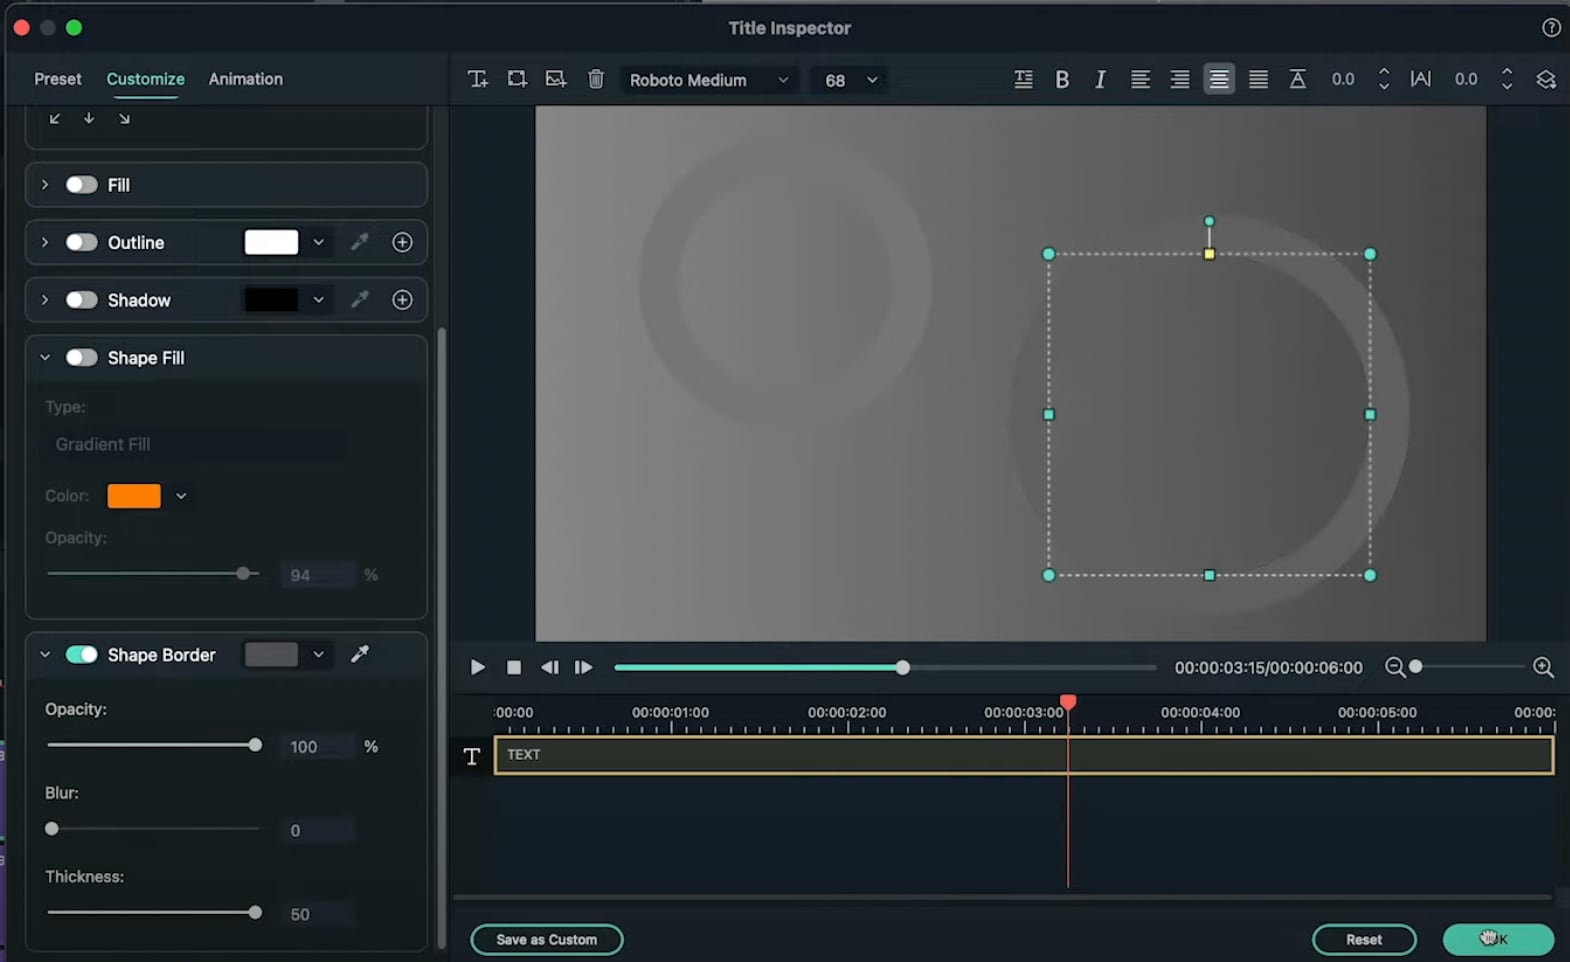
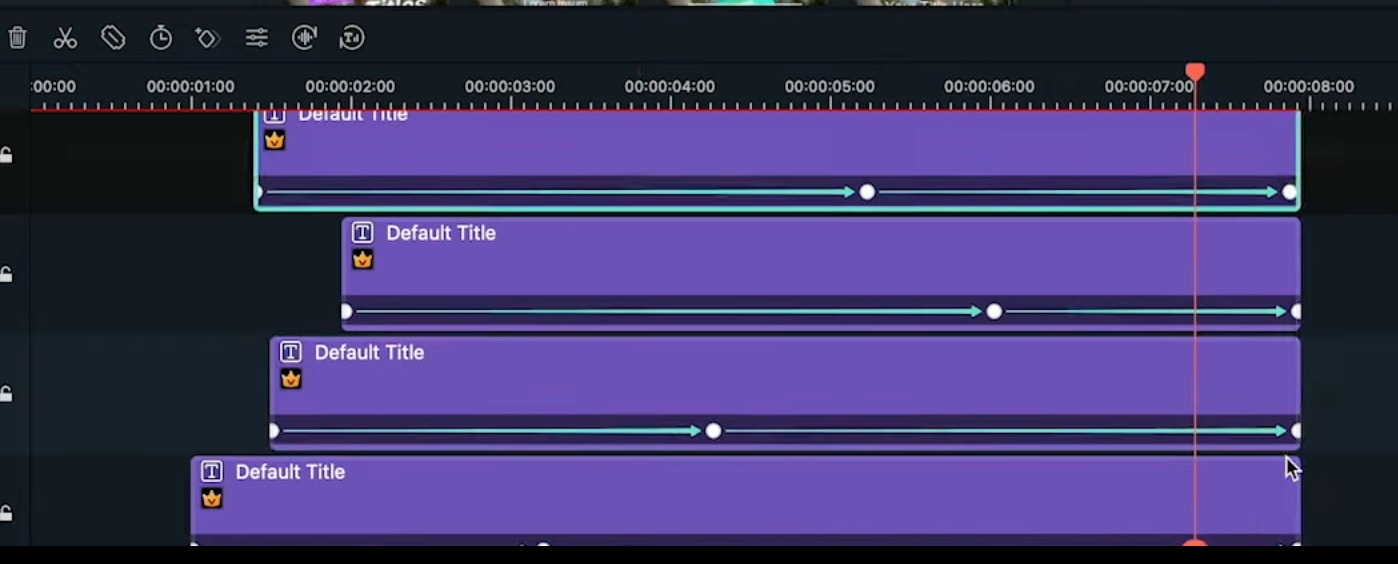
After you’re done copying and pasting more Default Titles with more Circles inside, you can start animating them. Start with the first one. Double-click on the first Default Title with the Circle inside. Make sure you place the Playhead at the beginning of that clip. Then, go to the Animation tab.
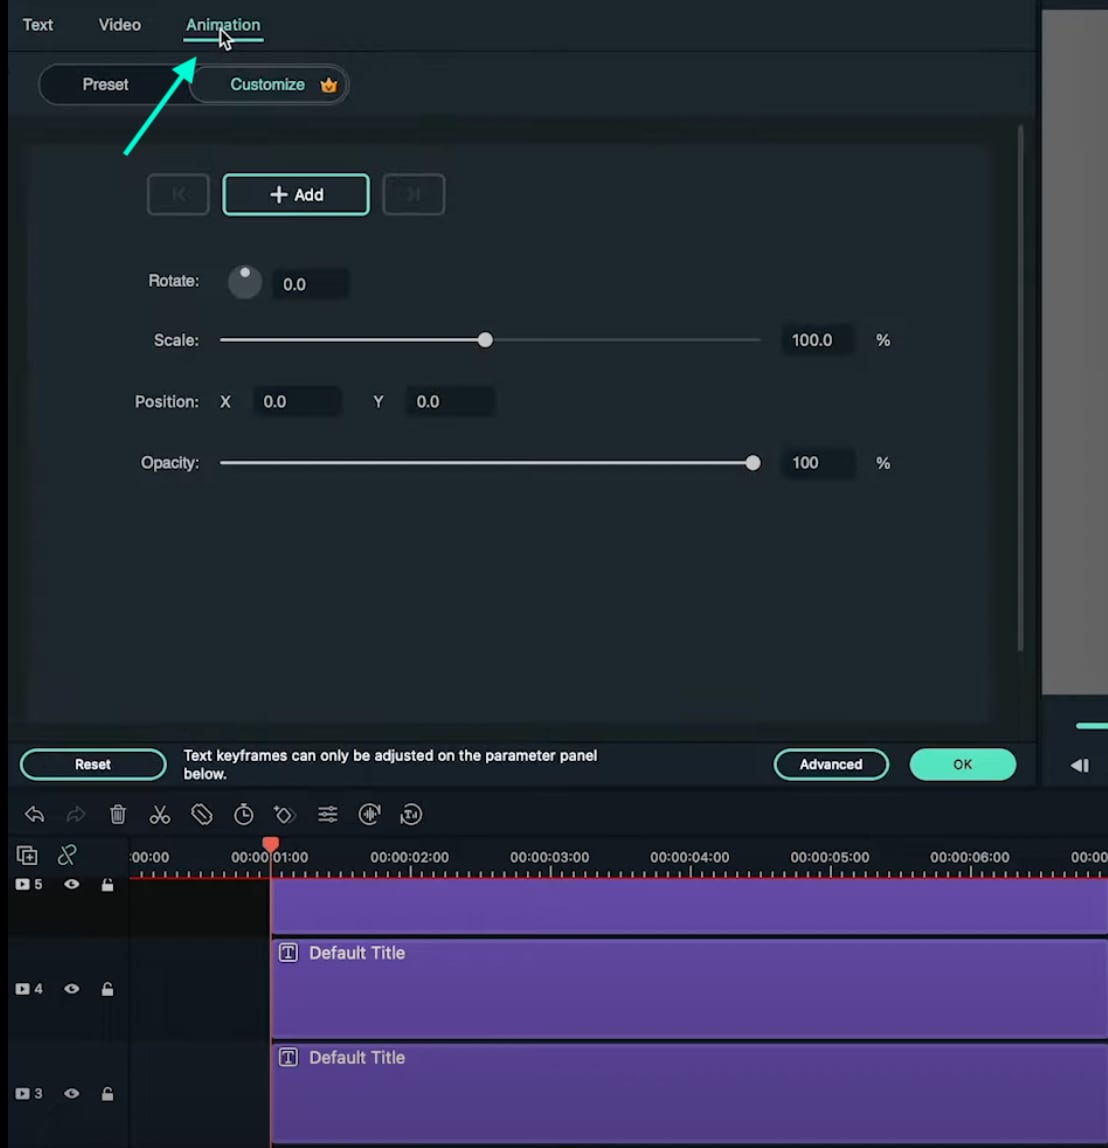
You need to add 3 keyframes. Add the first one right now. Just click on the “+Add” button. Then, move the Playhead somewhere in the middle and click “+Add” again. Last, move the Playhead at the end of the clip, and click “+Add” again to add the third keyframe.

Now, go back to the first keyframe to edit its settings. Click the arrows to move between keyframes. Once you’re at the first one, start decreasing the Scale and the Position values as you move the Playhead toward the second keyframe. There are no rules here. Move each value based on how it looks best to you.
For the second keyframe, just increase the Scale and adjust the Position value based on how it looks on the screen.
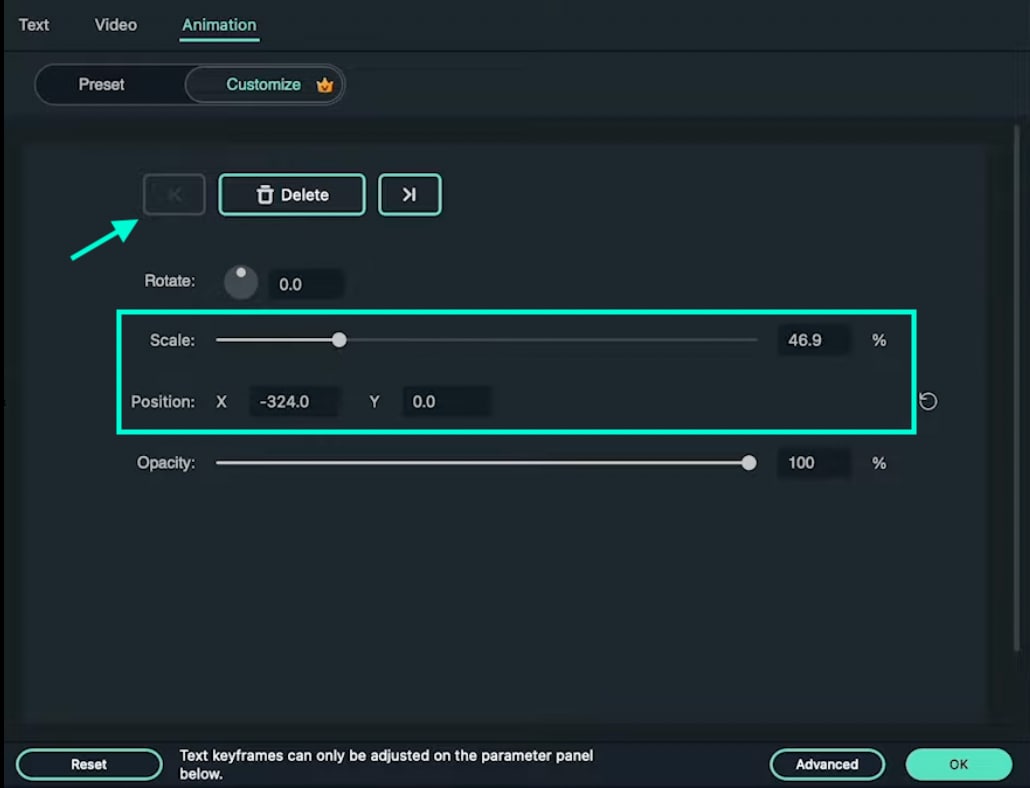
Now, apply the same method as in Step 14 to all the other circles in your video. Then, adjust the keyframe positions for all layers to create more unique movement throughout the video.
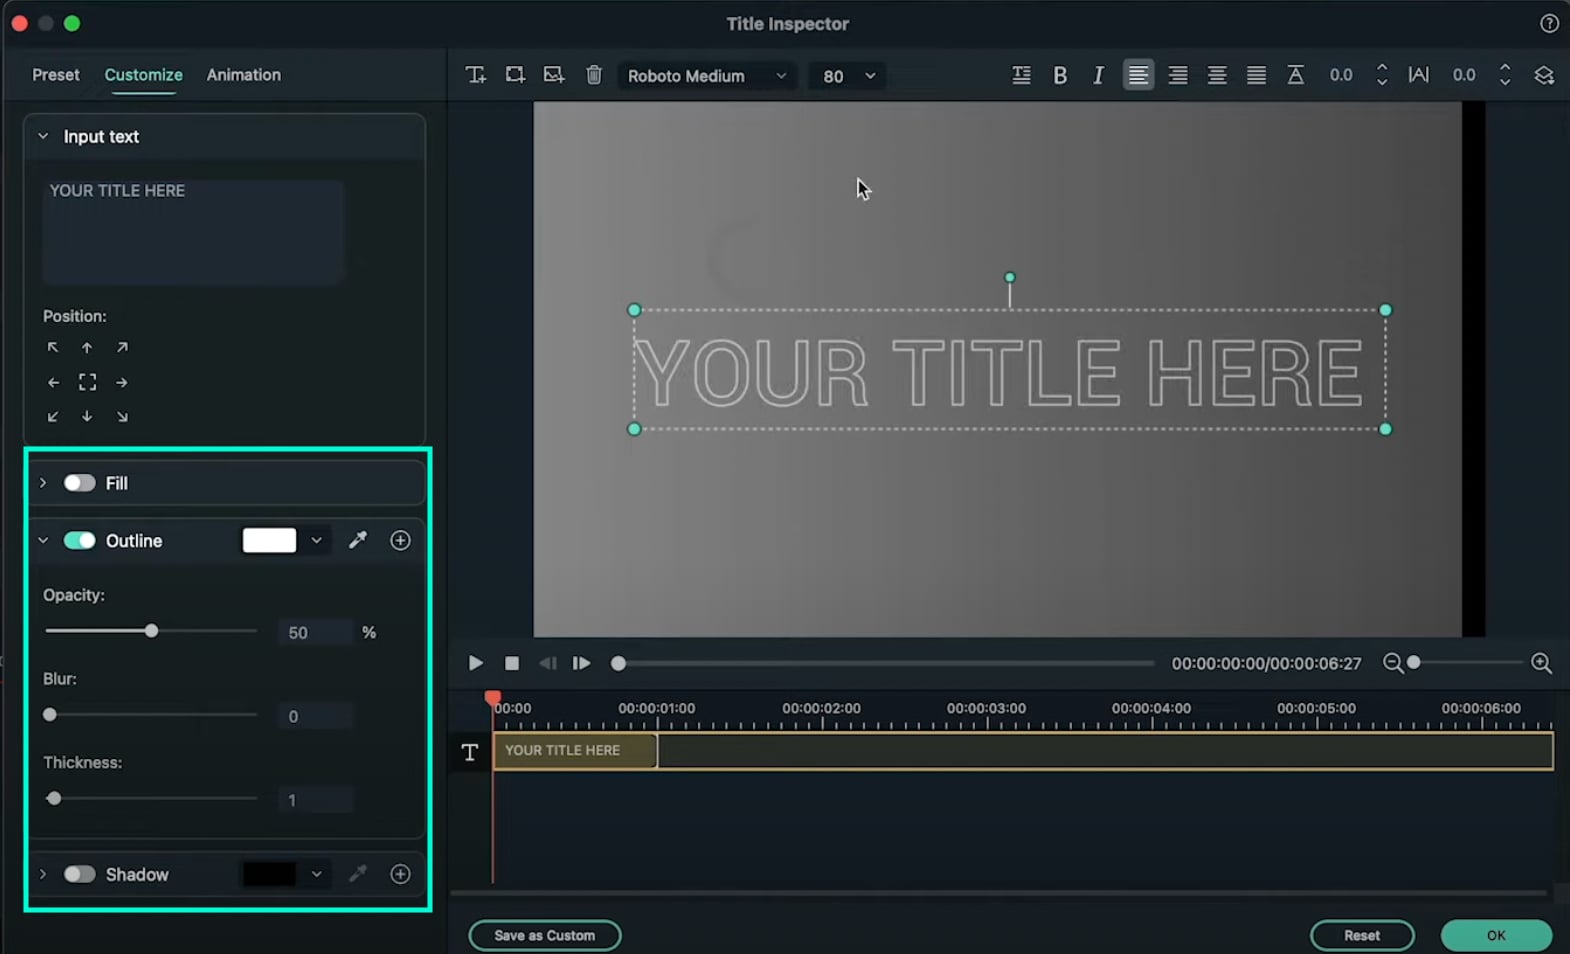
Move the Playhead to 1 second and 30 frames. Then, add a new Default Title in the Timeline and go to its Advanced settings panel. From there, Enable the Outline option and Disable the Fill option. In the Outline option, change the color to White, set Opacity to 50%, and decrease Thickness to 1.
Next, choose your favorite font and type in your text inside the textbox. Then, change the value you see highlighted in this image to “-20”. Finally, increase the text size to almost fit the entire screen. Don’t worry about the fact that you can’t see all of it on the screen.

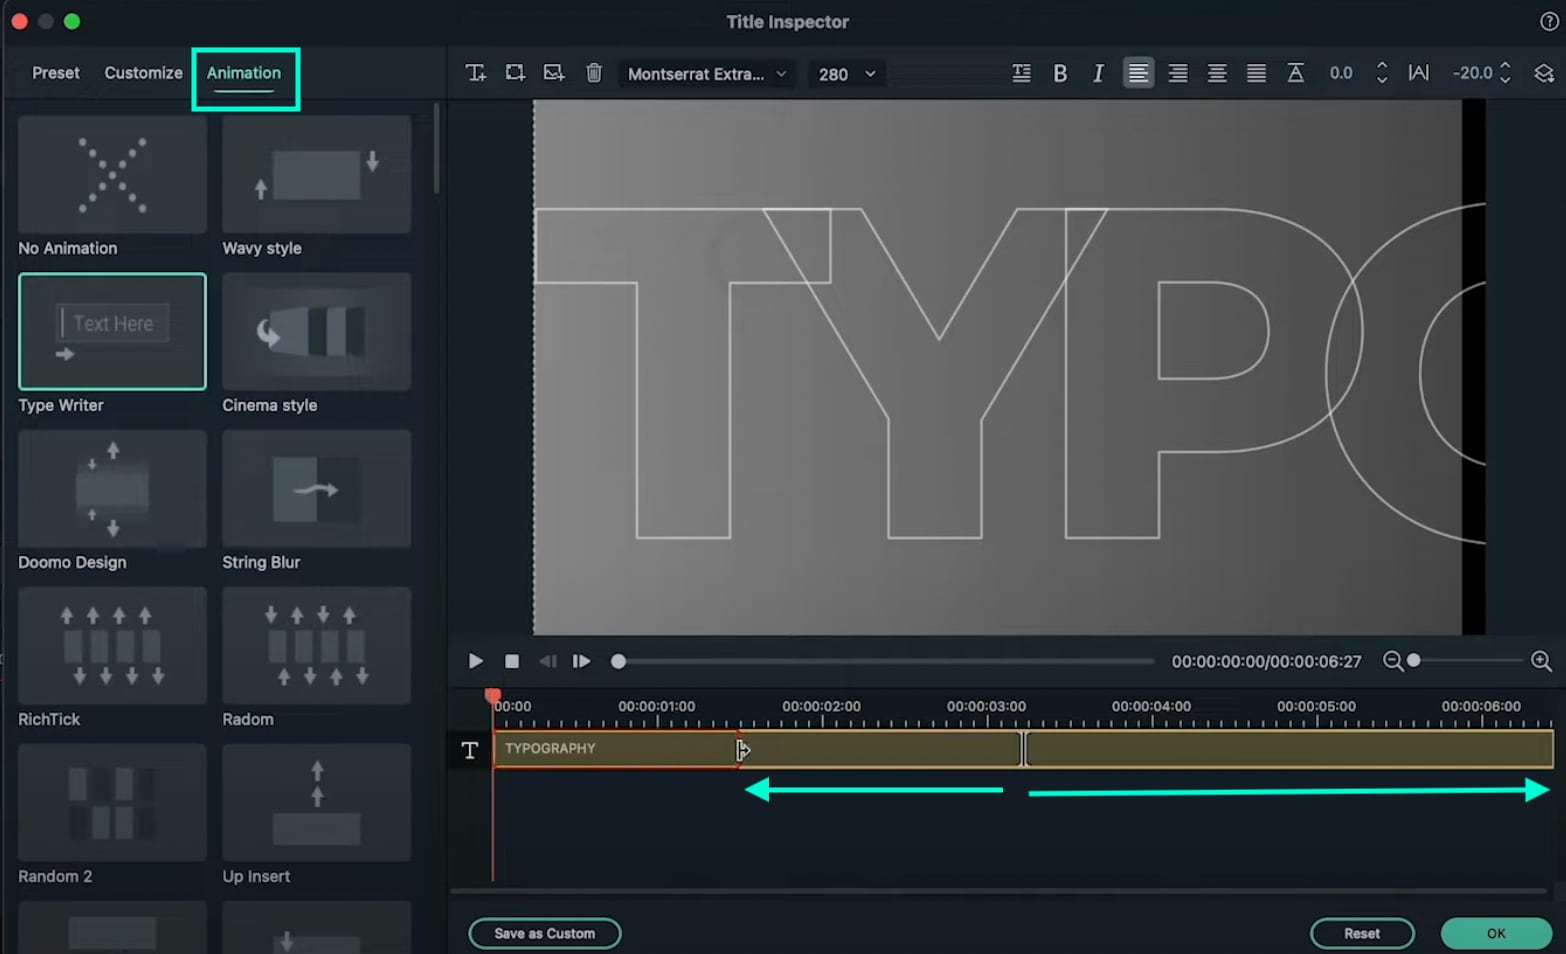
Go to the Animation tab and apply the “Type Writer” animation. Then, drag the yellow lines below just like you see in the image here. The arrows show you the length to which you need to drag these lines. Click OK.
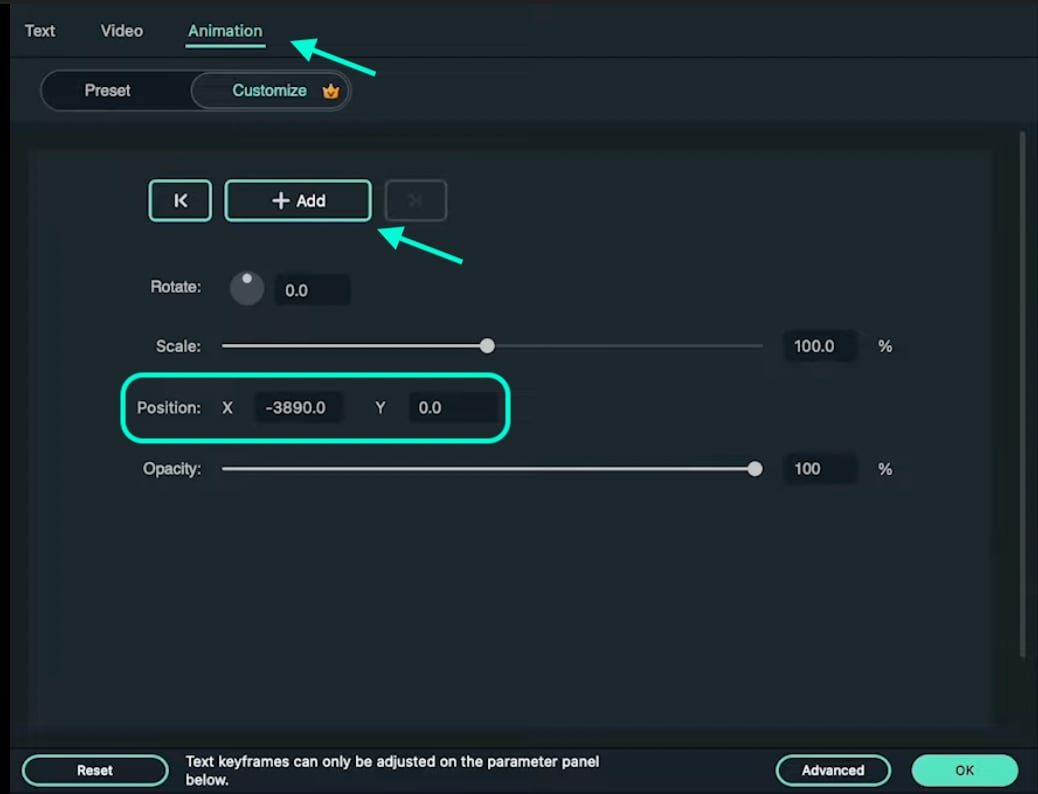
Set the Playhead to 1 second and 40 frames. Now, double-click on the last Default Title we just created and go to its Animation settings. NOTE: Don’t open its Advanced settings this time. Next, add a keyframe. Then, move the Playhead near the end of this clip in the Timeline. Now, drag the X position to the left until you see the last letter of your text appear on the screen. Click OK.
Now, add another Default Title to the Timeline. Open its Advanced settings and type in your main text. Then, go to its Animation tab and apply the “Random 2” animation. Change its starting and end times according to your preference. Click OK.

That’s it. You’re done! Feel free to preview the video and Render it. Congratulations on creating unique motion graphics in Filmora.
Related Templates For You to Try


What you've learned:
- How to create custom motion graphics in Filmora
- How to edit and add animations to titles in Filmora
- Customize text and shapes in Filmora


