
 100% Security Verified | No Subscription Required | No Malware

In this article
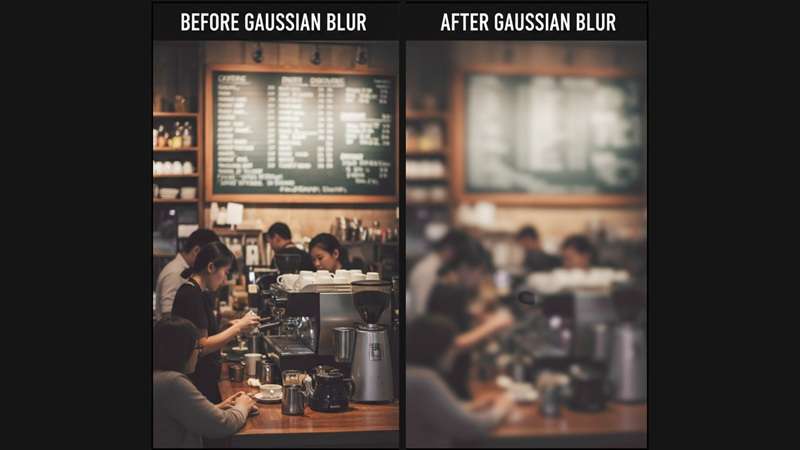
Gaussian blur is a popular tool in photo and video editing that helps create smooth, visually balanced images. Many editors use the Gaussian blur effect to enhance portraits, stylize footage, or censor sensitive details. The technique is based on a mathematical formula, but is simple to apply through modern editing software.
Let’s get into more details about what Gaussian blur is, how it works, and how to apply it effectively to elevate your photos and videos using different platforms.

Part 1. What Is Gaussian Blur and How Does It Work?
Gaussian blur is a type of image-blurring effect that smooths details and softens edges to make visuals look more natural. It’s called “Gaussian” because it uses a mathematical function known as the Gaussian distribution, which spreads pixel values evenly in all directions. This process reduces harsh transitions between light and dark areas, helping images appear smoother and more refined.
How It Works
Gaussian blur works by applying a weighted average to each pixel within a specific radius. Pixels near the center of the selection are given more importance, while those farther away have less influence. This weighting creates a soft falloff effect, resulting in smooth transitions and natural-looking blur.
Part 2. Blur and Gaussian Blur: What’s the Difference?
At first glance, all blur effects might seem similar, but there’s a clear distinction between a regular blur and the Gaussian blur effect.
A standard blur (or box blur) simply averages nearby pixels equally, which often results in a flat or artificial look. It softens edges but doesn’t consider how light and color should naturally fade across an image.
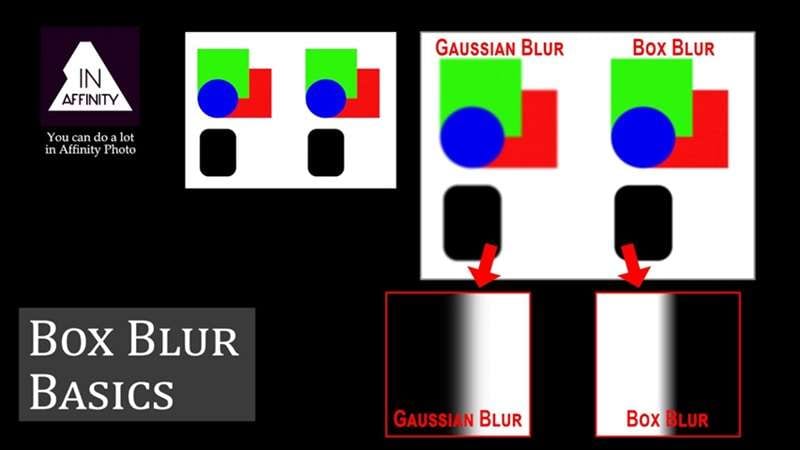
Gaussian blur, in contrast, calculates a weighted average using a Gaussian curve. Pixels near the center of the selection carry more weight, while those farther away contribute less to the final look. This gradual transition creates a smooth and natural blur that closely mimics how light behaves through a real camera lens.
Because of its realistic and symmetrical falloff, the Gaussian blur effect delivers professional-looking results that enhance rather than distort an image. But at a glance, they look pretty similar to other softening effects like box blur or average blur.
Advantages of Using Gaussian Blur
- Reduces image noise and distractions. It smooths uneven tones and removes unwanted textures, making images look cleaner and more refined.
- Censors sensitive information. Useful for blurring personal details such as faces, text, or license plates without degrading overall quality.
- Adds artistic depth and focus. Helps highlight the main subject by subtly muting the background, guiding viewers’ attention naturally.
- Works consistently in all directions. The Gaussian function’s symmetry ensures balanced results across the entire image or video frame.
- Easy to implement. Found in most modern photo and video editors, including Photoshop, Filmora, and many free online Gaussian blur photo editors, making it simple for anyone to apply professional-quality effects.
Part 3. Free Online Gaussian Blur Tools
Free online Gaussian blur tools offer an easy way to create smooth, professional blur effects without the need for complex software. One good example is Pi7 Image Tool, which provides a fast and convenient way to apply a Gaussian blur directly from your browser.
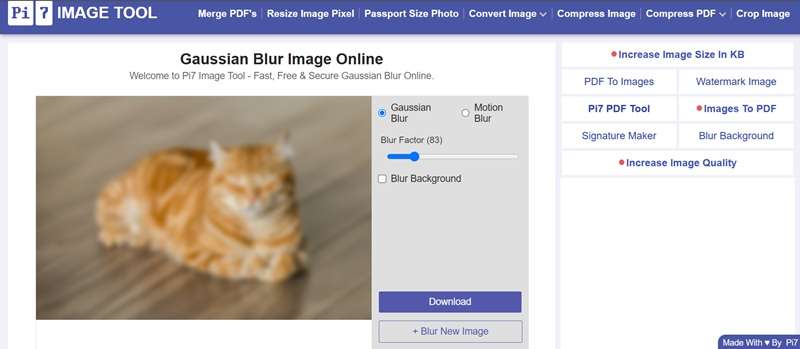
After uploading your photo, you can fine-tune the blur intensity and choose whether to apply it to the entire image or just the background. Besides Gaussian blur, Pi7 also offers a motion blur option to create a sense of movement in your photos.
Part 4. How to Apply Gaussian Blur in Photoshop
Photoshop remains one of the most reliable tools for applying Gaussian blur to a photo with precision and control. The Gaussian blur effect in Photoshop allows you to soften details, reduce background distractions, or highlight your subject without losing image quality.
Before starting, make sure your image is open in Photoshop. You can then follow these simple steps to apply the Gaussian blur filter effectively.
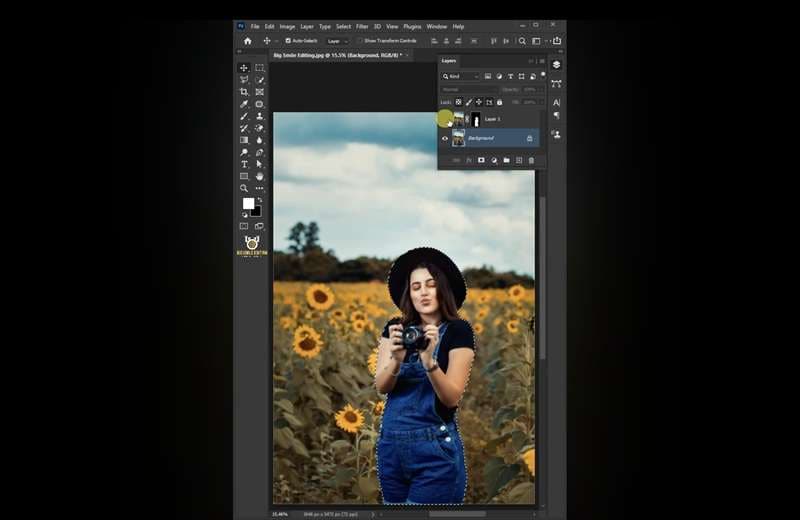
Step 1. Open and duplicate the background layer
Start by duplicating your background layer from the Layers panel. This protects the original image and allows you to compare the blurred and unblurred versions later.

Step 2. Select the area with the Pen Tool or the Lasso Tool
Use the Pen Tool or Lasso Tool to outline the subject or area you want to keep sharp. Precise selection ensures the Gaussian blur affects only the desired background or portion of the image.
Step 3. Convert path to selection and invert for background blur
After outlining the subject, convert the path to a selection. Then invert it so the background becomes active. This ensures the Gaussian blur is applied around the subject while keeping the focal point crisp and detailed.
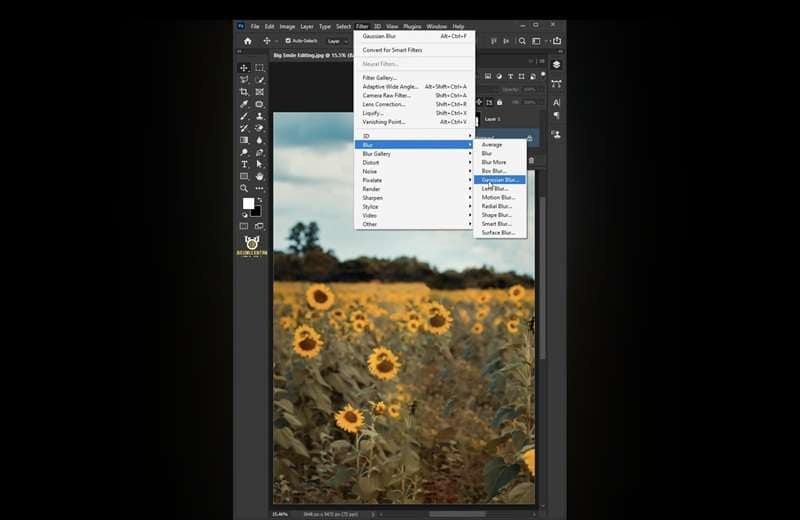
Step 4. Apply the Gaussian Blur filter and adjust the radius
Navigate to Filter > Blur > Gaussian Blur from the top menu. In the dialog box that appears, move the radius slider to control the blur intensity. A smaller radius gives a light softening effect, while a higher value creates a stronger background blur.
The Gaussian blur effect in Photoshop gives you full control over how subtle or dramatic the blur appears. By carefully adjusting the radius and selection area, you can create realistic depth and focus similar to a professional camera lens.
Part 5. How to Apply Blur to a Video with More Options
While Gaussian blur in Photoshop focuses on still images, Wondershare Filmora brings the same visual effect to video editing.
The blur effect in Filmora helps you soften distracting backgrounds, draw attention to your subject, or conceal sensitive information efficiently. It’s widely used by creators who want professional-looking results without complex tools or heavy manual masking.
 secure download

Filmora provides several built-in blur options that can be applied directly to your video clips. Its user-friendly interface and real-time preview make the process quick and accessible, even for beginners.
How to Blur a Video in Filmora
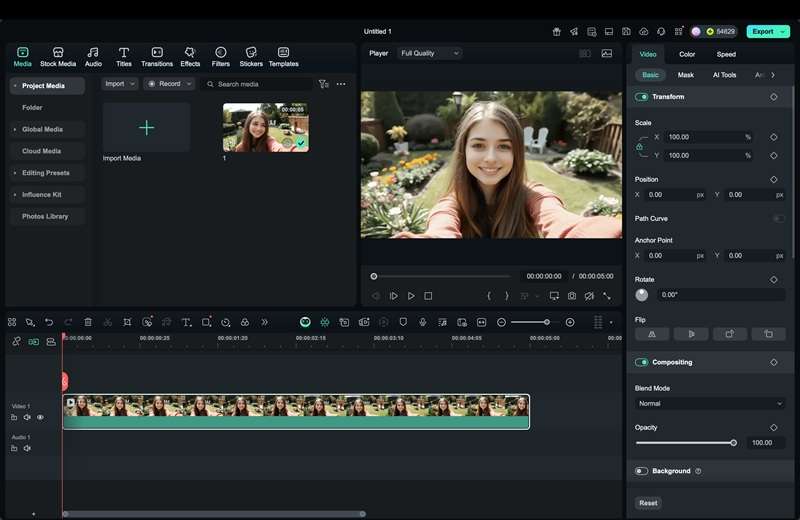
Step 1. Import your video into the timeline
Open Filmora and start a new project. Import your video clip, then drag it onto the timeline to begin editing.
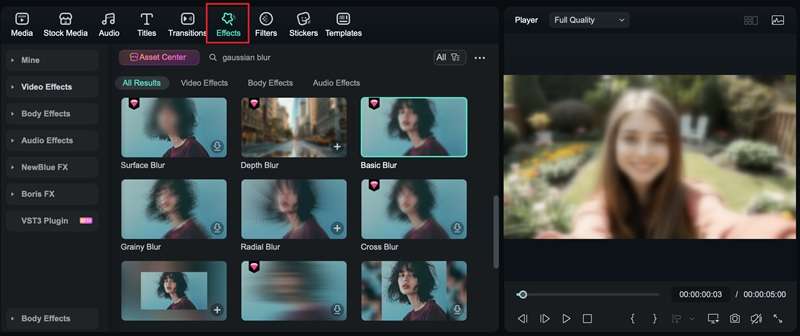
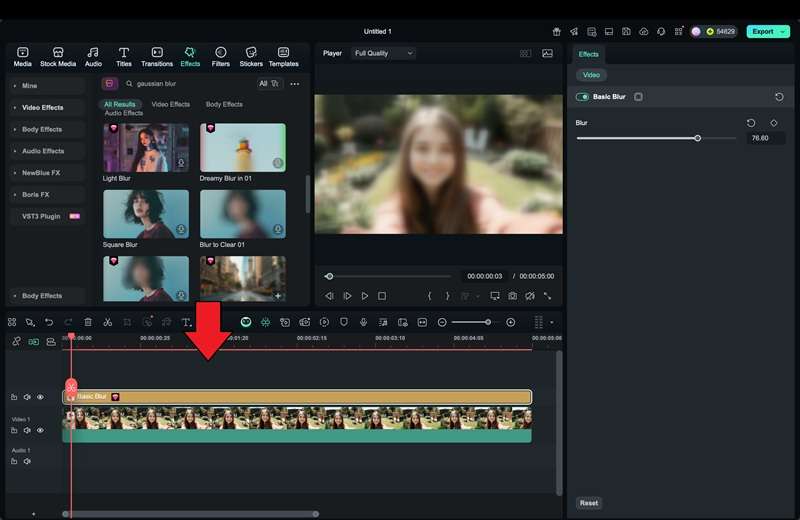
Step 2. Apply the Background Blur effect
Go to the Effects tab and search for Blur. Filmora offers several ready-to-use blur styles that can be applied directly to your clip. Drag the chosen effect to your video and preview the changes in real time.
Step 3. Adjust blur intensity and settings
Click on the video in the timeline to access customization options. Adjust the blur radius, opacity, or blending strength to create a balanced effect.
Key advantage: Unlike Photoshop or online tools, Filmora offers video-focused Gaussian blur with minimal steps. Using Gaussian blur in Filmora is ideal for creators who want both precision and speed. It’s effective for privacy-focused edits, such as blurring faces or text, and for stylistic purposes, like adding depth to footage.
Conclusion
Gaussian blur remains one of the most practical and versatile tools in digital editing. Blending pixels smoothly helps reduce noise, soften sharp edges, and guide attention to the subject. The effect adds a natural sense of depth and polish, making photos and videos look more balanced and professional.
The Gaussian blur effect works seamlessly across different platforms. In Photoshop, it offers precise control for detailed image adjustments, while Filmora makes it simple to apply to video backgrounds. Free online Gaussian blur tools also provide quick solutions for quick editing needs.
Frequently Asked Questions
-
Can a Gaussian blur be reversed once applied?
Once a Gaussian blur is applied and saved directly to an image or video, it cannot be fully reversed because the original pixel data is altered. To maintain flexibility, apply a Gaussian blur on a duplicate layer or use non-destructive methods like Smart Filters in Photoshop. This way, you can easily adjust or remove the blur later without losing quality.Once a Gaussian blur is applied and saved directly to an image or video, it cannot be fully reversed because the original pixel data is altered. To maintain flexibility, apply a Gaussian blur on a duplicate layer or use non-destructive methods like Smart Filters in Photoshop. This way, you can easily adjust or remove the blur later without losing quality.Is Gaussian blur the same as bokeh?Is Gaussian blur the same as bokeh? -
Is Gaussian blur the same as bokeh?
No, Gaussian blur and bokeh are not the same. Gaussian blur is a digital effect that smooths pixels evenly using a mathematical algorithm, while bokeh is a natural optical effect produced by a camera lens with a shallow depth of field. Gaussian blur can simulate the soft background look of bokeh, but lacks the distinct light shapes and depth created by real lenses.No, Gaussian blur and bokeh are not the same. Gaussian blur is a digital effect that smooths pixels evenly using a mathematical algorithm, while bokeh is a natural optical effect produced by a camera lens with a shallow depth of field. Gaussian blur can simulate the soft background look of bokeh, but lacks the distinct light shapes and depth created by real lenses.Does Gaussian blur affect image quality?Does Gaussian blur affect image quality? -
Does Gaussian blur affect image quality?
Gaussian blur doesn’t harm image quality when used correctly. It actually improves visual smoothness by reducing noise and softening distracting details. However, overusing the blur can make the image appear flat or lose important definition. The key is to adjust the blur radius carefully to keep the result natural and balanced.Gaussian blur doesn’t harm image quality when used correctly. It actually improves visual smoothness by reducing noise and softening distracting details. However, overusing the blur can make the image appear flat or lose important definition. The key is to adjust the blur radius carefully to keep the result natural and balanced.
