- Home
- DIY Special Effects
- TEXT REVEAL Animation | Easy Masking
Transcript
Let's import the footage. Next, drag the footage to the timeline. Here we choose escaping footage that the motion is perfect for creating a revealing text effect.
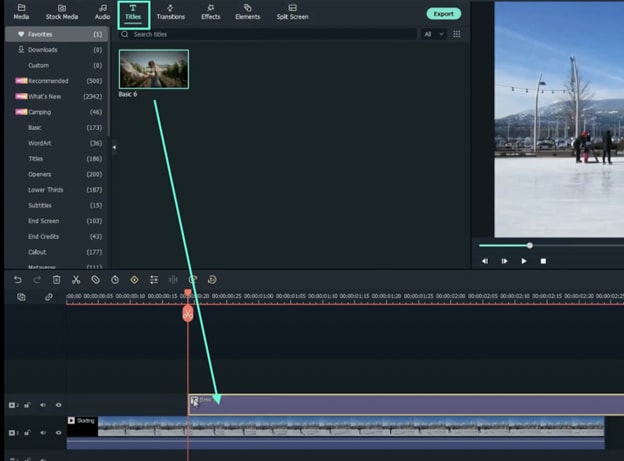
Now go to the titles tab. Drag the primary title to the second layer. Right-click and go to edit properties. Change the text and replace the current font with any bold font you like.
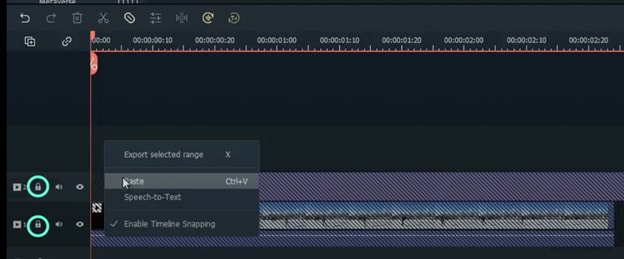
Now copy the footage layer. Lock both layers and paste it on the third layer.
The next step is adding a mask. Place the play head where the text starts. Right-click and go to edit properties.
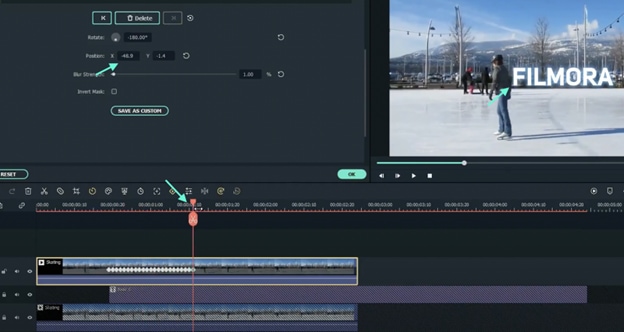
Last, add a keyframe to the third clip. Move one frame forward and drag the X-axis slowly to the left to reveal the text.
TEXT REVEAL Animation | Easy Masking Filmora
What you need to prepare:
- A computer (Windows or macOS)
- Your video materials.
- Filmora video editor
Download the Filmora video editor and install it. Once it loads, click on “New Project”.
Import your footage by clicking on “Import Media”. Then, drag your clip to the Timeline to start editing it.
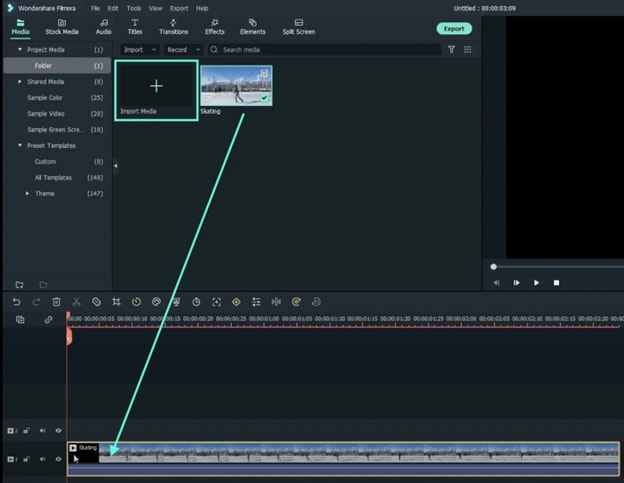
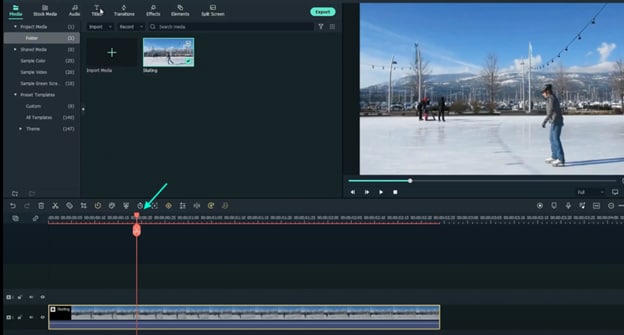
Review your video and place the Playhead at the point where you want the text reveal to begin.
Go to the Titles tab and drag the Basic title to Track 2 on the Timeline. Then, right-click on the Title clip and go to Edit Properties. Here, type in your text and change the font to any bold one. You can also go to the WordArt tab to further customize your text. Click OK.
Now, move the text to fit the objects or people on your video perfectly. Copy the video clip on Track 1. Then, lock both Track 1 and Track 2 by pressing the key-lock button. Right-click anywhere above Track 2 and select Paste.
Move the Playhead to where the clip on Track 2 starts. Right-click on the clip in Track 3 → go to Edit Properties → select the Mask tab → click on Single Line. Then, adjust the Rotate value to “-180°”. Drag the slider on the screen to the right side until the text totally disappears next to your moving object. Now, scroll down from the panel on the left and change Blur Strength to 1%.
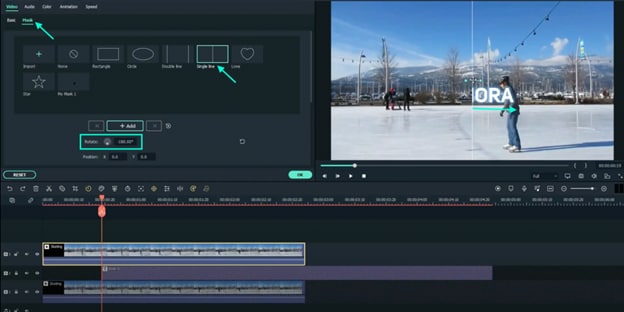
Next, add a keyframe by clicking on the “+Add” button. Move the Playhead one frame forward. Drag the X-axis to the left slowly to reveal a tiny portion of the text on the screen. Then, repeat this as many times as it takes until the full text is revealed, going one frame at a time.
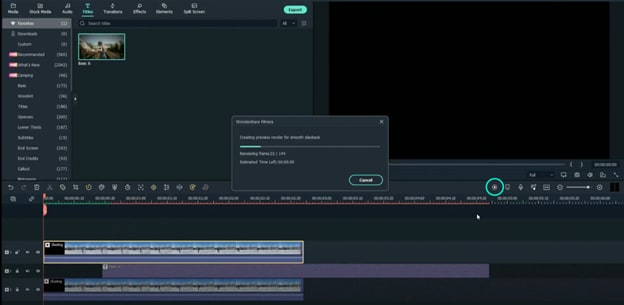
Finally, Render the video and watch the final preview. Congratulations, you’ve just successfully created a text reveal animation in FIlmora.
What you've learned:
- Animate text frame by frame in Filmora
- Edit the properties of clips in the video editor
- Add titles and manipulate clips on the Timeline


