- Home
- DIY Special Effects
- Make TikTok Dance Locked on Effect Video
Transcript
Before we start editing, click the download link in the description box and click on the free download option. Now a Filmora installer is downloaded automatically.
Before editing, make sure your dancing video is filmed in landscape mode. First, let's drop the dancing clip on the timeline. Keep the original project settings, then change the aspect ratio to Portrait and resolution to 1080 by 1920.
Double-click on your clip, increase the scale to zoom in, and adjust the object position to the middle of the screen. Just keep in mind that we need a good amount of space on the top, down, right and left to move our clip. That's why we need the landscape mode video.
The next and most important step is to create a benchmark that our object can follow it. For that purpose, let's go to sample color, drag the green color to the timeline and reduce its scale to between one to two percent. You will see it comes out as a small dot. Increase its duration to match the clip. Move the dot on the head. Here we focus on the chin and lock the green screen track.
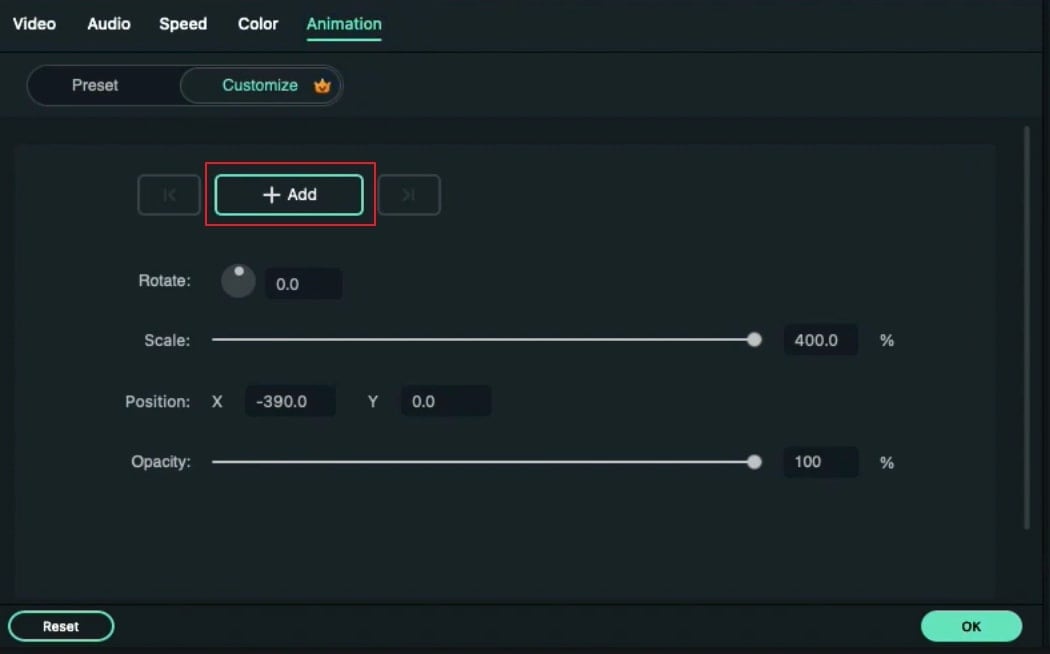
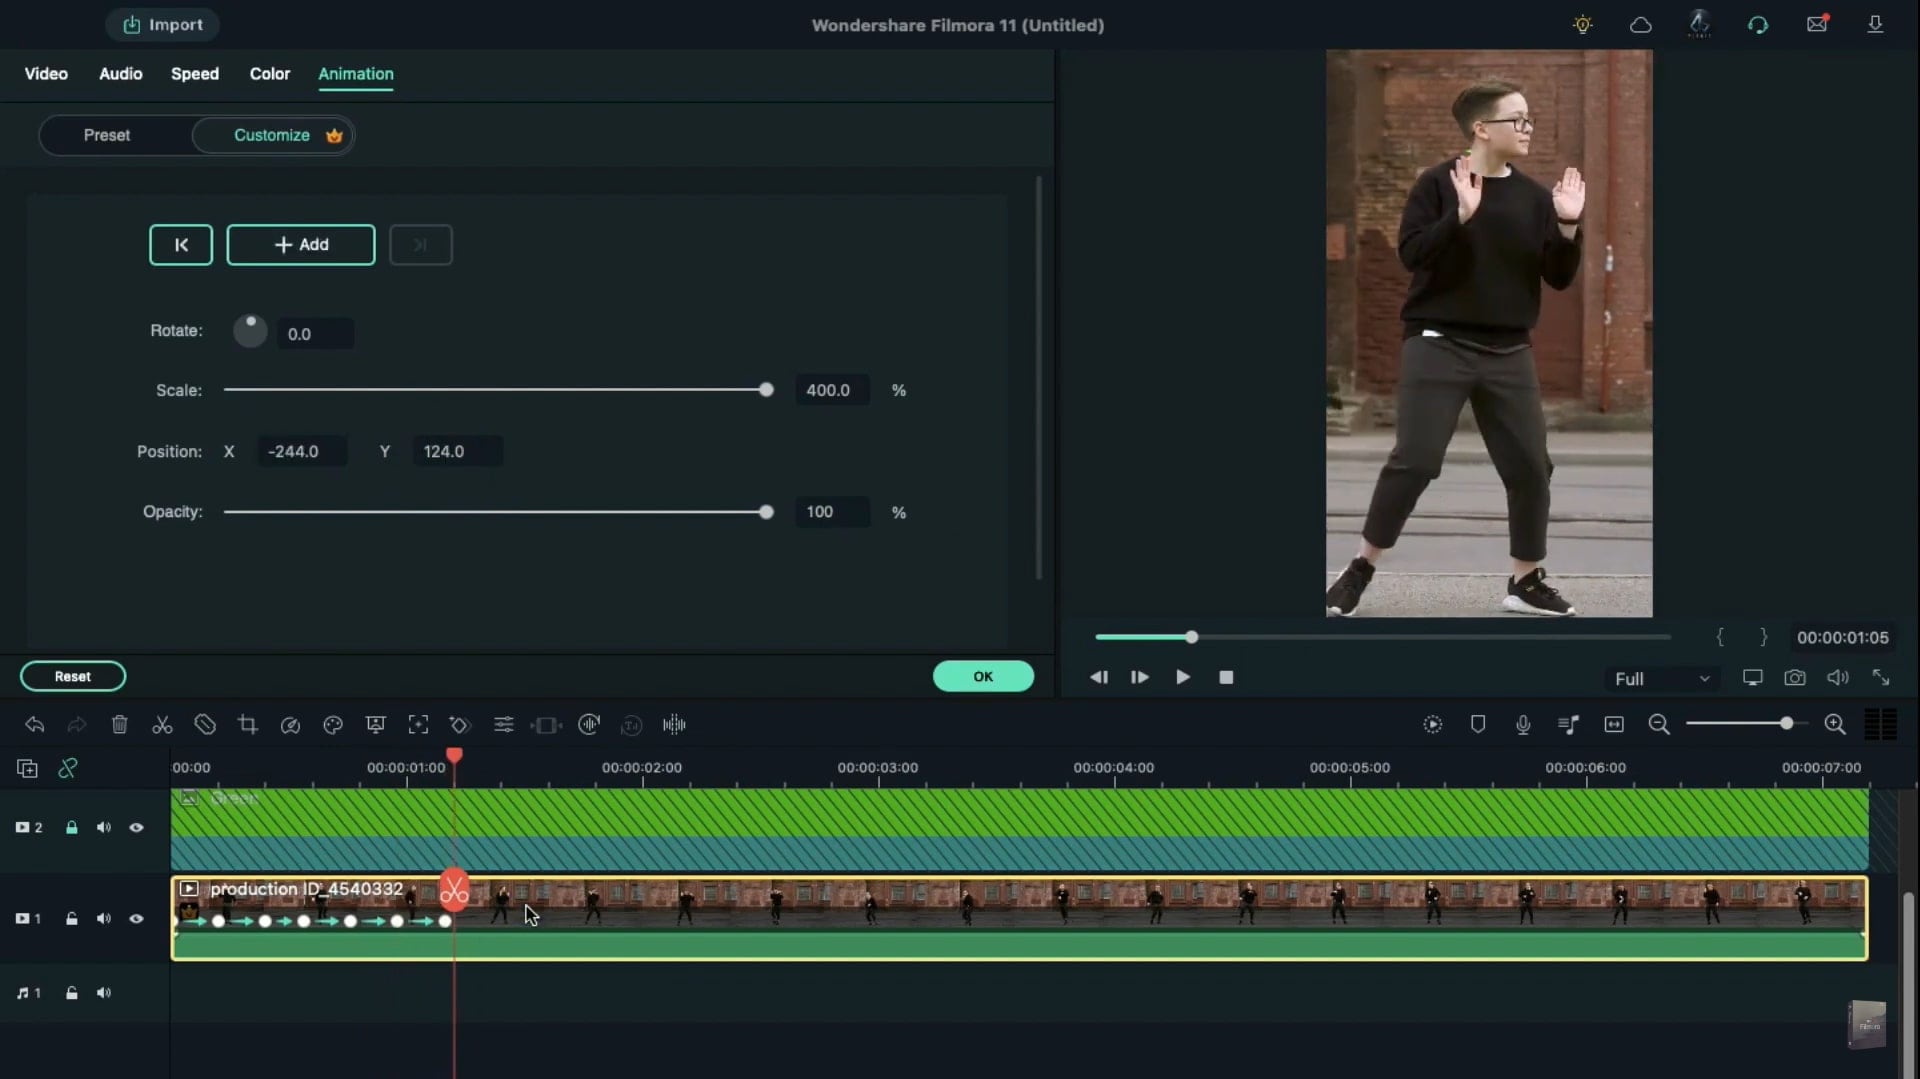
Select your clip on the timeline. Go to animation and add a blank keyframe. Now, move 5 frames further. Here you can see the head is away from the dot. Let's move the clip until the chin position is back to the dot position. Again, move 5 frames further and bring the subject close to the point.
Repeat the same process for a few more moves.
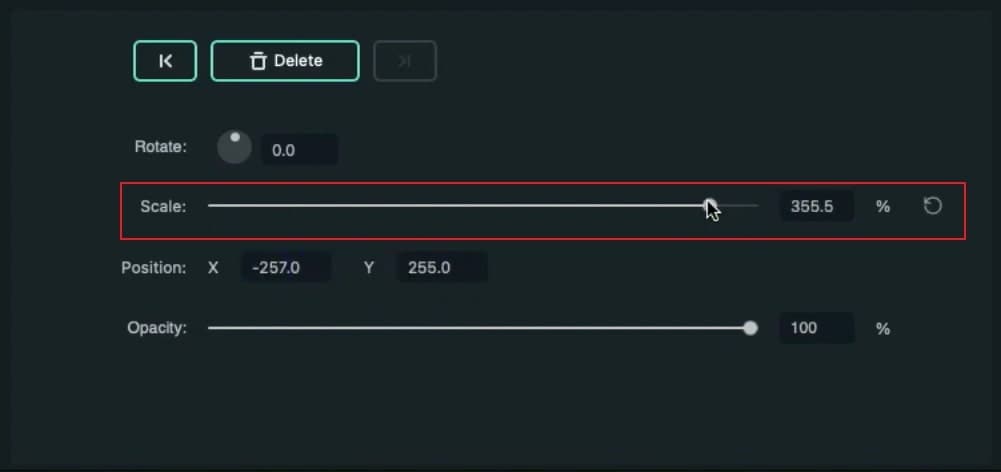
If you like to add more effect, you can zoom in and out by using scale. Just keep your subject in the center of your clip to make this effect more effective. And repeat the same process till the end of your clip. Product Organization Structure: Visualization and Best Practices.
How to Make TikTok Dance Locked on Effect
What you need to prepare:
- A computer (Windows or macOS)
- Your video materials.
- Filmora video editor
Head to the website of Filmora and search for the Free Download button. After completing the installation, you can open the interface of this tool.
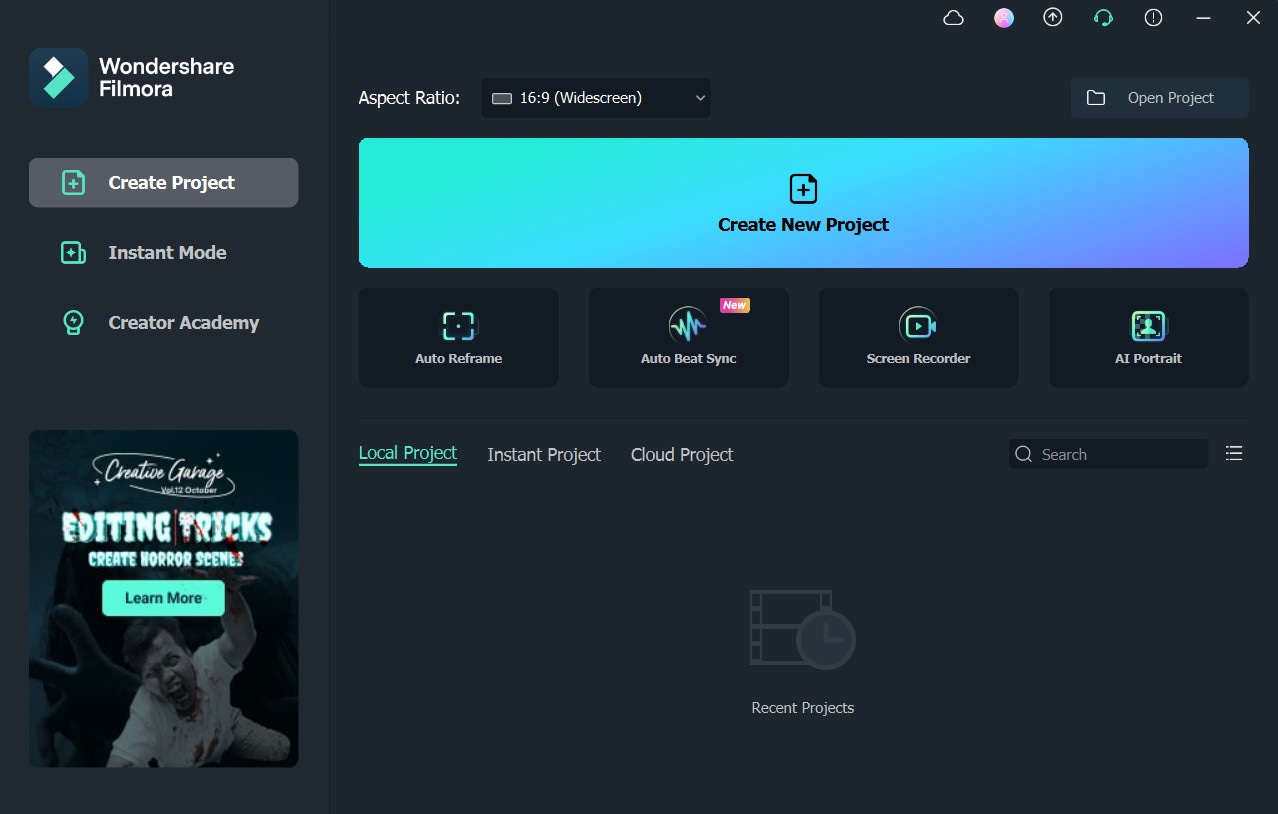
Before you begin the editing process, ensure that you have captured your TikTok dance video in landscape mode. Afterward, upload it to the interface of Filmora and drop it into the timeline. Make sure to keep the original project settings before starting with the editing.
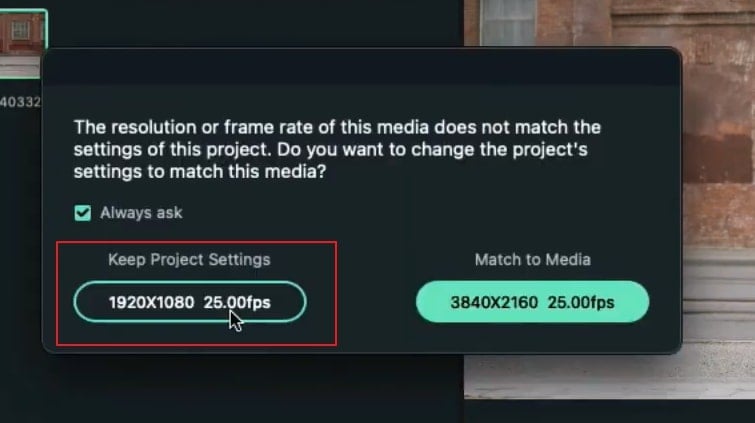
Go to the File tab and modify the Aspect Ratio to Portrait. Afterward, change the resolution to 1080x1920. Now double-click on your video to open settings. By staying in the Video section, increase the Scale percentage of your video to zoom in. Make sure to place your subject at the center. Also, ensure that you have enough space in the right, left, up, and down directions to make the video clip easily, which is why it is required in landscape mode.

Now head to the My Media section and click on Sample Color. Now, locate the green color among other options and drag it to the timeline. Double-click the green color and decrease its scale to 1 to 2%. You will be able to see a small dot on your preview screen. Now enhance the duration of the color on the timeline to match your added video clip.
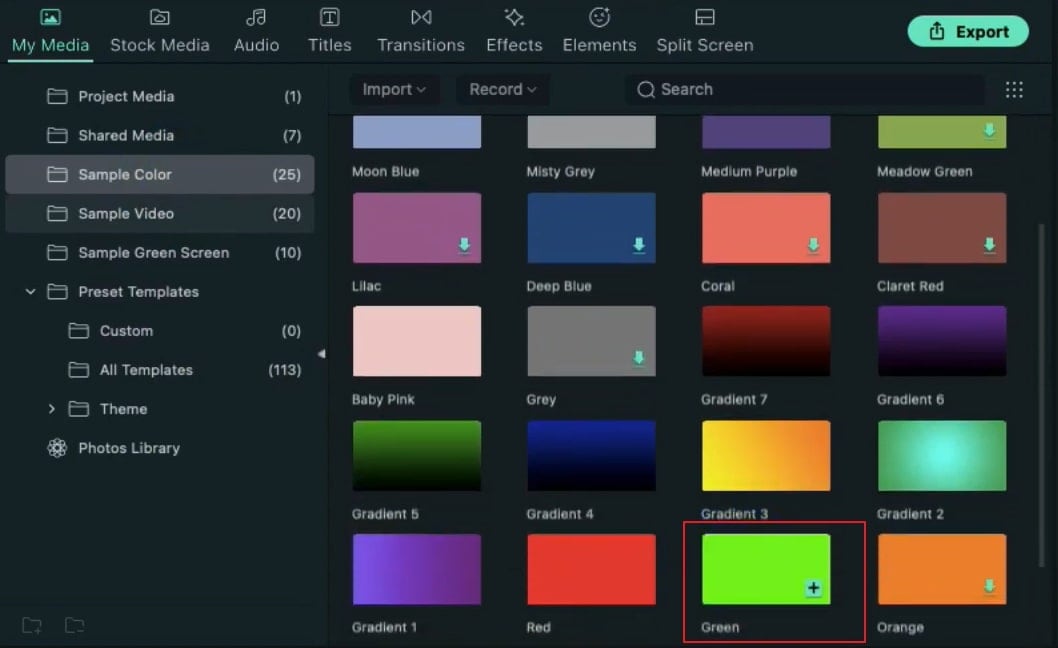
To continue, move the green dot on your face and make your focus on the chin. Afterward, lock your green screen track on the timeline. Double-click on the video clip on your timeline to open settings. Head to the Animation section and then to the Customize tab. From there, add a blank keyframe to your video clip. Now move further for 5 frames.
On the preview screen, you can see that the dot has moved away from the chin. Adjust the dot to place it back on the chin area. Afterward, head further for 5 frames and adjust the dot according to the subject’s face. You can repeat the same process for some more frames.
To add a more dynamic effect, you can modify the Scale to zoom out. Meanwhile, make sure to place your subject at the center. You can repeat these steps until the end of your video clip. After making all the adjustments, you can start rendering your video to generate a final output.
What you've learned:
- You can change any background in video with green screen.
- Use transitions in video to make it more smoothly.
- Filmora comes with many types of background, including social, busiess, sports and more.


