


 TL;DR:
You can add transitions in Premiere Pro by importing your effect files, toggling the insert sequence icon on the timeline, and dragging the effect directly between two clips, or use Wondershare Filmora for a more accessible alternative.
● Premiere Pro offers 38 default transitions and the ability to design custom effects for broadcast-quality projects, while Filmora is a lower-cost option featuring over 500 ready-to-use transition effects.
● To apply external transitions in Premiere Pro, you must first import the MP4 files into organized project folders and open them in the Source Monitor to preview the effect before applying it to your footage.
● For mobile editing, the iOS and Android compatible Filmora app allows you to apply transitions directly between timeline clips and manually adjust the effect's intensity and speed before exporting.
Ask AI for a summary
 ChatGPT
 Perplexity
 Gemini
 Claude
 Grok
Grok
Versatile Video Editor - Wondershare Filmora
An easy yet powerful editor
Numerous effects to choose from
Detailed tutorials provided by the official channel
Premiere Pro can be helpful for all regular video editing assignments to create broadcast-quality, top-quality video if you know how to add transitions in Premiere Pro. Do you know how to add transitions in Premiere Pro? It’s a useful tool to import video, sound, and graphics, and is used to create new, edited versions of video that are tailored for the medium and platform required for distribution. Plus, you can create custom transitions in Premiere Pro based on your specific needs.
This article will briefly discuss how to add transitions in premiere pro.
In this article
Part 1 Steps to add a transition in Premiere Pro
Adding Video Transitions in Premiere Pro needs proper direction. A transition is an impact added between media bits to make an animated interface between them. Shifts can move a scene starting with a single shot then onto the next. To add transition effects Premiere Pro, we will list changes that you can apply to a row.
Let’s take a look over some of the primary steps to learn how to add Transition Premiere Pro with proper understanding:
Step1 Inserting Footage
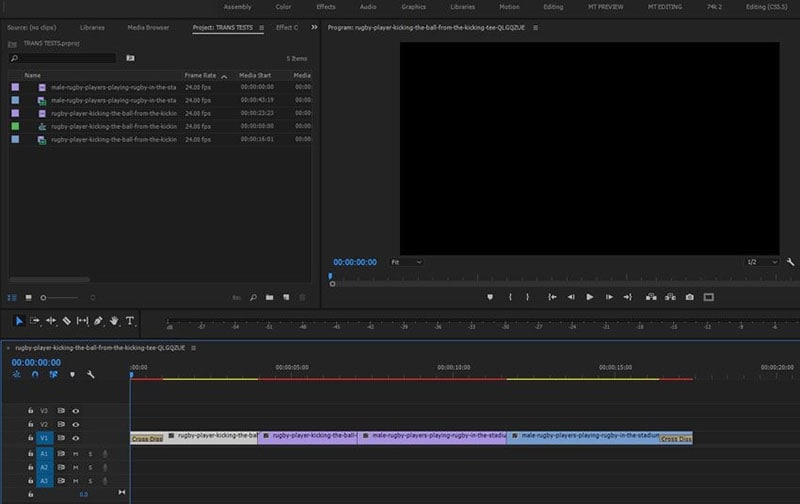
At first, after launching the Premiere Pro insert footage into the timeline. Initially, there would be rough cuts between each footage since there are no transitions applied.
Step2 Import Transitions
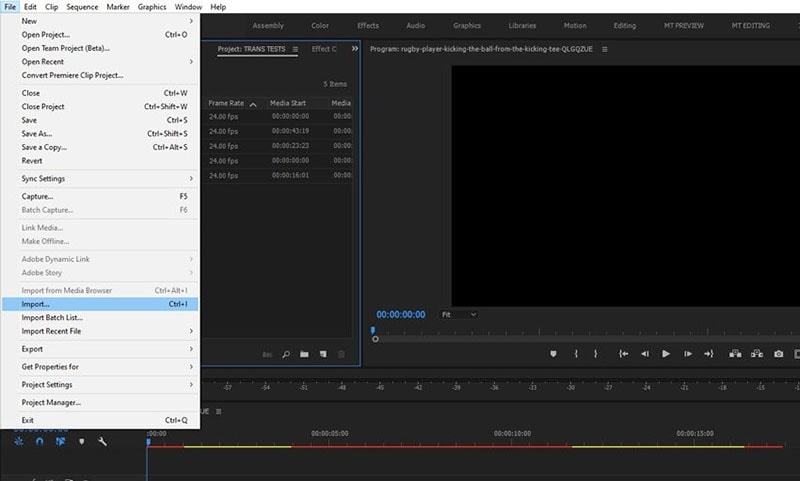
Secondly, follow Steps:
Open File menu> select Import
Browse files to the location of destination files. The file format will be MP4 with a Premiere Pro icon on it.
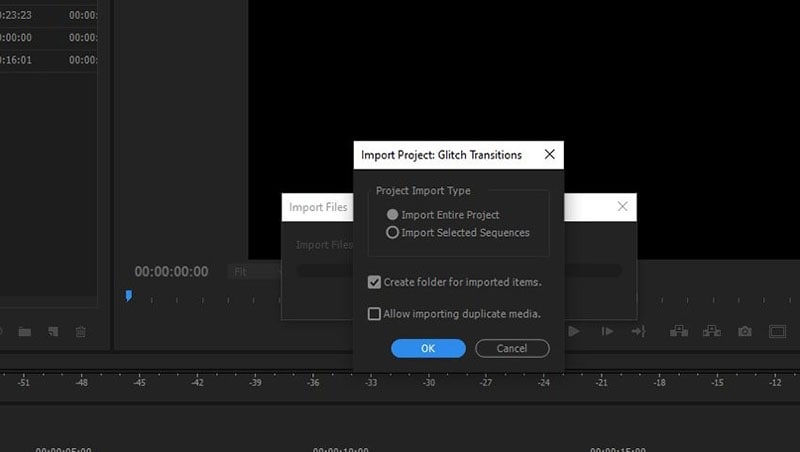
Thirdly a pop-up dialogue box will appear on the screen
Follow the steps:
Import entire project > Tick create a folder for imported items. It will keep the project neat and organized.
Step3 Preview Transitions
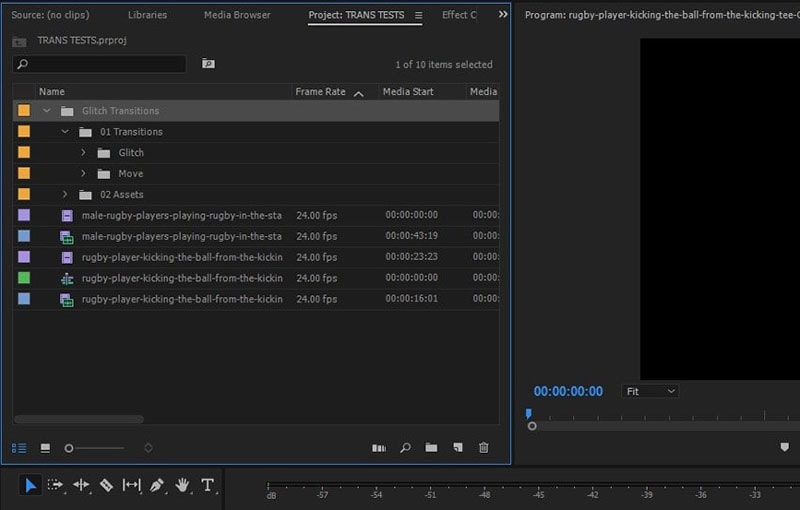
Later dropdown options containing the transitions will appear in the project managing all the transitions. The assets and transitions are split into many relevant folders. You can ignore it if no necessary changes are required to the changes.
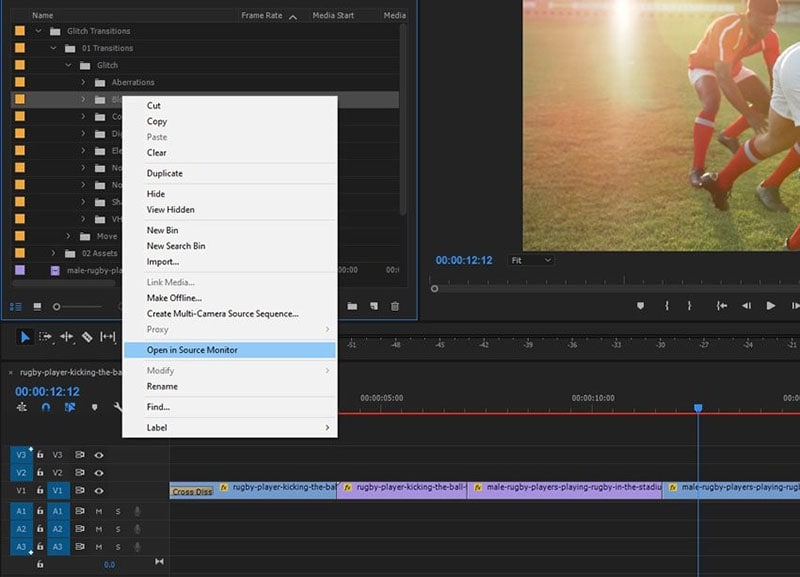
Select the folders Transitions > Glitch. The visible folders are of transition effect. Now, right-click on any folder and choose Open in Source Monitor.
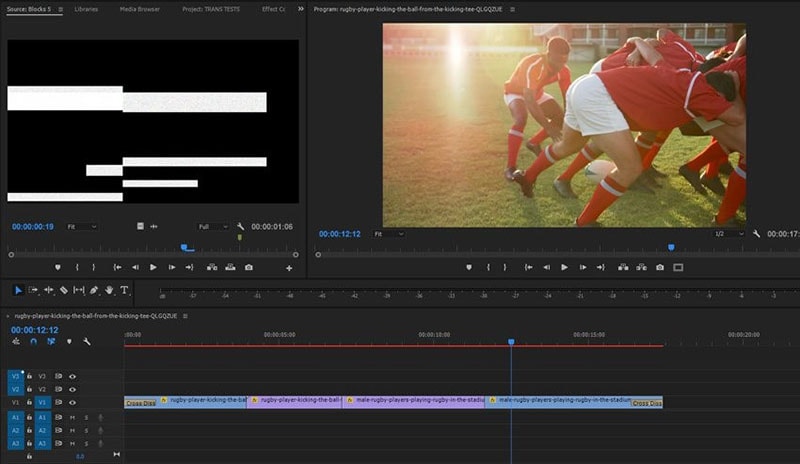
After all the above steps, you can preview the resulting video or graphical video, etc. This will let you do the effect in a fresh panel without adding it to your timeline. By this process, you cannot see the effect on the footage, but only the effect itself.
Step4 Applying Transitions to Footage
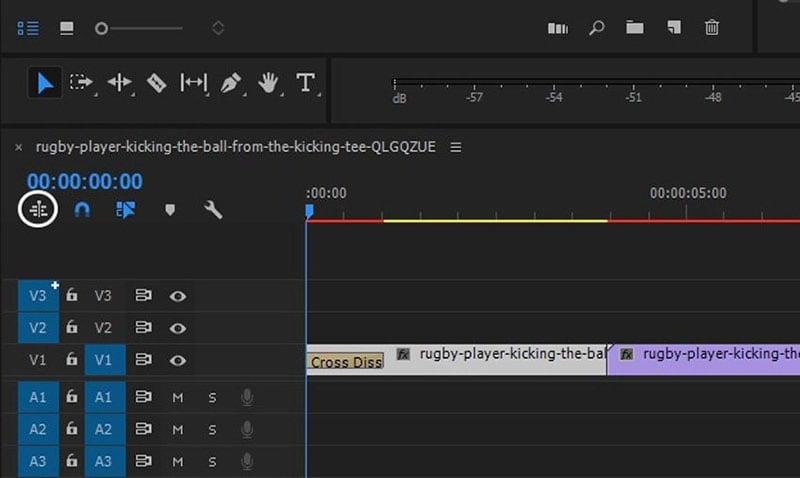
There is an icon at the left corner that looks like a file hierarchy in the timeline. Keeping the cursor on the icon will show “Insert and Overwrite sequences as nests or individual clips” that, when clicked, will change the color blue to white and result in merging the clips.
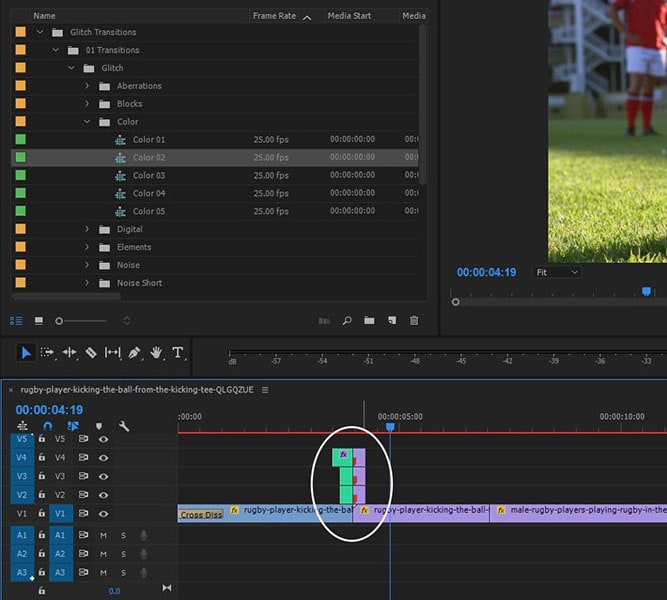
Lastly, drag a transition into the timeline above, where two footages meet from the project panel. There will be a mark clearly where you can place the Transition up the line between the clips.
After proper alignments, press Play to preview the final clip after transitions.
Thus, following the above steps you learned will answer how to add more transitions in Premiere Rush.
Part 2 Find easier ways to add transitions for your video.
After learning how to add default transitions in Premiere, let’s explore alternative, easier ways to add transitions with Filmora. As a solid and intuitive video editor, AI Image to VideoWondershare Filmora empowers you to make intricate and astonishing-looking recordings without any problem. It works on cutting-edge highlights to make them available to everybody. With it, you can rapidly begin your creation and offer them to friends and family straightforwardly, regardless of whether you are an entrant to video altering.
Wondershare Filmora
Get started easily with Filmora's powerful performance, intuitive interface, and countless effects!

● Filmora is also a video editing software for ordinary people to easily make videos in daily life since it doesn’t cost a lot compared to other video editors like Premiere Pro and has 500+ transition effects.
● You can add transitions between the clips to bring a flow to the videos. Here, you will also know how to add transition effects in Filmora.
● There are 800 implicit video effects, including text (like titles, openers, lower thirds), transitions, stickers, channels, overlays, movement illustrations (emoji and charming creatures), and 3D LUTs.
● Besides, it gives a broad scope of shocking split-screen layouts, ideal for making recordings for web-based media stages like Instagram or Facebook.
Use the Filmora Desktop to Add Transitions to Videos
Step1Create a New Project in Filmora

Install Wondershare Filmora and open it on your device, then hit the “New Project” to start the process of adding transition effects to your videos.
Step2Upload the Videos from Your Device

Next, import a few clips from your device where you want to add transition by pressing the “Import” button from the main window.
Step3Add Videos to Timeline and Choose Transition

Now that the videos are uploaded, drag them on your “Timeline” and select the “Transition” tab to choose the effect from the list.
Step4Select Transition Effects and Add Them To Your Videos

Afterward, from the left side of the screen, click the “Transitions” section. A list of transition effects will appear, then download the desired effect and drag it between two of your videos in “Timeline.”
Step5Add Filter to Make It Appealing

Before you save the video, go to the “Filter” tab, download a suitable filter, and drag it to the “Timeline” to make the video more appealing.
Step6Export the Transitioned Video From Filmora

Once you are satisfied with the results, hit the “Export” button from the top right corner of your screen. A pop-up menu will appear from where you have to access the “Local” tab to tap the “Export” button once again to save the final video.
Use the Filmora App to Add Transitions to Videos
Apart from learning how to add default transitions in Premiere Pro, you can access the Filmora App, which is compatible with both iOS and Android. The Filmora App provides you with a list of transition effects that you can use to make your videos cool and trendy. When you apply the transition, you can adjust its speed so it won't look odd and separate from your video.
Moreover, it lets you add trendy music to your videos, which can enhance their appeal and make them more engaging. If the video is too long and you need a shorter clip, it offers a scissor tool to trim it to your desired length. In addition, you can add fun stickers to give your videos a playful touch and make them visually appealing.
Step1Install the App and Add Videos

Download the Filmora App on your device and click the “New Project” button to upload the videos. Then, select the target video and press the “Import” button to add them to this application.
Step2Add the Transition Effect and Make Adjustments

Next, hit the “Transition” icon between your videos in the timeline and choose a suitable transition effect. When done, adjust its intensity from the “Toolbar” to give a smooth transition.
Step3Download the Video on Your Device

Once done, press the “Export” button on the top corner of your screen to download. A new screen will open where you have to choose the resolution and frames per second and eventually hit the “Export” button once again to save the final result on your device.
Conclusion
Hence, we discussed how to add transitions in Premiere Pro, add transitions in Filmora, and add transitions to multiple clips.
Adobe Premiere Pro offers 38 transitions to look over, while Filmora provides more than 500. However, Premiere Pro is the leading video altering apparatus with a choice that allows you to plan your changes.
It highlights a lot of text templates that you can utilize, each flawlessly hued and vivified to look proficient. You can likewise use the Advanced Text Edit choice to make your text formats, to which you can add your tones and liveliness.
