
 100% Security Verified | No Subscription Required | No Malware


 ChatGPT
 Perplexity
 Gemini
 Claude
 Grok
Grok
In this article
Do you want to add depth and motion to your clips but don't know where to start? Try 3D effect video editing. This style can turn flat scenes into layered shots that move with depth, creating a sense of perspective and realism.
Many creators assume 3D editing requires heavy CGI or complex animation software. In truth, you can achieve realistic 3D visuals using a 3D video editor for PC such as Adobe Premiere Pro.
This guide will walk you through how to use 3D effects in Premiere Pro step by step. You'll also learn about an alternative editor that makes creating 3D-style edits faster and more accessible. Let's jump right in.
Part 1. What is 3D Effect Video Editing?
3D effect video editing adds visual depth, motion, and perspective to your footage so it looks more dimensional instead of flat. This technique helps separate elements within a scene so the viewer senses distance and movement between layers.
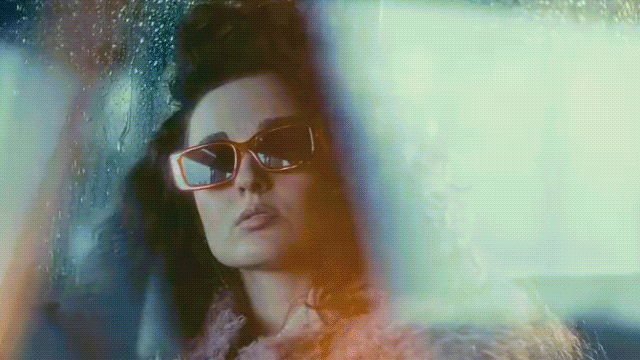
You don't need full 3D modeling software to achieve this look. Here are some common examples of how creators apply 3D effects in video editing:
- 3D Text and Titles – letters that seem to pop out from the screen.
- 3D Transitions – simulate camera movement or perspective shifts between scenes.
- 3D Overlays and Filters – use particles, flares, or abstract shapes that move through space.
Still, these 3D effects also have their own challenges:
- It's not the same as CGI or 3D modeling, which builds objects from scratch.
- It may require longer rendering time, especially for layered elements and high-resolution projects.
- It needs consistent lighting and camera movement to avoid a fake or uneven look.
Part 2. How to Make Video 3D in Premiere Pro [Step-by-Step Guide]
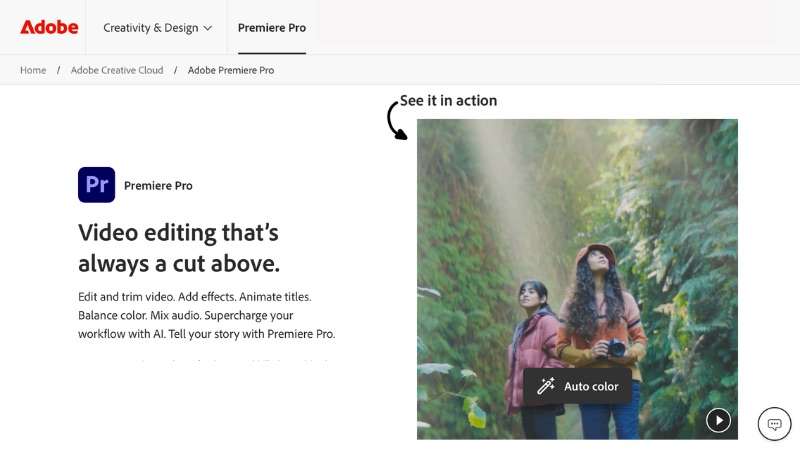
When you're looking for a 3D video editor for PC, Adobe Premiere Pro is often one of the best options. It offers built-in tools to create 3D-style motion without extra software. You can combine layers, shapes, and keyframes to add depth and natural movement to your clips.
Follow these steps to learn how to make a 3D video in Premiere Pro:
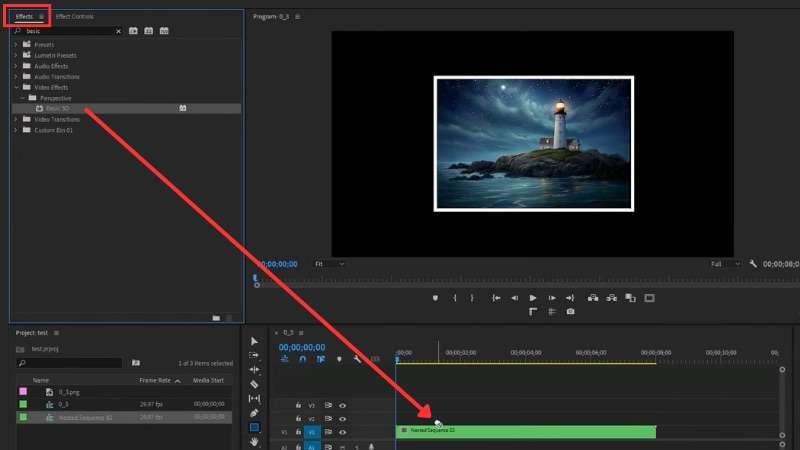
Step 1. Apply the Basic 3D Effect in Premiere Pro
- Start by importing your video or image into the timeline.
- Select the clip and go to the Effects panel > Video Effects > Perspective > Basic 3D. Or, you can type “Basic 3D” in the search bar.
- Then, drag and drop the Basic 3D effect onto your clip to apply the effect.
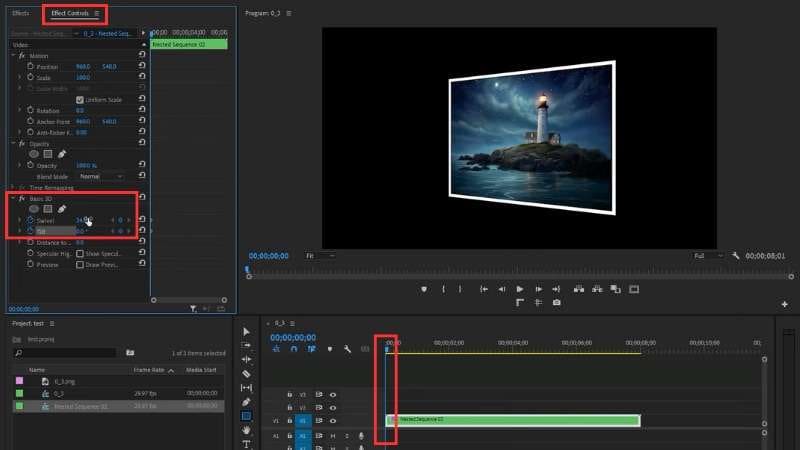
Step 2. Set the Start Keyframes
- In the first frame, head to the Effect Controls > Basic 3D.
- Click the stopwatch icons beside Swivel and Tilt to enable them. Then, adjust their values until your image rotates slightly to one side.
Step 3. Set the End keyframes
- Move the Playhead to the end of the clip, change the Swivel and Tilt to new values to create a different angle.
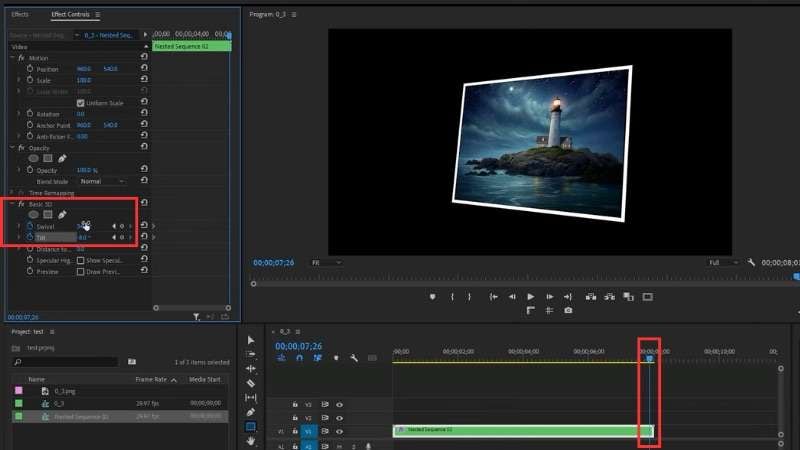
Step 4. Preview and Fine-Tune
- Play the clip to see your 3D animation. You can tweak the swivel, tilt, or scale for smoother motion. If needed, adjust the stroke color or width to match your project's style.
Once you finish fine-tuning the motion, your clip should show realistic depth and smooth rotation. The Premiere Pro Basic 3D effect gives you control to shape angles, adjust perspective, and create dimensional visuals inside the editor.
Bonus: Alternative Editor to Premiere Pro for Edit 3D Videos
If you want a faster way to edit 3D video, Wondershare Filmora offers a simpler workflow with ready-to-use 3D presets. Instead of setting keyframes or adjusting angles manually, you can apply 3D tools that already include depth, shadow, and motion settings.
 secure download

Filmora also provides visual overlays and motion elements that fit 3D-style scenes. You can adjust intensity, blend mode, or duration to match your project's style.
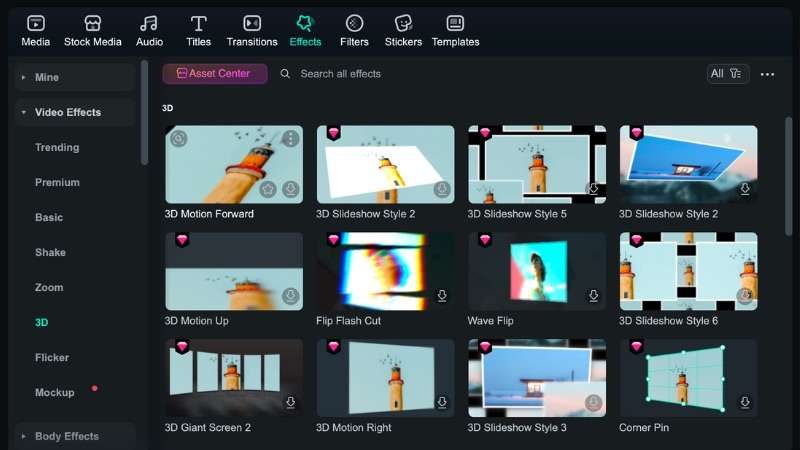
To access the 3D effects in Filmora, open the Effects panel > Video Effects, and search 3D.
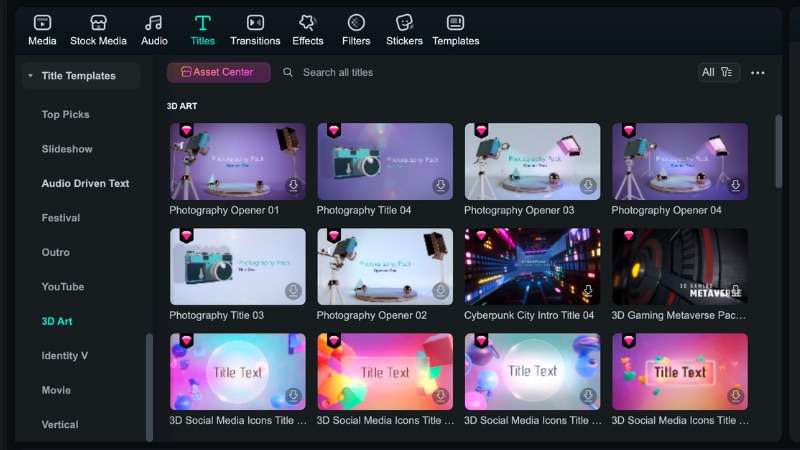
Filmora offers 3D title templates that add depth and movement to your text. You can edit font, color, and animation in the preview window to match your scene.
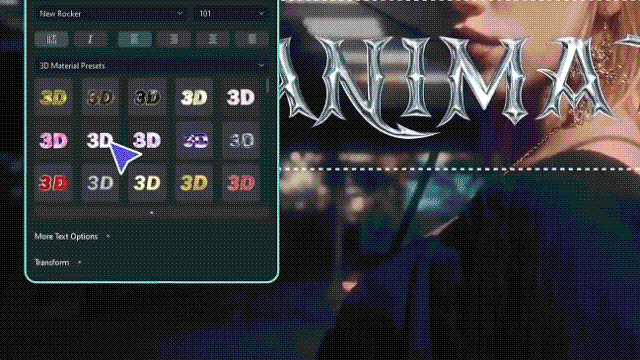
To use them, go to the Titles tab > Titles Templates, and open the 3D Art category.
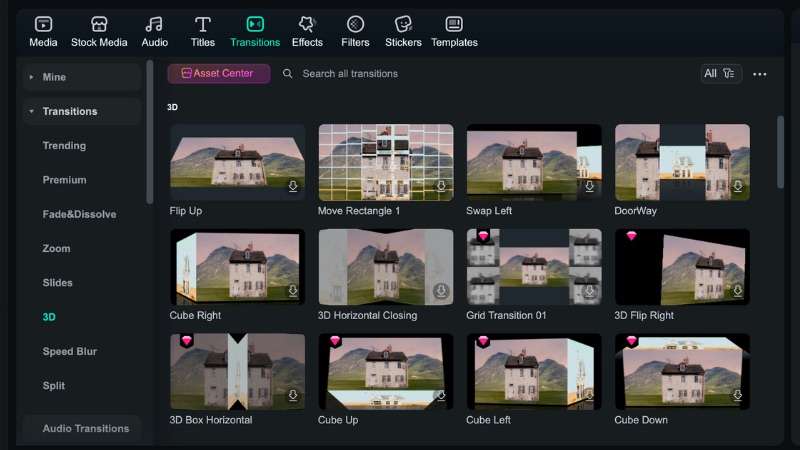
You can create smooth perspective changes between clips using 3D transitions. The transition options simulate camera movement for a more cinematic shift between scenes.
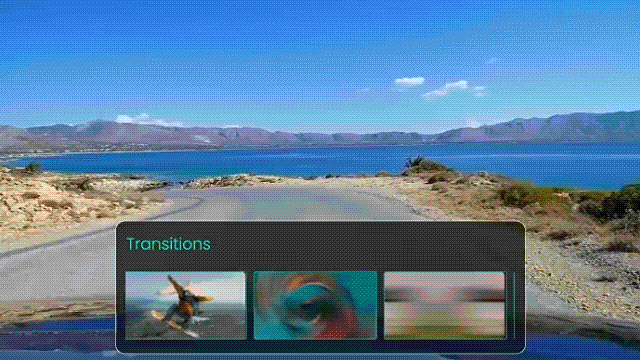
To access the 3D transition in Filmora, go to the Transitions tab and search for the 3D category.
Conclusion
3D effect video editing adds depth and movement to make scenes feel more dimensional. You can build these visuals using tools already available in a 3D video editor for PC like Adobe Premiere Pro.
With 3D effects in Premiere Pro, you can shape perspective and motion through keyframes and layering. But if you want faster results, Filmora 3D offers ready-made presets for titles, transitions, and overlays.
Start your next project today and turn ordinary clips into engaging 3D-style visuals.
Frequently Asked Questions
-
What's the difference between 3D effects and 3D modeling?
3D effects focus on creating depth and movement within 2D footage using editing tools. 3D modeling, on the other hand, builds full objects or environments from scratch in 3D software.3D effects focus on creating depth and movement within 2D footage using editing tools. 3D modeling, on the other hand, builds full objects or environments from scratch in 3D software.Do I need a powerful computer for 3D effect video editing?Do I need a powerful computer for 3D effect video editing? -
Do I need a powerful computer for 3D effect video editing?
A strong system helps, but it's not always required. For 3D effects in Premiere Pro, a mid-range computer with enough RAM and GPU power can handle most edits smoothly. Filmora can run lighter 3D presets on standard PCs without lag.A strong system helps, but it's not always required. For 3D effects in Premiere Pro, a mid-range computer with enough RAM and GPU power can handle most edits smoothly. Filmora can run lighter 3D presets on standard PCs without lag.Can I add 3D effects to videos on Filmora for mobile?Can I add 3D effects to videos on Filmora for mobile? -
Can I add 3D effects to videos on Filmora for mobile?
Yes. The Filmora mobile app includes 3D effects, titles, and transitions. While options are more limited, it still lets you edit 3D video easily on the go.Yes. The Filmora mobile app includes 3D effects, titles, and transitions. While options are more limited, it still lets you edit 3D video easily on the go.Grammarly:
