Planar Tracking:
Enjoy Easy and Advanced Tracking Solutions in Filmora
 4.7
(15746 reviews)
4.7
(15746 reviews)
Point-Based Planar Tracking Technology
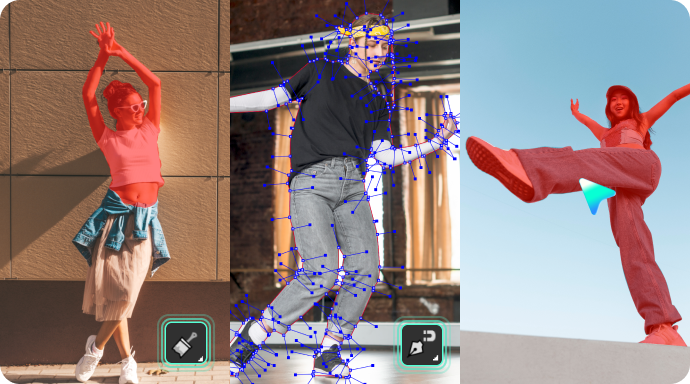
Filmora's planar tracking uses a four-point tracking method, also known as corner pin tracking, which tracks four reference patterns in a video clip or film to gather information on position, scale, and rotation. The four trackers analyze the relationships between the reference patterns, such as the corners of a PC screen or a license plate, allowing you to attach another clip, text, or image to them, much like adding a picture to a frame.
Auto Planar Tracking: Easy Tracking for Beginners
Advanced Planar Tracking: Super-Precision for Pros
Fast Processing
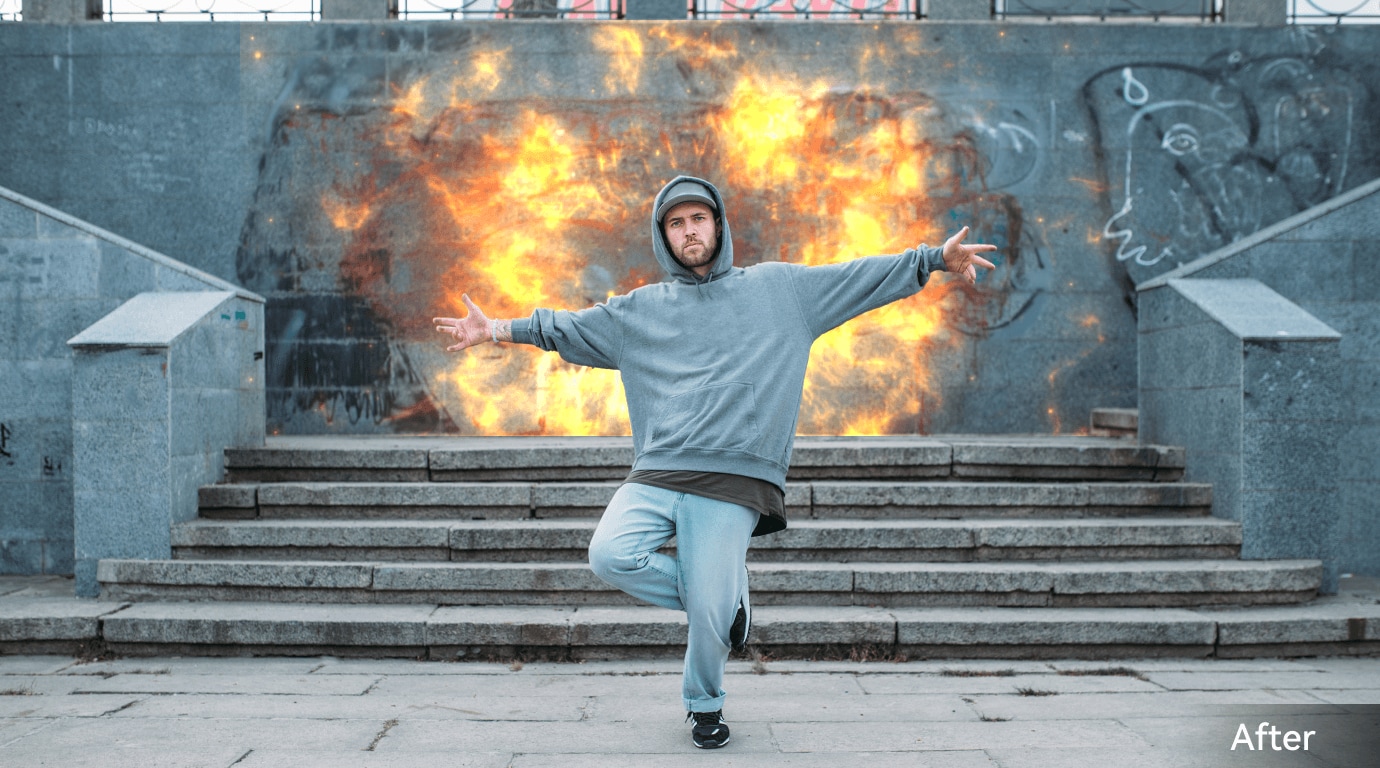
Diverse Application Scenarios

Plane-Based Tracking Technology
Professional VFX PluginMocha's planar tracking uses surface-based analysis to understand how textures and motion change in a video. It tracks an object's position, rotation, scale, and perspective shifts with high accuracy. Unlike traditional four-point tracking, it detects full surfaces—such as screens, walls, or packaging—and can continue tracking even when the object is temporarily hidden or leaves the frame, using motion prediction and feature matching.
Rock-Solid Planar Tracking
- Surface-based tracking analysis
- Automatic perspective matching
- Anti-occlusion capabilities
- High-speed object tracking
PowerMesh Sub-Planar Tracking
- Organic surface adaptation
- Natural lighting compatibility
- Wrinkle and curve tracking
- Smooth motion without jitter
Simplified Masking &Roto Workflow
- Magnetic spline tools
- Edge-snapping assistance
- Automatic motion following
- Minimal keyframe requirements
Precise Screen Insertion With Insert Module
- High-quality sub-sampling
- Realistic motion blur
- Curved surface mapping
- Perfect motion matching
How To Use the Planar Tracking in Filmora
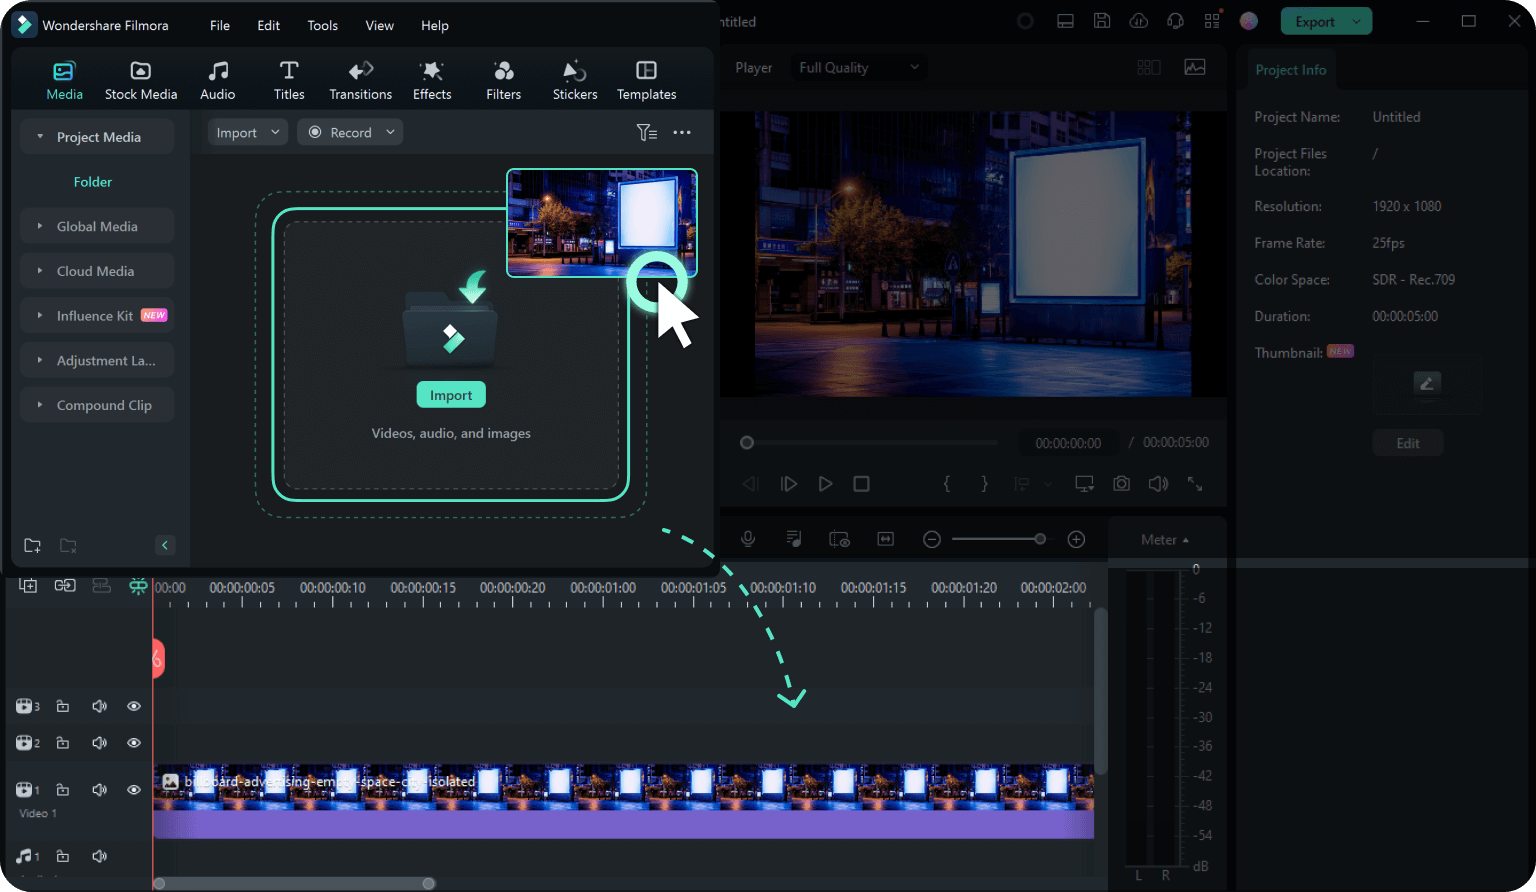
Step 1 Import Video Footage into Filmora
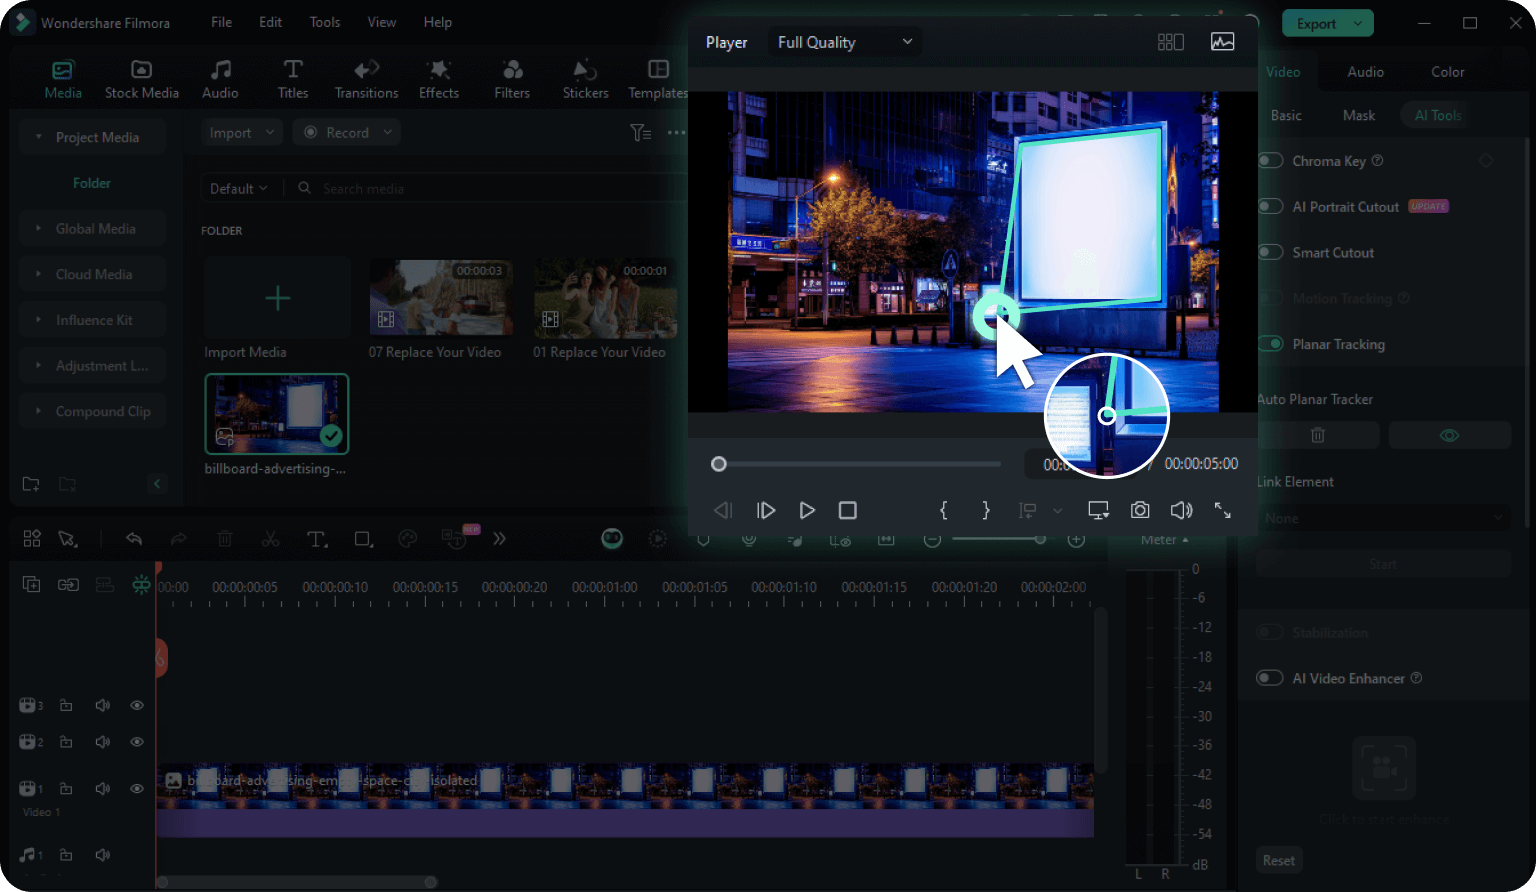
Step 2 Enable Planar Tracking
Step 3 Track a Planar Surface
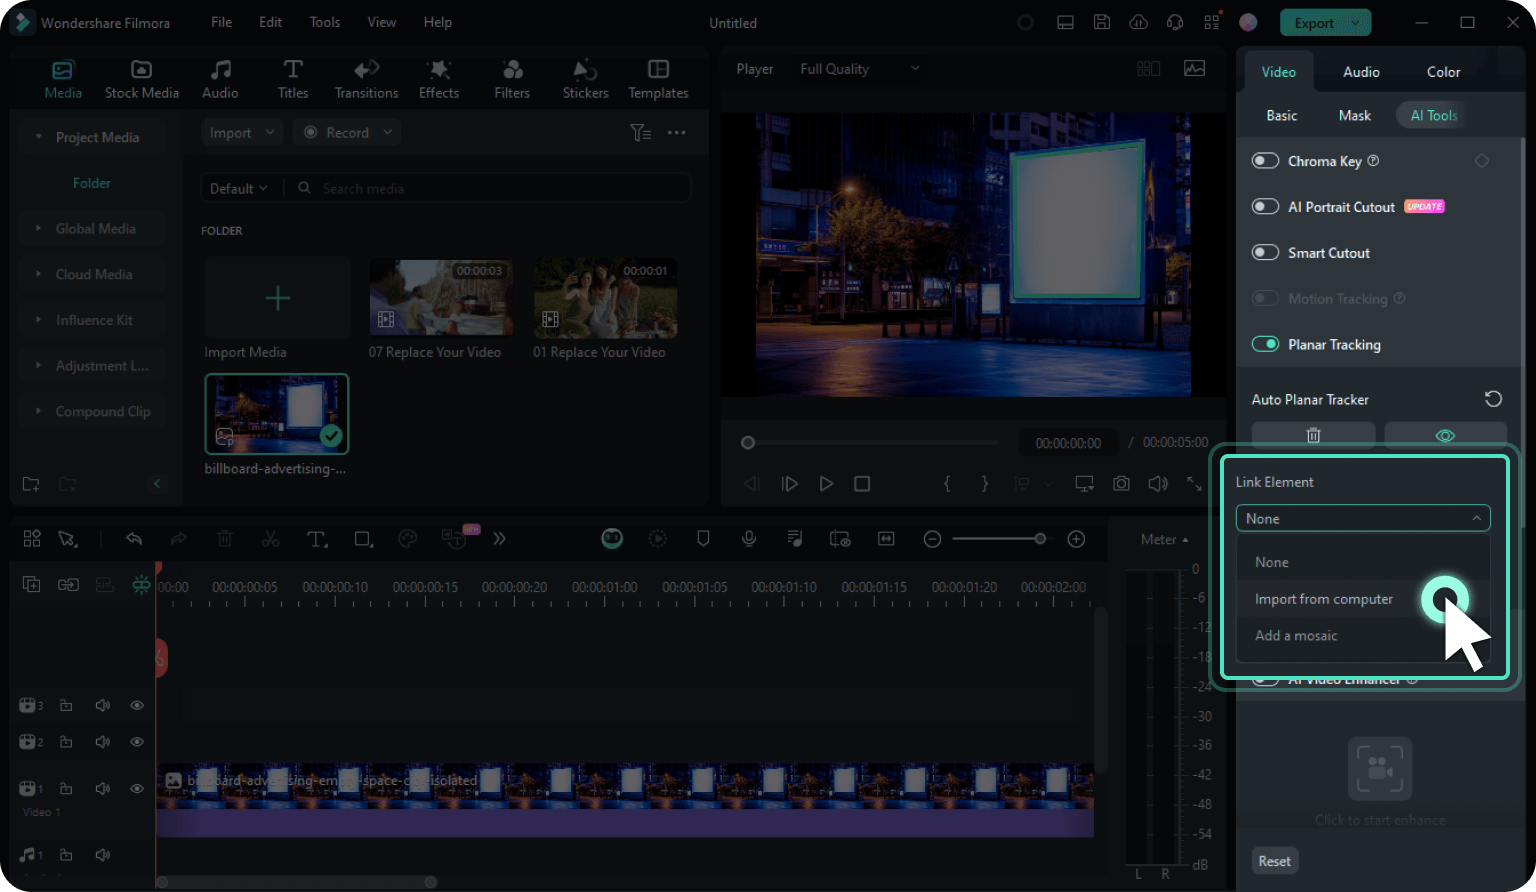
Step 4 Select the Binding Object
Step 5 Adjust the Parameters
Step 5 Complete and Export
-
Step 1: Import Video Footage into Filmora
Click on Import or drag your video clip to Filmora. Add it to the timeline and make necessary edits before you start planar tracking. -
Step 2: Enable Planar Tracking
Select your video clip in the timeline and navigate to the Video tab in the Properties panel. Go to AI Tools and toggle the slide button to enable Planar Tracking. Select the Auto mode. -
Step 3: Track a Planar Surface
The tracker will appear in the preview window. One by one, grab the four points of the tracking box and move them to the plane you want to track. Click on the Start button and wait for the tracking process to complete. -
Step 4: Select the Binding Object
Choose the bound object in the Properties panel. The bound object can be a video, image, text, mosaic, or anything else from Filmora's Stock Media or media imported from the computer. -
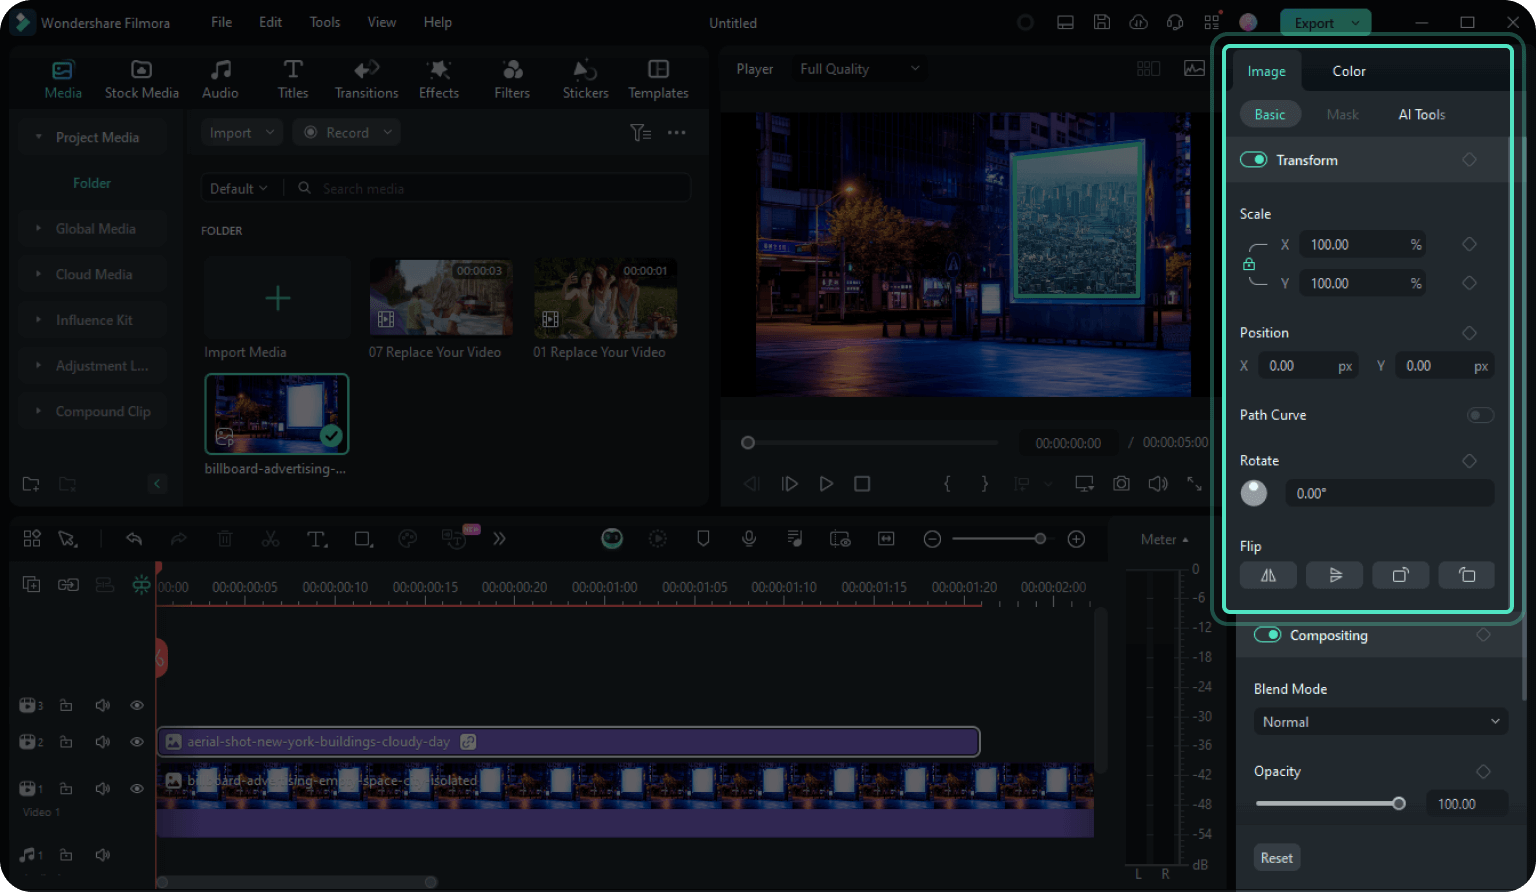
Step 5: Adjust the Parameters
Corner pinning properties will be added to the bound clip, automatically stretching to fill the planar tracker. You can also adjust the Scale, Position, Rotate, and Flip values in the Transform properties to fit your needs. -
Step 6: Complete and Export
Preview the results. If you are satisfied, click the Export button to export your video.
Step 1 Access Mocha Plugin
Step 2 Apply Mocha to Your Clip
Step 3 Launch Mocha Interface
Step 4 Create Tracking Shapes
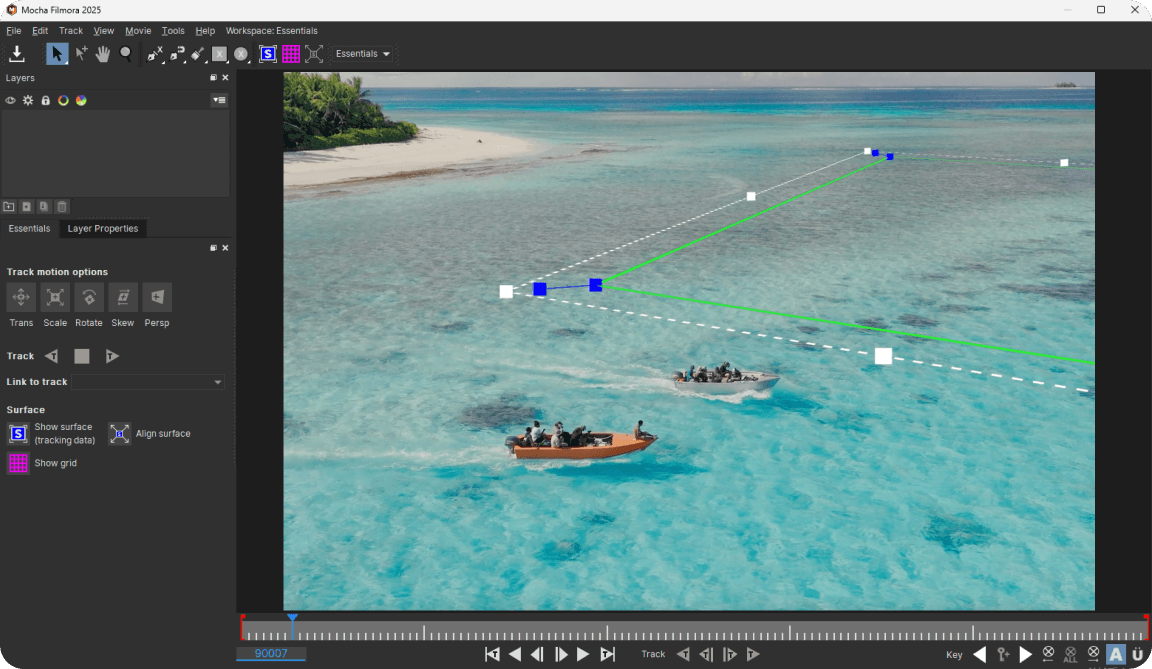
Step 5 Execute Plane Tracking
Step 6 Export to Filmora
-
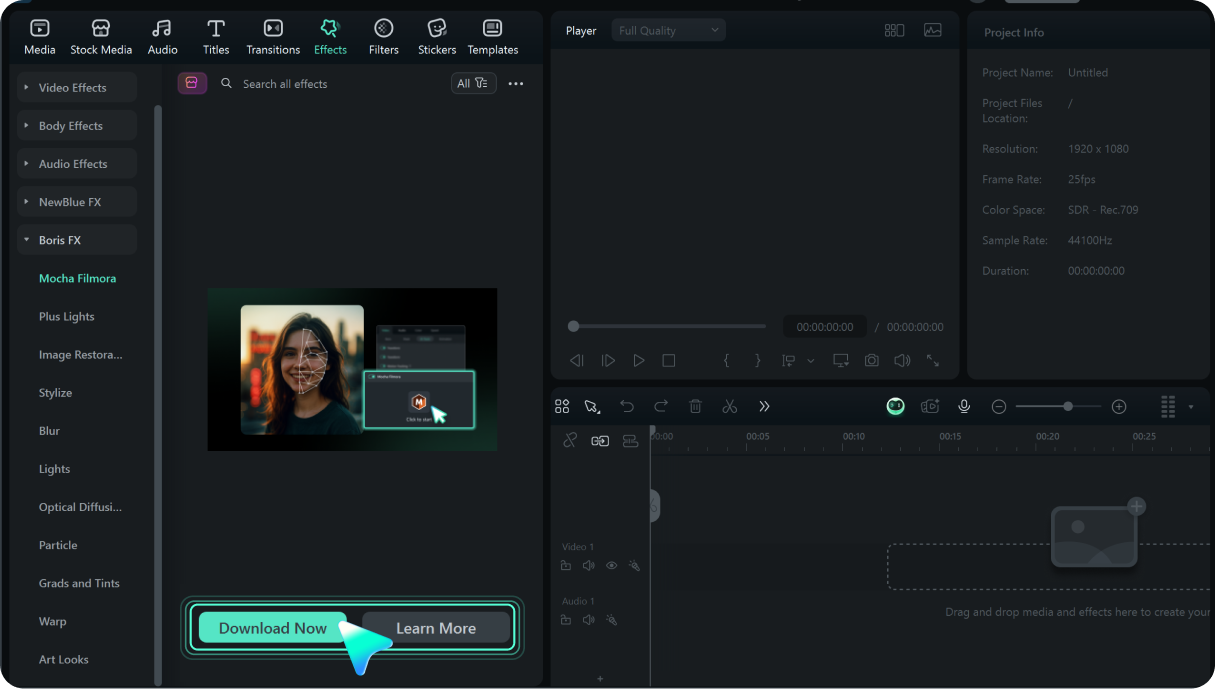
Step 1: Access Mocha Plugin
Navigate to Effects > Boris FX > Mocha Filmora and click "Download Now" to install the plugin. No registration required for Filmora users. -
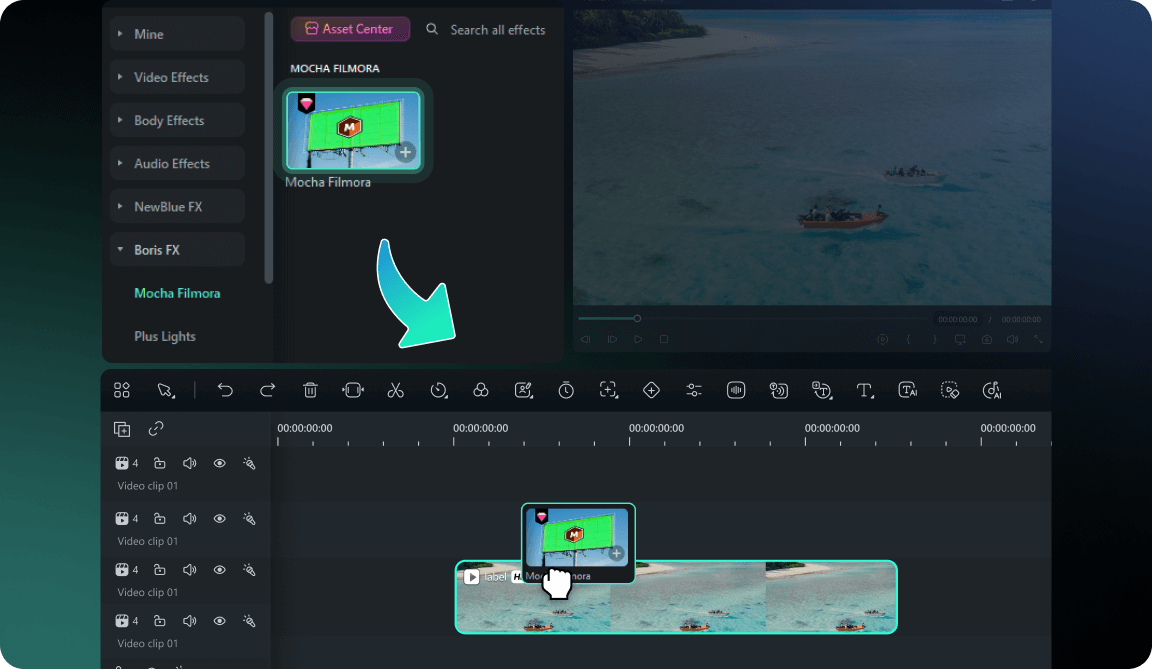
Step 2: Apply Mocha to Your Clip
Drag the Mocha Filmora effect onto your video clip. The Properties panel will dynamically load the Tracking module interface. -
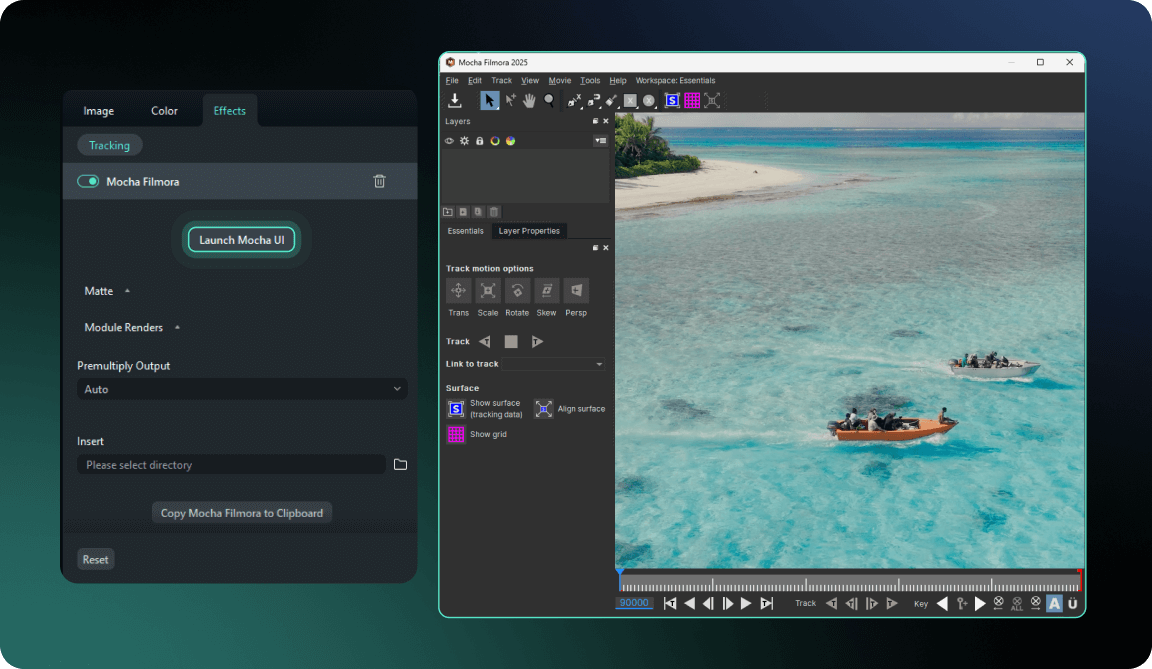
Step 3: Launch Mocha Interface
Click to enter the Mocha plugin interface where you can create tracking shapes and define the planar surface for analysis. -
Step 4: Create Tracking Shapes
Use Mocha's spline tools to outline the planar surface. Draw around areas with good texture and contrast for optimal tracking results. -
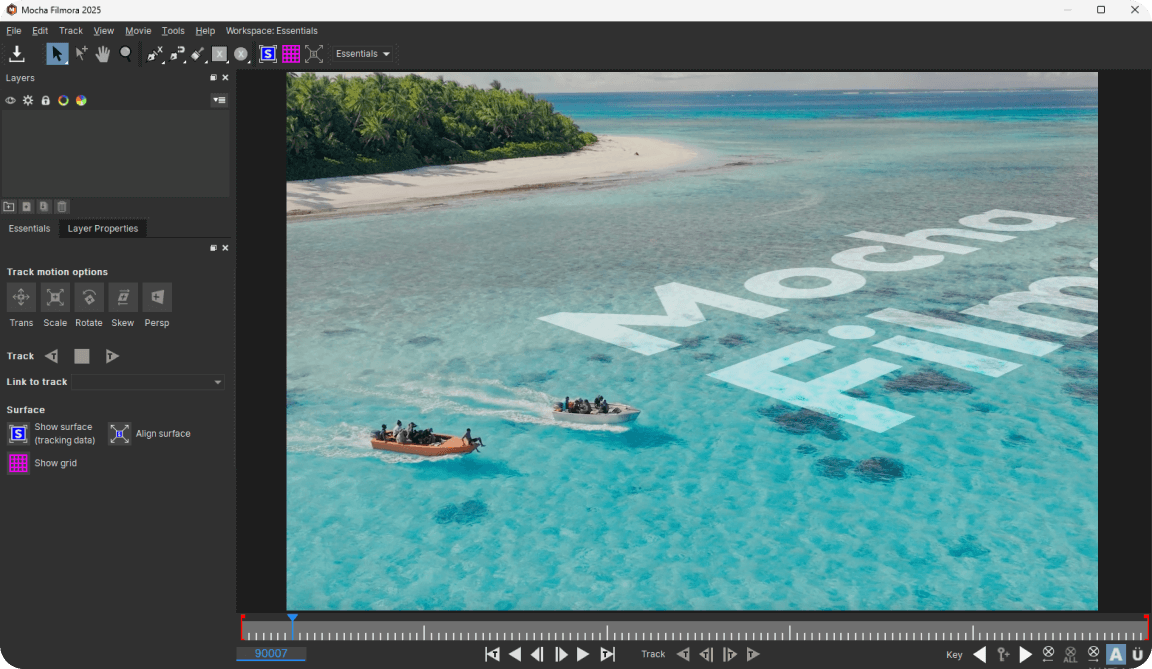
Step 5: Execute Plane Tracking
Start the tracking process. Mocha will analyze the entire surface texture. You can then integrate it with Mocha’s Insert module or Masking & Roto tools for creative work. If you are new to Mocha, you can View full Mocha tutorial >> -
Step 6: Export to Filmora
Transfer tracking data back to Filmora and continue your editing or export video directly.
Feature Comparison - Built-in Planar Tracking vs. Mocha Planar Tracking
| Feature | Built-in Planar Tracking | Mocha Planar Tracking |
|---|---|---|
| Tracking Algorithm | Point-based tracking | Surface-based planar tracking |
| Stability | Basic stability | Rock-solid even in difficult conditions |
| Occlusion Handling | Limited capability | Advanced anti-occlusion technology |
| High-Speed Objects | Limited tracking ability | Excellent high-speed tracking |
| Mesh Tracking | Not supported | PowerMesh sub-planar tracking |
| Learning Curve | Beginner-friendly |
Professional level |
| Setup Time | Instant |
Quick download & install |
Unlock New Creative Dimensions With Planar Tracking
- Mask Tracking
- Ads Integration
- Visual Effects
- Animation Production
Learn More About Planar Tracking in Our Blogs
Frequently Asked Questions
What Our Customers Say About Us

Bane B

David Kuc

Lily K.

Katherine Kowalski
Discover More Powerful Video Editing Features