Key Steps of This Video Tutorial To Follow
Guide to using Filmora AI Tools
Once your Filmora software is launched, navigate into the “Media" tab from the top-left corner. Press the "Click here to import media" button to import your required videos, images, or music.
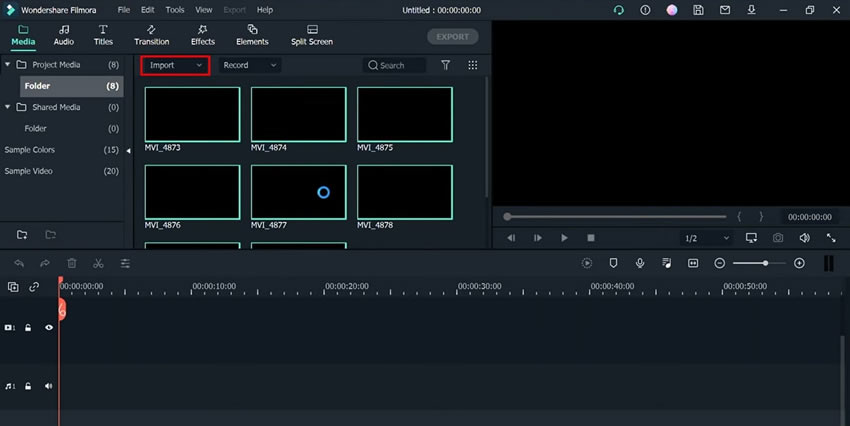
From the "Project Media" section, drag and drop your imported media items into the project timeline below. You can also click the “Add to Project" button indicated as a "+" icon on the video or photo that moves it into the project timeline.
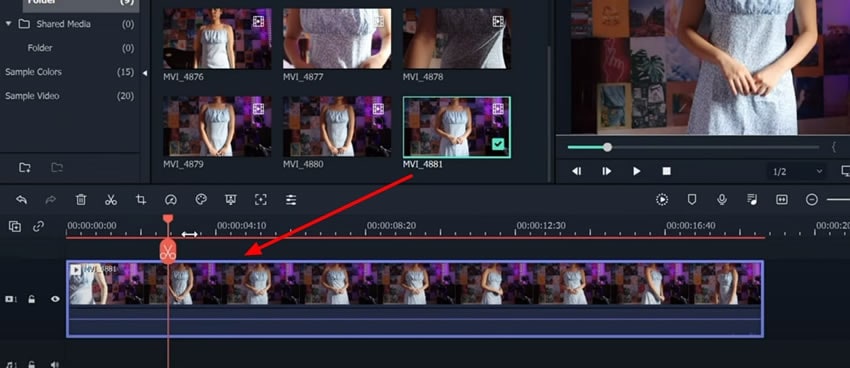
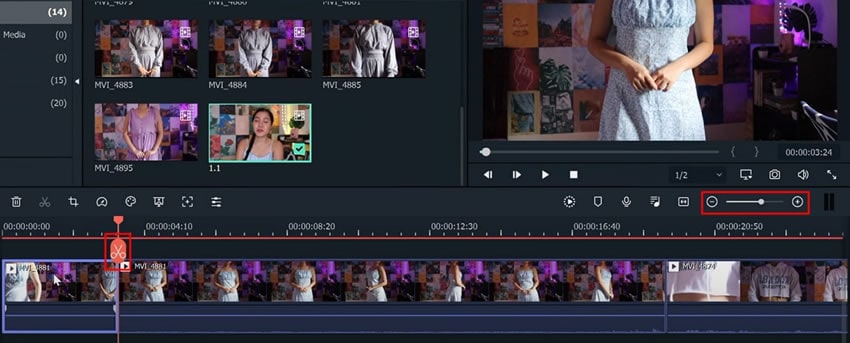
All your required media items are now added to the first track of the project timeline. By using the playhead, you can make a perfect video from different clips and images. So, continue moving the Playhead in the desired frame, and click the "Scissor" icon to apply the split. Keep adding splits like this in different frames, and delete unnecessary parts by selecting them and pressing the "Backspace" key.
For adding more precise splits, you can also use the "Zoom In" and "Zoom Out" functions available under the preview screen. The adjustment can be made through an available slider.
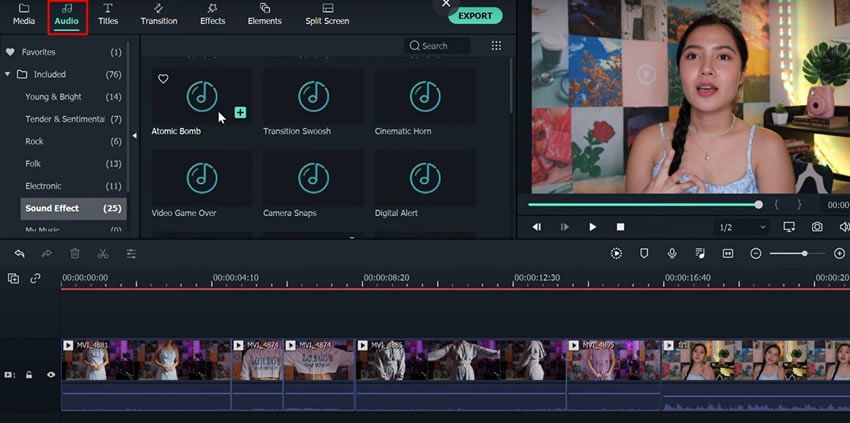
If you have already imported music into the "Project Media," continue to drag and drop it into the project timeline below. If you don't have your music, you can get stock audio from the "Audio" tab in the top-left corner. Make sure to adjust the duration of your music track as per your requirements. You can add as many audio effects as required.
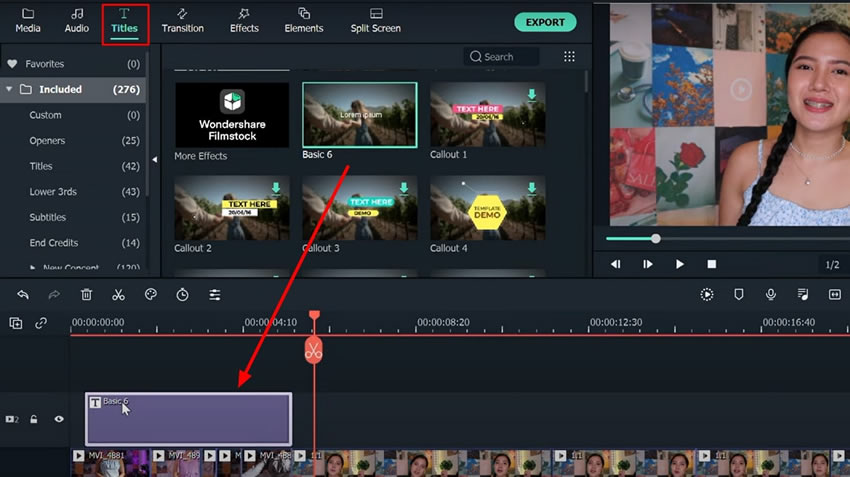
Navigate into the "Titles" tab from the screen's top, and you will see different categories on your left side. Each category will lead to specific text title templates. So choose your desired text template option; let’s say you selected "Basic 6". Drag and drop the selected template into the timeline. Make sure to adjust the track duration accordingly.
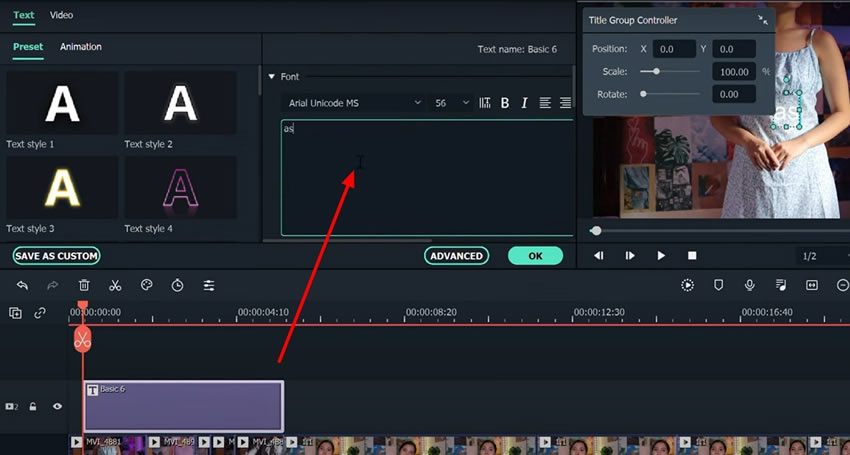
Double-click on the title track, and the editing window will appear in front of you. You can write any text or adjust text style, position, size, layout, margins, and other parameters here.
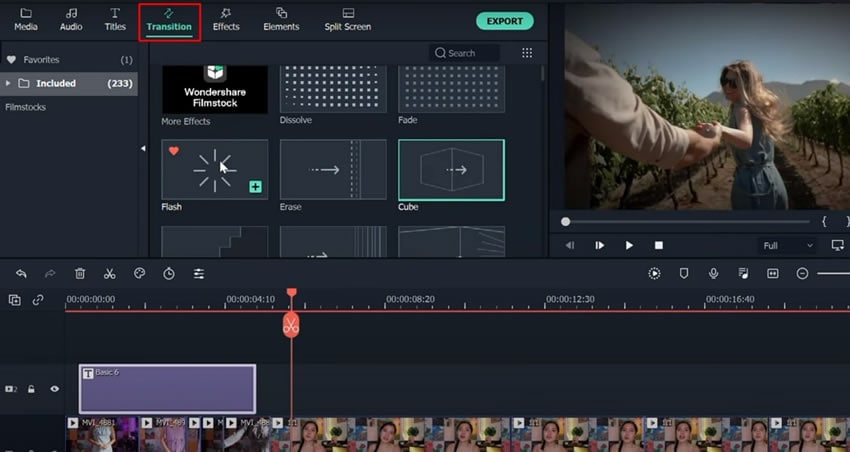
Move into the "Transitions" tab from the top of the screen, and different categories of transitions will appear on your left side. Choose your desired category, and select the required transition from it. Drag and drop the selected transition into your video in the project timeline.
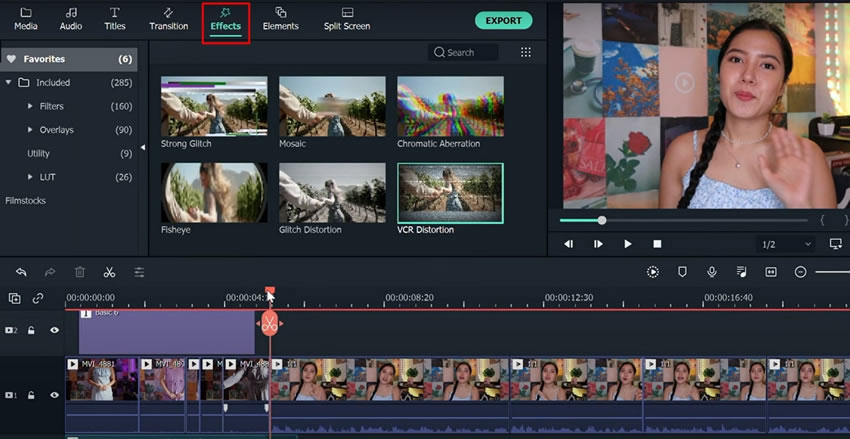
From the screen's top, head into the "Effects" tab and select your desired effect from the available options. Make sure to move the chosen effect into the timeline while applying it to the video clip for a better preview.
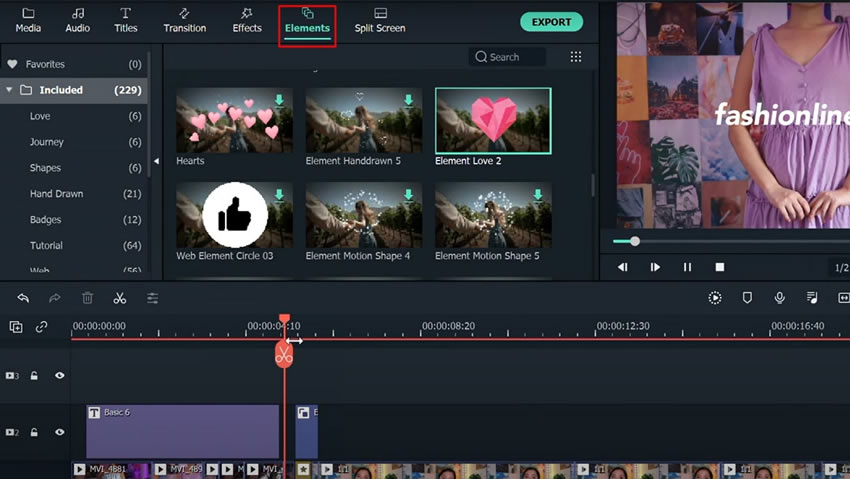
Click the "Elements" tab from the top, then head into the desired element category from the left side. Begin to select your preferred element option from the menu and drag it to the timeline below. You can add as many elements as possible according to your project requirements. Adjust the duration of the applied element considering your project's visual needs.
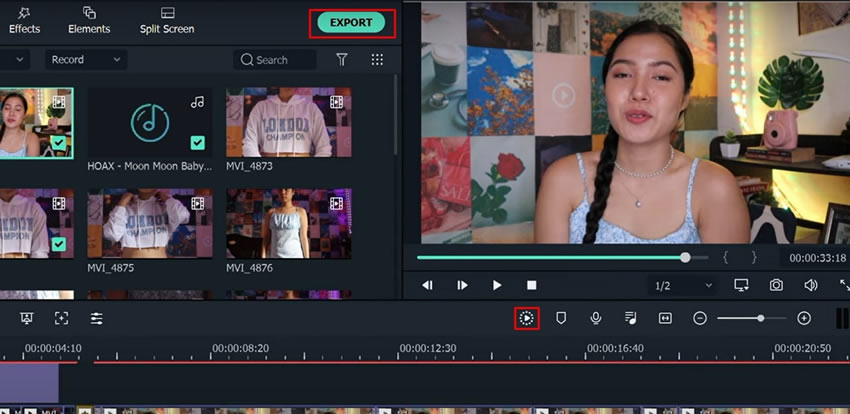
Press the "Render Preview" icon to enjoy a smooth, high-quality playback of your final video. If you're satisfied with your efforts, move ahead to save this video project on your device by clicking the "Export" button from the top-right corner.
Video editing is an essential way to enhance your videos' quality and improve engagement levels. So, whether you're upscaling your personal video or designing a video for YouTube, freelancing, or other professional service, editing it can bring visual enchantment to life. As a result, this video on Wondershare Filmora provided all details involving basics of video editing within simple steps.


