Key Steps of This Video Tutorial To Follow
Guide to using Filmora AI Tools
Let’s begin the editing process for your videos using Wondershare Filmora. The first step that you need to follow is to import all the desired clips into the media library by simply clicking on the "Import" button. Following this, you need to arrange your clips in a required sequence by dragging and dropping them on the timeline.
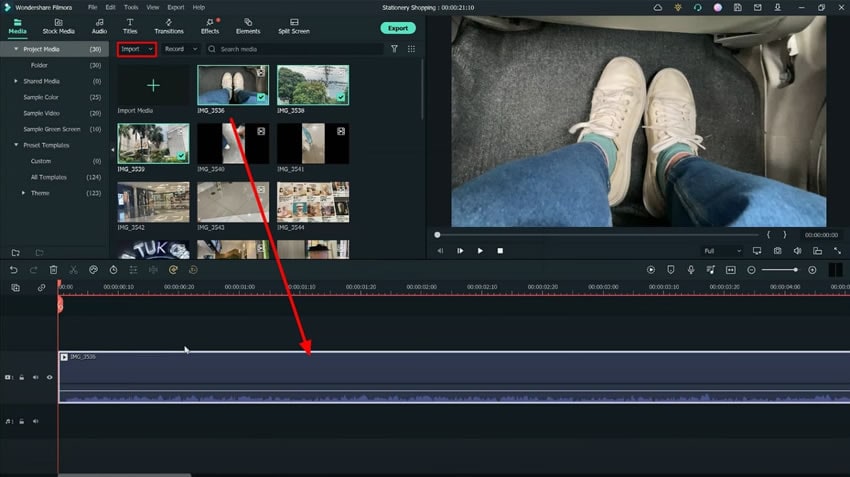
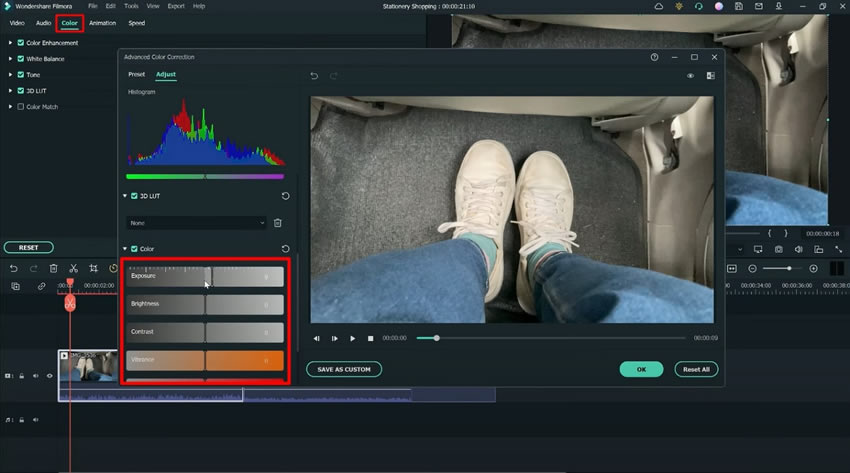
Once these clips are placed on the timeline, you can double-click the first clip to access its settings. You can lead toward the "Color” tab from the top toolbar and continue into the “Advanced” section. Under this tab, you can see different color settings like “Brightness,” "Exposure," and more. You can use these settings to improve your video quality per your needs.
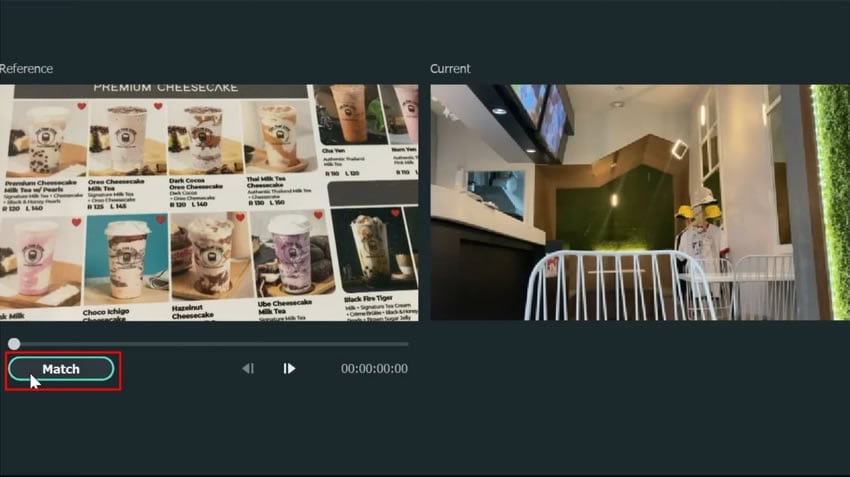
If you have recorded your videos from different cameras or may have some parts which don't have a good lighting effect, then you don’t need to worry. Filmora helps you in this scenario with its “Color Match” feature. Using this feature, you can adjust your video with one click according to your requirements.
To access this feature, you can double-click on your video clip to access the respective settings. From there, go under the “Color” tab to access the “Color Match” feature.
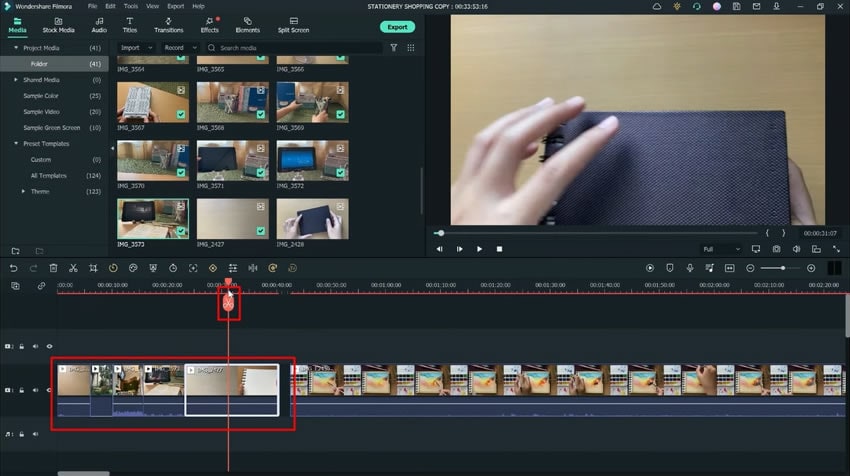
Here you can remove the unwanted parts from your clips to make a smooth video according to your requirements and keep your audience engaged. Start adjusting the parts from the start of the video as intros. Following this, you can improve your video body part by using some different angles as well. Afterward, in the end, you can adjust the outro as per your requirements.
If you like, you can add some ending elements with a sweet message for your viewers at the end of your video. This can help you to leave a good impression on your viewers.
You can choose different editing styles to make your content more unique and appealing. This takes time to finalize the best style that suits your style, but you can also get inspiration from different content creators you like. The theme is recommended so that your music, fonts, filters, and overlays can complement each other.
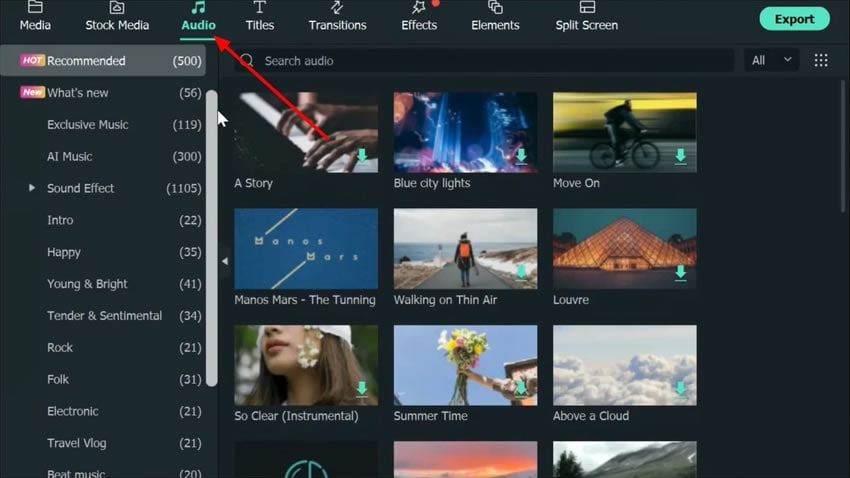
You can finalize any music you like and want to add to your video. For this, you can download your favorite music from the internet or can choose from the Filmora Royalty free music. To access this, you can lead on the "Audio" tab from the top toolbar menu. There you can choose any music you like from a variety of music.
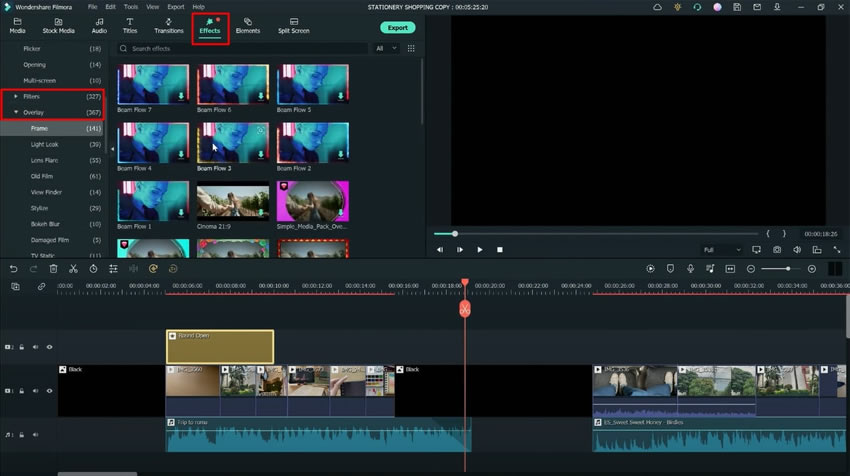
To make your content more appealing, you can also add filters and overlays. Wondershare Filmora gives you many filters and overlays to make your video look more professional. To access these, go to the “Effects” tab from the top tool menu bar. Here you can see both “Filters” and “Overlays” options.
From these options, you can choose the desired filters and overlays that match your theme to leave a good impression on your audience.
You need to understand the visual hierarchy of your audience to better understand how you can catch their attention and keep them interested in your content. You can select multiple fonts that can help you increase your creativity in your content and make it more appealing. For this, you can double-click on your title to go to its settings to select your desired fonts.
Remember to select simple and easy-to-read titles and fonts so your audience doesn't need to put effort into understanding your content.
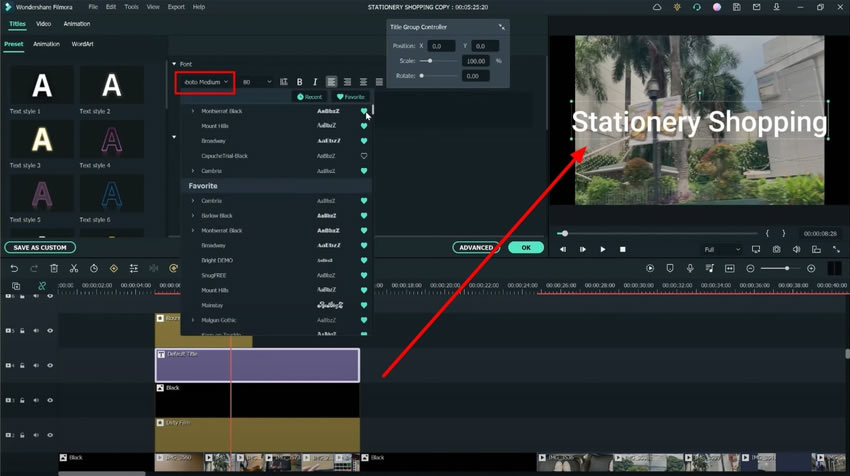
To add text, move toward the "Titles" tab from the top toolbar and click on it. Following this, you will get access to multiple titles which you can use in your video. You can select one according to your requirements and edit it. Mix fonts to add more creativity to your content.
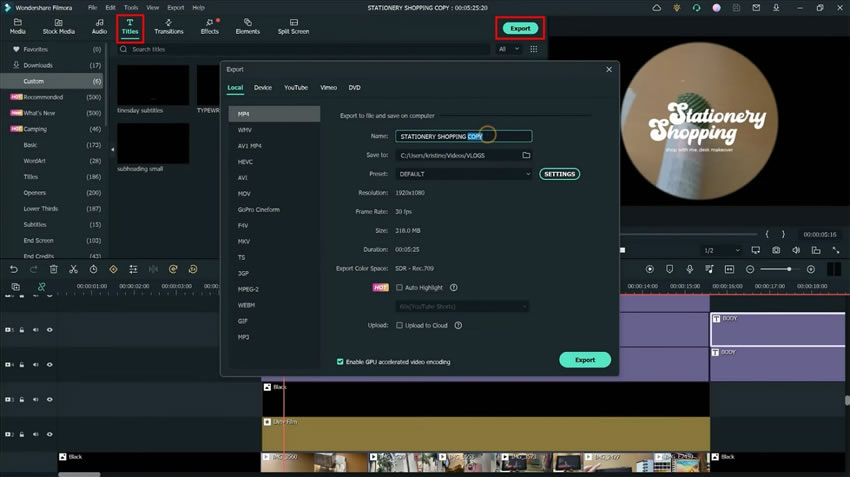
When you are done with all the steps required to edit your video, you can easily export it and save it on your device. For this, click on the “Export" button from the preview screen and get it exported.
Creating a unique and engaging video is very easy with the help of Wondershare Filmora. By following the steps in this tutorial, you can add your creativity to your content and can edit a video in a more professional way. Using Filmora, you can do many more things that helps you explain how to make a video aesthetic.


