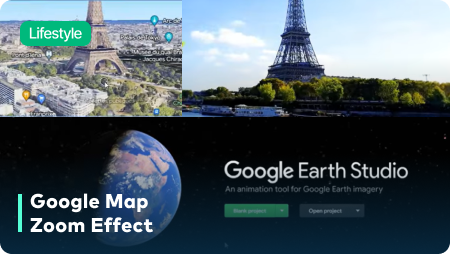
Guide on How to Create the Google Map Zoom Effect
There is never a limit to the ways in which you can surprise your viewers. Read how you can add the Google Map zoom effect to your videos through Wondershare Filmora. If you are also curious about how to create Earth zoom out effects with AI, check our best solutions here.
Key Steps of This Video Tutorial To Follow
Guide to using Filmora AI Tools
First, go to your web browser and launch “google.com.” Visit "earth.google.com" from the search tab and request permission from Google. Once permission is granted, click the "Blank Project" button on the home screen. In the space given below, type the name of your Project. Right at the front of the “Name” option, there is the “World” option. Choose between Earth, Moon, and Mars from the provided drop-down options.
Adjust the “Dimensions” and “Duration” of the project from the provided options. Finally, adjust the "Frame Rate" to align with your Filmora project, and click on the "Start" button in the green box below to begin.

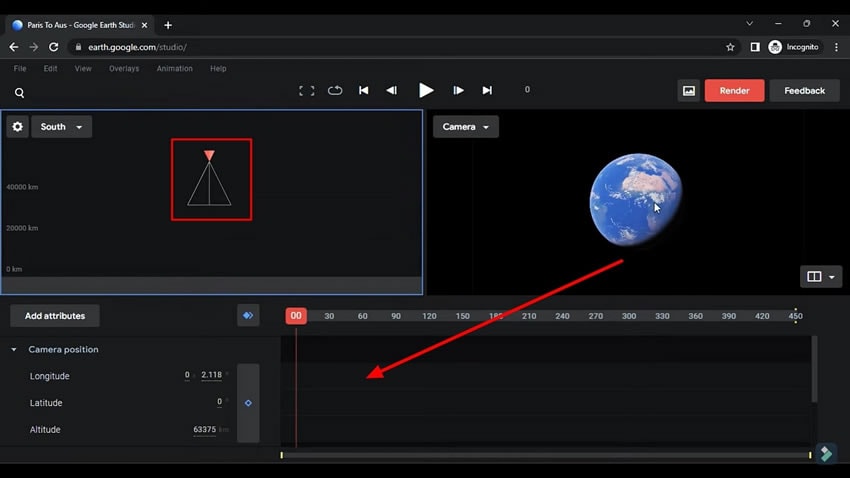
Once you press the “Start” button, a new page will appear. You will have access to the “Camera Control” key shaped like a triangle on the left side of the page. By changing the movements of this camera control key, the movements of Earth will change as well. The timeline is also available at the bottom right side.
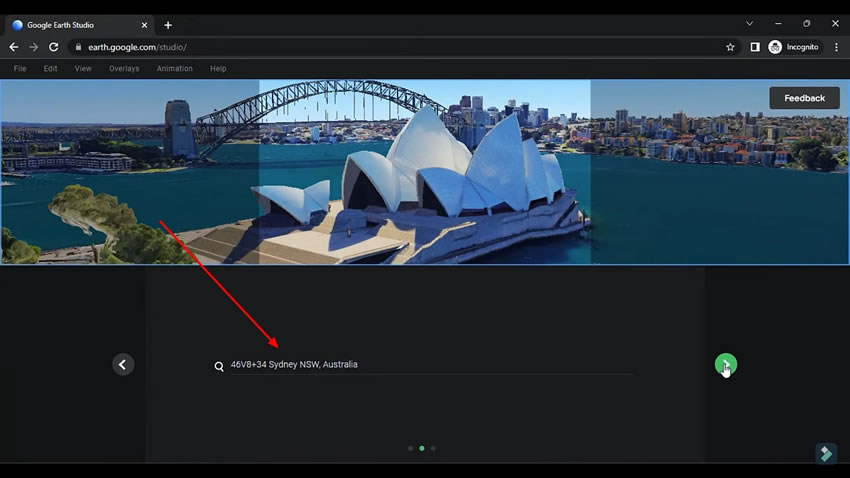
To add an animation effect, go to the "File" tab on the top-left corner of the page and navigate to the “New” section. You should choose the "Point-to-Point" effect to move your camera from one location to another as it zoom Google Maps. Once you choose an effect, a new page will open where you'll have to specify your destinations.
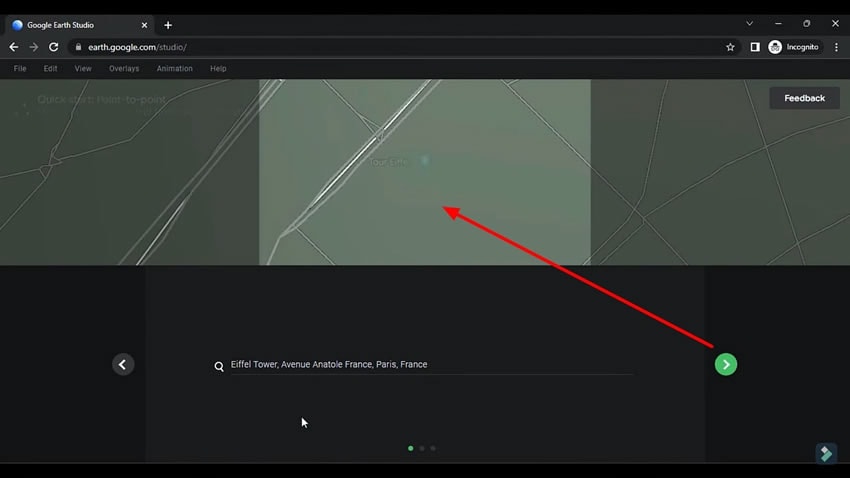
The search bar will ask you to "Search to set your first point." Enter the location of your starting point, thereby entering the location's name, and also adjust the camera's angle. Click "Next" and enter the name of the second point in the search bar, saying, “Search to set your second point.”
Proceed to the next point by clicking on the green tick icon. Once you click the button, you’ll be able to see the preview of the animation video for the point-to-point effects. If you’re happy with the results, click the green check button icon to finalize the animation effects.
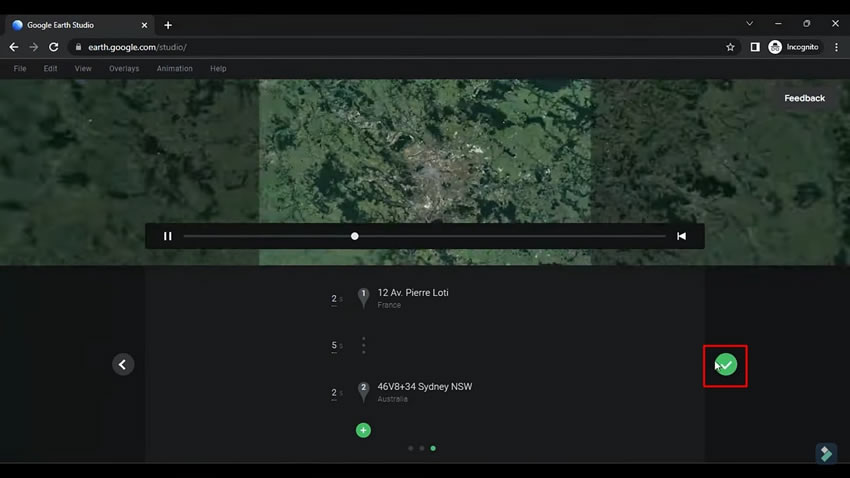
When you finalize the animation effect, you’ll see the keyframes on the geographic coordinates for camera position, camera target, and camera movement. If you move the playhead forward, you'll notice no animation until the second keyframe.
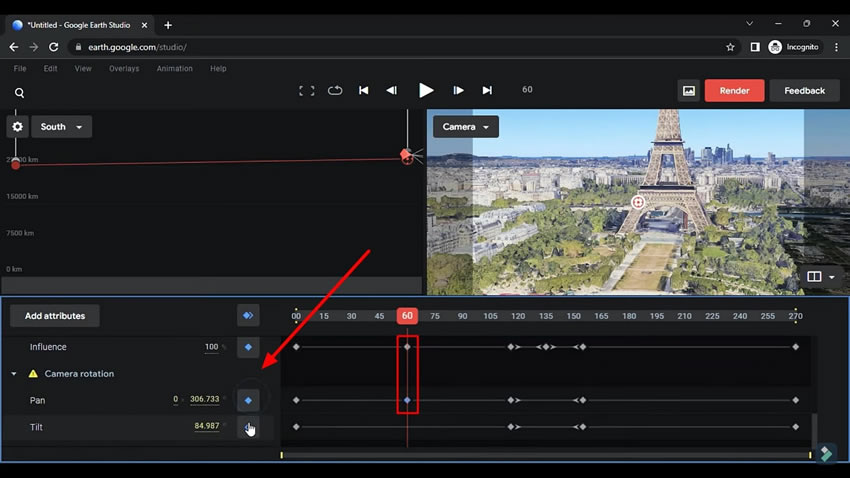
To create animation in these points, place the playhead on the second keyframe and use the camera screen to rotate or change the camera position. This is to add camera movements and rotations from the starting point toward the ending point. Notice that the keyframe will turn purple to yellow, signifying the change. Click on the yellow keyframe to edit and repeat the process. When you play the animation, you’ll see the camera movements until the destinations.
Similarly, if you want to add a camera rotation near the destination, add a keyframe, adjust camera movements and rotations, and it'll be done. You can continue to add keyframes and adjust camera movements differently to add more routes in animation.
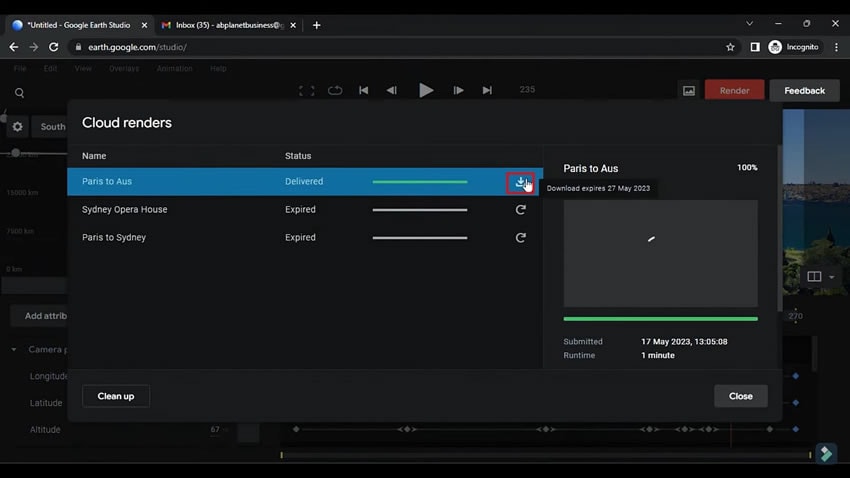
Once you've added all the keyframes and adjusted all the camera rotations, click the red colored "Render" button on the top right of the page. As you navigate to a new page, start by naming your animation. Choose "Image Sequence" or "Video" according to your requirements. You can download the image sequence speedily; meanwhile, the video image can be prolonged because it's a cloud render.
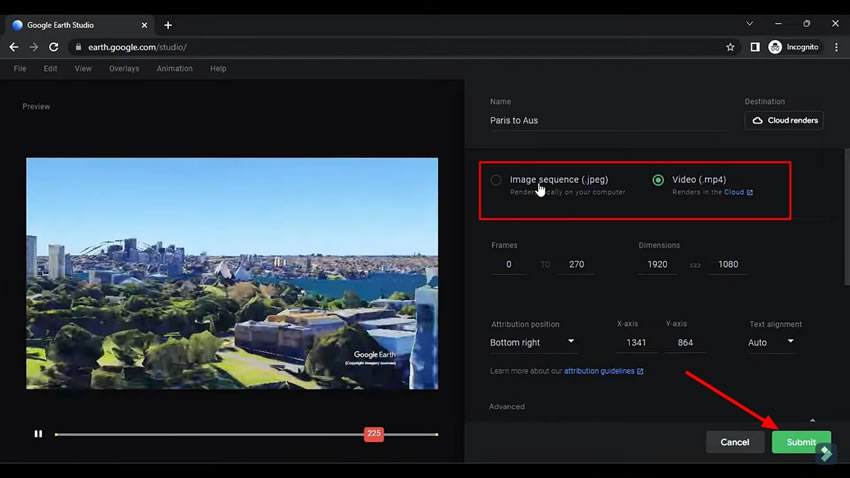
Select "Video," swipe down and click the "Submit" button. After waiting a few seconds, you'll see a notification saying, “Render is ready for download.” On the notification, click on the “View” option and proceed to select your file for download. Continue to click on the arrow icon given for downloading. It will ask you to save the animation on your desktop. Set the name and folder in which you want to download the video and click “Save.”
You must have the original videos of both of your locations to make this transition. Now, import the original video of your 1st point, 2nd point, and the rendered video in Wondershare Filmora.
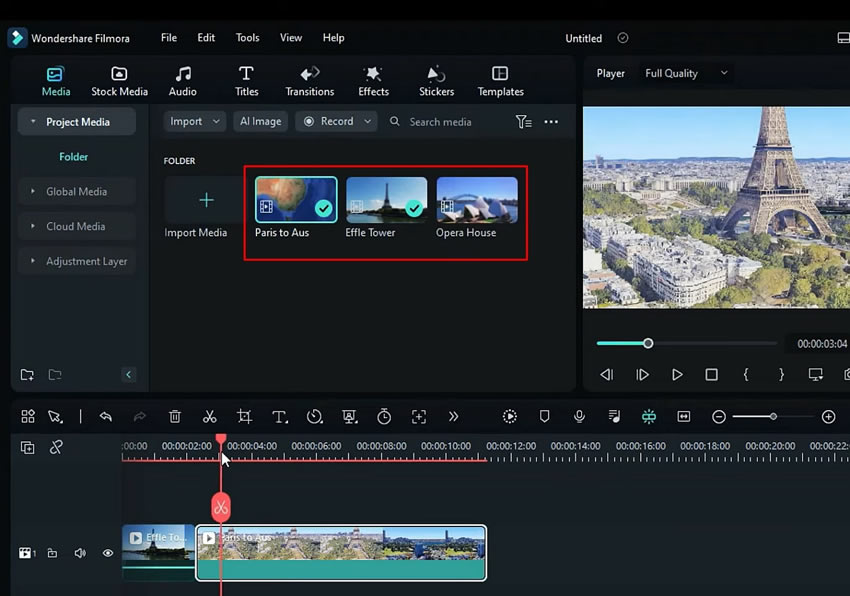
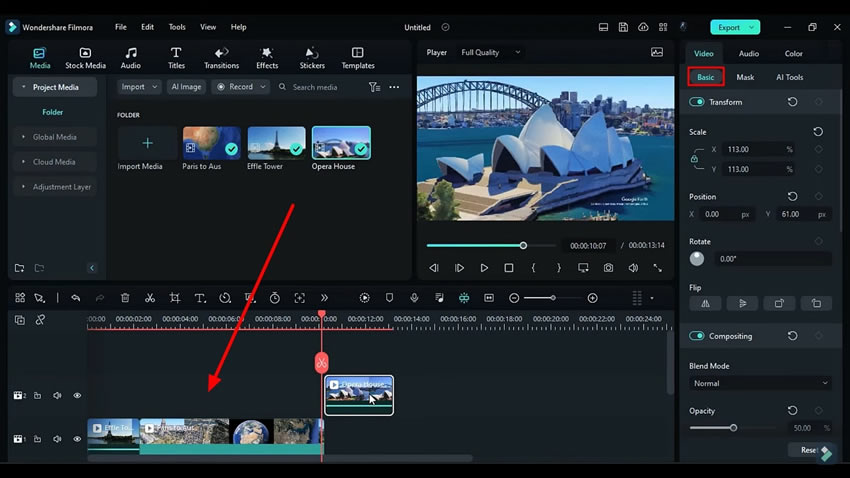
Drop the original video of the first track in the timeline. Then drop the rendered video and adjust how much starting animation of rendered video you want to add, trim the rendered video accordingly. Now, place the original video at the exact end of the rendered video. Shift the last added video to track 2 of the timeline and decrease its opacity. Try to align its position from the “Basic” option in the adjustment tools box according to the rendered videos.
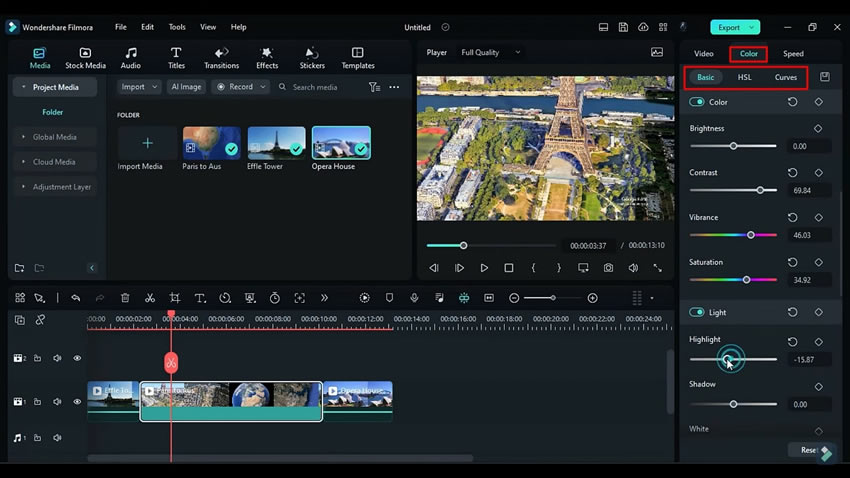
After aligning the video, it is time to adjust the colors of the rendered video. Select the rendered video from the timeline and navigate to the “Color” option at the right. Once you select "Color," there will be three sub-options named "Basic," "HSL," and "Curves."
Adjust the color and light settings from the “Basic” tab. Furthermore, adjust the remaining contrast and curve settings from the other two options according to your likeness. You can also adjust the color and contrast of the other two videos from the timeline following the same process.
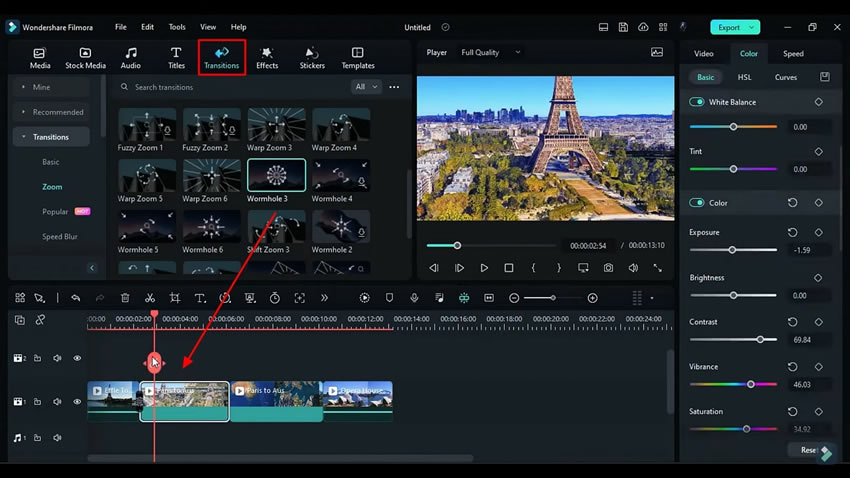
After adjusting the colors of the videos, from the upper horizontal row, select "Transitions" and add the transition effects at the points in the timeline where you want to add the transition. And set the time duration of transitions at the frames.
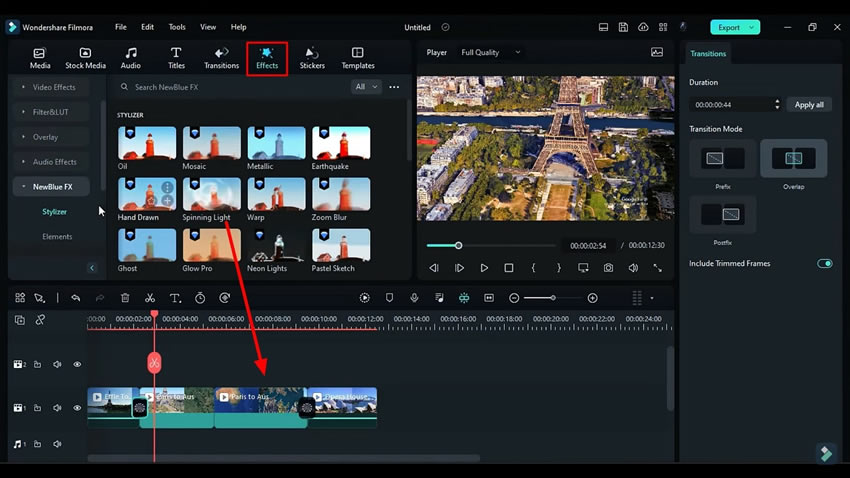
Now, from the upper horizontal row, click "Effects" and apply the sharpening effect to the overall video. You can also add the auto-enhancement effects to the video if you want.
Navigate to the play button just below the video for the final preview. After previewing the video, go to the “Export” button at the top right corner of the screen and export your final video.
People not only like and share but also try to follow the unique content themselves as well. Filmora will not only make your travel vlogs cinematic, but you can also edit videos with the Google Maps zoom effect without any expertise. Once you learn and master the technique, making your travel vlogs interesting will be almost effortless and cost-effective.