Guide to Hiding and Revealing the Text Behind the Object in Videos using Filmora
Do you wish to create a video with text behind the object? In this video, learn how Wondershare Filmora makes it easy with its effective tools to bring the text behind the object.
Key Steps of This Video Tutorial To Follow
Guide to using Filmora AI Tools
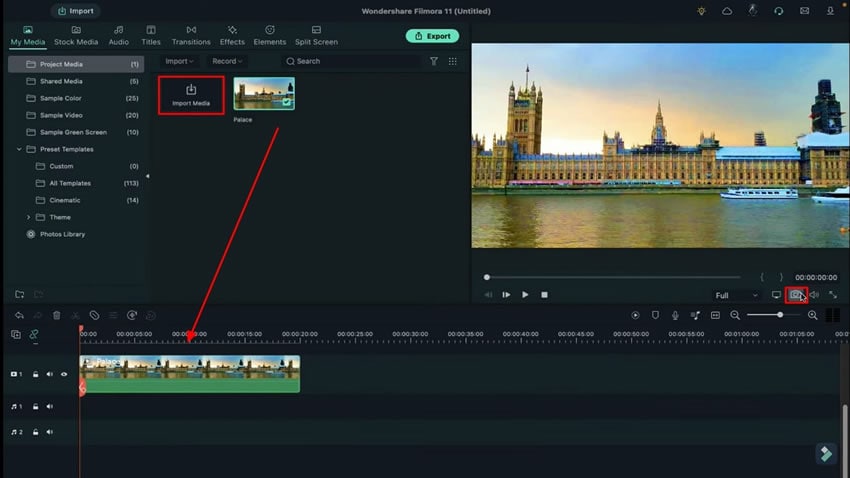
To start the process, select your background clip and drop it on the timeline. Take the snapshot and save it in PNG file format.
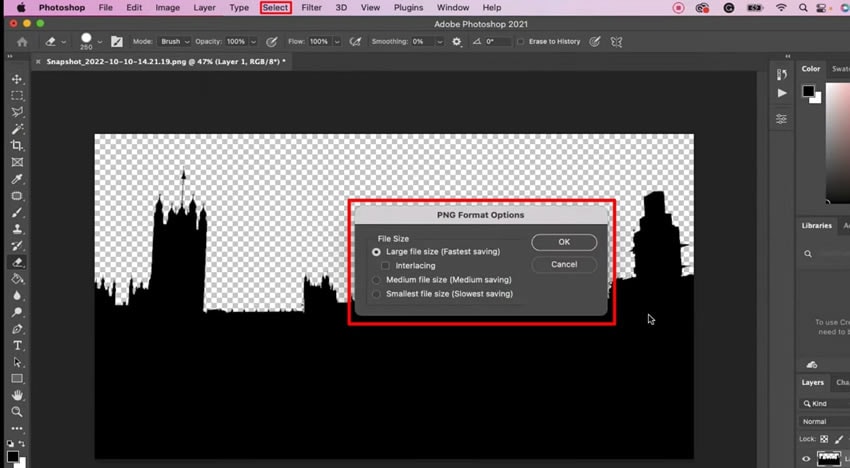
Open the snapshot in Photoshop and look for the "Image" tab. Click the "Image" and select "Adjustments" from the dropdown list. From the "Adjustments" list, select "Black and White" to change the color of your photo. Hit "Ok" to save the changes. Again, go back to the "Adjustments" and choose the "Curves" option and adjust them to get a full black and white effect.

Go to the “Select” section and choose “Focus Area” from the list. Remove the white color from the image by marking it. Create a mask by selecting the black color for the subject. Save the image in PNG format for further use.
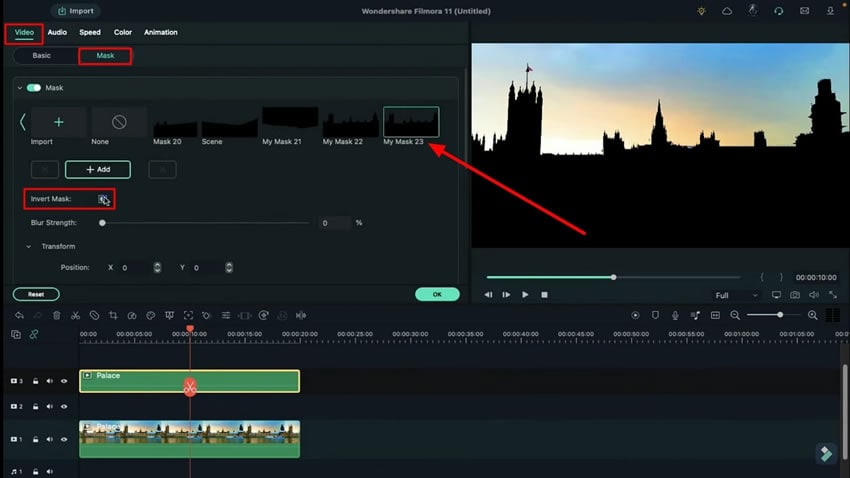
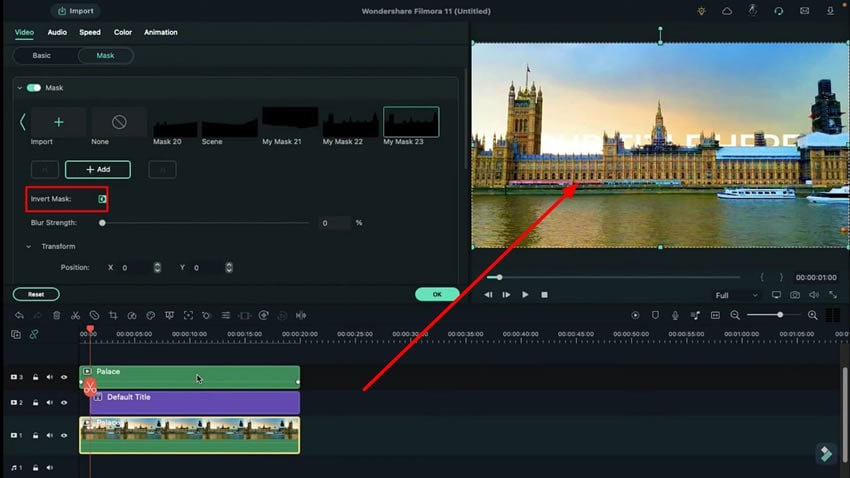
Open Wondershare Filmora and select the clip you’ve inserted on the first track. Enter its settings by double-clicking the clip and navigating to the "Mask" section under the “Video” tab. Import the mask you’ve created in Photoshop from your system into Filmora.
Select “Invert Mask” from the options and copy the footage from the first track to the third track. Double-click on the video added on the third track and deselect the “Invert Mask” option there.
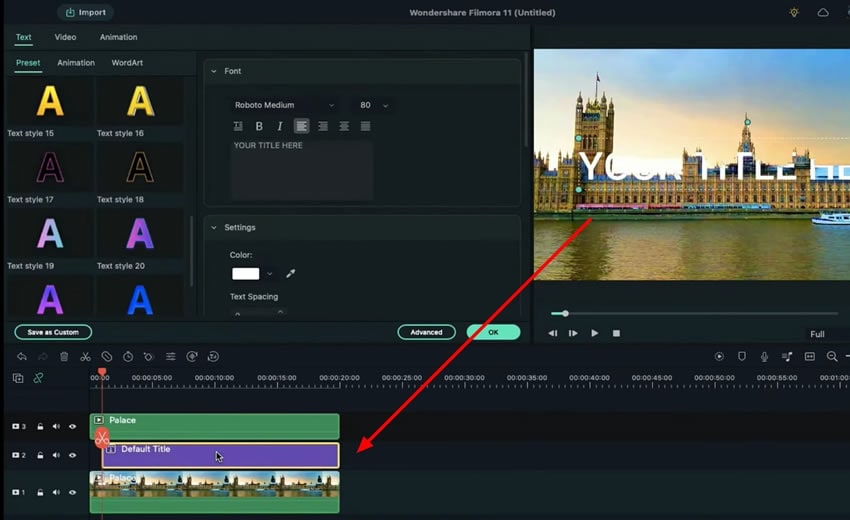
Select a title track from the “Titles” section and drop it on the timeline on the second track. It is recommended to keep this title a few frames towards the right. You can notice the title you’ve dropped on the timeline from the preview window.
Double-click the copied footage to open its settings. From the “Video” tab, go to the “Mask” option and turn off the “Invert Mask.” Open the settings of the video on the first track and turn on the “Invert Mask” option. The text is successfully brought behind the object in the video.
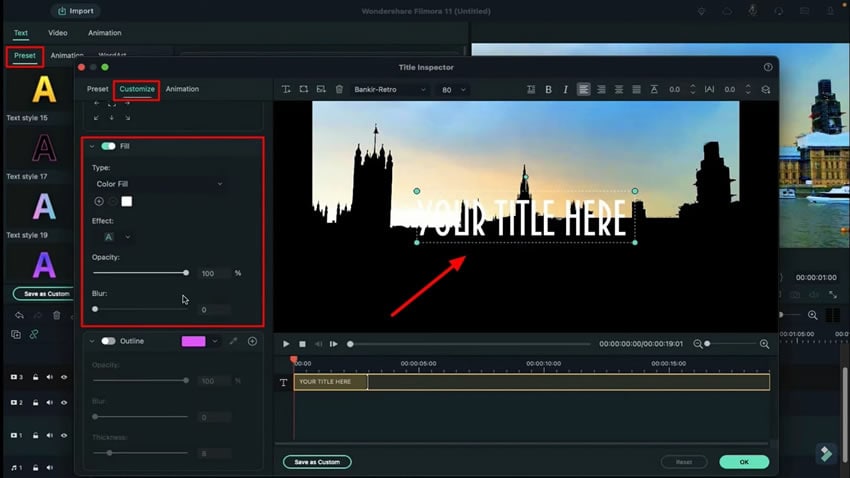
For customizing the text settings, double-click on the added title and select any gradient from the “Presets” section. Continue into the “Advanced” option and access the “Customize” tab. There, you can adjust multiple options according to your choice.
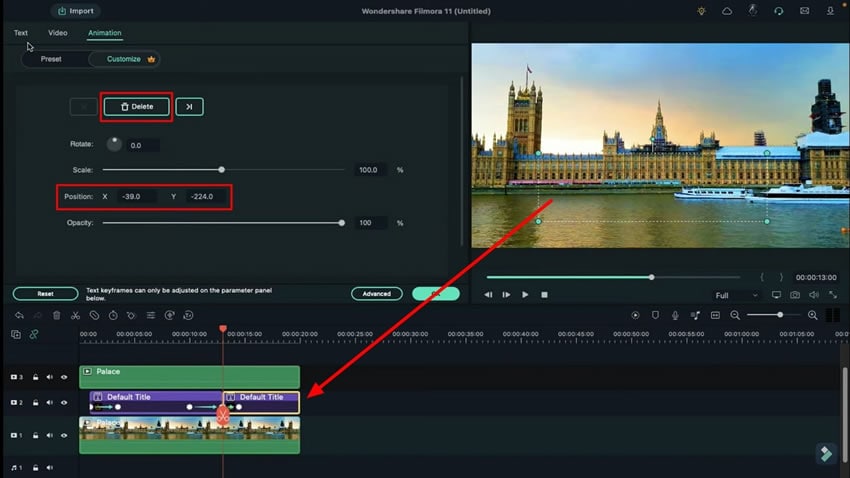
From the top panel, lead to the "Animation" tab and change positions "X" and "Y" to move the text behind the object. Move the playhead at the required timeframe and reveal the text by changing its position.
Split the text bar into two parts and add keyframes at the required time frames to hide the text behind the object by adjusting the "Position.” Select the second split part and set the keyframes. You can also customize the "Gradient Fill" from the settings under the "Customize" tab as you want, and here you go. Once you have adjusted positions, render a preview to see the final results.
When it comes to editing videos, good tools are the essential thing that helps the creator to bring his creativity into reality. Filmora has proven to be the best video editing tool with its great features. The provided steps explained how you can conveniently hide and reveal your text behind any object in the videos using Filmora.