Key Steps of This Video Tutorial To Follow
Guide to using Filmora AI Tools
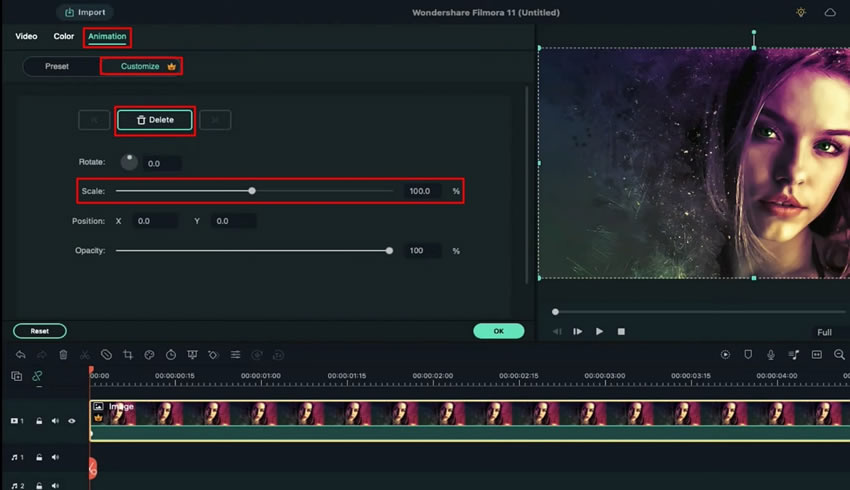
Select the video or photo and drop it on the first track on the timeline to start the process. Double-click on it and enter the video settings to navigate the "Animation" tab. On accessing the “Customize” section, add a blank keyframe at the start using the “+Add” button and change the “Scale” at the end of the track.
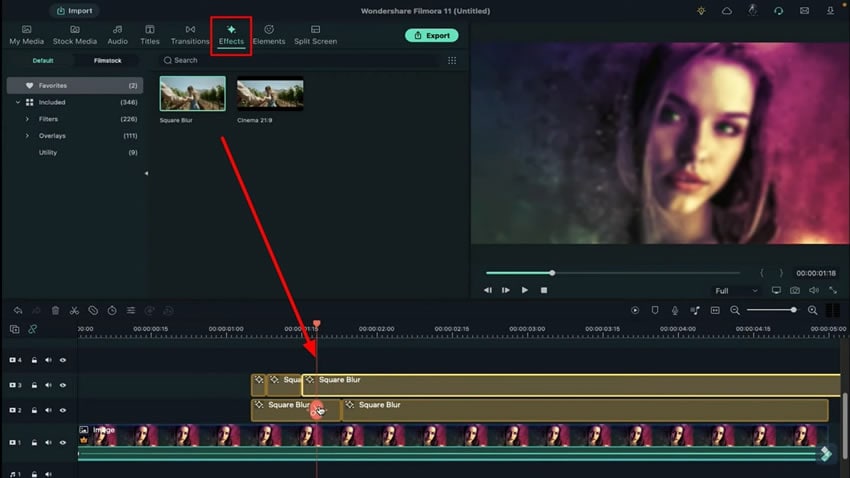
Place your playhead on the required time frame, and redirect to the “Effects” section. Choose a blur effect for this time frame and place it on another track on the timeline. Move your playhead towards the right and split the effect at any point on the timeline. Change the "Size" of both parts by double clicking on them and opening their settings.
Drop the same blur effect on another track and split this effect into three different time frames. Select the first and third parts of this track and change the "Size" to zero.
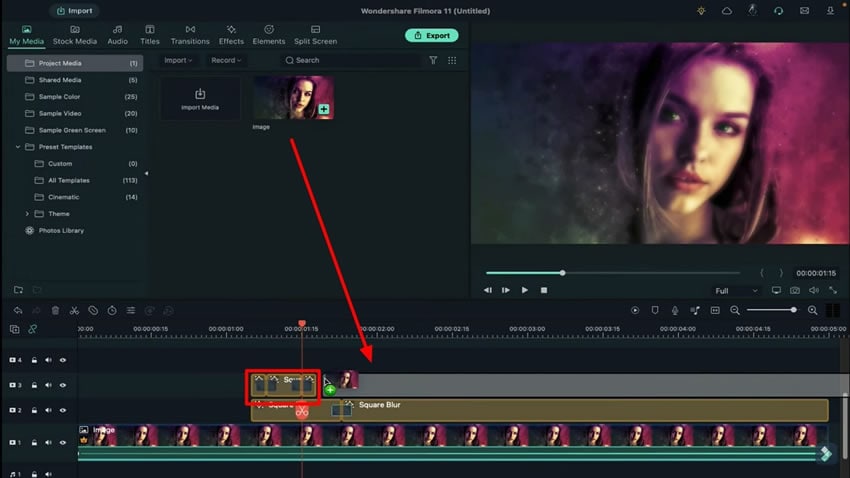
Head to the “Transition” tab from the top and select the “Dissolved” transition to apply it on the third track. Following this, keep the same transition on the second track and adjust them at the required time for the perfect image slideshow.
Drop the image on the third track, which will be placed a few frames next to the effect. Double-click on the image and reduce its “Scale” under the “Animation” tab. Keep the image only for a small part of the entire video and remove the excess.
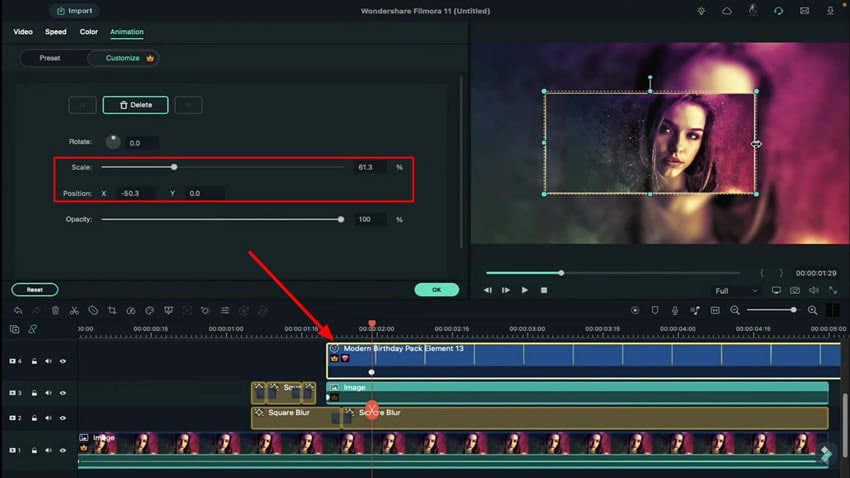
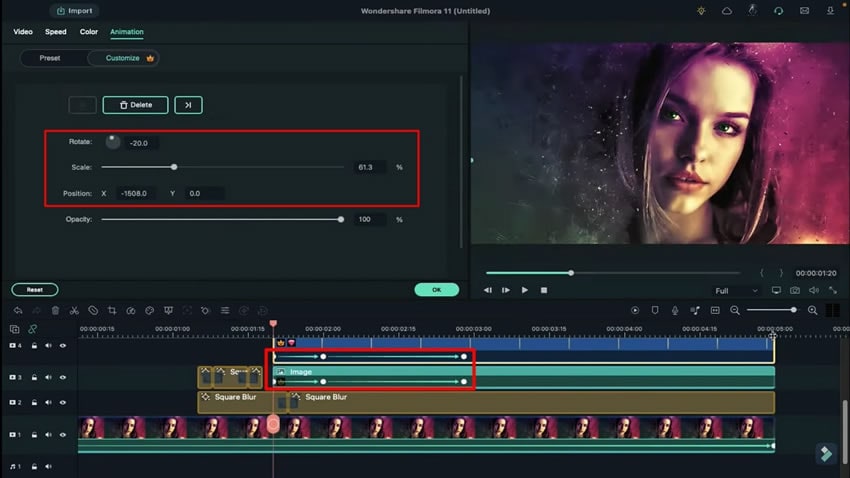
Go to the “Elements” section and search for a frame in the search bar. You will be provided with a variety of frames to choose from. Choose the desired frame and drop it right above the second image added before. Double-click on the frame and look for the "Animation" tab. From the "Customize" section, you can adjust the size of the frame according to the image by changing the "Scale" and "Position" on "X" and "Y."
You need to drag the playhead at the start and double-click on the image added afterward. Change the "Rotation" against it and do the same process for the frame. You need to select the image and frame respectively to change their "Position" on the "X" axis so they can be dragged out of the screen.
Place the playhead a few frames toward the right and return the frame and image to the screen by changing the "Position" to "X" again. Repeat the same process by moving the playhead further. Now go to the endpoint and set the "Scale" for the frame and picture. The entire change will be recorded across keyframes, creating proper momentum for the image slideshow.
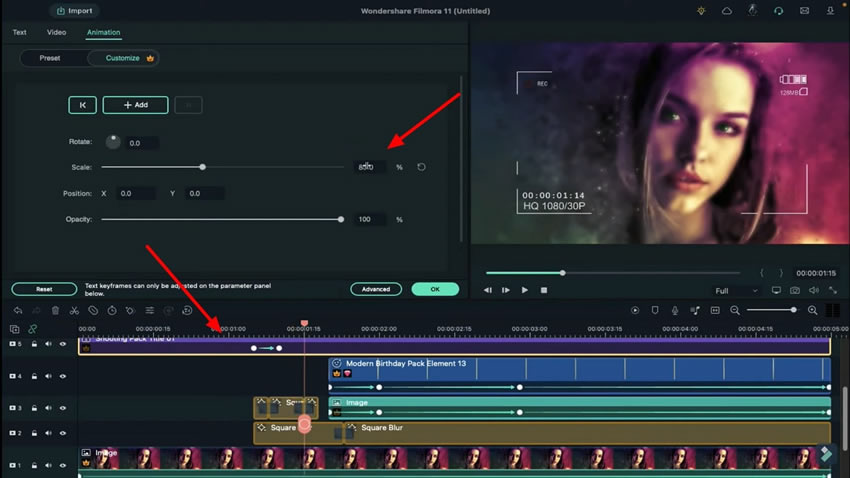
Move to the “Titles” tab, and look for “Shooting Pack” under the “Filmstock” section on the left. You’ll get some stylish overlay options to choose from. Choose one overlay and drop it on a new track on the timeline.
Double-click on the title to change its settings and remove the text from the “Text” section. Go to the “Animation” and adjust the “Scale” at different timeframes. Also, reduce the “Opacity” a few frames forward. From the “Transition” section, apply another transition to the frame and image. Click on “Render Preview” to see the slideshow you’ve created.
If you intend to present your work attractively, you can shoot videos and photos to set them as a slideshow. The provided details have helped you out on how to create a slideshow using Wondershare Filmora to get the finest results.


