Key Steps of This Video Tutorial To Follow
Guide to using Filmora AI Tools
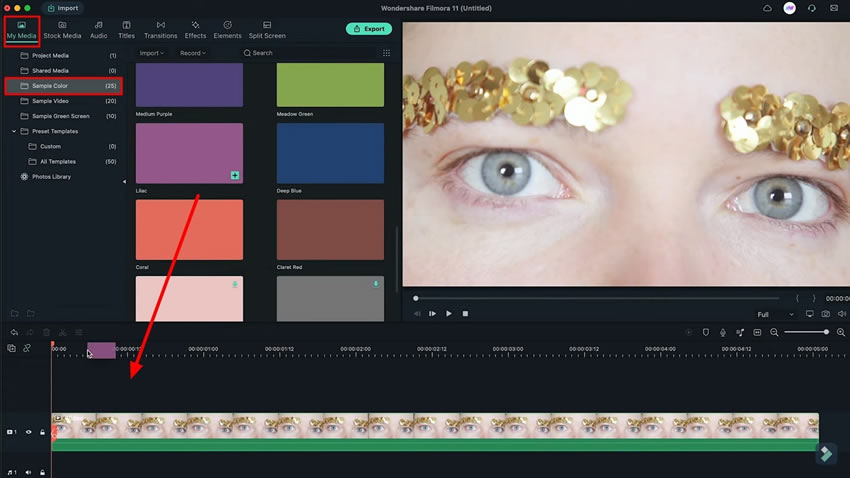
Starting with the process, import the video that needs to be edited in Filmora. Continue to bring the video to the timeline which should be a close-up shot of the eyes. Move into the “My Media” section and look for the “Sample Colors” section from the left. Drag down any color from the list onto the timeline track that you want to insert the eye color.
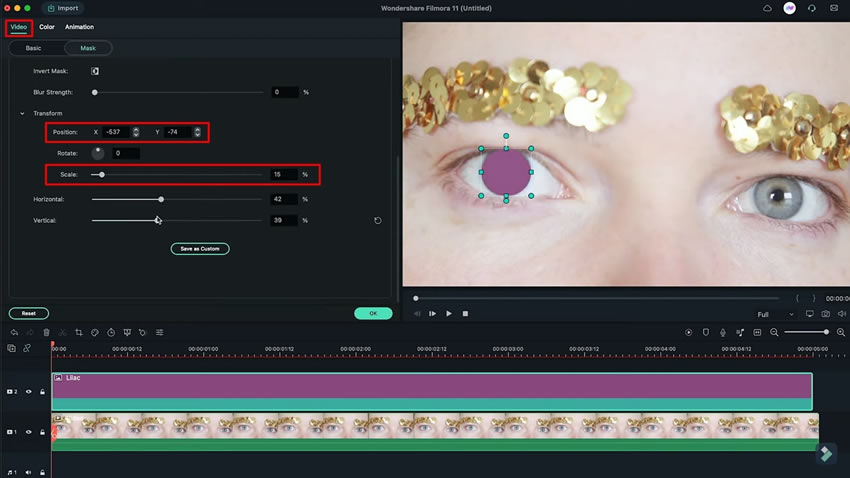
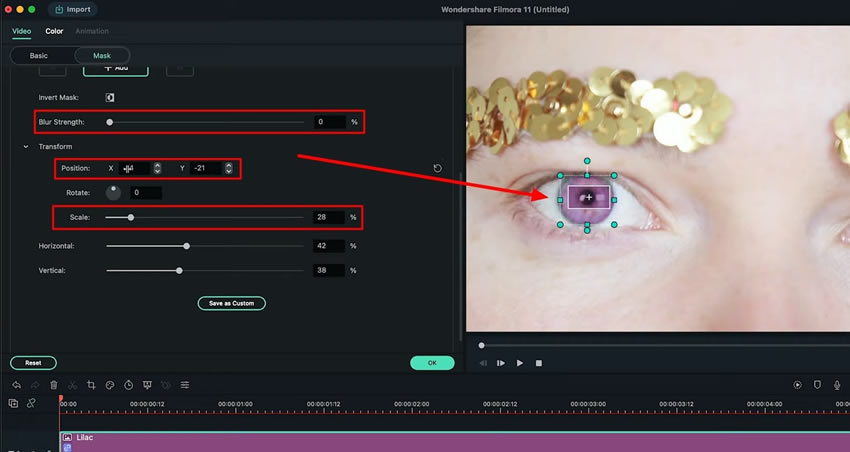
Double-click on the track where you’ve added the color to open its settings. Continue to the “Video” tab and lead into the “Mask” section for selecting the mask shape. On selecting the shape according to the shape of the eye, which is a circle, adjust the “Scale” and “Position” to fit on the eyeball.
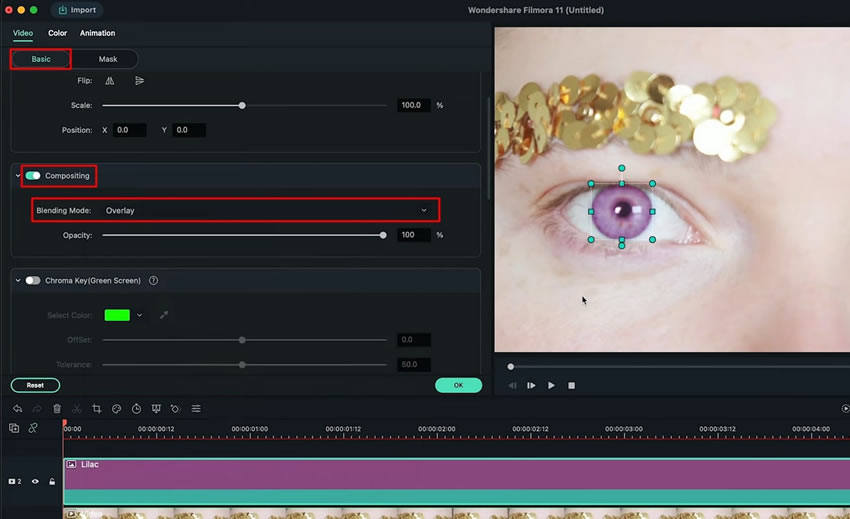
Continue to the “Basic” section, and proceed to make the eye color change more natural. For that, lead into the “Compositing” section and change the “Blending Mode” option to the appropriate choice. You can define the blending mode between “Overlay” or “Soft Light” according to the conditions.
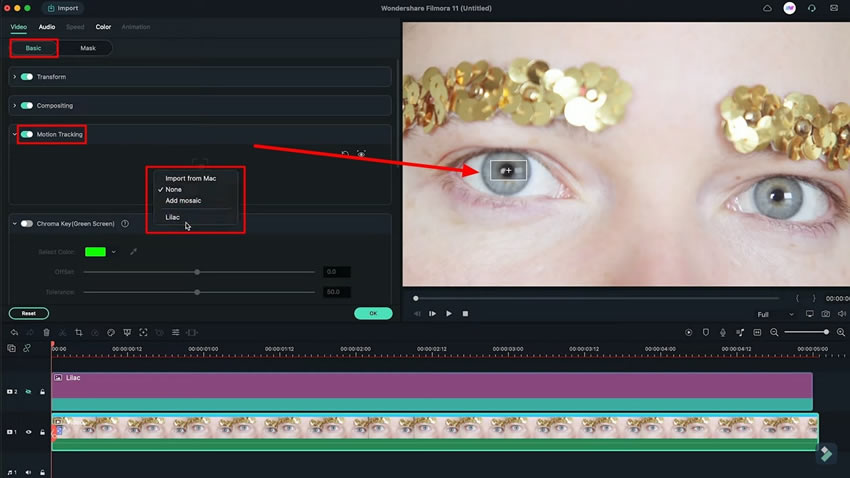
As you play the video, you will observe that the color fade does not move with the eye. For that, you will need to use the services of “Motion Tracking.” Lead into the “Basic” section from the “Video” tab and look for the “Motion Tracking” toggle. As you activate the option, a box will appear on the preview screen. This particular box will be used to track the pupil of the eye that needs to be assessed. Reduce the size of the box according to the eye and click “Start Tracking.”
Once the analysis is done, you will observe an option below the “Motion Tracking” button in the settings. Select the drop-down and change the option to the selected color for tracking the color against the pupil.
After selecting the color, you’ll notice that the size and shape of the color have been altered. Repeat the process of adjusting its magnitude by double-clicking on the color and setting its “Scale” and Position” accordingly. You can also manage its “Blur Strength” settings for realistic adjustment within the footage.
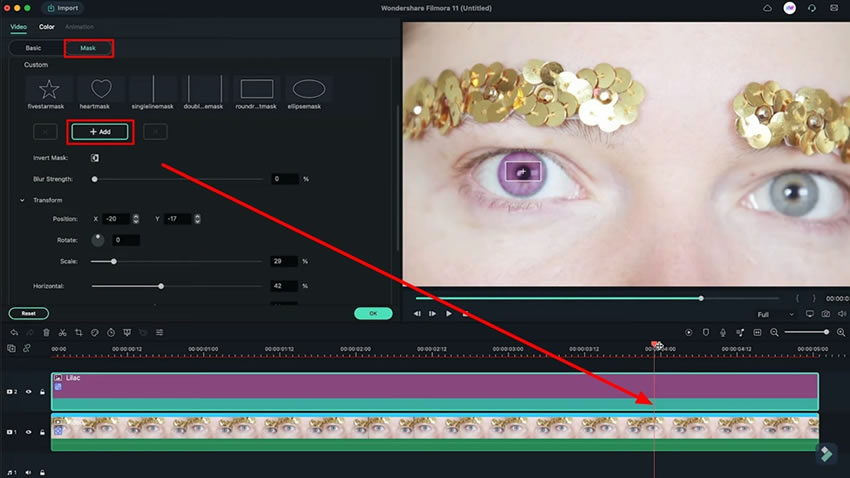
If you’re editing a video in which your eyes are continuously opening and closing, you’ll have to adjust that as well. Fix this by adding keyframing in Filmora into the timeline at points where your eyes are getting closed. Bring the playhead to the point in the timeline where eyes are closing, after adjusting the playhead, go to the “Mask” tab and keep adding keyframes from the “+Add” option.
Adjust the “Scale” and “Position” of the color at every keyframe individually. Follow the same process for the second eye as well, so that both eyes match.
You’ve seen that understanding about how to change eye color in videos is not a big deal with tools like Wondershare Filmora. With all the enhancements and editing options available, it is easy for you to execute such procedures. However, the tool ensures in making your videos unique and attractive with its efficient editing tools.


