Key Steps of This Video Tutorial To Follow
Guide to using Filmora AI Tools
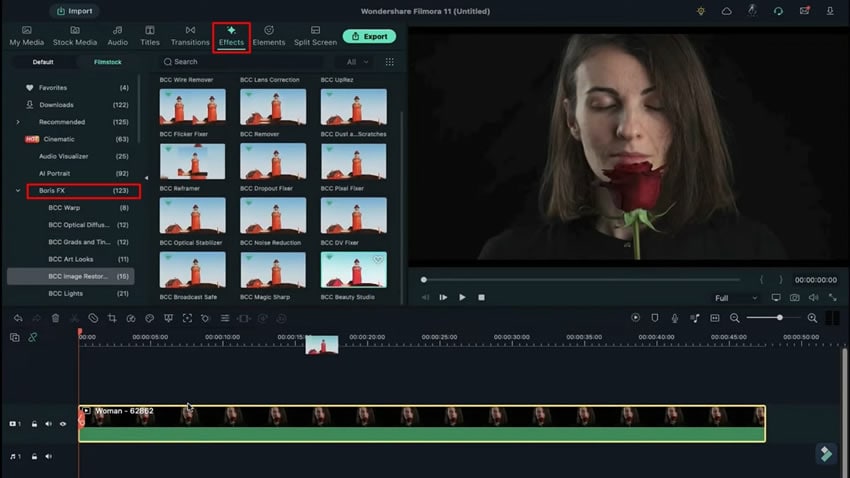
Start the process by dropping the video clip that wants to be retouched. After adding it to the timeline, lead to the “Effects” tab from the top and navigate to the “Boris FX” effects. Look for the “BCC Image Restoration” option from the list that can be used for the particular process and add it to the video on the timeline.
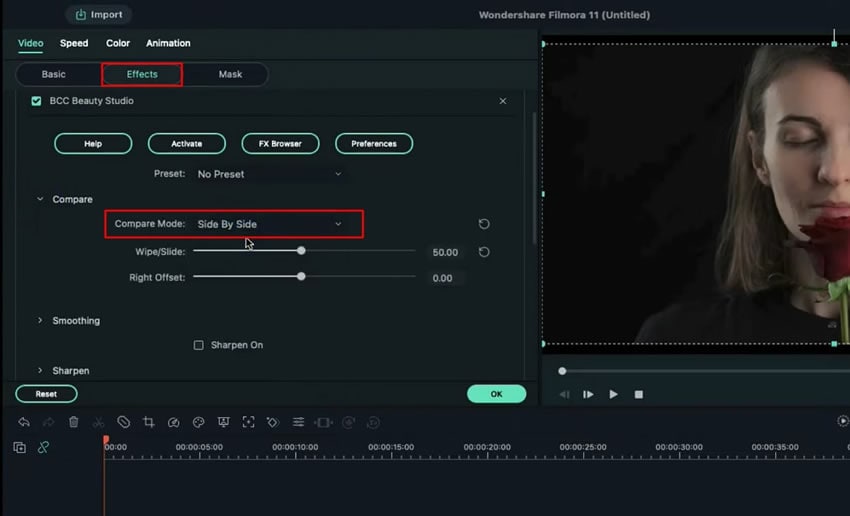
Double-click on the imported video and lead into the “Effects” settings. Look for the “Compare” option in the list of options and change the particular set to “Side-By-Side.”
Continue to look for the "Smoothing" options, which will help you execute skin retouching according to the requirements. Utilize the available sliders and set them according to the uploaded content.
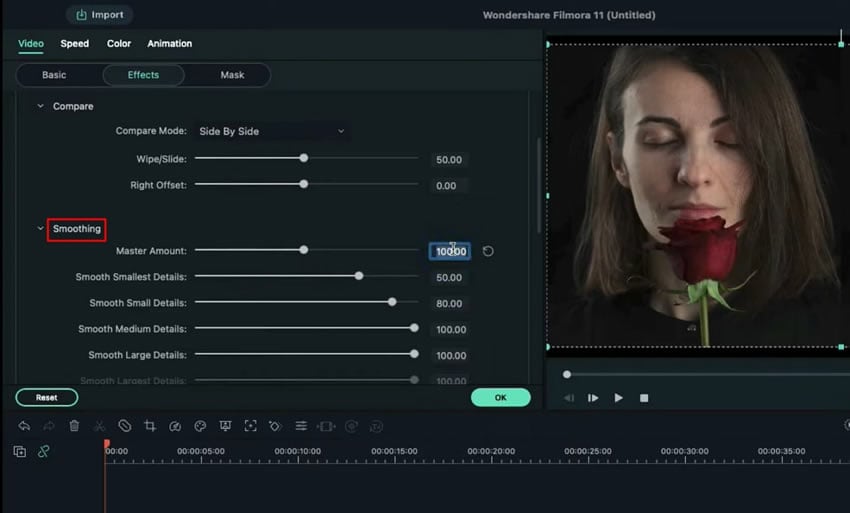
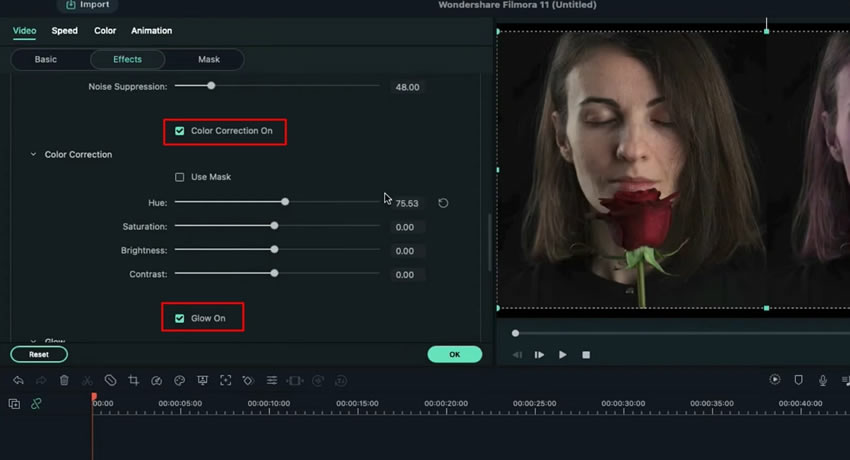
With all the available options, you can adjust the “Master Amount” and continue to options like “Smooth Small Details.” As you enable the “Sharpen On” option, lead into the variety of sharpening effects options and set them accordingly.
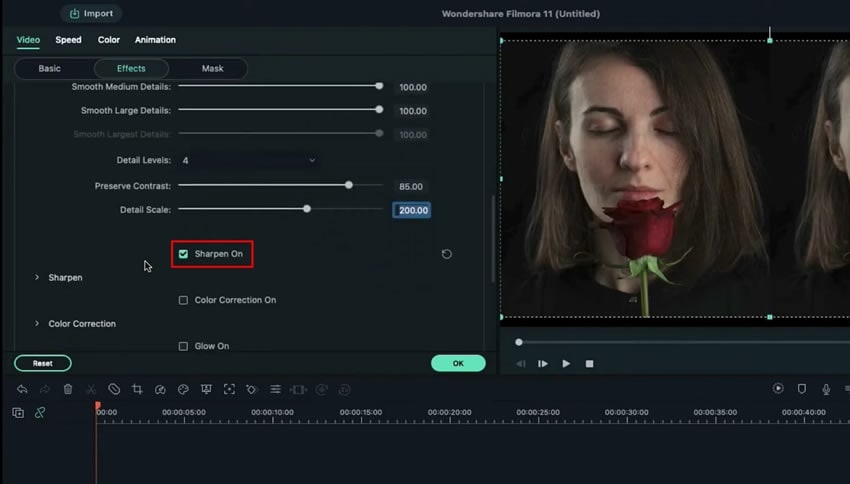
Enable the "Glow On" effect and "Color Correction" options for inserting your final touches on the video. Change the "Contrast," "Saturation," and other options according to the requirements.
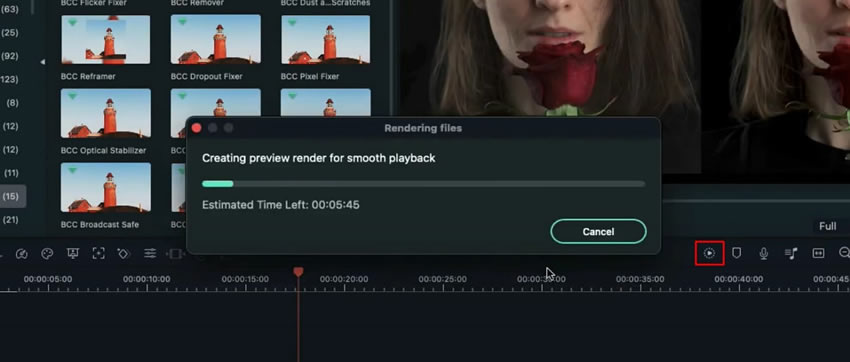
Once you are done with setting all options, click the "Render Preview" button to finalize the process.
With such tutorials, you can easily retouch your skin tone within any media content. With side-by-side comparisons, you can retouch skin in video properly with the right effects. Using tools like Wondershare Filmora helps you achieve a more assistive result with ease.


