Key Steps of This Video Tutorial To Follow
Guide to using Filmora AI Tools
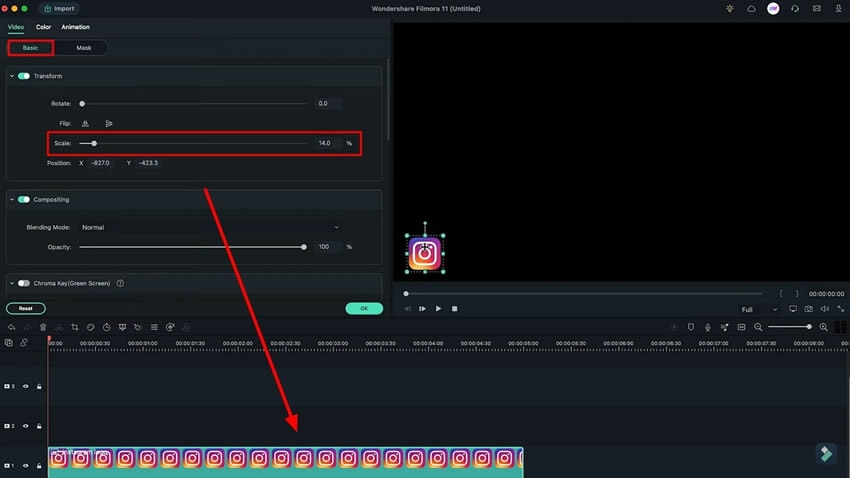
To start, you will need to import your social media platform logo in “PNG” format in Filmora. You can download it from Google or any other free stock image website. On importing, drag it to the timeline and double-click on it to access the customization settings.
Under the “Basic” tab, you can see some more settings to customize your logo, including “Rotate," "Scale," and a few more. You will need to click on the “Scale” option and adjust the size of your logo according to your requirement. After this, you can move it to the desired lower corner or any other position you like.
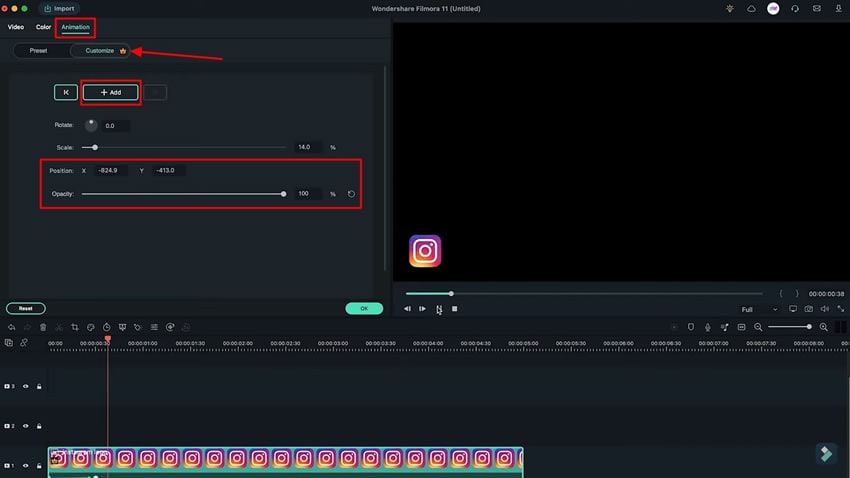
Redirect to the “Animation” tab from the top and make sure that you are on the first frame of the video. Click the “Add” button below the “Customize” section to add a keyframe.
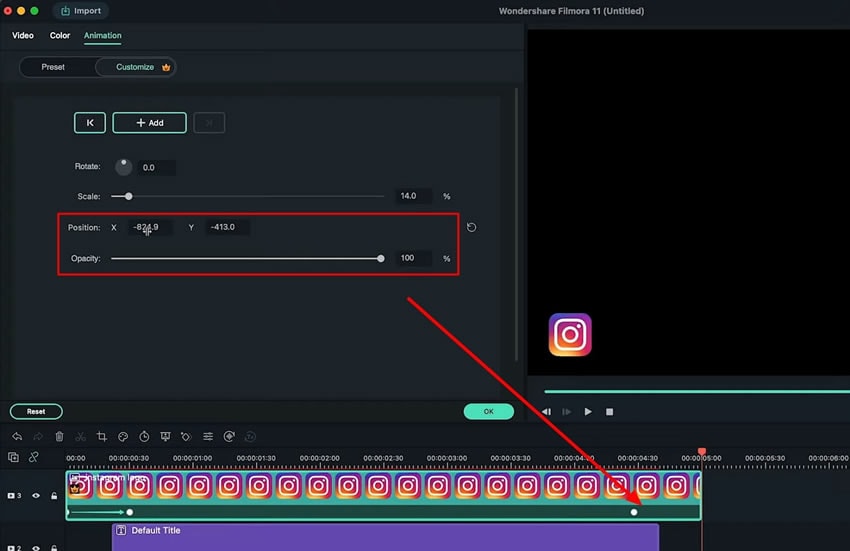
After this, move the playhead to the desired frame and again add another keyframe to it. Lead back to the previous keyframe and change its “X-axis” according to your requirements and move it out of the screen. You can also change the “Opacity” according to your needs. This will make reveal animation effects for the social media lower thirds template.
Go to the "Titles" tab from the top and drag the title you wish to add to the timeline. After placing it on the required frame, adjust its duration and keep a difference of about a second to create space for the social media logo ending animation. Double-click and continue to the "Advanced" settings. Look for different options to customize the title and add text, and change its color and size.
Since this is a social media lower-thirds template, enter the username of your social media accounts. You can use the "Add Shape" button to add the desired shape as the text background. Disable the options of "Text Fill" and "Shape Color" while changing the color of the shape according to the requirements.
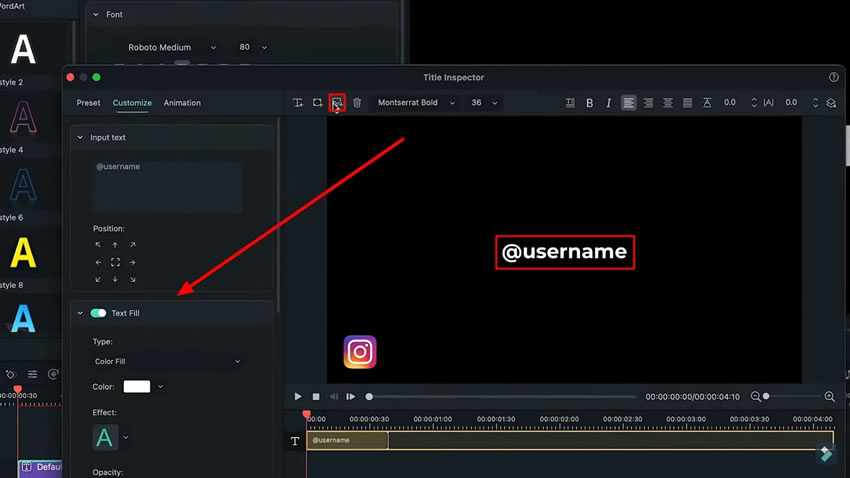
You can adjust the edges of the shape using the yellow dot present on its boundaries. On customizing the size of the added shape and logo, change the color of the text. Proceed to the “Arrange Object” option from the top-right corner and select “Move Forward One” to adjust the layers.
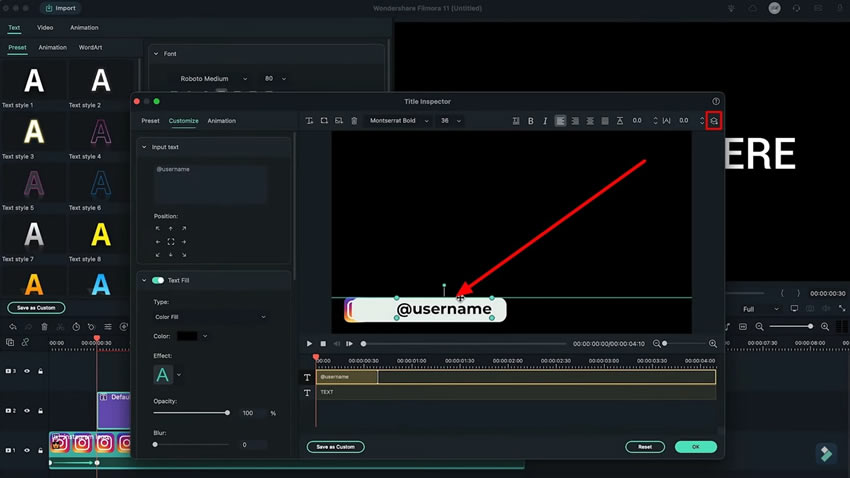
Move the logo layer above the title in the timeline and double-click to adjust the position and size of the logo. Continue to the "Advanced" section and decrease the duration of the title layer to the shape from the timeline. Lead into the "Animation" tab and select the animation you want to add to create a good effect.
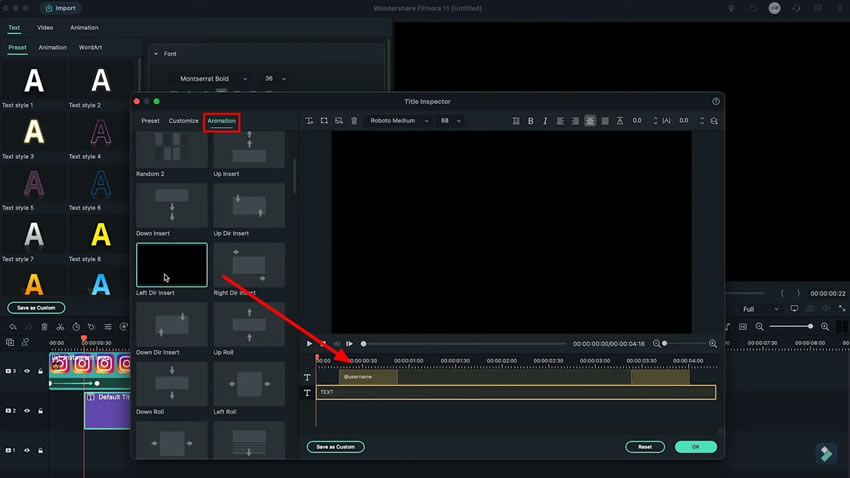
Once done, you will have to create an ending animation logo. For this, look where the text animation ends, and place your playhead on the particular frame. On double-clicking the logo, direct into the "Animation" tab and add a keyframe. Move to the end frame and change the position and opacity per requirements.
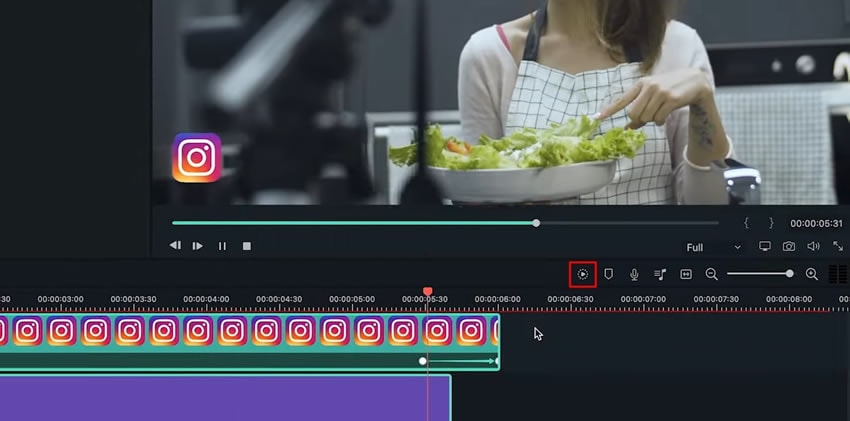
Once you have created the social media lower third, add your footage and adjust accordingly. Use the same tutorial for creating lower thirds for Facebook and Twitter. On completing all edits, click the "Render Preview" button to conclude and export accordingly.
With the help of this tutorial, using Wondershare Filmora, you can now create social media thirds in your video in different styles. This way, you can redirect traffic from one social media platform to another in a cost-effective manner. You can also build your authenticity by being available on multiple platforms through Filmora lower thirds creation.


