
Private Twitch streams, now referred to as Subscriber streams, are a neat way to connect with your most loyal followers and engage with them more meaningfully. However, this is not available to just anyone. In order to be eligible to host private streams on Twitch, you have to be a Twitch Affiliate.
Becoming a Twitch Affiliate might sound easy. Basically, you need to do three things:
- Reach 50 followers;
- Be live and streaming for 8 hours within a 7-day period;
- You need to have an average of 3 viewers while you are streaming;
- All of the above has to be correct in a 30-day time window.
Sounds easy, right? Well, it might be harder than you think, considering the sheer number of active streamers. Getting noticed is challenging, but with a little help from some cool software, you can make it work.
But since you are reading this, you are probably already a Twitch Affiliate, and we are sure that you have some questions. We are here to answer them!
In this article
How to Make a Private Twitch Stream?
If you successfully become a Twitch Affiliate, setting up a private stream for your subscribers is pretty easy. Before you go live, you just need to select Subscribers Only in the Audience section.
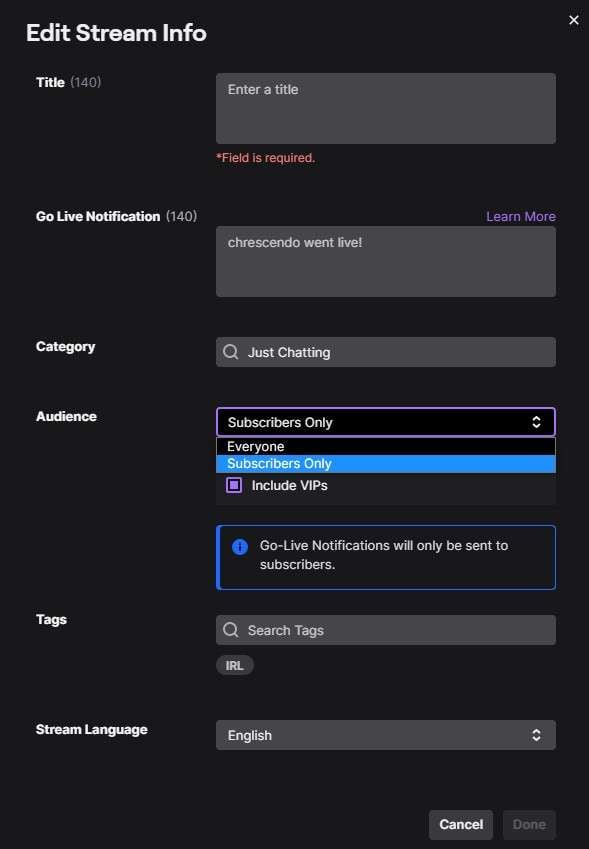
If you have VIPs in your audience, you can choose to include or exclude them. You can see the box you can tick in the screenshot above. However, why should you exclude them? These are your very own VIPs we’re talking about.
In any case, the fun doesn’t stop there.
Collecting Twitch Clips from Subscriber Streams
Twitch clips are an excellent way to engage with your audience. These can be generated by you or your audience. While you are streaming, Twitch allows you and your users to capture your favorite moments and share them on other social media.
These Twitch Clips are great in two ways. First, they give you an insight into what your audience loves most about your work, and second, when you amass a certain number of those clips, you can repurpose them for other platforms to grow your brand and audience.
To do this, you need extensive video editing knowledge. Or do you? There is one way to easily cut and edit your streams and Twitch Clips, and we’ll get into it right away. Spoiler alert! It’s called Filmora, and you’ll love it!
Transforming Private Stream Twitch Clips into Stellar Content
Wondershare Filmora is one of the best (if not THE best) video editors. Its AI features are fine-tuned to suit beginners and professionals alike. Using Filmora, you can use the content you gathered from your private Twitch streams to make exclusive content for your most loyal followers.
This can be anything from special highlight reel videos to exclusive behind-the-scenes footage. It can also be some fun, fast Q&A session or a fan interaction montage. You can also be creative and work on creating something truly unique.
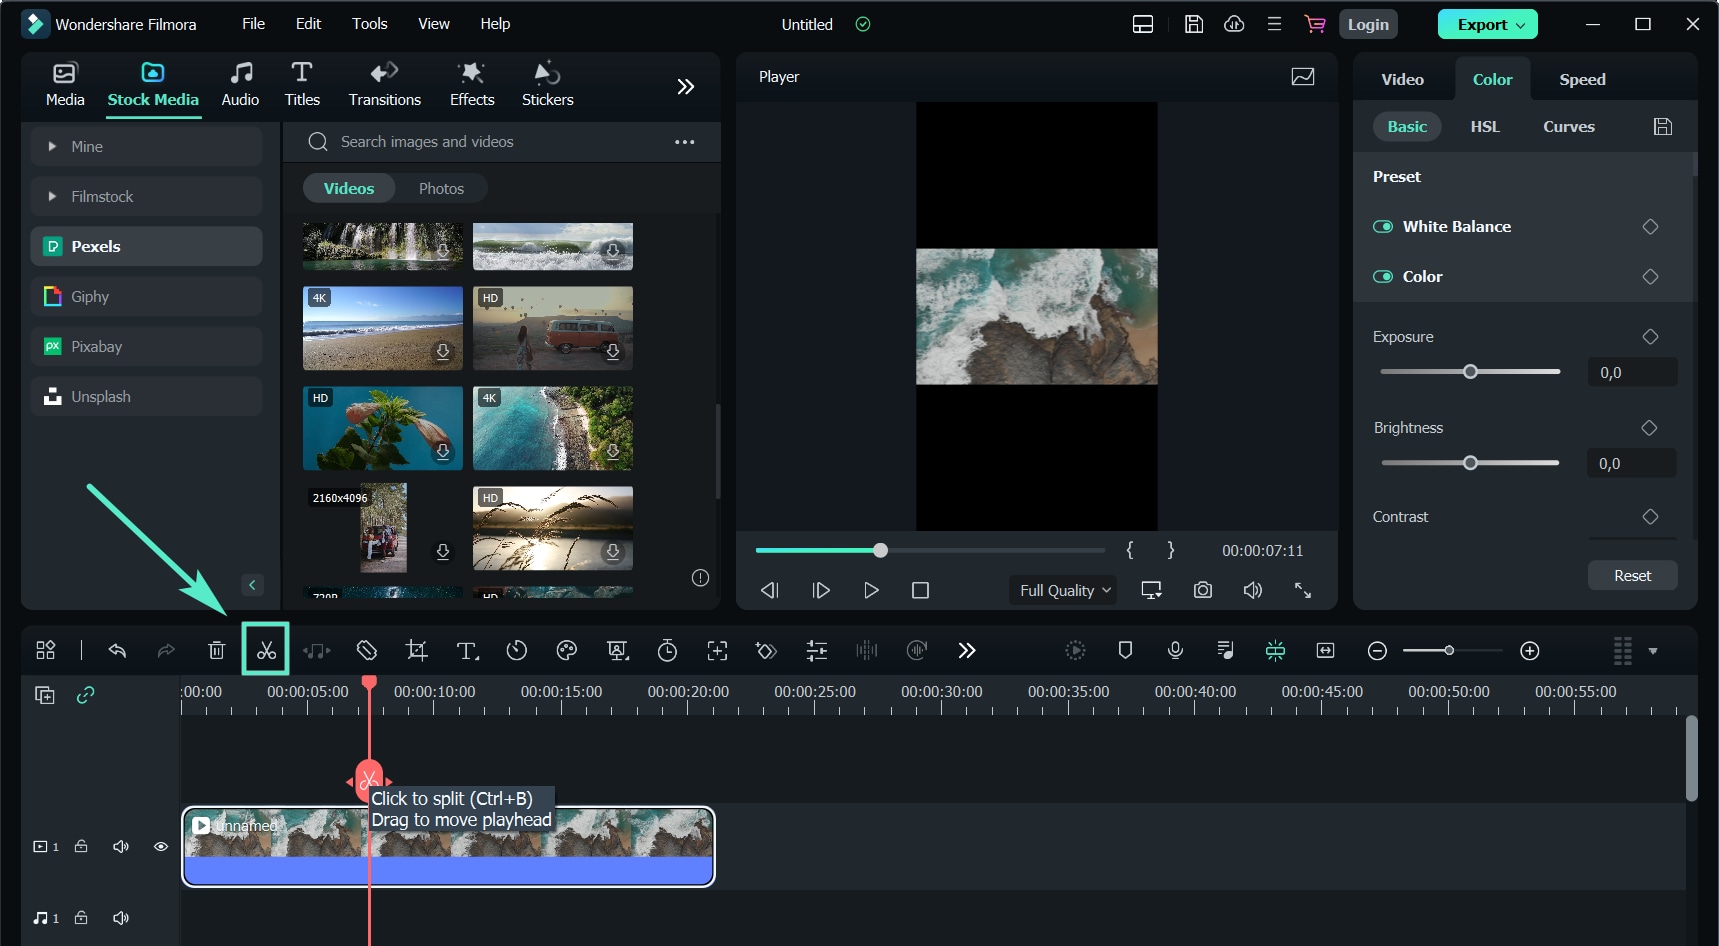
So, first things first. You need to cut long videos up into smaller chunks and trim them to perfection. This is done using Filmora’s Split and Trim functionalities.
To split a video, click on a specific moment in your video in the timeline and click on the Scissors button.
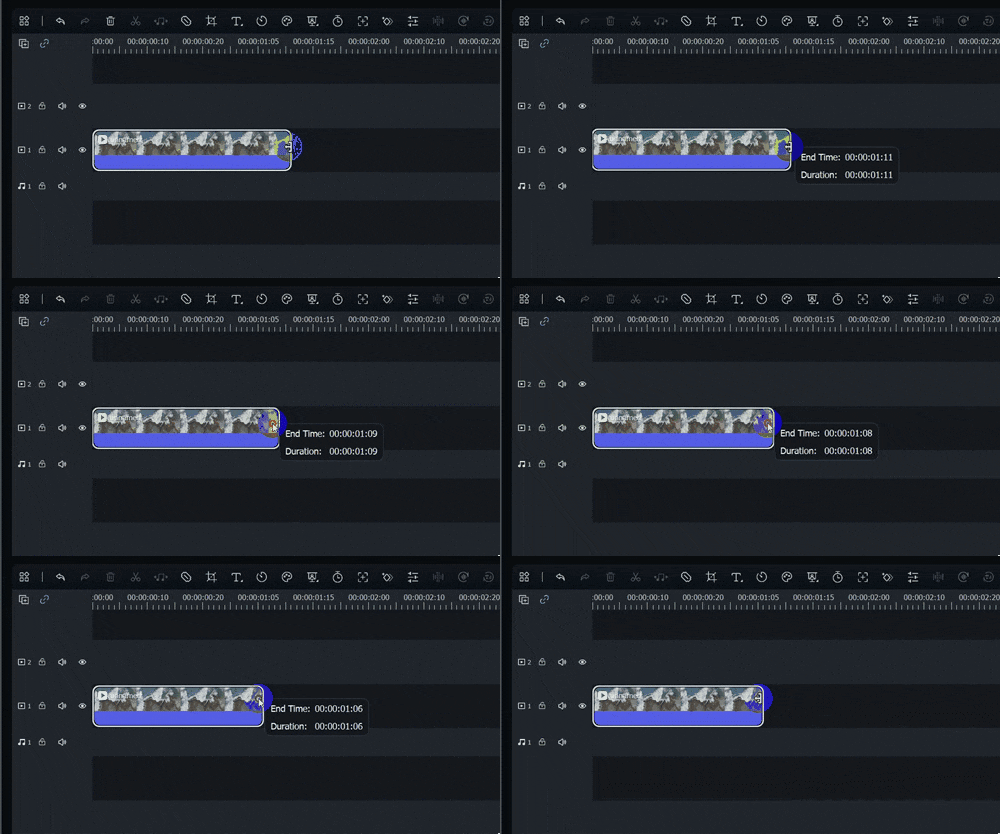
To trim a video, simply move your mouse to the beginning or end of the video file until the Trim icon appears, and then simply click and drag to the left or right.
That was easy. Now, it’s time to make magic happen.
Add effects to videos from your Twitch private streams
Effects make the video stand out. With Filmora, you will have several options to consider. If we were to cover all types of effects you can work with, this would be a long text. We’ll just focus on how to get to them. It’ll be up to you to explore all available options and find something that you like.
Reaching the effects tab and adding them to your video is an easy, two-step process.
Step 1: Find and click on Effects in Filmora’s interface.
Step 2: As the arrow above indicates, simply drag the desired effect to your timeline and place it above the video. Then, fine-tune its location by dragging it left or right to find the perfect moment for the effect to take place in your video.
Add transitions for seamless montages
If you want to combine two videos, cutting between two scenes abruptly is not the best choice. The best choice is to add transitions. If you are using Filmora, you can find the Transitions tab right next to the Effects tab you found earlier.
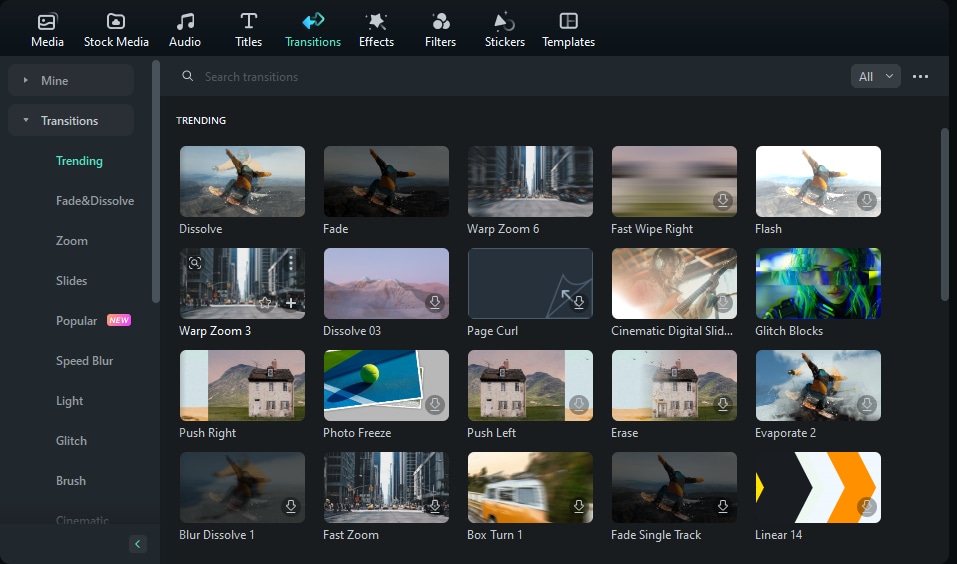
The process now is very similar to adding effects. Find a transition effect you like and drag it to an adequate place in the timeline. If you want to add a transition between two scenes, add the transition effect between those two clips.
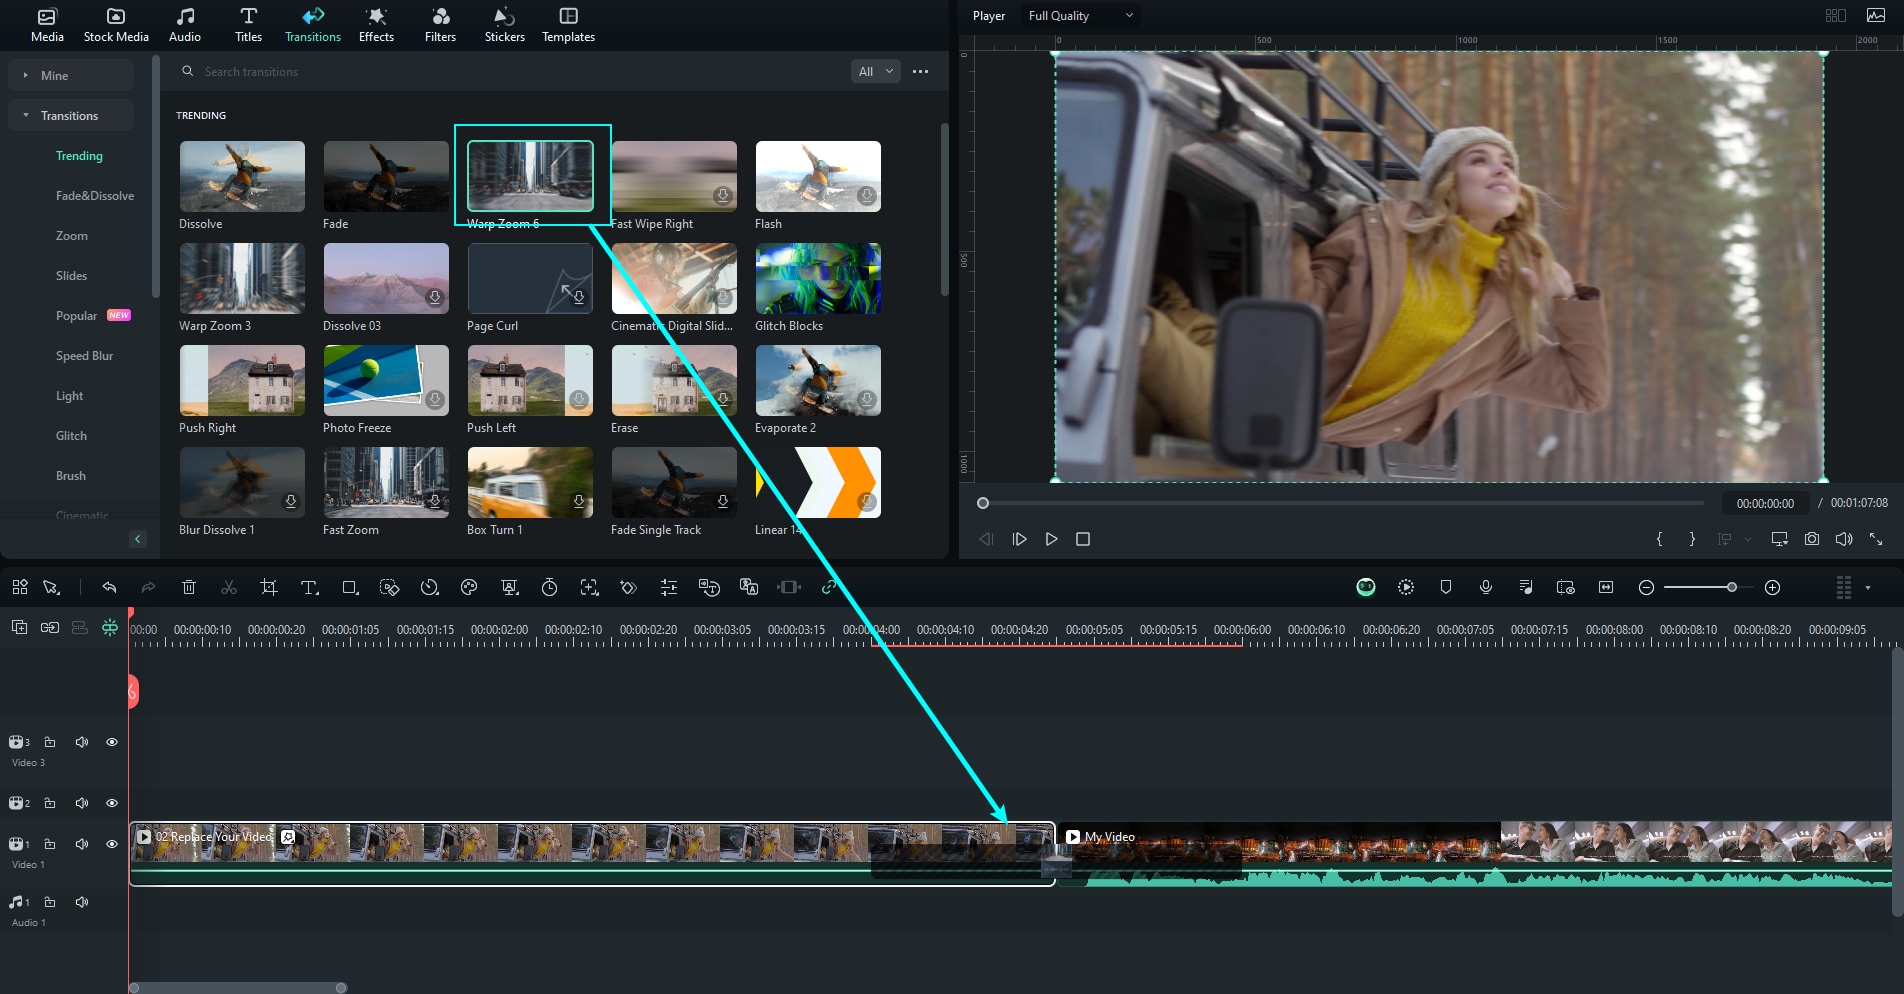
These transitions are perfect for combining the best clips from your private Twitch streams into one longer video for YouTube. Such videos are excellent for attracting more people to your Twitch streams.
Add stickers to your video for a fun twist
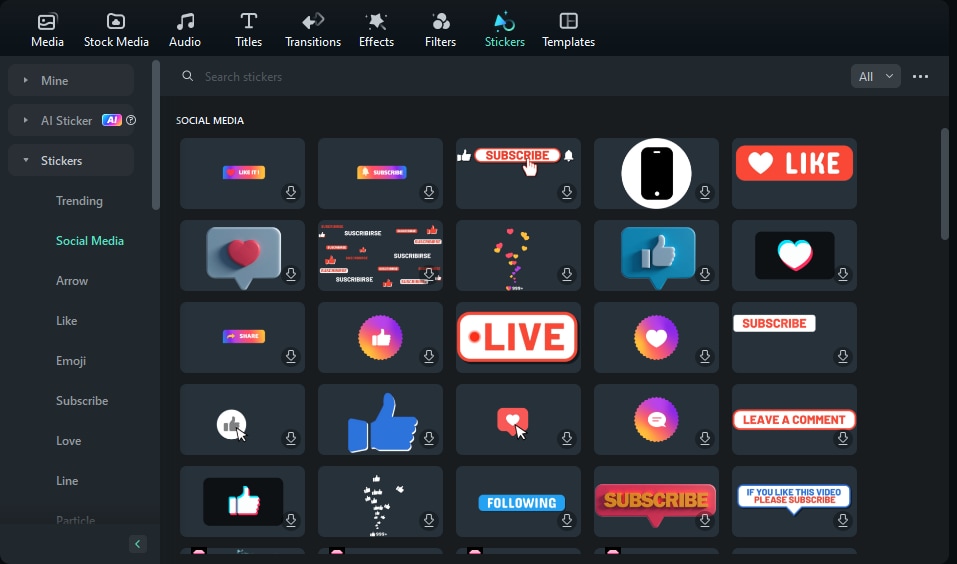
Stickers add color to your video. They are excellent if you want to attract a younger audience and expand your viewership demographics. Also, if you want to accentuate certain moments from your clips, you can find stickers that will do a good job.
It’s exactly the same as adding effects and transitions. Just find the Stickers tab and select something you like.
Then, drag the sticker to the timeline.
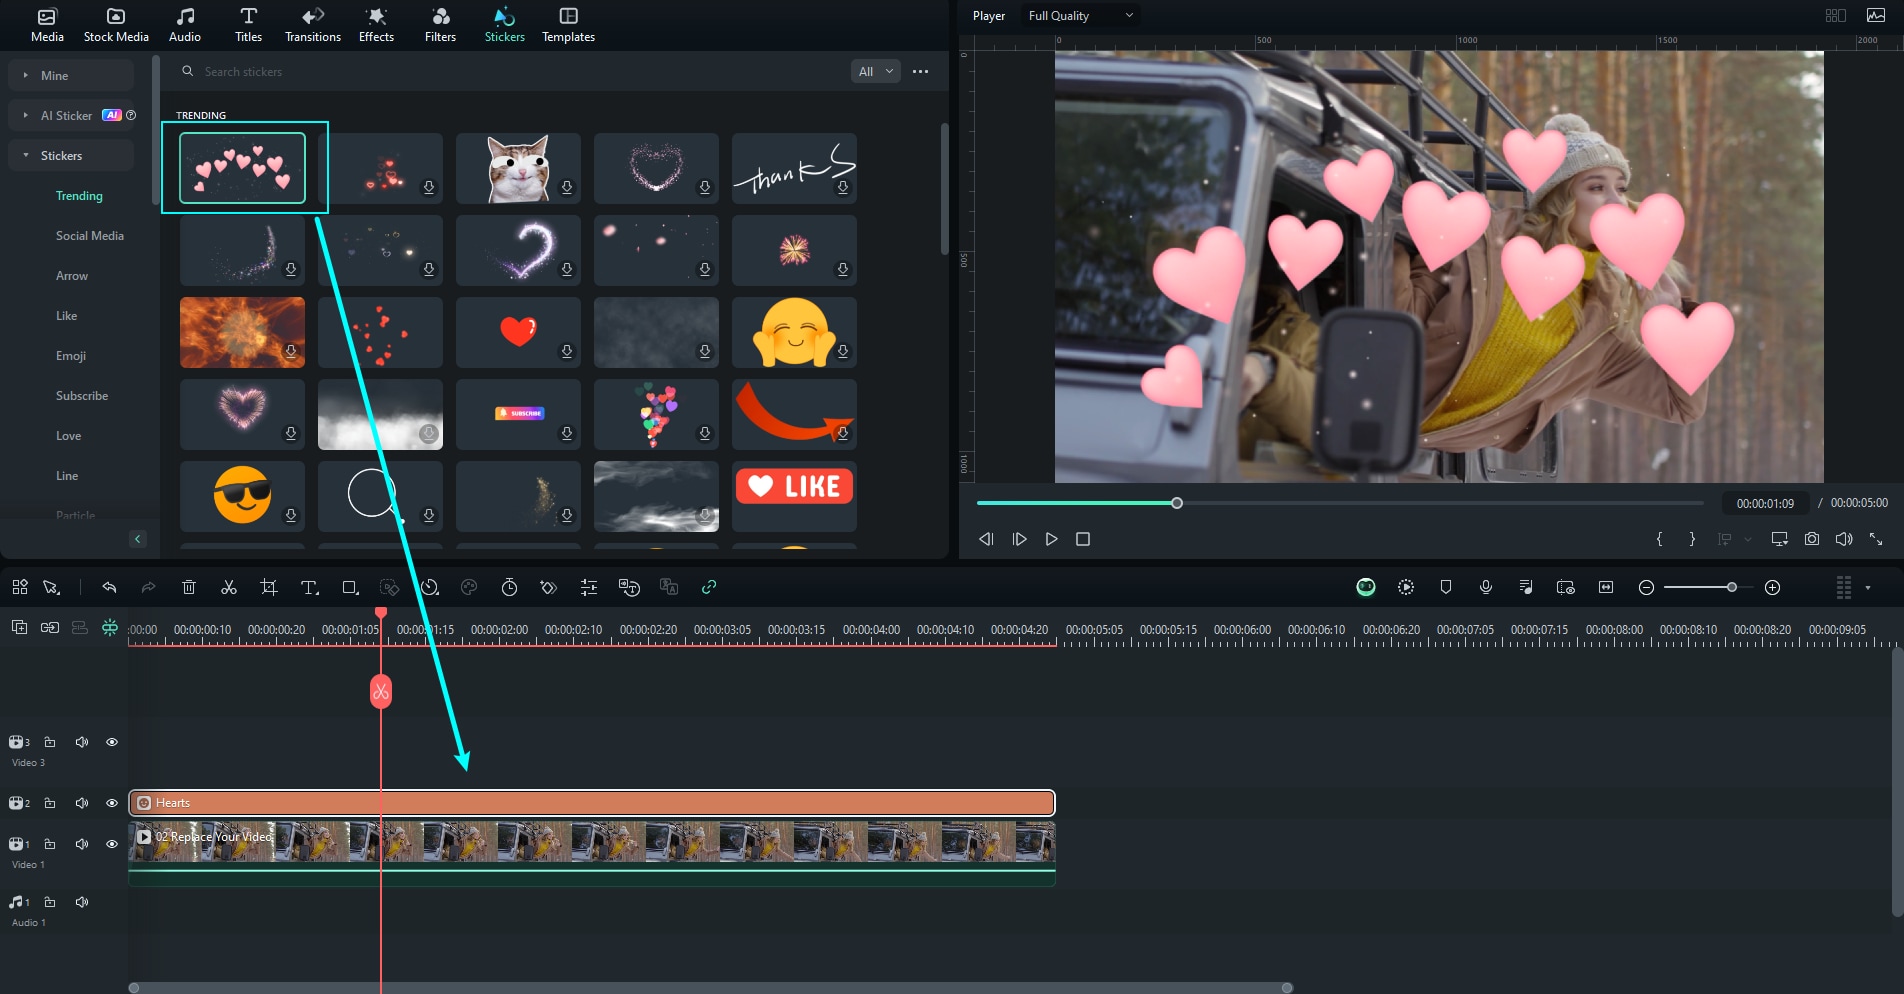
You can spend days exploring and experimenting with Filmora’s effects and options. Getting to know this software is easy because the interface is clean and easy to navigate. But there’s more in store for you.
Use Fimora’s Smart Short Clips AI feature
Imagine that you had a long Subscriber Stream on Twitch. You have the recording of your entire stream, but you cannot find the time to skim through the footage and identify the best moments to create short clips. That’s where Filmora’s Smart Short Clips AI feature comes into play.
Follow these steps to let Filmora help you out with this task.
Step 1: You can find Smart Short Clips the second after you boot up the program. Double-click on them, as shown in the image.

Step 2: A simple interface will appear, as you can see below. You can drag & drop your stream video there, or you can click to upload from your device.

Step 3: Here you have some options. You can select the language of your video, the duration of the clips you want to create, and the overall theme.

Step 4: This step is optional, but you can check the advanced settings, where you can select the aspect ratio for the output clips. You can also activate Smart BGM Generation and add main topic keywords if you want the software to focus on something specific.
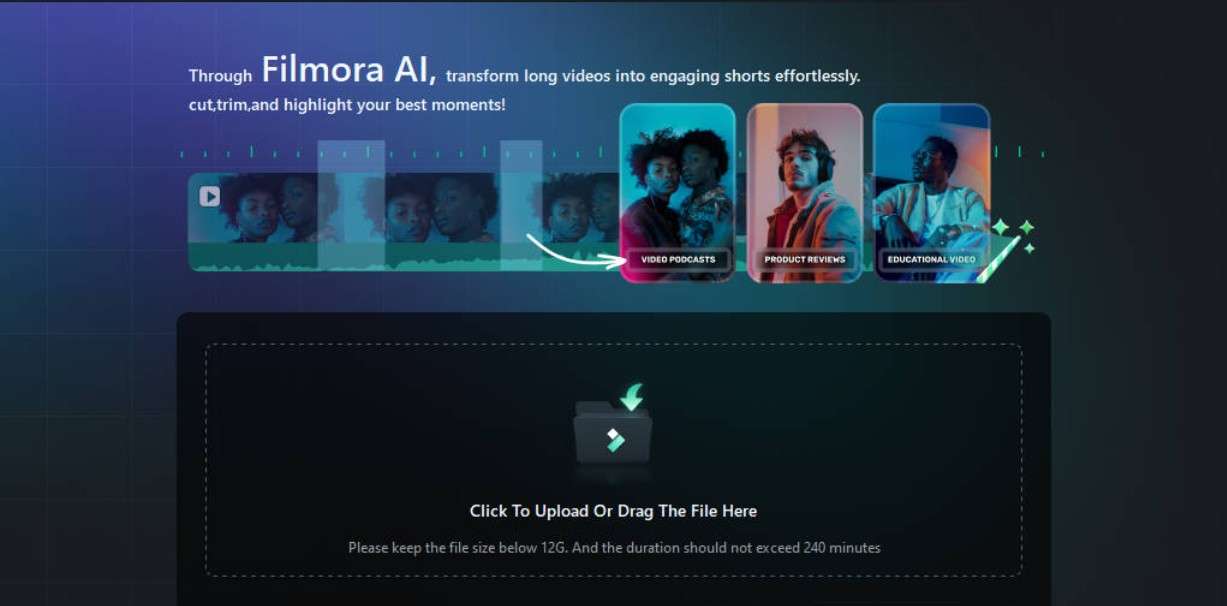
That’s it. Now, you just click on the green Generate button and wait for the process to finish. When you are done, you will be left with something like this.
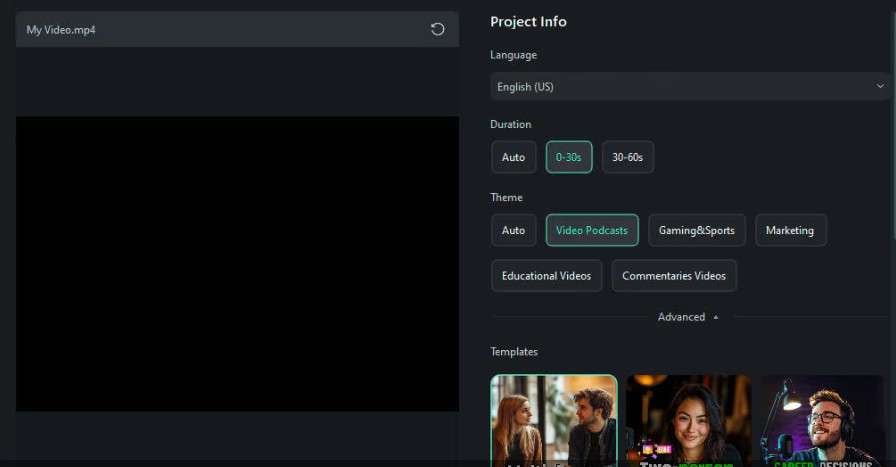
All that’s left is to check the work done by Filmora’s AI feature and Export those videos that you like.
With all these tools at your disposal, making videos that engage your VIP audience will be a breeze. Just make sure to announce that you are working on this during your stream. Let your viewers know when and where to expect these new videos.
Conclusion
Being a successful Twitch streamer is not easy. It takes time and persistence to make this a viable career path. If you can have some help along the way, you should use it, particularly if it comes free of charge or with a small subscription fee for advanced features. In the end, the best piece of advice is never to give up, learn from your mistakes, and improve bit by bit each day.


 100% Security Verified | No Subscription Required | No Malware

