How to Use the Audio Ducking Feature in Filmora
Do you often experience low or dull audio in videos where you’ve also embedded the background music? Since background music makes your videos more interesting, you can't ignore them immediately. Wondershare Filmora can help you overcome this situation through audio ducking, and this tutorial will help you move forward.
Transcript
Now, the audio ducking feature is useful, especially when you're working with video that has voiceover narration and music. The reason is you may want the music lowered a little bit without you having to adjust or use manual keyframes but automatically by audio ducking.
That is, you emphasize the voiceover, and the music is ducked down; so that people can hear what is going on. Now, it's pretty simple; I already have my music available. But let's import some media. Let's say we go with these three videos; let's just add this one, add this one and add this one.
Just the clips of me talking, nothing relevant whatsoever. Now they look good. I can't complain, so what we need now is probably just to play a little bit. Actually, let's just move them back to the beginning. Let’s play. The volume is a little bit down, but that's not an issue whatsoever. And you can still adjust using the sliders.
Let’s say we go up, let’s say 4.29, 4.29. Well, look good, but you can still use the other audio options. So that's the video, that's audio. Now, let's get some music. Let's add some music down here, and if you go back to the start. So, let’s assume you feel like the music is too much.
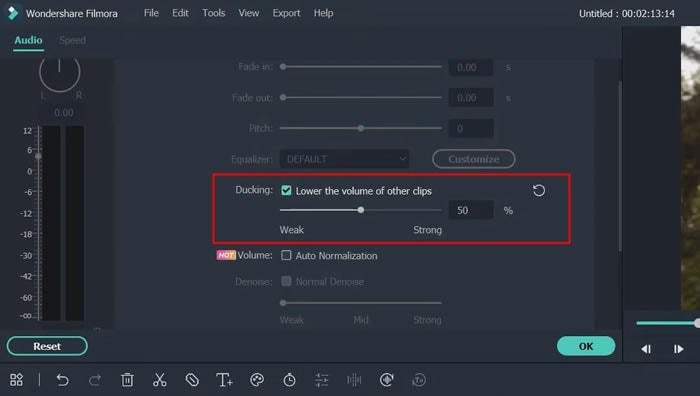
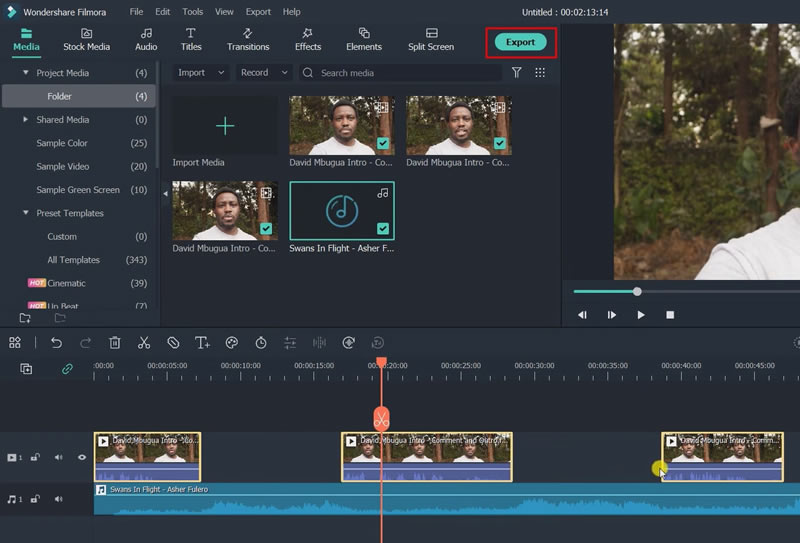
Now, instead of having to lower the volume here or maybe even adding keyframes, you can use the audio ducking feature in Filmora. So, what we're going to do, we're going to highlight our clips. Right-click and then “Adjust Audio.” Now once we do that, you'll get to the “Audio” section here, and you can see a couple of options.
These are grayed out because you cannot use them as it is. But we have the “Ducking” option. Lower the volume of other clips, so if you check this box, check it, you’ll see what happens to our audio or the music down here. The volume is going to be lowered.
Now, you also have the option to set the weakness and the strength of that particular duck that you want to add to your audio. Now let's go with the default. Let's reset at 50%, then listen to this particular clip, and we can make our judgment.
Now it looks good, but let's try and see if we can actually change something of that sort. Add some separation of sorts and see what happens. Let's just select the clips again and right-click. Actually, if I notice something, the audio levels come up right here. Actually, it's automatic, so let's go back.
Now it looks good, but let's try and see if we can actually change something of that sort. Add some separation of sorts and see what happens. Let's just select the clips again and right-click. Actually, if I notice something, the audio levels come up right here. Actually, it's automatic, so let's go back.
So that you don’t really have to keep adding keyframes or lowering the volume individually for each and every section. So that is how you can use the audio ducking feature in Filmora to lower the volume of other clips automatically in Filmora.
How to Use the Audio Ducking Feature in Filmora
What you need to prepare:
- A computer (Windows or macOS)
- Your video materials.
- Filmora video editor
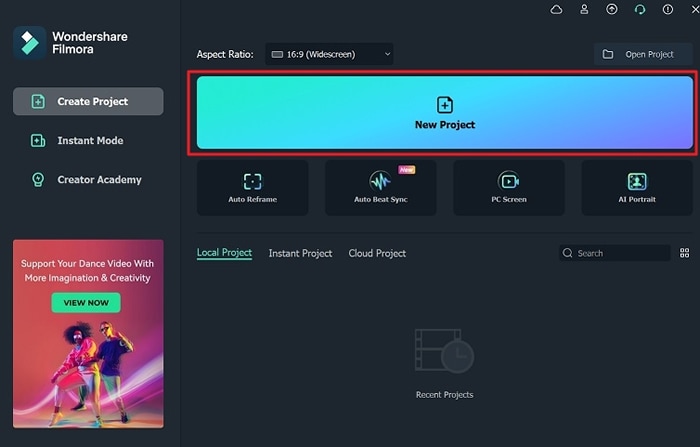
Start Wondershare Filmora
You can start using it immediately after downloading and installing Wondershare Filmora on your device. The initial interface will interact with you with three options, including “Create Project,” “Instant Mode,” and “Creator Academy.” Since you want to adjust the soundtrack in your video, click on the "Create Project" option.
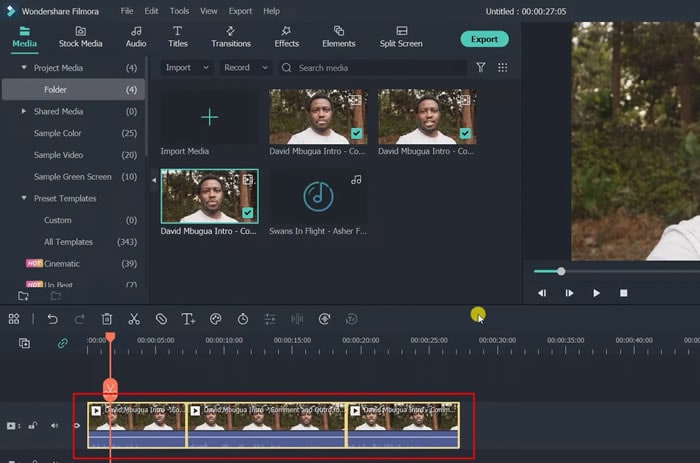
Import Your Media File
You’re required to upload your media to the Filmora software. This is done by navigating the "Media" section at the top left of your screen, where you'll press "Import Media." Upload the music you want along with your video.

Add Media To Timeline
After importing all the media items, you will use in your video editing process, drag your required videos and audio into the project timeline.
Adjust the Sound Settings
Firstly, you'll highlight your videos and right-click. Press the "Adjust Audio" button to open the options for voice adjustment. However, the options that are available in grey can't be used. After scrolling down, you’re required to checkmark the "Ducking" button. Now, you can easily adjust the sound weakness and strength as required.
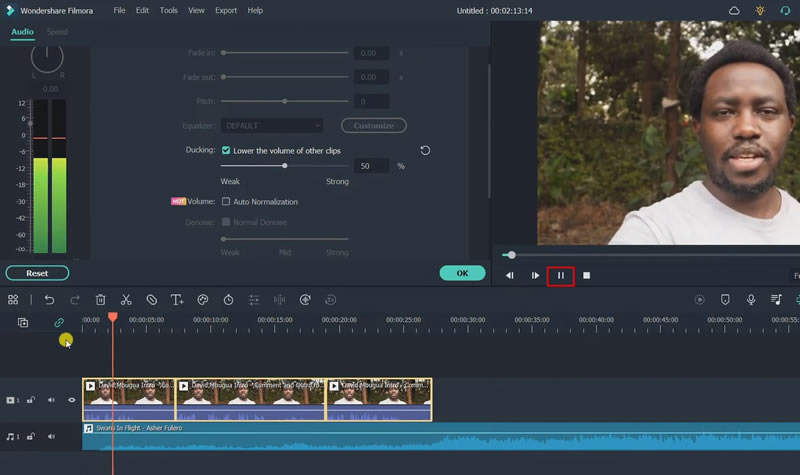
Play Your Video to Check
Since you've already applied the audio ducking feature, it's time to test the video by clicking on the “Play” icon.
Save the Edited Video
If you’re satisfied with the ducking feature in your edited video, you can now move ahead by downloading the video. This is done by clicking the "Export" button at the top of the screen. You can also view your video length, size, and resolution on this page. Finally, download your new video after choosing the desired file location on your device.
Audio ducking is a great way to lower the background sound in your video when required. Majorly, people don't know about this voice control technology, and even if someone does, more likely he/she doesn't know how to implement this functionality in videos. This tutorial offers a comprehensive implementation guide for anyone who wants to use Filmora for the audio ducking feature.


Speak Your Mind