Transcript
So, in today's video, I’m going to tell you how you can make a visualizer in Filmora. Now we will edit and watch one video with the visualizer here.
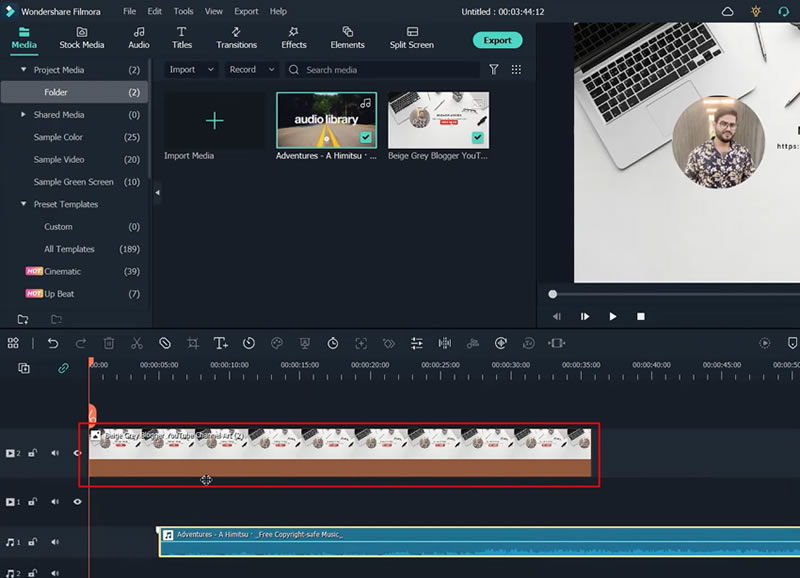
Thus, here, first of all, we will select a background picture for our music. So as you can see, we’ve selected our background picture here. After this, from "Media," we will select any of our music. So here, we’ve also added our music.
Afterward, we will select them into our timeline. Here we will play it.
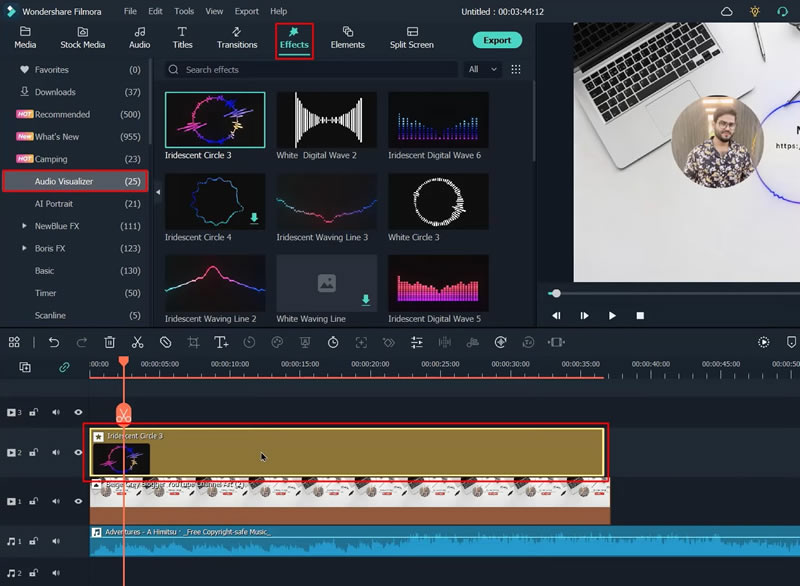
Now we will click on the "Effects" button, and here we get an option of "Audio Visualizer." Here we will watch it by using it. So here, we get a lot of options, and you can select anyone to watch. Here you've to drag the one which you want to select.
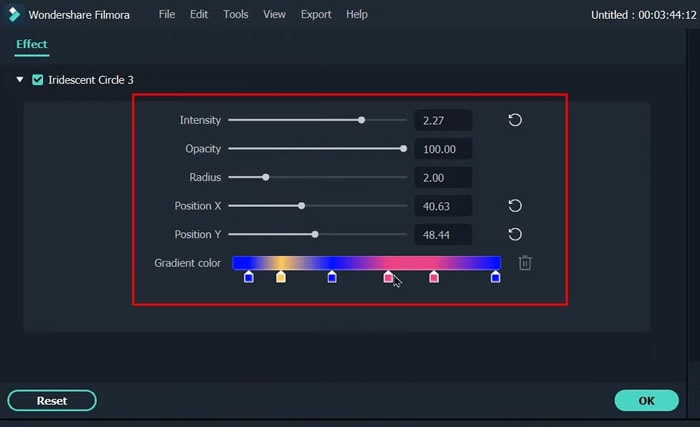
Right-click, and you can also increase or decrease its size or change its position. For this, you've to right-click and click on "Edit Properties." Here you can change its position. Further, adjust its setting. Here you can watch it by playing.
We will use more effects on it. We will also change the color and change its position after it. You can also rotate it from here. We will reduce its size a bit and increase its length a little. Now let's play it again to watch.
We will add more effects to it. This way, a lot of options are available that you could add to your audio. You can also see this. You can adjust all of its settings very easily. Let’s add one more effect to it, which is in white. You can customize it very easily.
So this way, you can add a visualizer to your audio.
How to Make Audio Spectrum in Filmora - Tutorial
What you need to prepare:
- A computer (Windows or macOS)
- Your video materials.
- Filmora video editor
Import Required Media
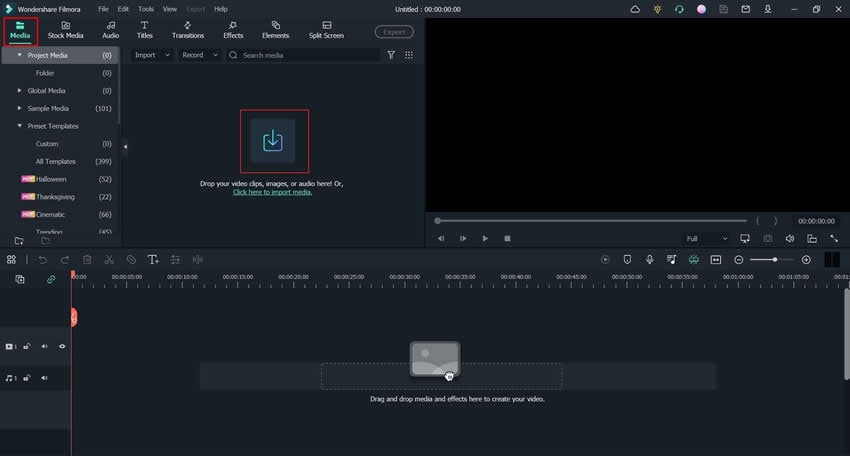
To begin your video editing with respect to the audio spectrum, first, you've to import your background picture and audio. For this, click on the "Media" tab from the top-left and select the "Import Media" button to import your background image and audio clip to Filmora.
Add Selected Media to the Timeline
Your background image and audio are already imported. Now drag them to the project timeline below to continue editing further. You can add them to the timeline by clicking the "+" icon on your audio and image.
Implement Visualizer Effect on the Project
Click the "Effects" tab from the top of your screen, and you'll see various categories of effects on your left. Scroll down, select the "Audio Visualizer" category, and you'll see multiple options to choose from. Select your desired effect that looks suitable to your project and add it to your timeline below. Adjust its timeline duration as per your requirements.
You can add as many effects as required from the given options in the "Audio Visualizer" category. There isn't any limitation or anything like that.
Edit the Effects Dimensions
Right-click on your effects track from the timeline, select "Edit Properties," and you'll see an editing window appearing on top. Now, you can edit your selected effect with customizations like “Intensity,” “Opacity,” “Radius,” “Position,” “Color,” etc. If you’ve multiple effects and you want to edit them, continue repeating this process. Click “OK” once you’re done with the changes.
Save the Video to Your Device
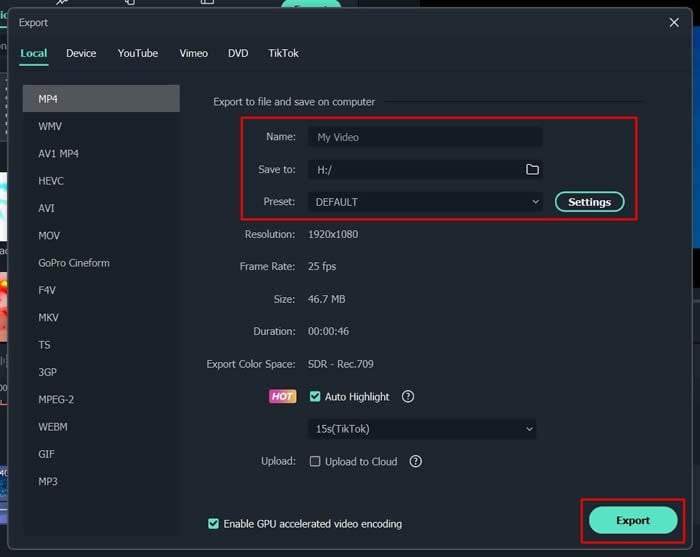
Now press the “Export” button from the top, select the name for your video, and choose the location where you want to save this file on your device. Finally, click the "Export" button again, and your new video will be successfully saved.
Audio problems within the videos happen often, and the major reason is mostly synchronization issues. Hence, the thrill and spark of that video would automatically disappear, causing the audience to lose interest. Following this simple and easy tutorial on Filmora, you can apply and edit audio spectrum effects to all your essential videos with professional instructions.


