-
Guide On How To Create Dr. Strange Effect In Video Through Filmora
-
Guide On How To Create Audio Visualizer in Filmora
-
Guide On How to Add Smoke Effect in Filmora
-
Tutorial On Smooth Blur Transition in Filmora
-
A Simple Photoslide Tutorial With Slideshow Effects In Filmora
-
Isolate Color Effect Or Selective Color Effect In Wondershare Filmora
-
Guide On How To Add Dr. Strange Effect In Video
-
How To Make Snap Video – Filmora Tutorial
-
Guide On How To Edit Coin Magic Tricks With Filmora
-
How To Get Explosion Effect On Your Video Using Filmora
-
Creating Seamless Typography Animation with Filmora 1202:11
-
A Guide to Creating Looping Text Animation With Wondershare Filmora02:11
-
Tutorial - Create 3D Photo Zoom Effect in Filmora02:11
-
Filmora Tutorial – Setting Up The New Dynamic Countdown Timers02:11
-
5 Essential Video Editing Tips You Must Know On Wondershare Filmora02:11
-
Performing Next-Level Editing With Ready-Made Templates on Filmora 1202:24
Tutorial – How to Make Fast Speed Effect Like The Flash With Filmora
What you need to prepare:
- A computer (Windows or macOS)
- Your video materials.
- Filmora video editor
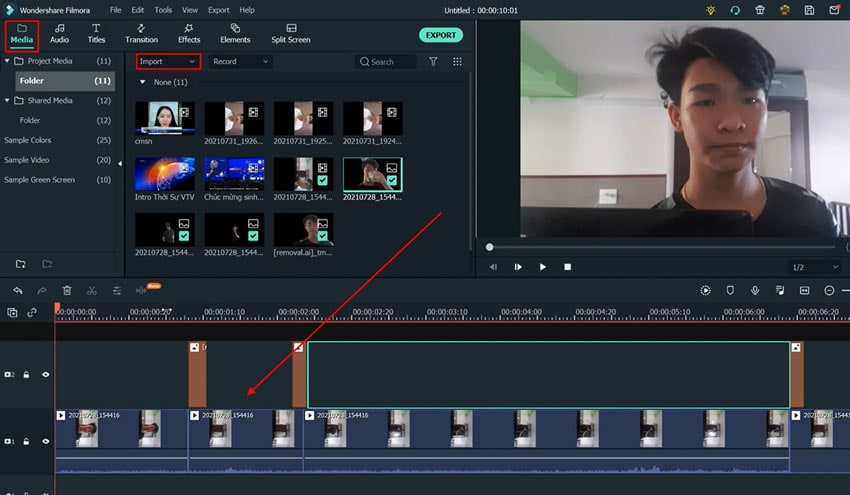
Start Filmora and Import Media
After starting Filmora on your computer, begin your editing process by importing the required video and image files. For this purpose, click the "Media" bar from the top-left and press the "Import Media" button. Once your media is imported, drag it to the project timeline below.
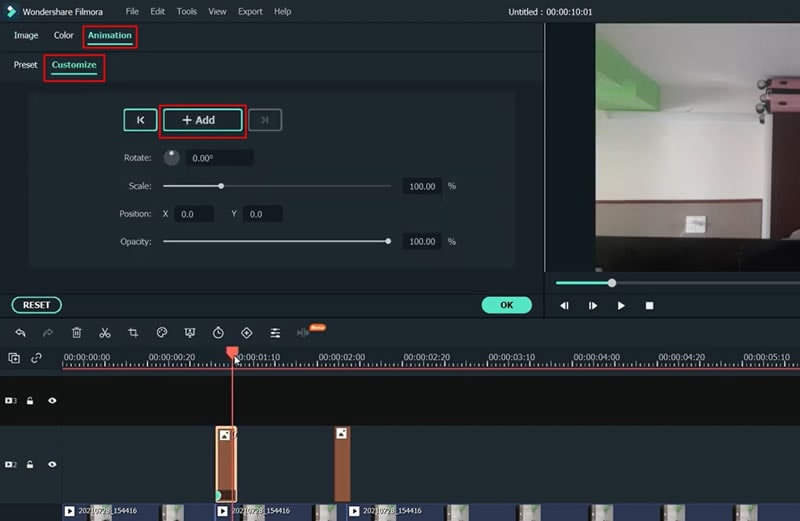
Apply Keyframe Animation to the Image
If you want to apply animation to your image, adding a keyframe is the right thing. So, double-click on your image track, and from the available window, select "Animation," and press “Customize.” Now position your playhead on the image, and finally, press the "Add" button to add the animation keyframe. You can also edit the animation with provided customizations through different scales.
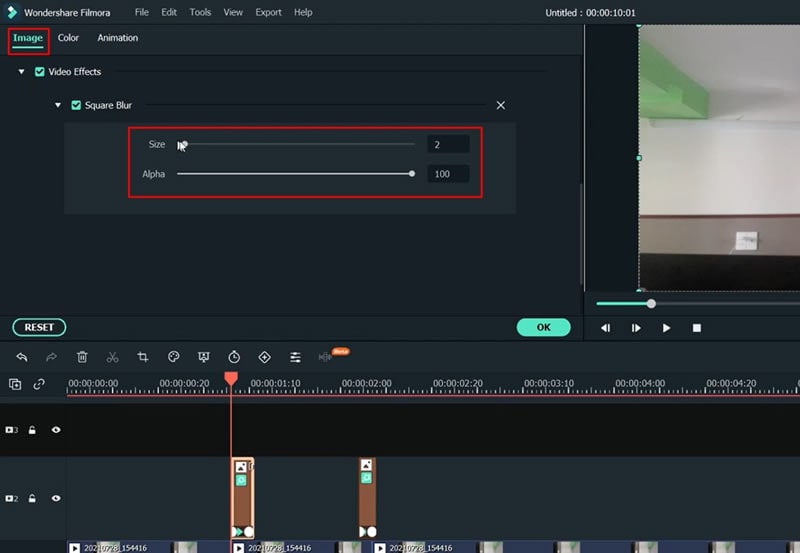
Integrate Effects to Visualize Project
Move into the “Effects” bar from the top and choose your desired effect from the given options. After this, add the selected effect to the image track on your timeline.
To edit the effect, double-click on your image track to see an editing window in front of you. Now navigate into the "Image" menu, scroll down and click "Video Effects," and now turn on the "Square Blur" option. Thus, a blur effect is applied to your image, and you can also edit it using "Size" and "Alpha" customizations.
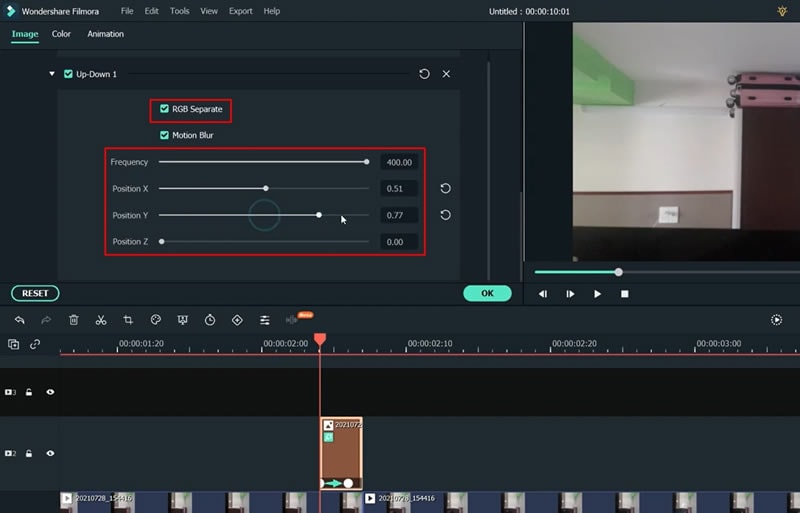
From the "Video Effects," you can adjust the "Up-down 1" customization by clicking on it and adjusting frequency and position. With this type of effect, make sure to turn off the “RGB Separate” option. You can apply as many effects to your image and video tracks as required.
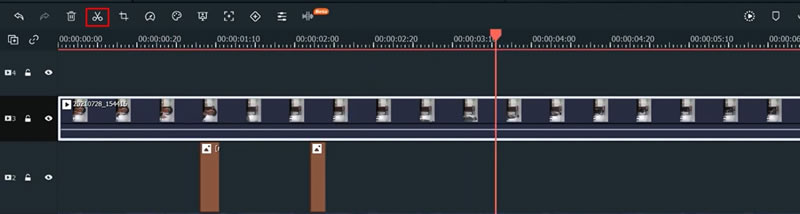
Trim All Unwanted Track Durations
While adding different images, videos, or effect tracks, you may notice that their duration is not similar in the timeline. It's where you can trim the unwanted duration in the track, and it's possible by using the “Scissor” icon on the playhead. So, by moving it, you can trim all the unrequired parts in different tracks.
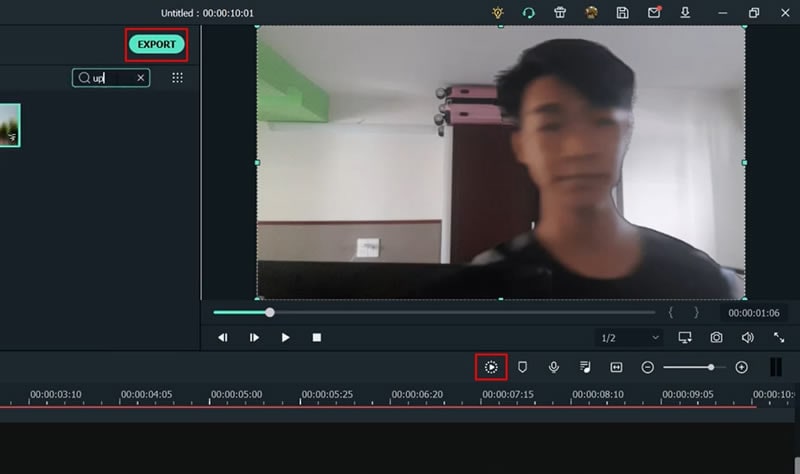
Preview the Final Video and Export
Click on the “Render Preview” icon to witness a smooth playback of your video in HD resolution quality. It's time to save the video to the device. Therefore, click the "Export" button from the top, select the file location, set the video name, and finally, click the "Export" button again to save and download the video.
Flash-like speed effects are always exciting to watch as a viewer. Therefore, adding them to your videos; means you're getting a huge audience engagement as a result. By following this simple and easy tutorial on Filmora, you can also create your Flash effect video in a quick time. Don't worry, even if you don't have video editing experience.


