-
Guide On How To Create Dr. Strange Effect In Video Through Filmora
-
Guide On How To Create Audio Visualizer in Filmora
-
Guide On How to Add Smoke Effect in Filmora
-
Tutorial On Smooth Blur Transition in Filmora
-
A Simple Photoslide Tutorial With Slideshow Effects In Filmora
-
Guide On How To Add Dr. Strange Effect In Video
-
How To Make Snap Video – Filmora Tutorial
-
Tutorial – How to Make Fast Speed Effect Like The Flash With Filmora
-
Guide On How To Edit Coin Magic Tricks With Filmora
-
How To Get Explosion Effect On Your Video Using Filmora
-
Creating Seamless Typography Animation with Filmora 1202:11
-
A Guide to Creating Looping Text Animation With Wondershare Filmora02:11
-
Tutorial - Create 3D Photo Zoom Effect in Filmora02:11
-
Filmora Tutorial – Setting Up The New Dynamic Countdown Timers02:11
-
5 Essential Video Editing Tips You Must Know On Wondershare Filmora02:11
-
Performing Next-Level Editing With Ready-Made Templates on Filmora 1202:24
Transcript
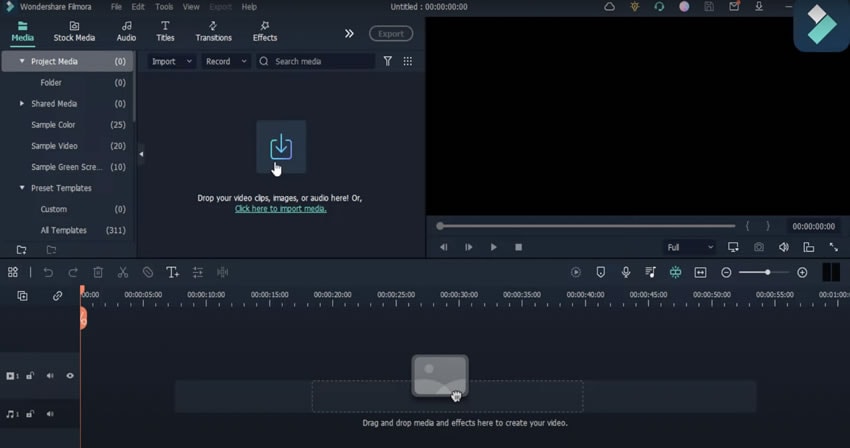
Click on this New Project Button to start the process. You can import your media files from here or you can also do this from the Stock Media.
I want to isolate this video so I download it from the Stock Media and add it to my media. As you can see, before isolation all the colors are stable and all the themes are well.
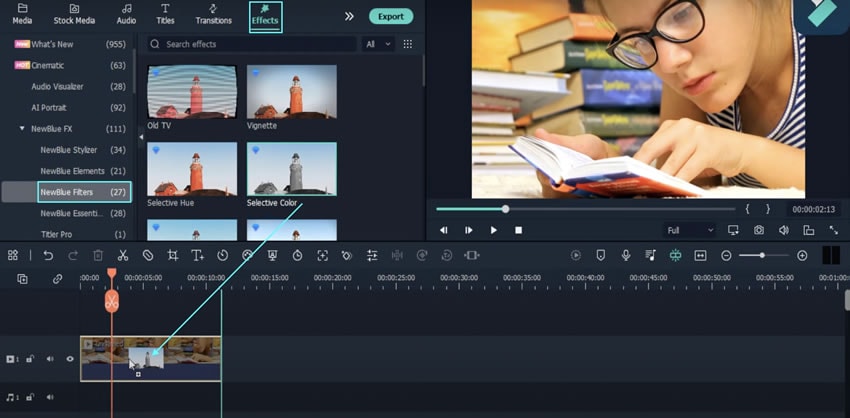
So, I click on this Effects section and then click on this NewBlue FX effects. Then I will add the NewBlue filters to it. Here is an option like Selective Color. I drag and drop it into my video. As you can see, all the themes are isolated now.
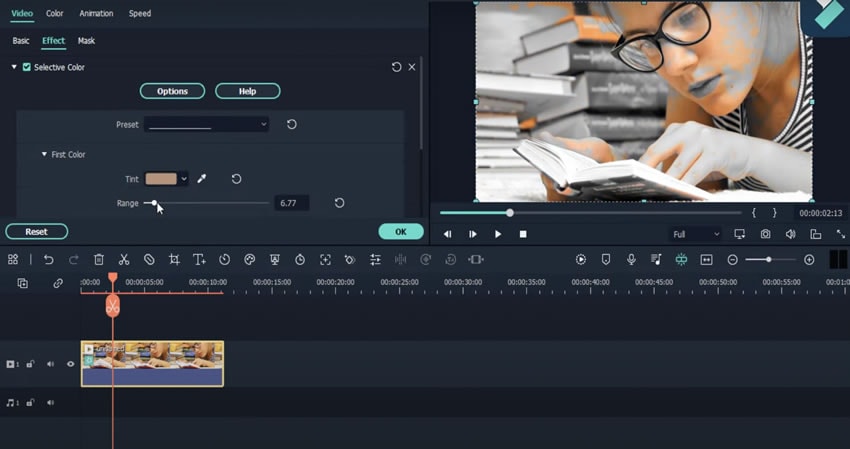
I double-click on this and then click on this Compositing. Then click on this Effects option. Then I choose the preset Flash Tones. Then I choose our first color and choose the theme according to it. You can also choose the second color option here.
Isolate Color Effect Or Selective Color Effect In Wondershare Filmora
What you need to prepare:
- A computer (Windows or macOS)
- Your video materials.
- Filmora video editor
The first step is to simply go to the Wondershare Filmora website and download the Filmora video editor. Once you’re done with that, run the program and click on Create New Project.
Next, you need to import your video to the editor. Simply click on Media in the top-left corner and then click on Import Media. Select your file and click OK. Then, just drag that video clip to the Timeline near the bottom of the screen.

Go to the Effects tab → BNewBlue Effects and then drag the Selective Color effect on top of your video clip in the Timeline.

Double-click on the video clip in the Timeline. Then, check the Compositing box. Next, move to the Effects tab in the same window. Under Preset, select which color tones you want to keep on the video. Then, below that, you can adjust more color shades to further customize your color isolation process. Just play around with it until you find a preset that works.

And you’re done! You’ve just created a color isolation technique on your video in Filmora in just a few minutes. It’s a very simple process that you can adjust and edit until it’s perfect.


