-
Guide On How To Create Dr. Strange Effect In Video Through Filmora
-
Guide On How To Create Audio Visualizer in Filmora
-
Guide On How to Add Smoke Effect in Filmora
-
Tutorial On Smooth Blur Transition in Filmora
-
Isolate Color Effect Or Selective Color Effect In Wondershare Filmora
-
Guide On How To Add Dr. Strange Effect In Video
-
How To Make Snap Video – Filmora Tutorial
-
Tutorial – How to Make Fast Speed Effect Like The Flash With Filmora
-
Guide On How To Edit Coin Magic Tricks With Filmora
-
How To Get Explosion Effect On Your Video Using Filmora
-
Creating Seamless Typography Animation with Filmora 1202:11
-
A Guide to Creating Looping Text Animation With Wondershare Filmora02:11
-
Tutorial - Create 3D Photo Zoom Effect in Filmora02:11
-
Filmora Tutorial – Setting Up The New Dynamic Countdown Timers02:11
-
5 Essential Video Editing Tips You Must Know On Wondershare Filmora02:11
-
Performing Next-Level Editing With Ready-Made Templates on Filmora 1202:24
Transcript
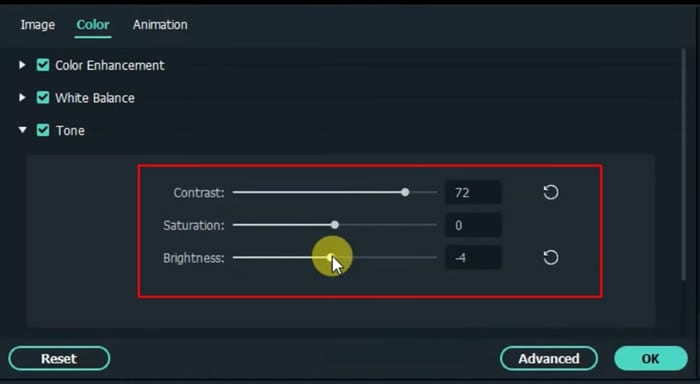
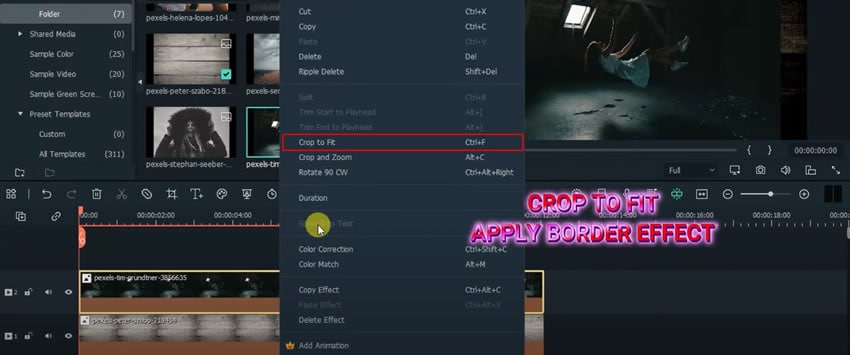
In this tutorial, I have six pictures with a background. So, drag down your background and adjust the color to make it darker. Now drag down the first picture. Extend to match the background. “Crop to Fit” if necessary and apply the “Border” effect, and edit as shown on the screen.
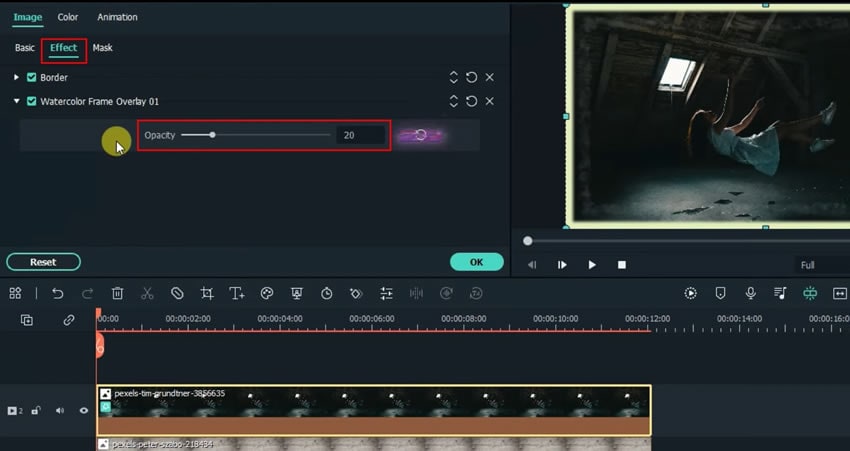
Apply “Watercolor Frame Overlay 1” and reduce the “Opacity” to 20. And also, apply “Drop Shadow” and adjust accordingly.
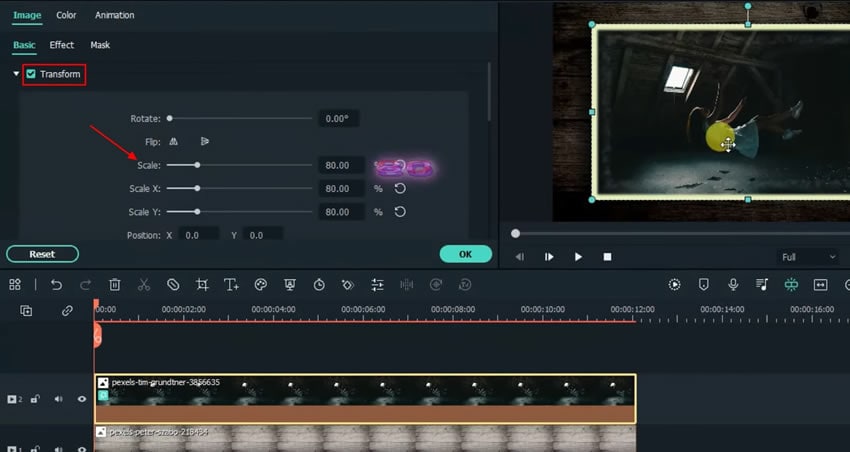
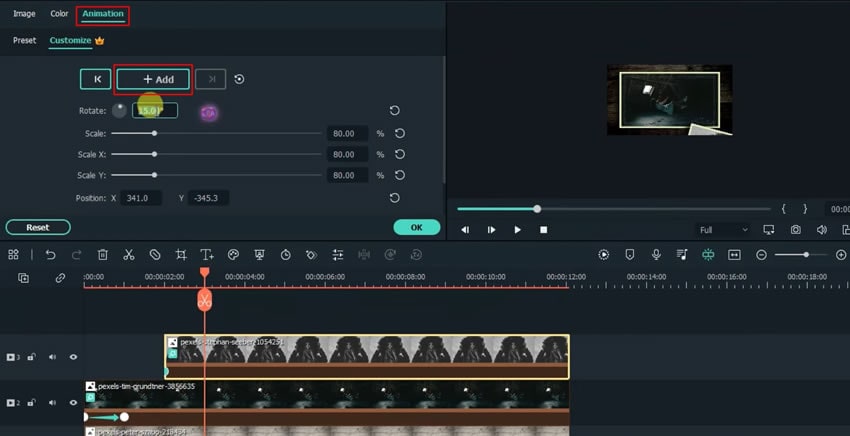
Click and go to “Transform” to scale down to 80%. Go to the screen, and right-click to reduce the zoom level to 10%. Afterward, drag down the picture on the screen to the right. Animate accordingly.
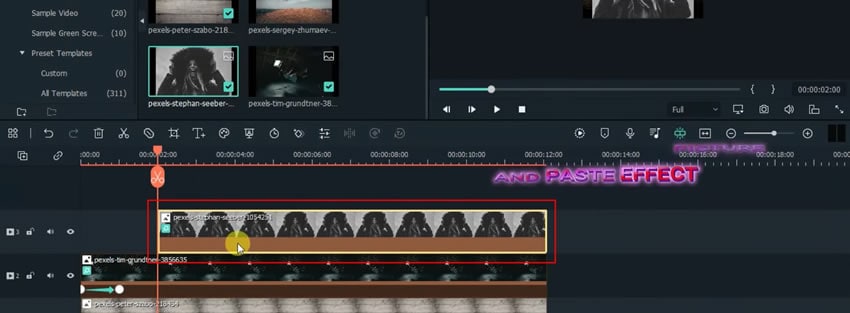
Preview. Move the playhead 5 frames forward. Copy effect, change the “Zoom Level” to 10%, and drag down another picture. Paste effect. It will appear below the screen on the right side, so animate accordingly afterward.
The X and Y axis is for the positioning of the pictures. So I used the measurement to move the picture to the right a bit. Move the playhead 1 second forward. Adjust the “Zoom Level” to 10% and drag down another picture. Paste effect. It will appear at the bottom right of the screen. Drag to the left and animate accordingly.
Move the playhead 1 second forward, drag down another picture, and continue the process until the last picture.
Done, so let's adjust the timeline to small for full visibility, preview, and export.
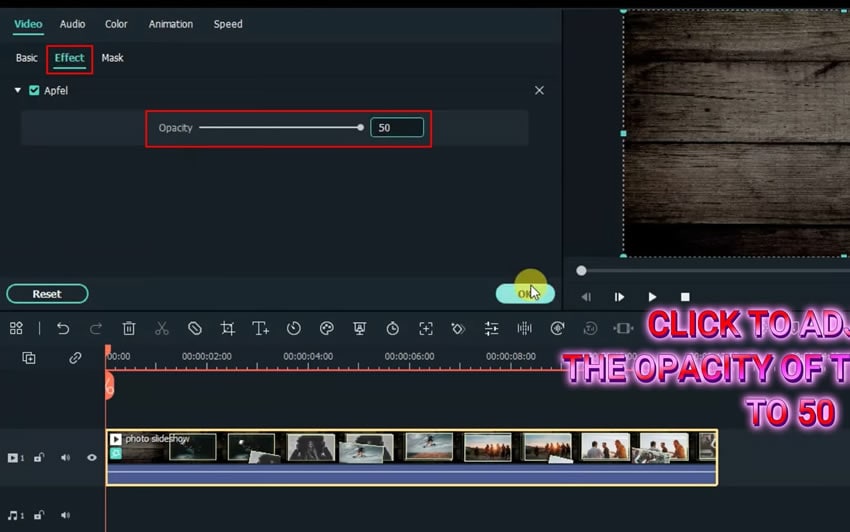
Highlight and delete everything on the timeline and import the exported file. Apply the “Apfel” effect and reduce “Opacity” to 50. Preview.
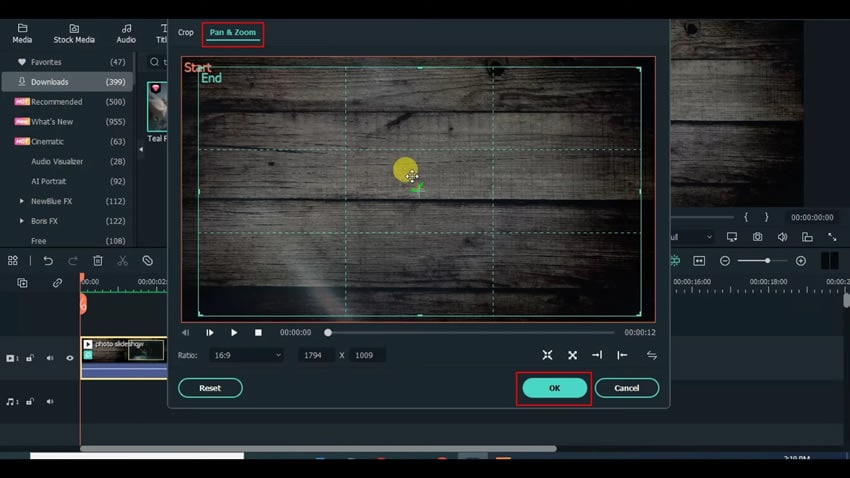
Apply the “Teal Flares” effect and reduce the “Opacity” to 30. Preview. Now apply “Pan & Zoom” accordingly. Then split in the middle, apply pan, and zoom again on the other half accordingly. Preview.
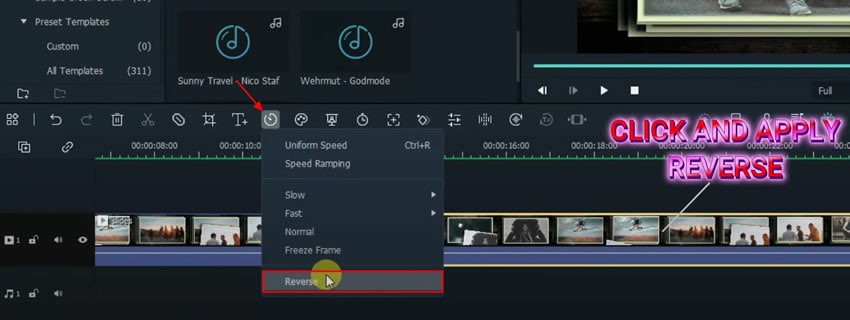
Export. Delete everything on the timeline. Import the file and drag it to the timeline. Lastly, copy and paste in the front, and apply the “Reverse” effect. Then done.
A Simple Photoslide Tutorial With Slideshow Effects In Filmora
What you need to prepare:
- A computer (Windows or macOS)
- Your video materials.
- Filmora video editor
Start the Photoslide Editing Process
After setting up the Filmora application, you’re ready to start the photoslide editing process. The first thing you need to do is upload all the required photos to the Filmora video editor. You can do this by clicking on the "Media" bar at the top-left side of the screen and then pressing "Import Media." This way, all your required images, and background pictures will be imported.

Adjust and Edit the Background in the Timeline
Once your media is uploaded, you need to drag and drop the background to the project timeline and set its duration as required. If you need a completely fit background on your screen, right-click on the background track in the timeline, and press the "Crop to Fit" option.
Once your media is uploaded, you need to drag and drop the background to the project timeline and set its duration as required. If you need a completely fit background on your screen, right-click on the background track in the timeline, and press the "Crop to Fit" option.
Drag and Customize the First Image in the Timeline
Now drag your first image to the timeline, and set its duration similar to the background. If you want to apply the border effect on the image, right-click and press the "Crop to Fit" choice.
After that, navigate into the "Effects" bar at the top, search for the border, and then drag the "Border" effect to the image on the timeline. By clicking on the image, you can adjust the border color, dimensions, and positioning.
Add the Water Effect to Your Video
Moreover, if you want to add a water effect to your first image, this can be done by clicking on "Effects" and then search for the water effect. You have to locate and press "Watercolor Frame Overlay 1" and ultimately drag it to your timeline. Make sure to reduce the “Opacity” to 20.
This can be done by clicking on the image and selecting "Effect" from the top-left side. Then tick mark the option "Watercolor Frame Overlay 1," which provides an opacity adjustment option.
Add Shadows to Your Video
If you require shadow on the image, click on the image track in the timeline, and from the top-left, select "Image" and then tick-mark the drop shadow. This will also provide an opportunity to adjust and customize the layout of the drop shadow on your picture.
On the other hand, if you also need to transform the picture to scale it down, this is possible by tick marking the "Transform" option over the drop shadow menu.
Set Zoom Levels and Animate
To set the zoom level of the image, right-click on the image available on the right side of the screen, select the option "Zoom Level," and set desired margins, e.g.,.10%. Next, move and drag the image down to the screen's right side.
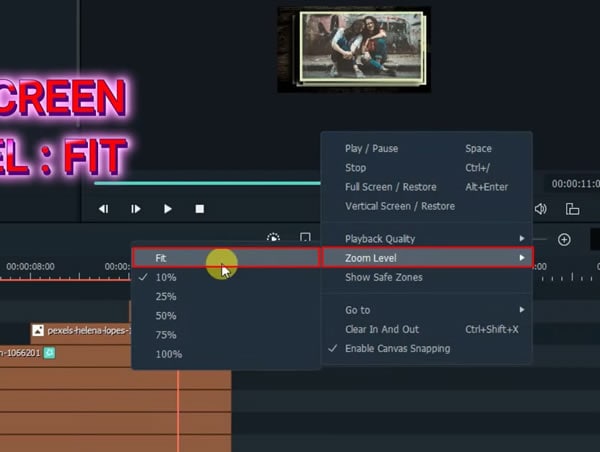
If you need to add animations, select "Animations" from the left side of the image section, click "Add," and set margins accordingly. At last, right-click on the screen and press the option "Zoom Level," where you will select "Fit."

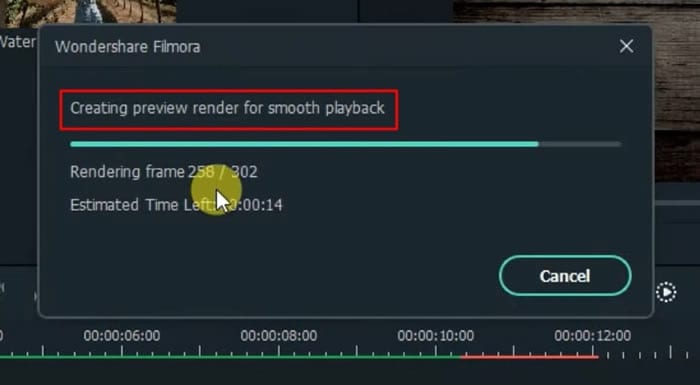
Preview and Render the Image
You’ve already implemented and adjusted your first image on the background. Now review it by clicking on the “Render Preview” button.
Add and Edit the Second Image
Drag your second image to the timeline and set its duration similar to the rest of the tracks in the timeline. Importantly, you’re required to move forward the starting playhead of the second image just a few frames ahead of the first image's starting playhead.
Drag your second image to the timeline and set its duration similar to the rest of the tracks in the timeline. Importantly, you’re required to move forward the starting playhead of the second image just a few frames ahead of the first image's starting playhead.
The image will start appearing below the screen on the right side. If you don't want the image on the right side, you can drag it to the left side of the screen.
To add animations, you can simply select the "Animation" menu from the left side of the open window. Therefore, click the "Add" button and set margins and positioning accordingly. Finally, right-click on the screen, select the "Zoom Level" option, and press "Fit." Your second image has been successfully added.
If you’ve to add more images, repeat the same process. Remember to keep the starting playhead of every new image a few frames forward than the starting playhead of the previous image. Rest all process is same as described above.
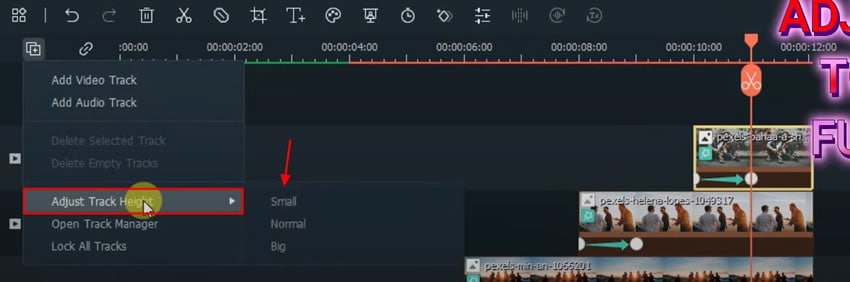
Adjust Timeline for Better Visibility
For better visibility of all the tracks, better to make them small. For this purpose, you have to click on the "Manage Tracks" icon on the left side of the screen. After this, you've to press "Adjust Track Height" and then click "Small."
Modify Screen Fit Ratio
Since you’ve already created your entire photoslide video, it’s time to adjust the screen fit. Go to the screen on the top-right side, right-click and select "Zoom Level," and then press "Fit." This way, your video will fit on the entire screen, leaving no empty edges.
Delete the Video From the Timeline
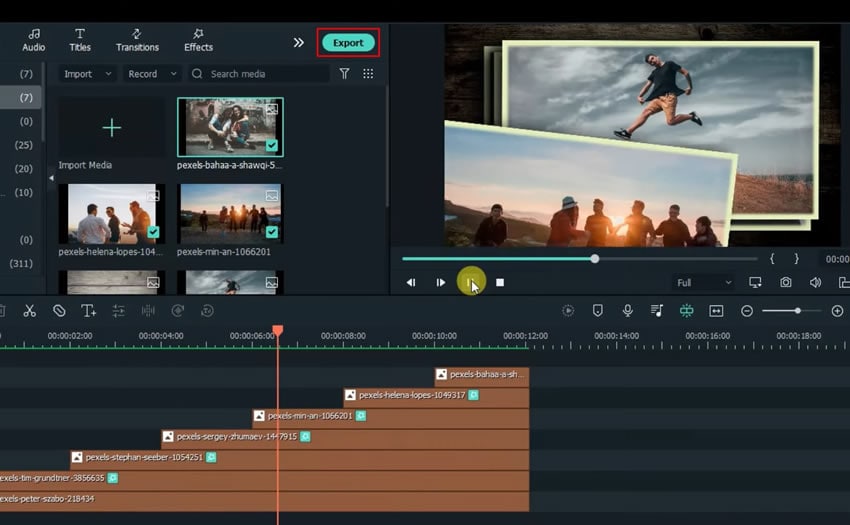
Now you've to delete the final video from the timeline. But before doing that, export it to the desired location on your device. You can export it by pressing the "Export" button.
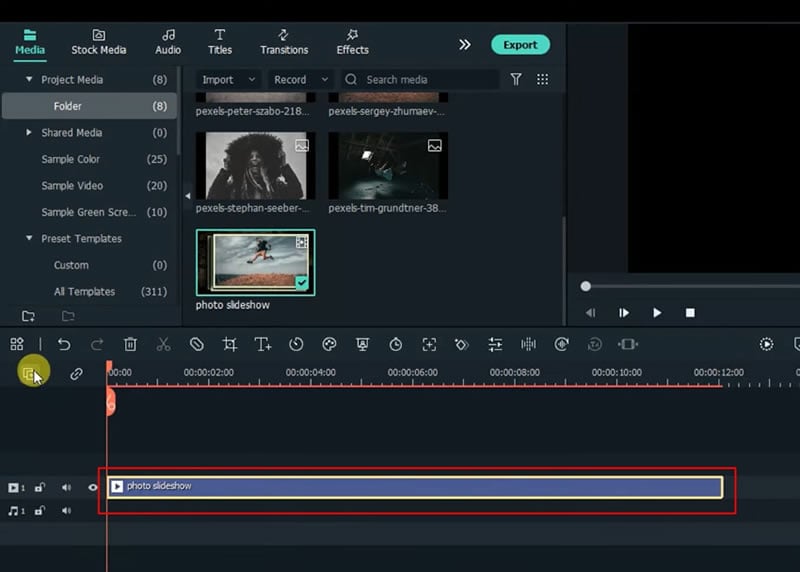
Import the Exported Video
It's important to import the exported video back. To do this, you've to click the “Media” bar at the top-left side of the screen and then press "Import Media." The imported video will then need to be dragged to the timeline.
Apply and Edit Effects for Better Visuals
For better visualization in your video, you can also apply effects. This is possible by pressing the "Effects" bar at the top and selecting your favorite effect from the category. Whatever options you choose, drag effects into the video track in the timeline.
If required, you can also adjust the effects by editing them through the window visible at the top-left side, and thus you can set opacity and dimensions as required.
Apply Pan and Zoom for Layout Settlement
A better video layout is possible through pan and zoom. This is done by pressing the "ALT" button, which helps apply image crop as per requirements. You can add “Pan & Zoom” functionality to different picture intervals on your timeline. Click “OK” if you’re done applying this feature.
Apply the Reverse Effect
This is also possible if you need to apply the reverse effect at last. First, right-click on the video, select the option "Copy," and paste it in front of the video by right-clicking and pressing "Paste." Finally, you've to apply the reverse effect, which is done by pressing the "Speed" icon and choosing the "Reverse" option.
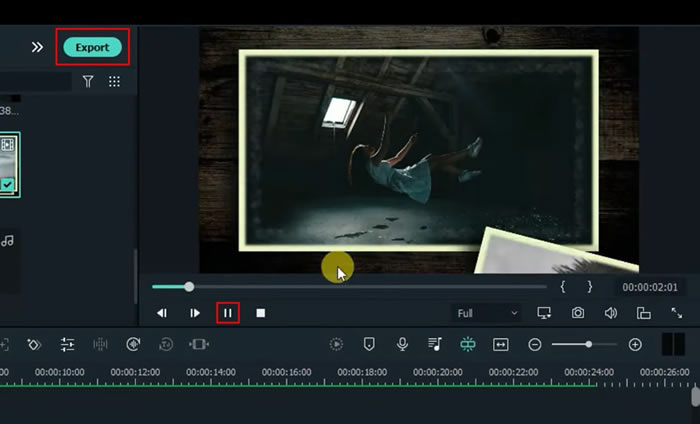
Download Your Complete Photoslide
Preview your final video by playing it after pressing the "Play" button. If the video is fine, you can save it on the required location of the device by clicking on the "Export" button.
Photoslide videos can definitely make your memories more enjoyable. Not to forget, the pictures are always at risk of getting lost or damaged. But when you can make a collective slideshow effect, this issue can be resolved. This tutorial will surely help everyone to make the best photoslides using the Filmora tool.