-
Guide On How To Create Dr. Strange Effect In Video Through Filmora
-
Guide On How To Create Audio Visualizer in Filmora
-
Guide On How to Add Smoke Effect in Filmora
-
Tutorial On Smooth Blur Transition in Filmora
-
A Simple Photoslide Tutorial With Slideshow Effects In Filmora
-
Isolate Color Effect Or Selective Color Effect In Wondershare Filmora
-
Guide On How To Add Dr. Strange Effect In Video
-
How To Make Snap Video – Filmora Tutorial
-
Tutorial – How to Make Fast Speed Effect Like The Flash With Filmora
-
Guide On How To Edit Coin Magic Tricks With Filmora
-
Creating Seamless Typography Animation with Filmora 1202:11
-
A Guide to Creating Looping Text Animation With Wondershare Filmora02:11
-
Tutorial - Create 3D Photo Zoom Effect in Filmora02:11
-
Filmora Tutorial – Setting Up The New Dynamic Countdown Timers02:11
-
5 Essential Video Editing Tips You Must Know On Wondershare Filmora02:11
-
Performing Next-Level Editing With Ready-Made Templates on Filmora 1202:24
Transcript
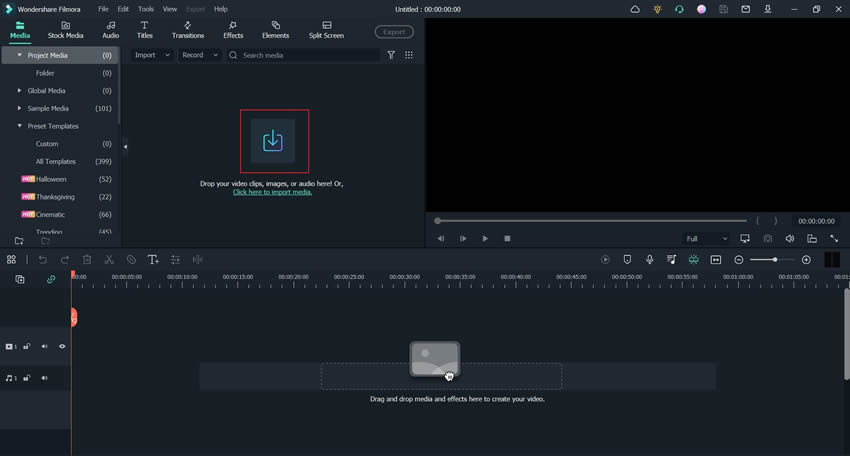
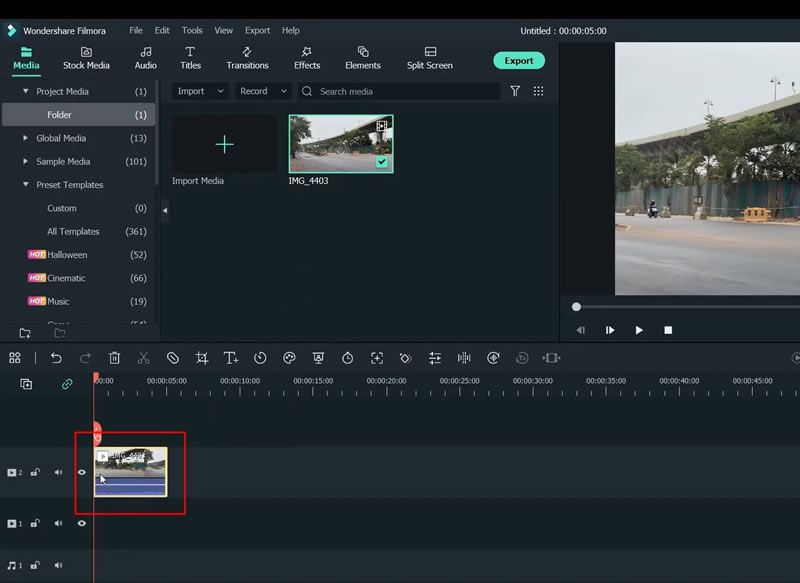
First thing you need to do is to import a clip onto your timeline. Already done that, and I'm going to drag it to the timeline and keep it there. It’s a normal clip.
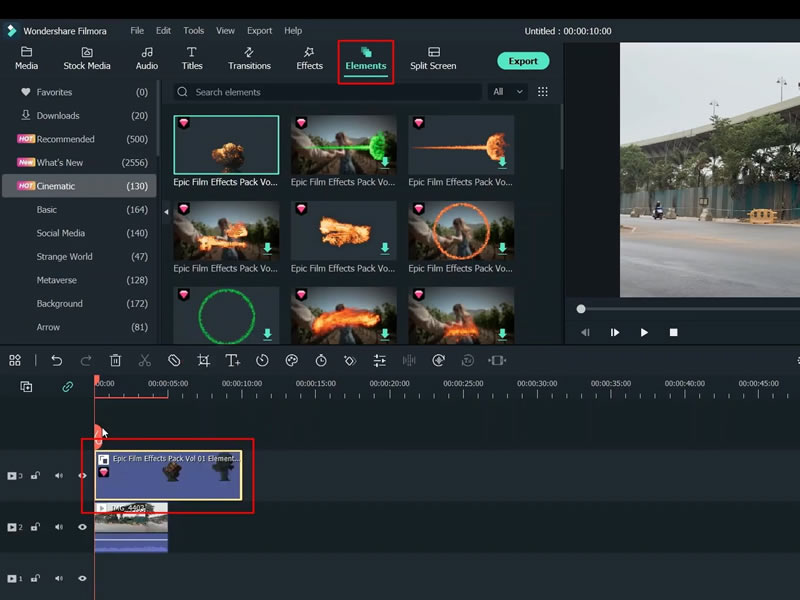
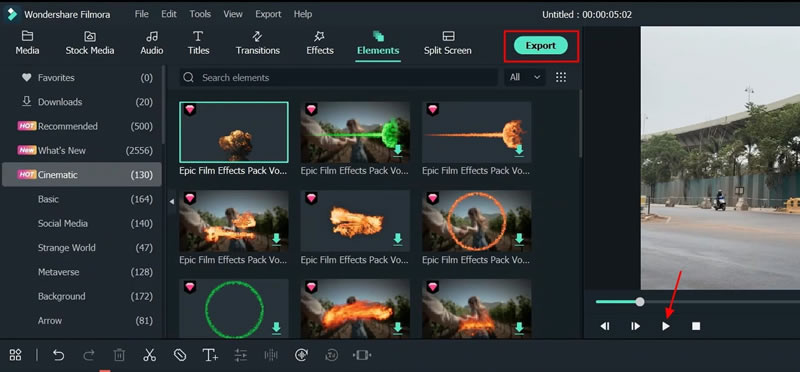
Now click on "Elements" and click on "Cinematic." If you don't get these fire effects, you can search “Epic Film Effects.” I like this one, so I’m going to choose this and drag it to the top of this clip. I’m just going to delete the rest of this. Now you have an explosion effect, but it's not being trapped as per the motion of the camera.
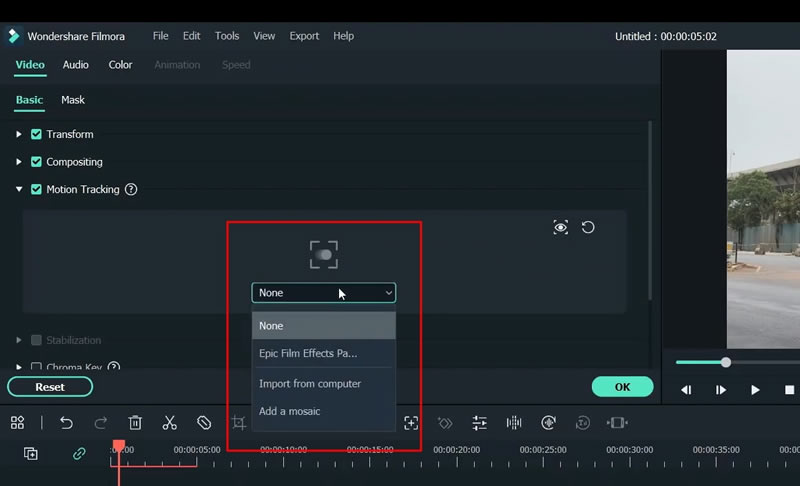
So the video is moving to the left; the explosion should stay at the same place. To get that, double-click on it. Then choose “Video” and check "Motion Tracking." Now put this box in any of the objects on display. I'm going to put it right here and make it as small as possible, and click on "Start Tracking." Tracking is now complete, and here, click on this and choose the effect.
Now, let's place the effect somewhere on the screen. I want this effect right in the middle of this road. So I’m going to keep it there; this place looks good. So, you can see the explosion stays right in the middle, and it is being tracked with the motion of the camera.
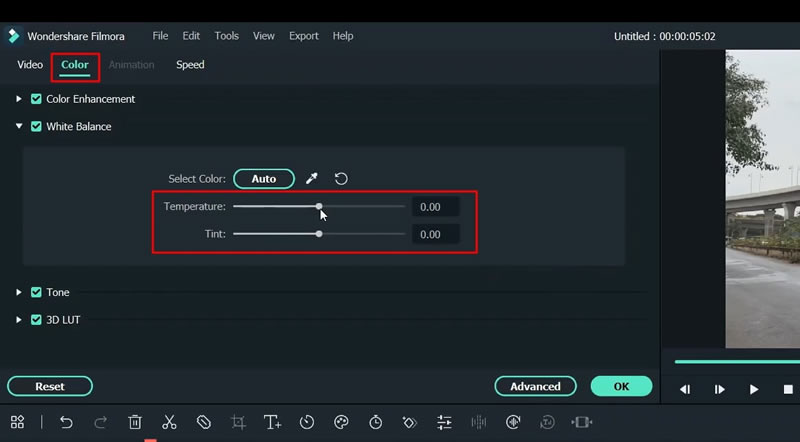
This one thing that’s making the explosion look fake is the color. The background color of this video is not looking that good. So, click on “Color," click on “White Balance," and for such an explosion, I want the whole video to be in a warm palette. I'm going to give it more of a warm look.
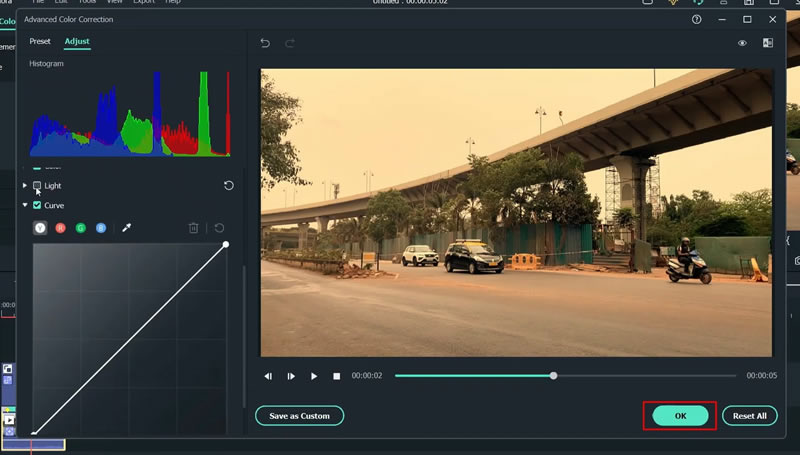
Click "Advanced," I want to increase the shadows and decrease the highlights. I’ll click “OK."
You can do more fine-tuning and adjust the color grading to match the explosion exactly.
How To Get Explosion Effect On Your Video Using Filmora
What you need to prepare:
- A computer (Windows or macOS)
- Your video materials.
- Filmora video editor
Start Wondershare Filmora and Import Files
Video import is the first thing you must do after starting the Wondershare Filmora. For this purpose, you need to click the "Media" bar from the top-left side of your screen and click the "Import Media" button again. This way, you can import your required video from the device that needs explosion effect editing.
Drag the Video to the Timeline
You have already imported the video to Filmora. Now you’re required to drag the imported video to the project timeline below.
Blend Explosion Effects into Video
Click on the “Elements” bar from the menu at the top of the screen, navigate into the "Cinematic" category, and choose your desired explosion effect from the options. Whatever explosion effect you select, drag it to the timeline below.
Customize the Duration of the Effect
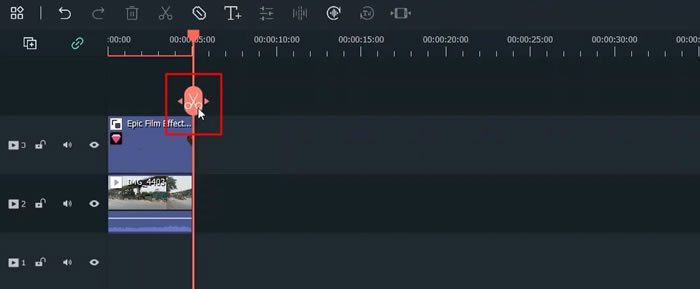
By using the playhead in the timeline, delete the excessive part of your effect using the "Scissor" icon. Make sure to set the duration of your chosen effect similar to the duration of your video in the timeline.
Improve Effect Movement with Motion Tracking
Your video may not be synchronized with the added explosion. To overcome this, double-click on your video in the timeline. A window will open, choose "Video" from the bar and tick mark the "Motion Tracking" feature. A motion tracking box will start appearing on the screen, adjust its size by placing it on any object in the video and make sure to keep it as small as possible.

Track Through the Object and Set the Effect as Subject
Now click on "Start Tracking," and the video rendering process will start with the application of motion tracking. Moreover, your motion tracking is now set to none; click on the dropdown menu and select the effect named Epic Film Effects. Adjust the explosion effect on the screen by dragging it to your desired location.
Edit Background Colors from Basic Parameters
Upon double-clicking the video in the timeline, a window will open on your screen. Press the option “Color" and then press the "White Balance" option and adjust the background color, temperature, and tint as required.
Adjust Advanced Coloring
You can also adjust the shadow of the background. To do this, click on "Advanced," select "Adjust," scroll down and click on the "Light" menu and then adjust shadows and other aspects as well. Click “OK” once all changes are done.
Save and Export Explosion Effect Video
Now preview your final video by pressing the “Play” button. After this, click on the “Export” button and set the file saving location on the device. Your video will be downloaded successfully.
Although explosions may look frightening in reality, the scenario is the opposite in the digital world. After all, adding explosions to the videos helps add an extra curious and interesting factor that attracts the viewer. With this tutorial on Filmora, everyone can add terrific explosion effects to their videos. As everything is simply and thoroughly explained.


