-
Guide On How To Create Dr. Strange Effect In Video Through Filmora
-
Guide On How To Create Audio Visualizer in Filmora
-
Guide On How to Add Smoke Effect in Filmora
-
Tutorial On Smooth Blur Transition in Filmora
-
A Simple Photoslide Tutorial With Slideshow Effects In Filmora
-
Isolate Color Effect Or Selective Color Effect In Wondershare Filmora
-
How To Make Snap Video – Filmora Tutorial
-
Tutorial – How to Make Fast Speed Effect Like The Flash With Filmora
-
Guide On How To Edit Coin Magic Tricks With Filmora
-
How To Get Explosion Effect On Your Video Using Filmora
-
Creating Seamless Typography Animation with Filmora 1202:11
-
A Guide to Creating Looping Text Animation With Wondershare Filmora02:11
-
Tutorial - Create 3D Photo Zoom Effect in Filmora02:11
-
Filmora Tutorial – Setting Up The New Dynamic Countdown Timers02:11
-
5 Essential Video Editing Tips You Must Know On Wondershare Filmora02:11
-
Performing Next-Level Editing With Ready-Made Templates on Filmora 1202:24
Transcript
Hello, friends. In this video, I'll let you know how you can add Doctor Strange effect to your video. If you've watched all parts of Marvel movies, then you would know that the Doctor Strange effect is amazing. If you want to add such an effect to your video, then I'm going to explain to you guys how to do it.
After installing Filmora, you'll see this type of interface. Now you've to add those files which you need to integrate with a Doctor Strange-like effect. Let's take a background first. After this, add it to the timeline.
After adding the background, now navigate into the "Elements." Here you've to scroll down, and you'll be able to see Doctor Strange-like effects. The effect which you want to add, simply drag it to the timeline. Now what you need to do is add whatever photo, video, or file that you want to attach to this circle, and make sure to add it to the timeline.
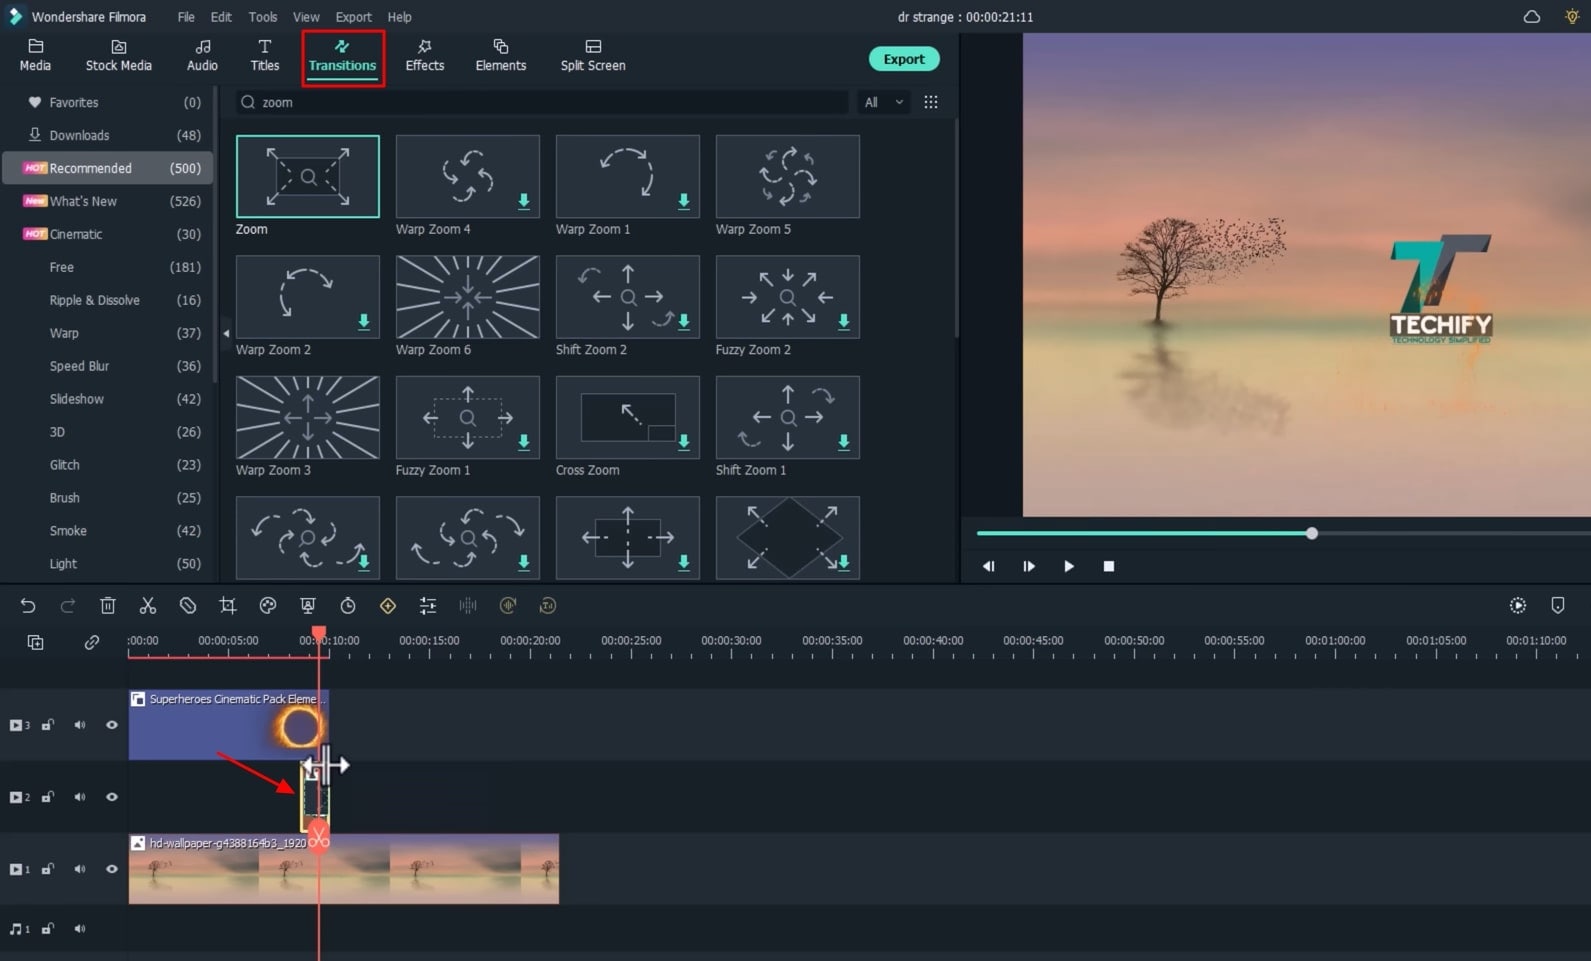
Now, what you've to do is trim your photo, video or file where your Doctor Effect is getting disappeared. Now you've to come to “Transitions,” and here you'll find one transition, "Zoom," which you have to add to your photo, video, or file placed in the circle.
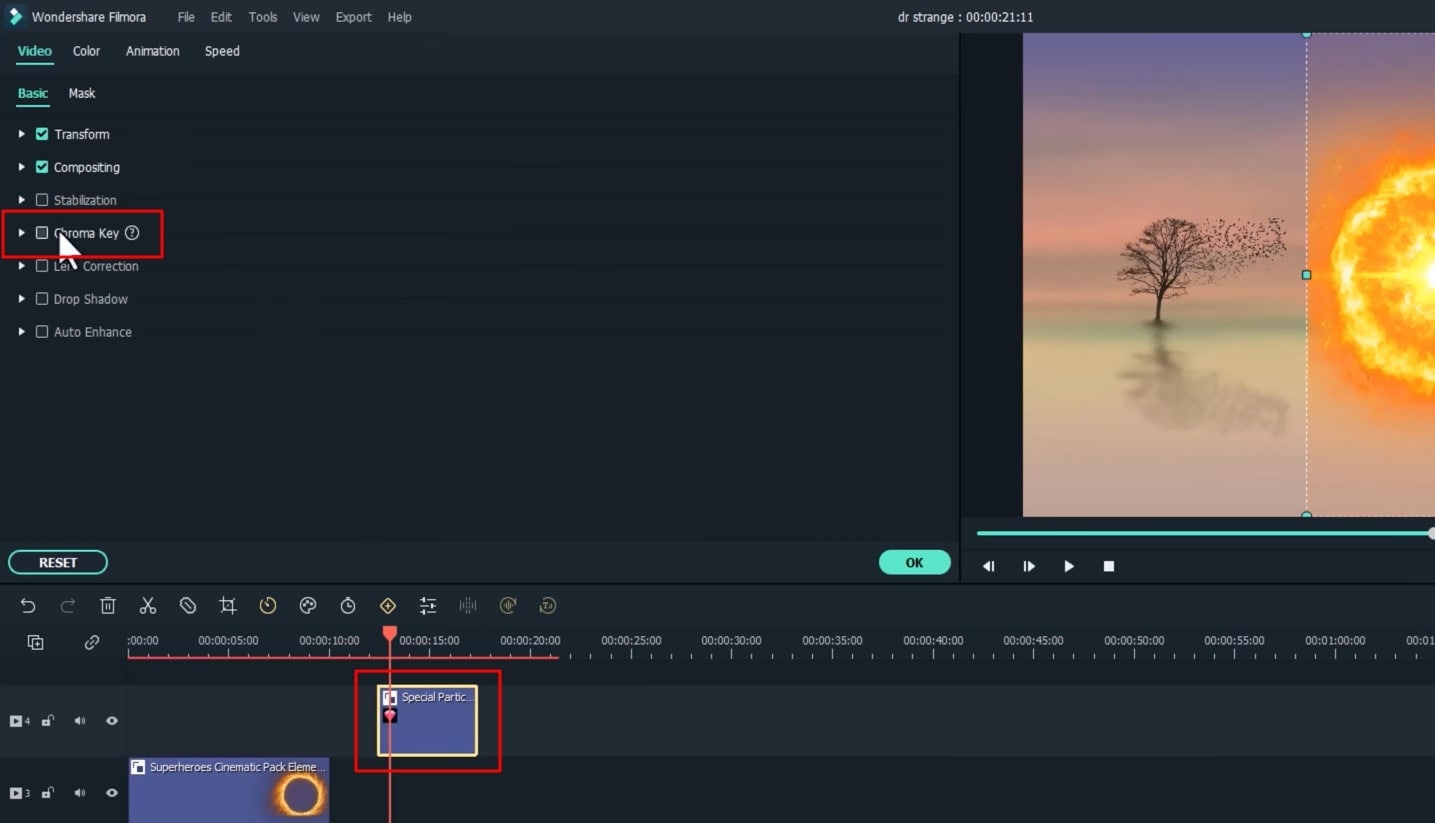
After this, you again need to come to the "Elements," and from here, you have to add a blast element to the timeline. So there is a shade on the blast element that we added. If you want to remove it, simply double-click on it and turn on the “Chroma key” from here. Ultimately, our shade around the blast will get disappeared. If you want to reduce further in here, you can do further setting from here.
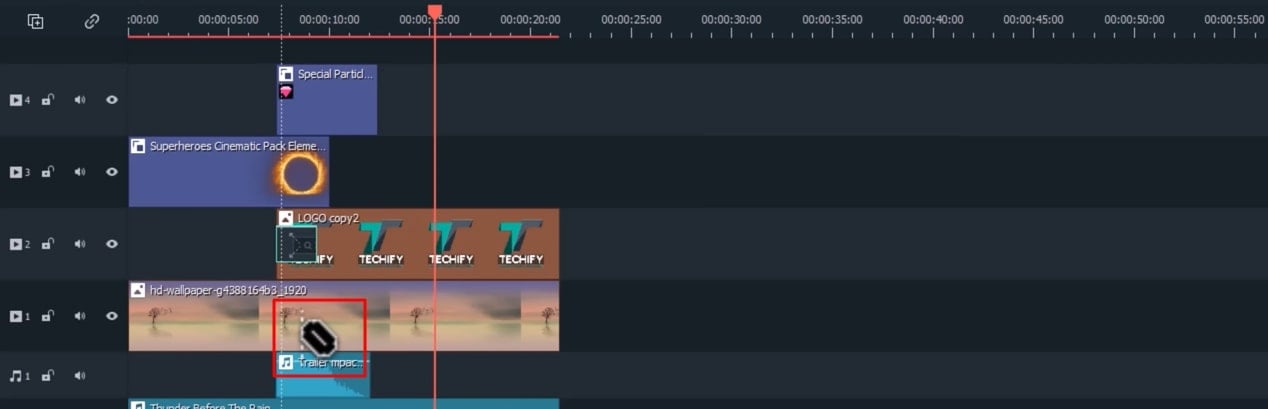
After that, now adjust it on the timeline. After that, move into the "Audio" category, and here you'll see many categories. After that, sound effects will be visible. Now the blast element that we added into the video, for this, we need to add a sound whose name is "Trailer." If you cannot find this sound here, then by visiting the search bar, you’ll have to search for it.
Now, you must place this sound where your element is getting blasted. After this, you've to add another sound to your timeline, and you'll be able to find it from here. It will sound like thunder before the rain, and you've to add that particular effect to your video.
Now, our video is completely ready. So let's preview it by playing it. But before playing, I want to let you guys know one more thing there are new options now in Filmora 11.7 or 6. So previously, what used to happen was the video could get splitted by clicking here. So here, you'll find an option called "Quick Split Mode." So if you open it, you can turn your single clip into multiple parts as splits.
After this, double click on the sound, and here as well, you'll find two new options, "Hum Removal" and "Wind Removal." So if you turn on these options from here, all the issues related to air noise or any other problem in your recording will be removed. After this, you have the option of “Auto Noise,” and if you also turn on this, then all the noise in your voice will be automatically removed. So let’s play the video to preview.
Now you have to export it from here, and before exporting, let me tell you guys one more thing whenever you edit your video using this software, so there will be a watermark present. If you want to remove that watermark, you can buy their one-month, lifetime, or annual plan.
Guide On How To Add Dr. Strange Effect In Video
What you need to prepare:
- A computer (Windows or macOS)
- Your video materials.
- Filmora video editor
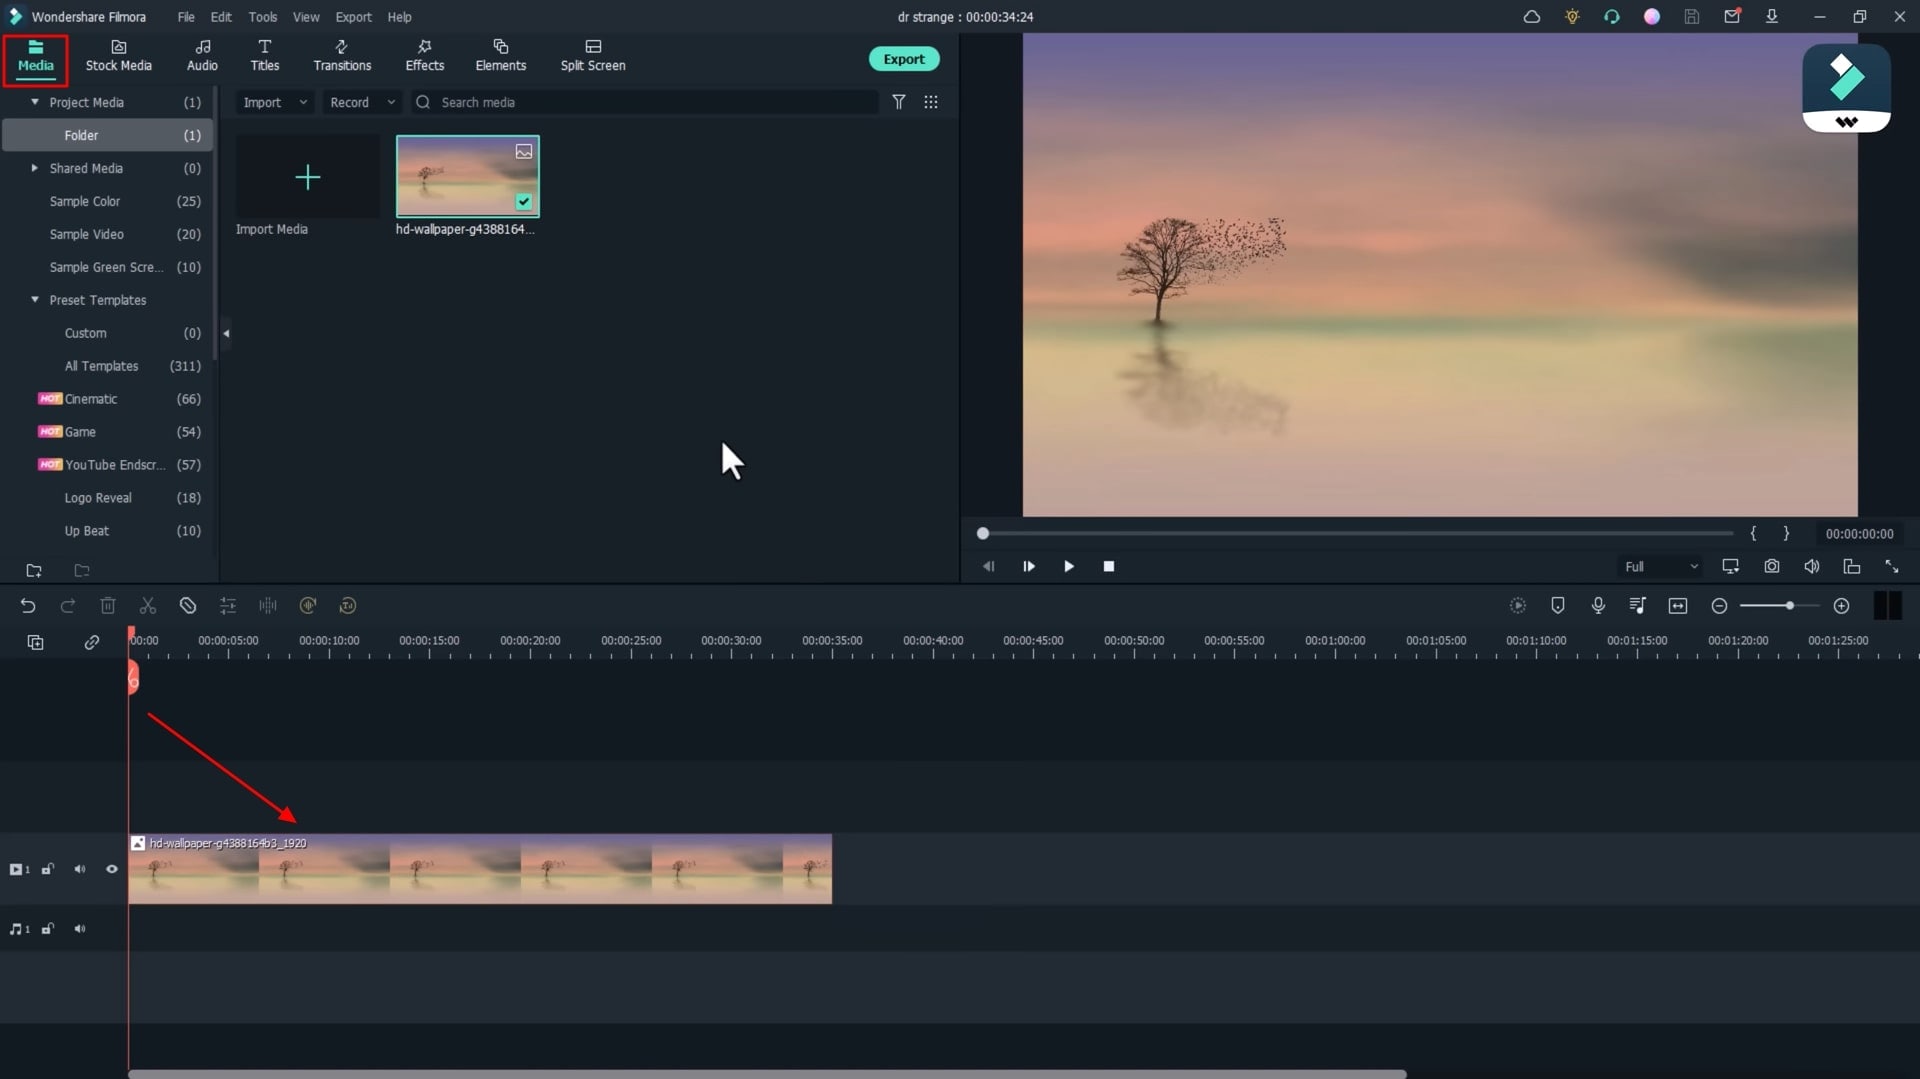
Import Background Image
After opening the Wondershare Filmora tool, import your background image to the editing interface. For this, you have to click "Media," and then press "Import Media," and this way, you can import your desired background image from your device.
Add Doctor Strange Element
Now click the “Elements” tab from the top, scroll down, and you'll see different Doctor Strange effects present. Choose your desired element effect, and drag it to the timeline below.
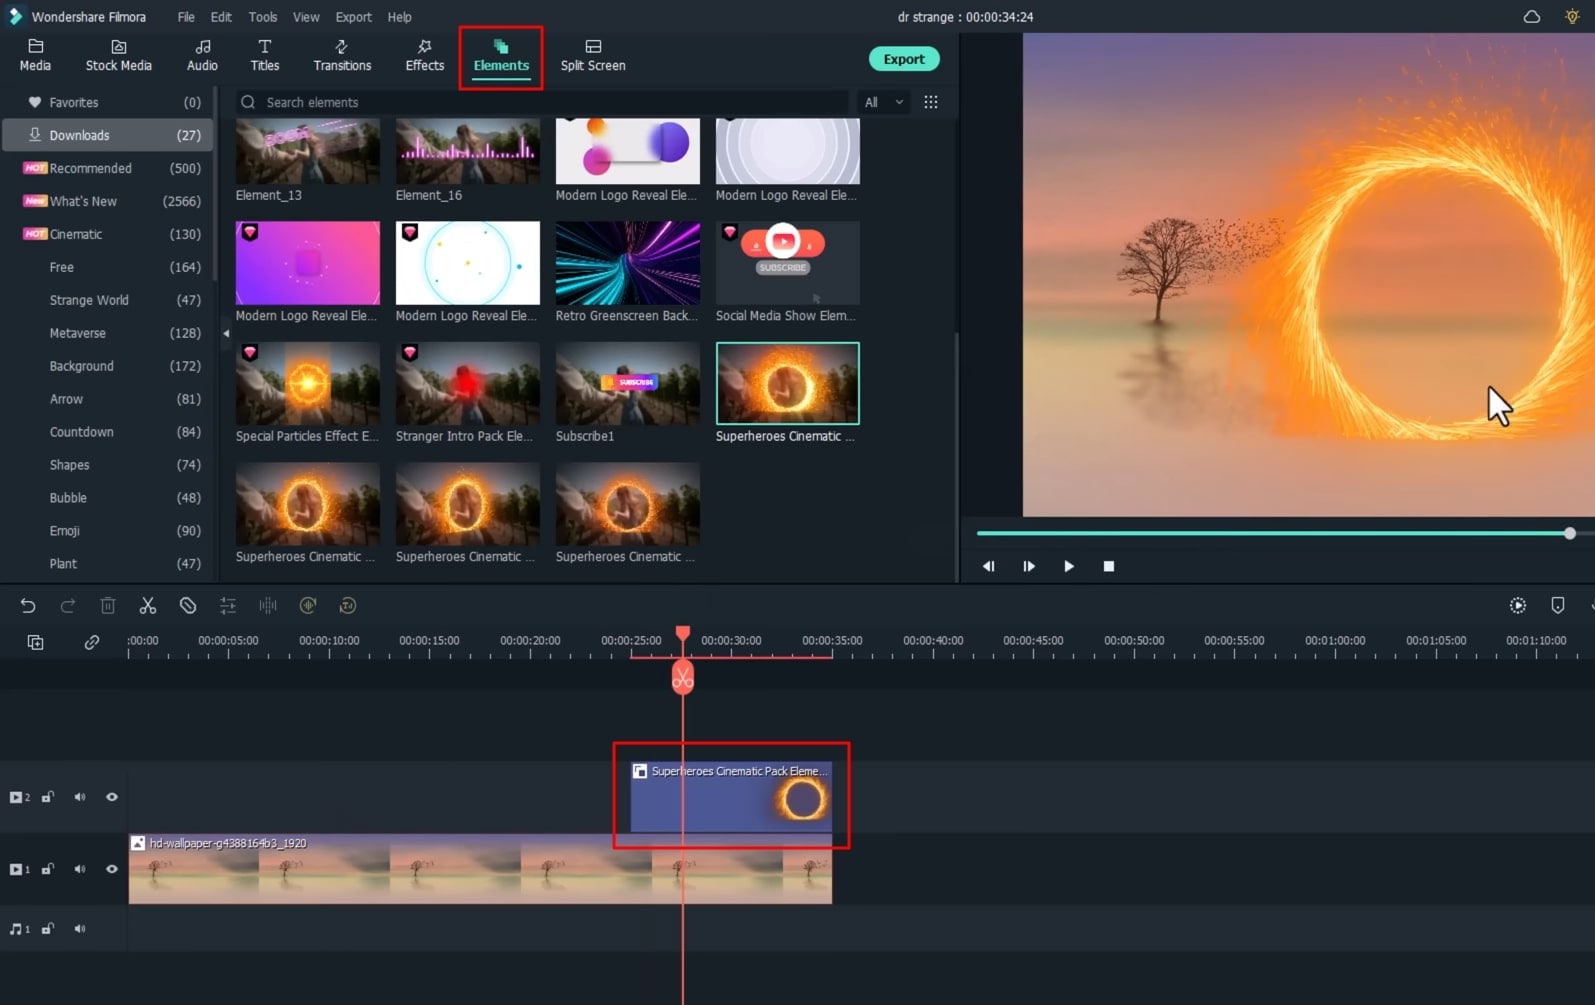
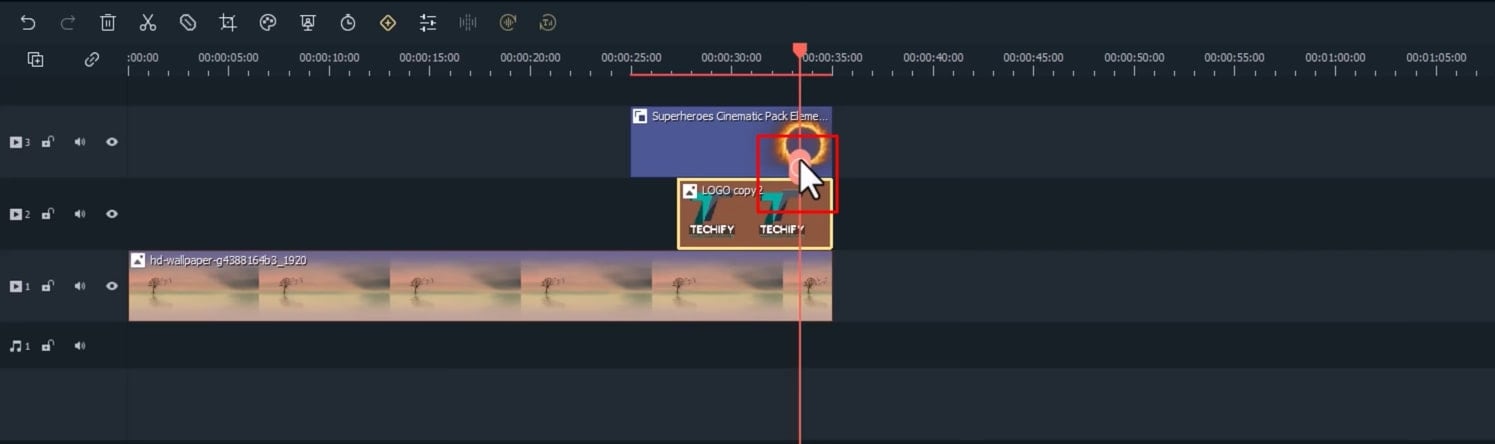
Integrate the File Into Doctor Strange Circle
If you want to add your image or video to the Doctor Strange circle, press the "Media" tab from the top left side and click the "Import Media" button. Once your photo or video is imported, drag it to the timeline below. If you choose a picture, that picture needs to be within your background image track and element track in the project timeline.
You’ll witness that your file is getting disappeared in the circle as the video plays. To overcome this, simply trim the file by using the “Scissor” icon present on the playhead.
Apply Transitions for Video Flow
Press the “Transitions” tab from the top side of the screen, search zoom, and apply the "Zoom" effect to the project timeline.
Use Blast Element For Enhancing Video
Visit the “Elements” again, and select the blast element named “Special Particles Effects” from the given options. Select it and drag it to the timeline. You’ll see shade around the blast effect on the screen. So, if you want to remove the shade effect, double-click on it from the timeline, and turn on the "Chroma Key” from the open window.
You can make further adjustments to this element with respect to different customization options. Click "OK" to proceed further if done with changes.
Implement and Customize Sound Effects
Click the "Audio" tab from the top, and you'll see different categories on the left side of the screen. Choose "Basic Sound" and select the sound "Trailer." You can also search for it by using the search bar. Now drag the sound to the project time and place it where your element displays the “Blasted” effect.
For better sound effects concerning the Doctor Strange effect, you have to apply “Thunder Before The Rain" to your project. Simply select it and drag it to the project timeline below.
If you want to edit your sound effect, double-click on it, and a window will appear. Navigate into “Audio” and customize the audio and noise effects as required from the given adjustment options.

Split Video Quickly
If you want to split your video into more parts, click the "Quick Split Mode" icon for better video flow. Subsequently, this tool will help you create splits in your video with a single click.
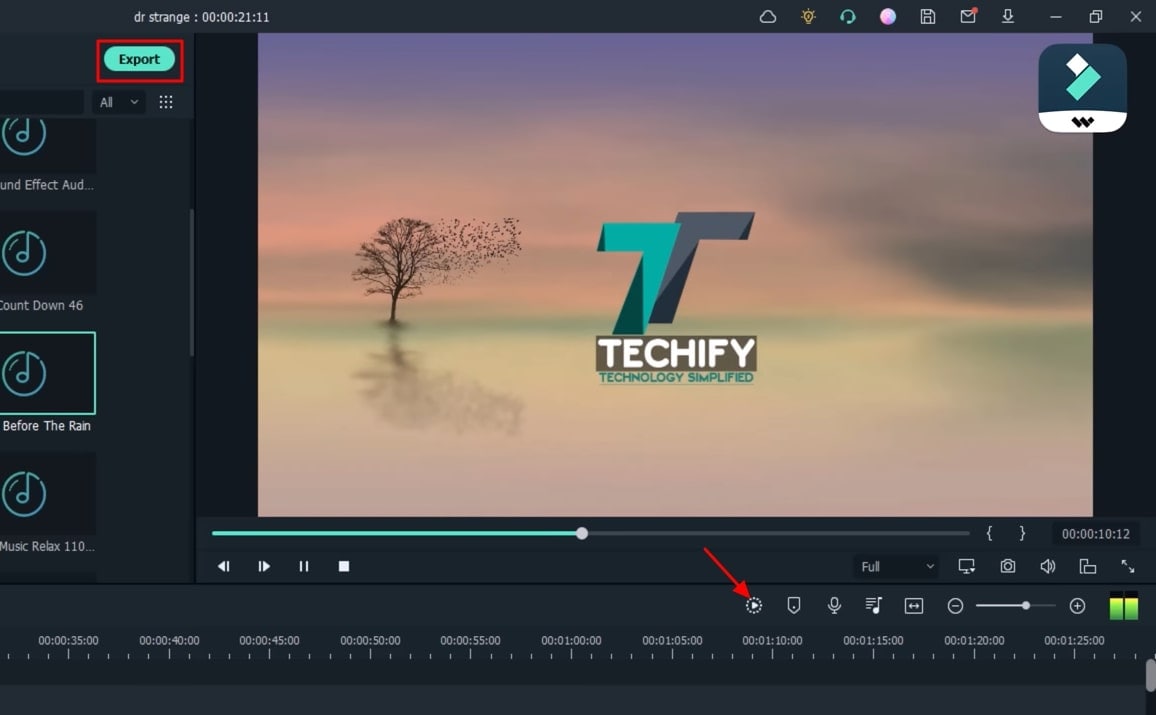
Play the Video and Export the Results
Preview your final effort by clicking the "Render Preview" icon. If the video is good and as per your requirements, click on the "Export" button, set the file location, and enjoy your new Doctor Strange effect video.
Superheroes are always inspiring because of their unique powers and abilities. It is the reason why people always follow them in different ways. Thus, for anyone looking to add Doctor Strange effects to their special videos, this tutorial on Filmora provides an easy guideline to apply such abilities with clear and simple steps.