Guide On How To Create Dr. Strange Effect In Video Through Filmora
If you're a fan of Marvel cinematics, you must be a die-hard fan of the iconic Dr. Strange. Interestingly, you would have tried his magic tricks to feel just like him. But do you know his famous magic effects can be added to your videos? This tutorial on Filmora will guide you through everything in a simple way.
-
Guide On How To Create Audio Visualizer in Filmora
-
Guide On How to Add Smoke Effect in Filmora
-
Tutorial On Smooth Blur Transition in Filmora
-
A Simple Photoslide Tutorial With Slideshow Effects In Filmora
-
Isolate Color Effect Or Selective Color Effect In Wondershare Filmora
-
Guide On How To Add Dr. Strange Effect In Video
-
How To Make Snap Video – Filmora Tutorial
-
Tutorial – How to Make Fast Speed Effect Like The Flash With Filmora
-
Guide On How To Edit Coin Magic Tricks With Filmora
-
How To Get Explosion Effect On Your Video Using Filmora
-
Creating Seamless Typography Animation with Filmora 1202:11
-
A Guide to Creating Looping Text Animation With Wondershare Filmora02:11
-
Tutorial - Create 3D Photo Zoom Effect in Filmora02:11
-
Filmora Tutorial – Setting Up The New Dynamic Countdown Timers02:11
-
5 Essential Video Editing Tips You Must Know On Wondershare Filmora02:11
-
Performing Next-Level Editing With Ready-Made Templates on Filmora 1202:24
Transcript
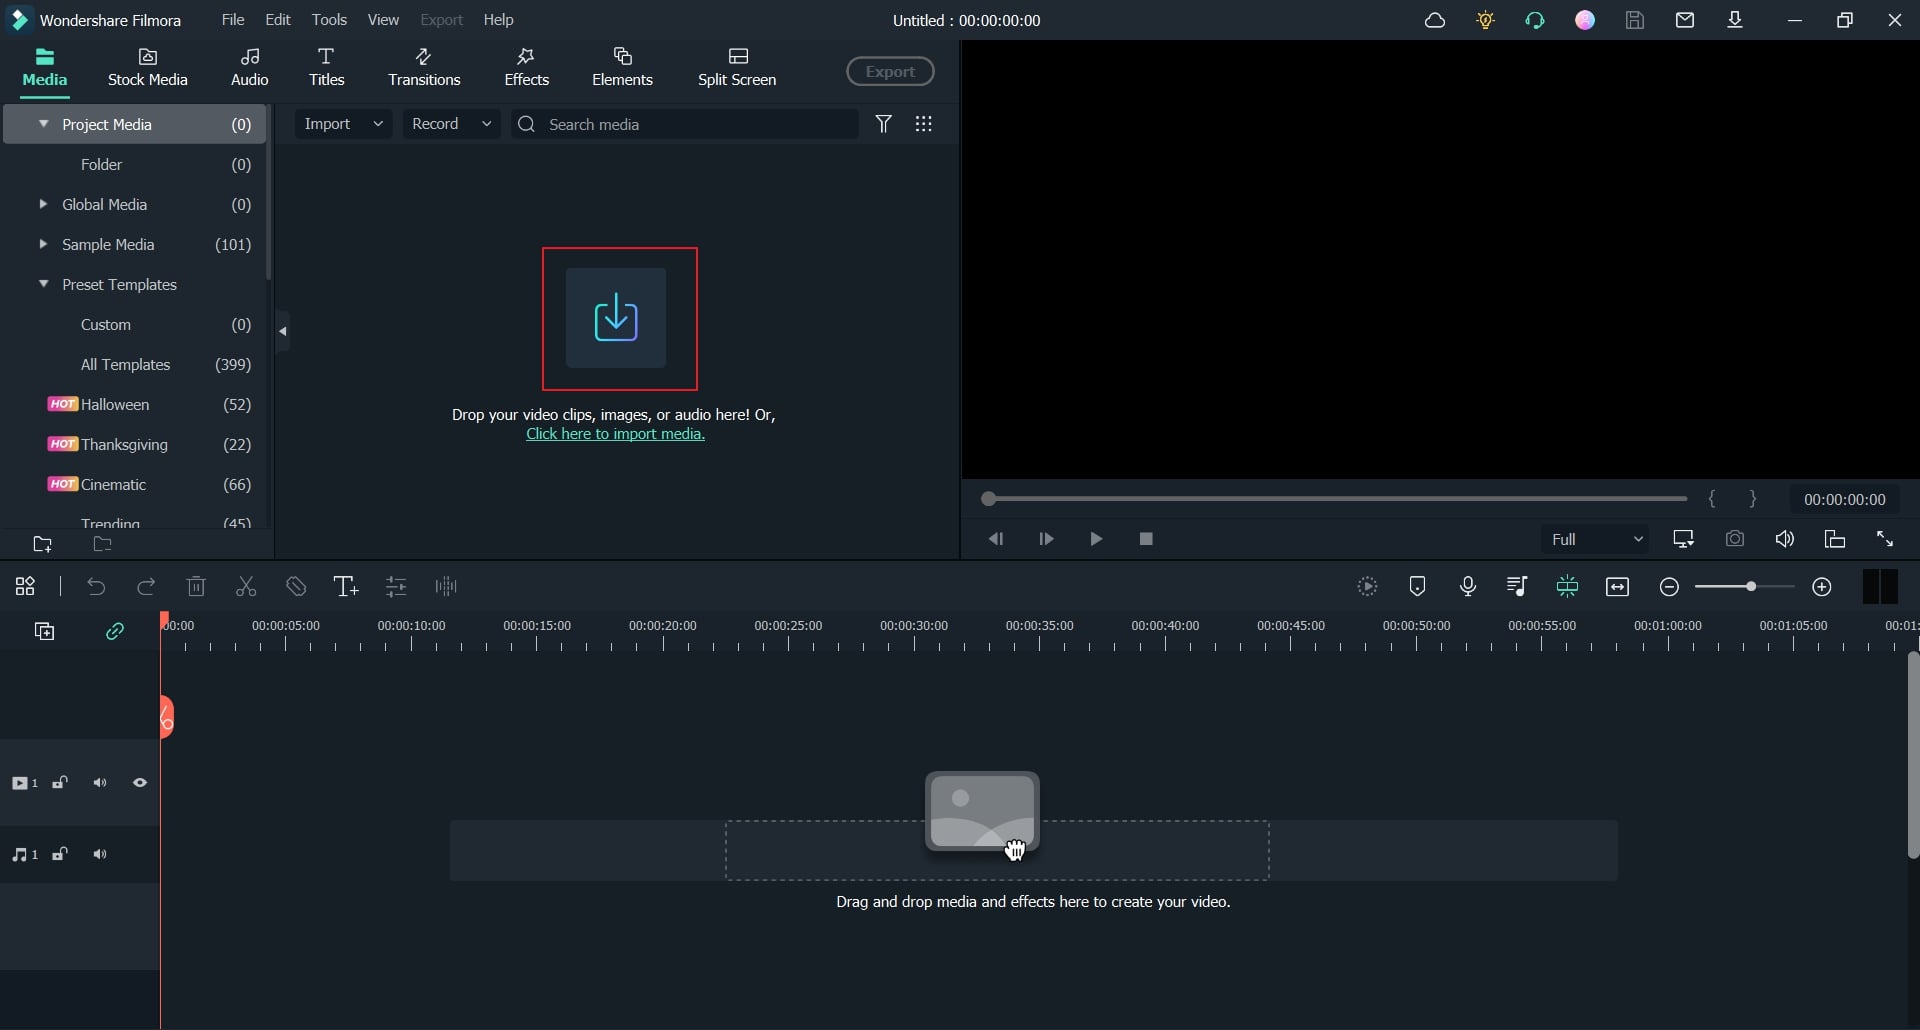
Today, in this video, I'm going to tell you how we can add Dr. Strange effect to our video. After downloading and installing, you’ll get this type of interface in front of you.
Now you've to import your video in which you want to add Dr. Strange effect. You can take any background, logo, or anything you want to add. So, first of all, I will add a background here.
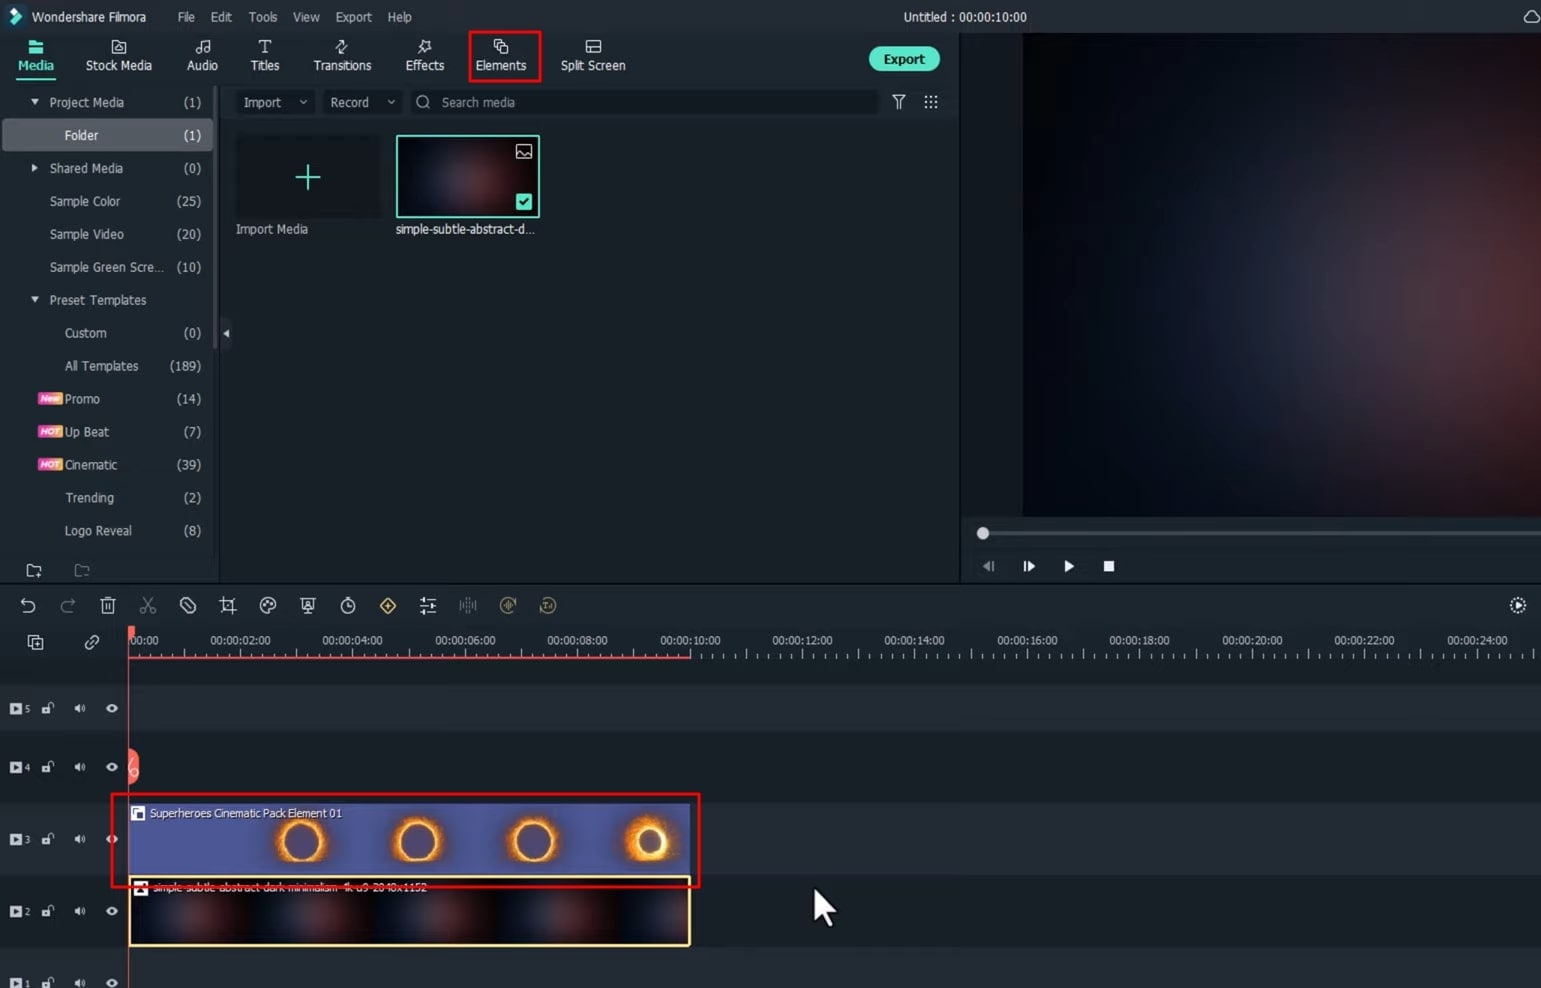
After this, you need to move into "Elements," and as you can see, there are many Dr. Strange effects present. For the effects that you want to add to your timeline, just download them and add them to your timeline.
Afterwards, you have to add a background to your timeline. As I have already told you earlier, you can also add a video, you can also make a video of yourself, and you can also add a background and add its Dr. Strange effect.
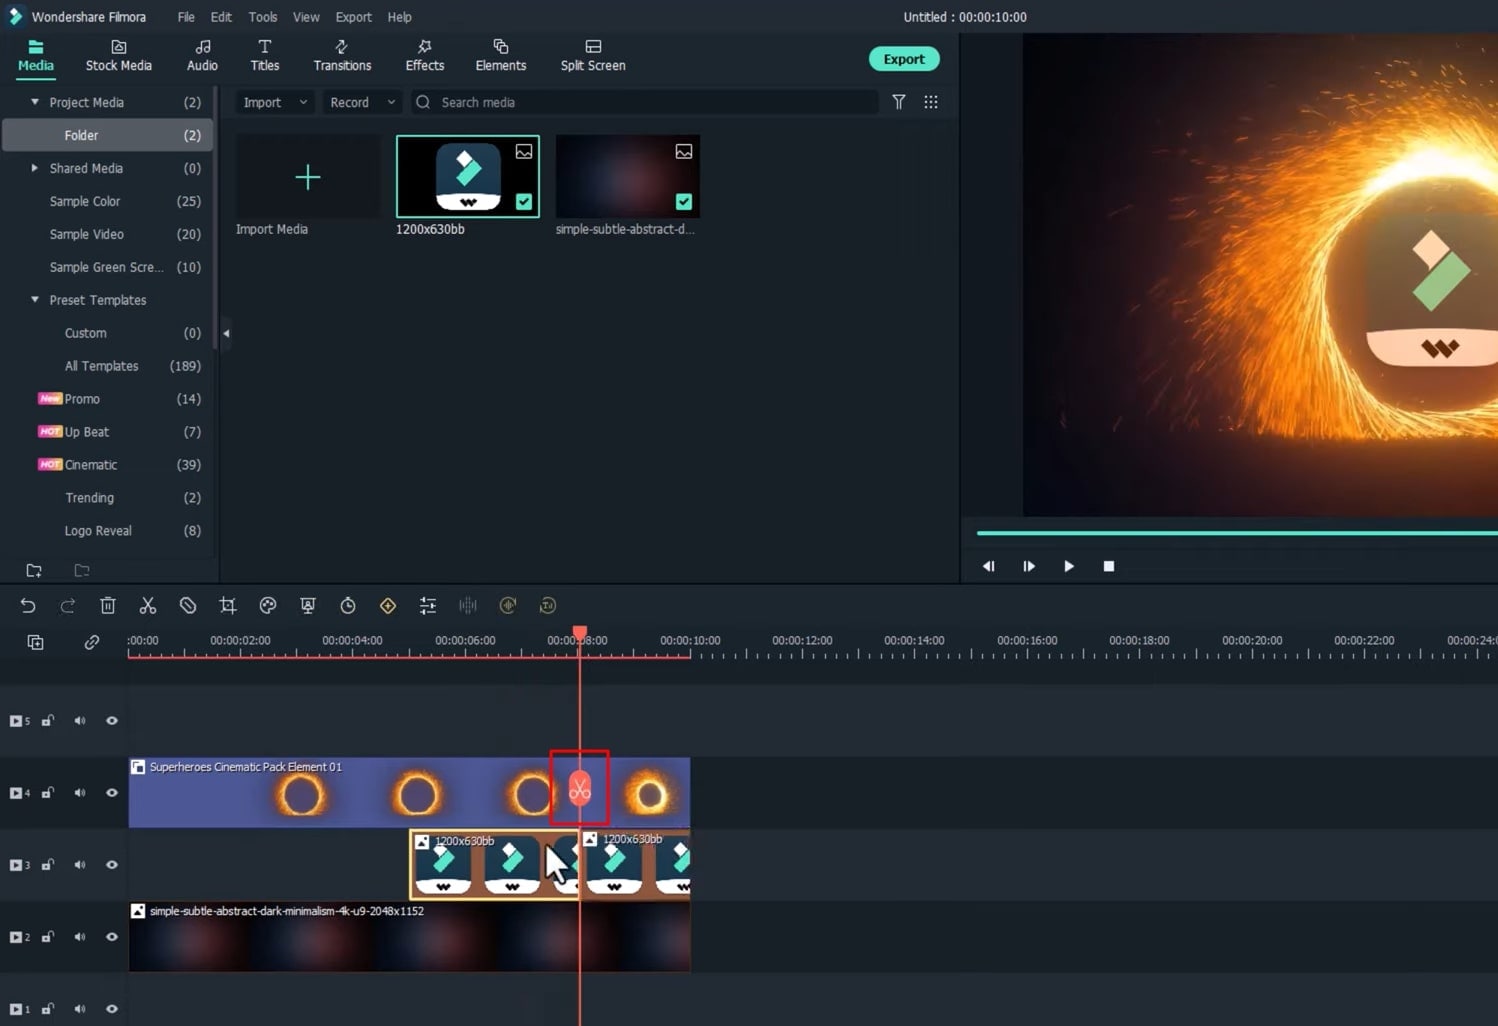
Now, you have to take a photo, video, or logo, which you need to add to the timeline. What you need to do now is the area where your Dr. Strange effect is getting dropped; you're required to delete that extra part from there.
Move into the "Transitions" now, and here you'll find a Transition named “Zoom Out,” which you need to add to your timeline. After this, you have to add special effects to your timeline, something like blast anything. You can take a video from the internet and also add their video.
You've to adjust it afterward, as per your requirements. For example, the photo, video, or logo that you're looking to blast, adjust it accordingly on the timeline.
So, as you can see, the blast we added possesses a shadow on its edges. To remove the shadow, double-click on it, and now you have to move into the "Chroma Key," and your shadow will disappear from here.
Now you're required to add audio effects. Hence you need to navigate into the "Audio," and here you'll get to see several categories and also many effects. The effect which we are going to add to our blast is “Traler.” So, you need to add it to your timeline and adjust it per your needs.
We are now going to add another piece of music to it, which is before the rain, like adding the sound of thunderstorms to our video. Our video is completely ready, so let's play and preview it. You can edit any video professionally. This is just an example I showed to you, like how you can add Dr. Strange effect to your video. Let’s play the video from here.
How do you have to export this video now? For this, you need to click on the "Export" option, write the name of the video here, and set the location from here. By going into "Settings," you can also set the video's resolution and frame rate. By clicking on the "Export" button, your video will be successfully exported. Let me tell you one more thing before exporting; you'll get a watermark of their software each and every time.
Guide On How To Create Dr. Strange Effect In Video Through Filmora
What you need to prepare:
- A computer (Windows or macOS)
- Your video materials.
- Filmora video editor
Import Required Media Items
Move into the “Media” section from the top-left corner of the screen and select the "Import Media" button to import all your required media items, e.g., background image, video, or logo. After importing, drag the media items to the project timeline below as required.
Add Dr. Strange Elements to Timeline
Select the "Elements" section from the top of the screen, and multiple elements for superhero cinematic effects will appear in front of you. Select your desired effect, download it, and move it into the timeline below. Adjust the duration of your applied element according to the duration of your media items in the timeline.
Trim Extra Part from Tracks
Slowly play your video by moving the playhead further and determine the area where your Dr. Strange effect is getting dropped. Select your photo or video from starting point of that particular dropping part and delete the rest part by clicking on the “Trim” icon on the playhead.
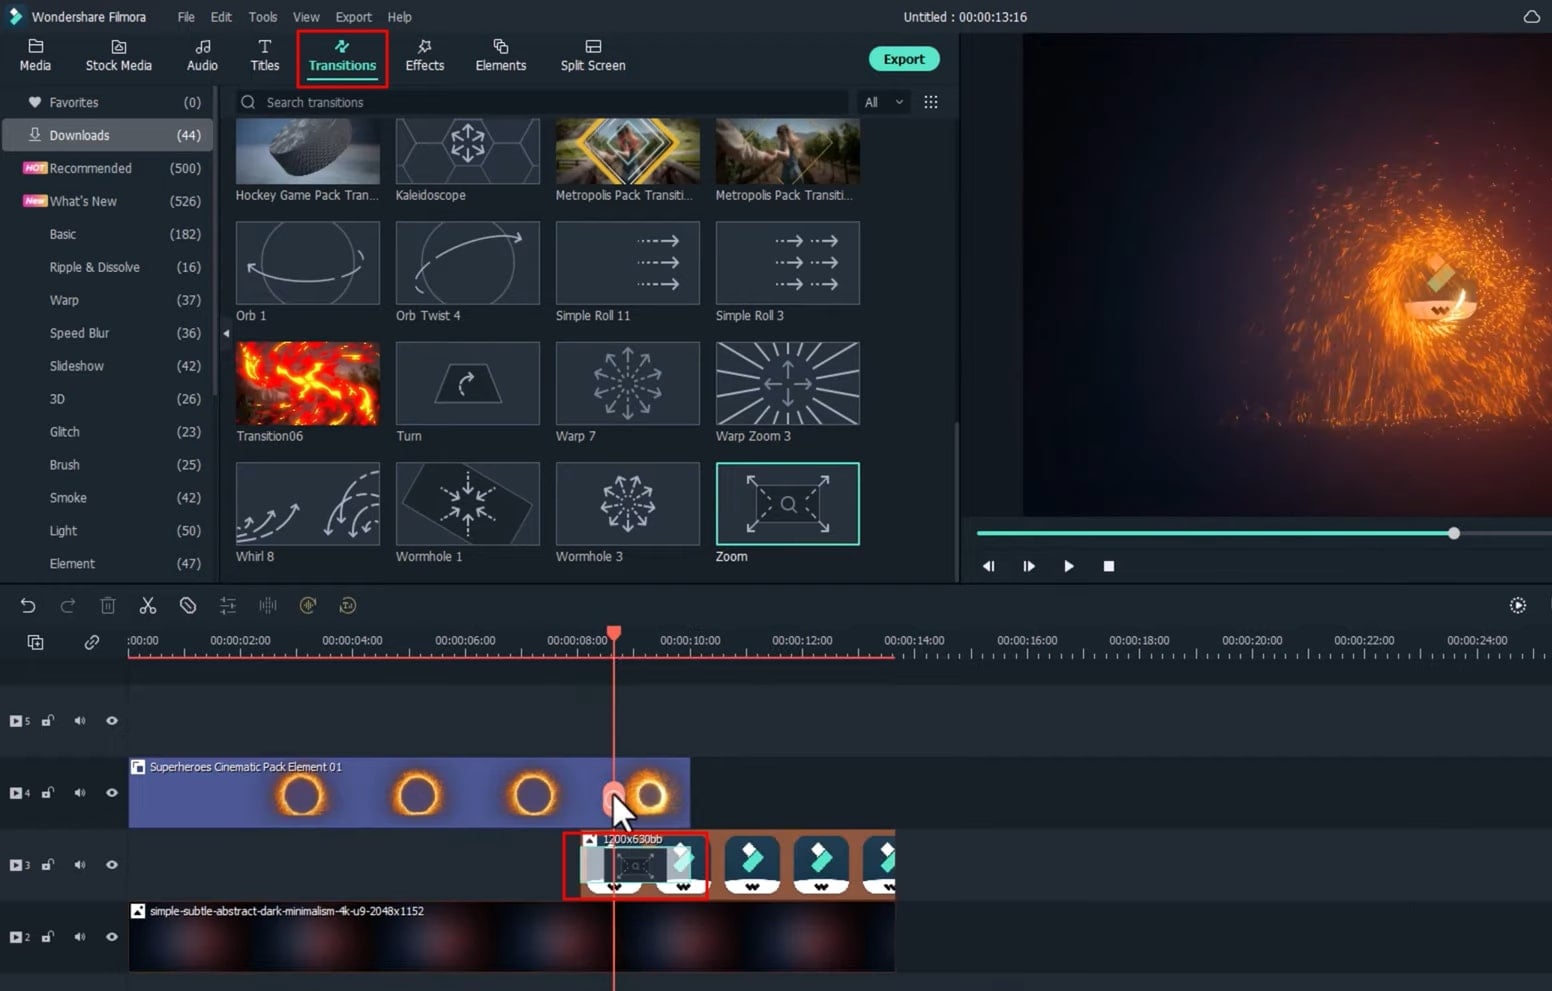
Utilization of Transitions into Project
Navigate into the category of "Transitions" from the top of the screen, search "Zoom" transition, select it, and add it to your timeline. You can also add a transition into a specific media item there.
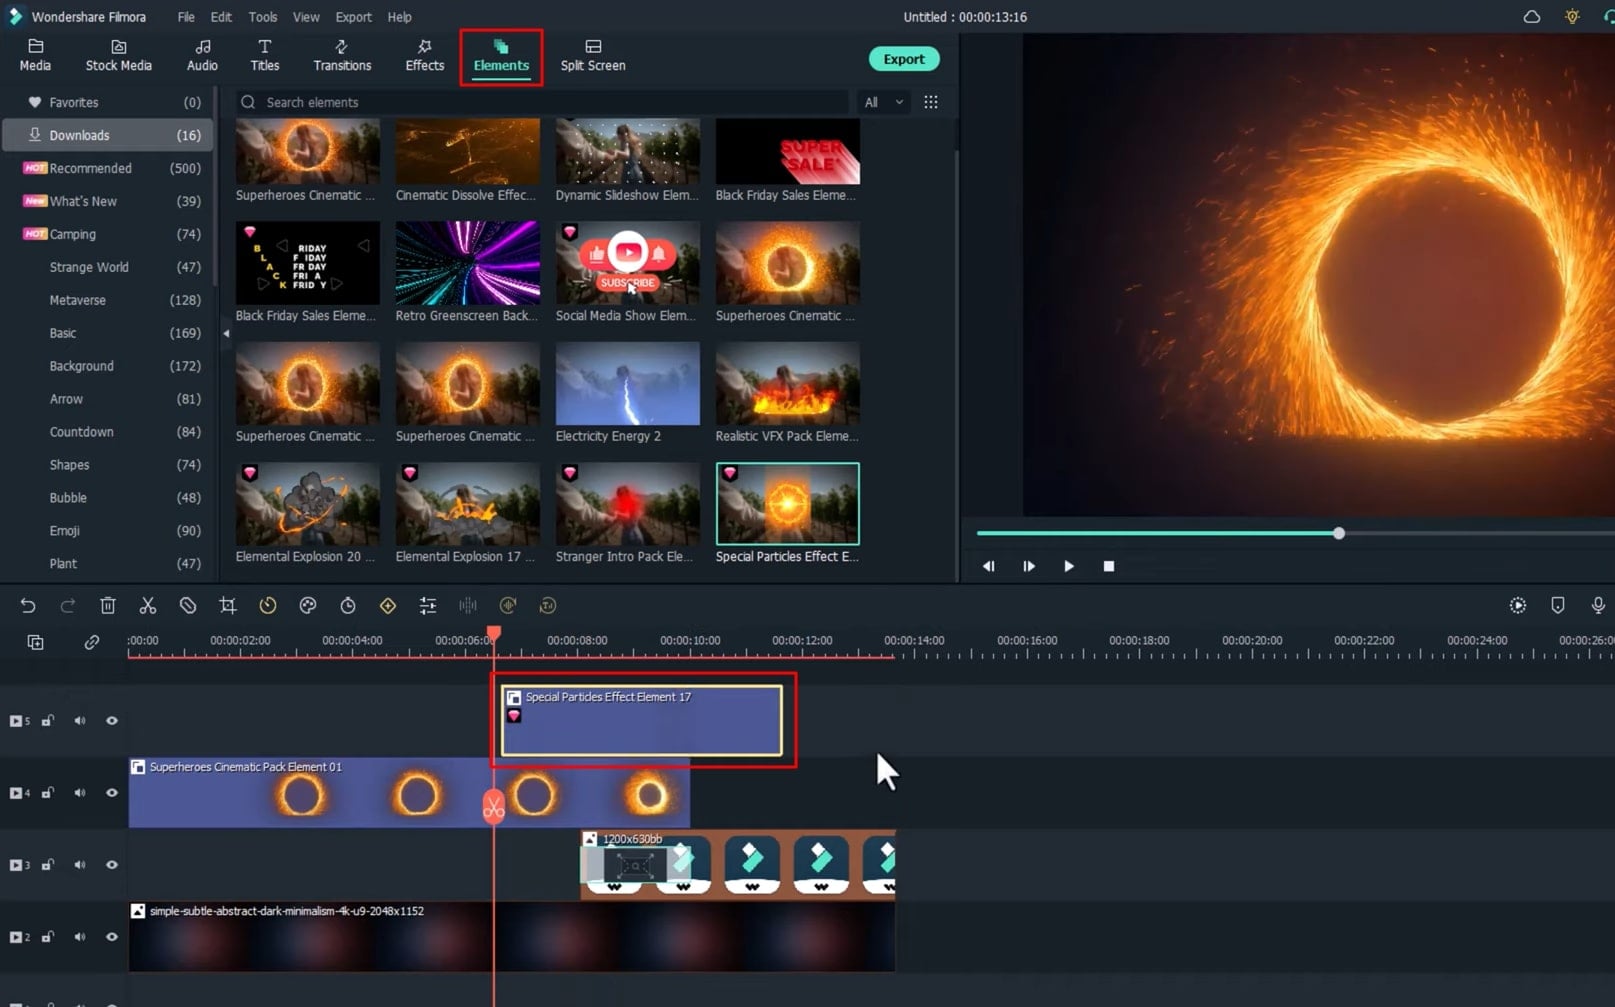
Apply Special Blast Effects
To apply special blast effects to make your Dr. Strange video more interesting, click on the "Elements" bar from the screen’s top. Search special particles from the search bar, select "Special Particles Effect Element 17", add it to your timeline below, and adjust its duration as needed.
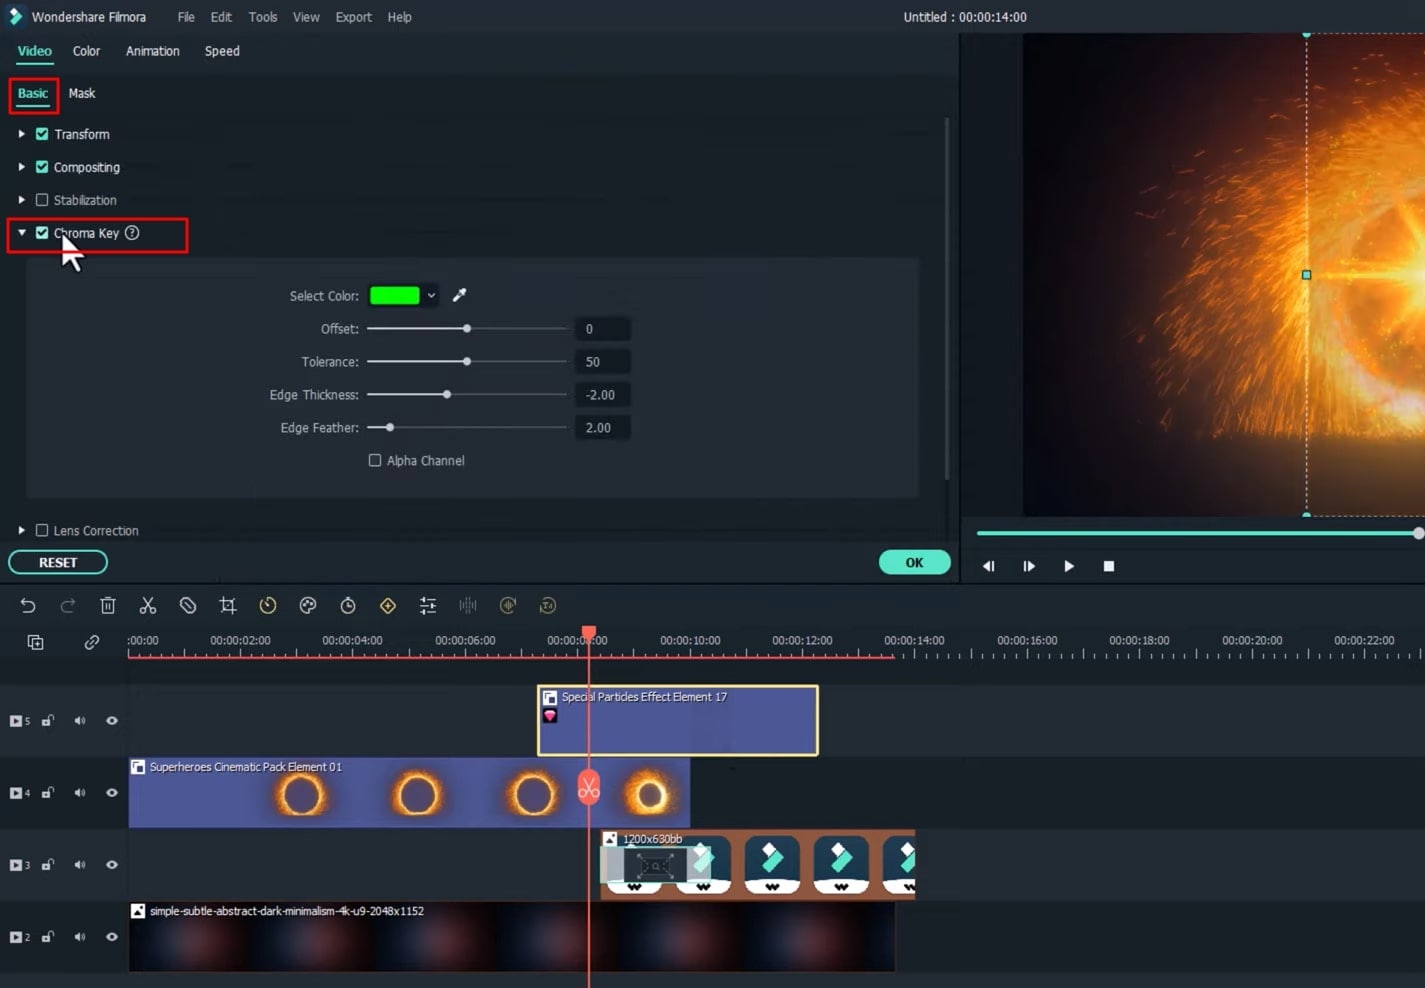
Remove Shadow from Blast
After applying the blast effect, you'll see a shadow on the edges of your video. To remove this shadow, double-click on your blast effect from the timeline. A window tab will open where you have to select "Video," choose "Basic" further, and turn on the "Chroma Key" option. After this, the shadow will be removed.
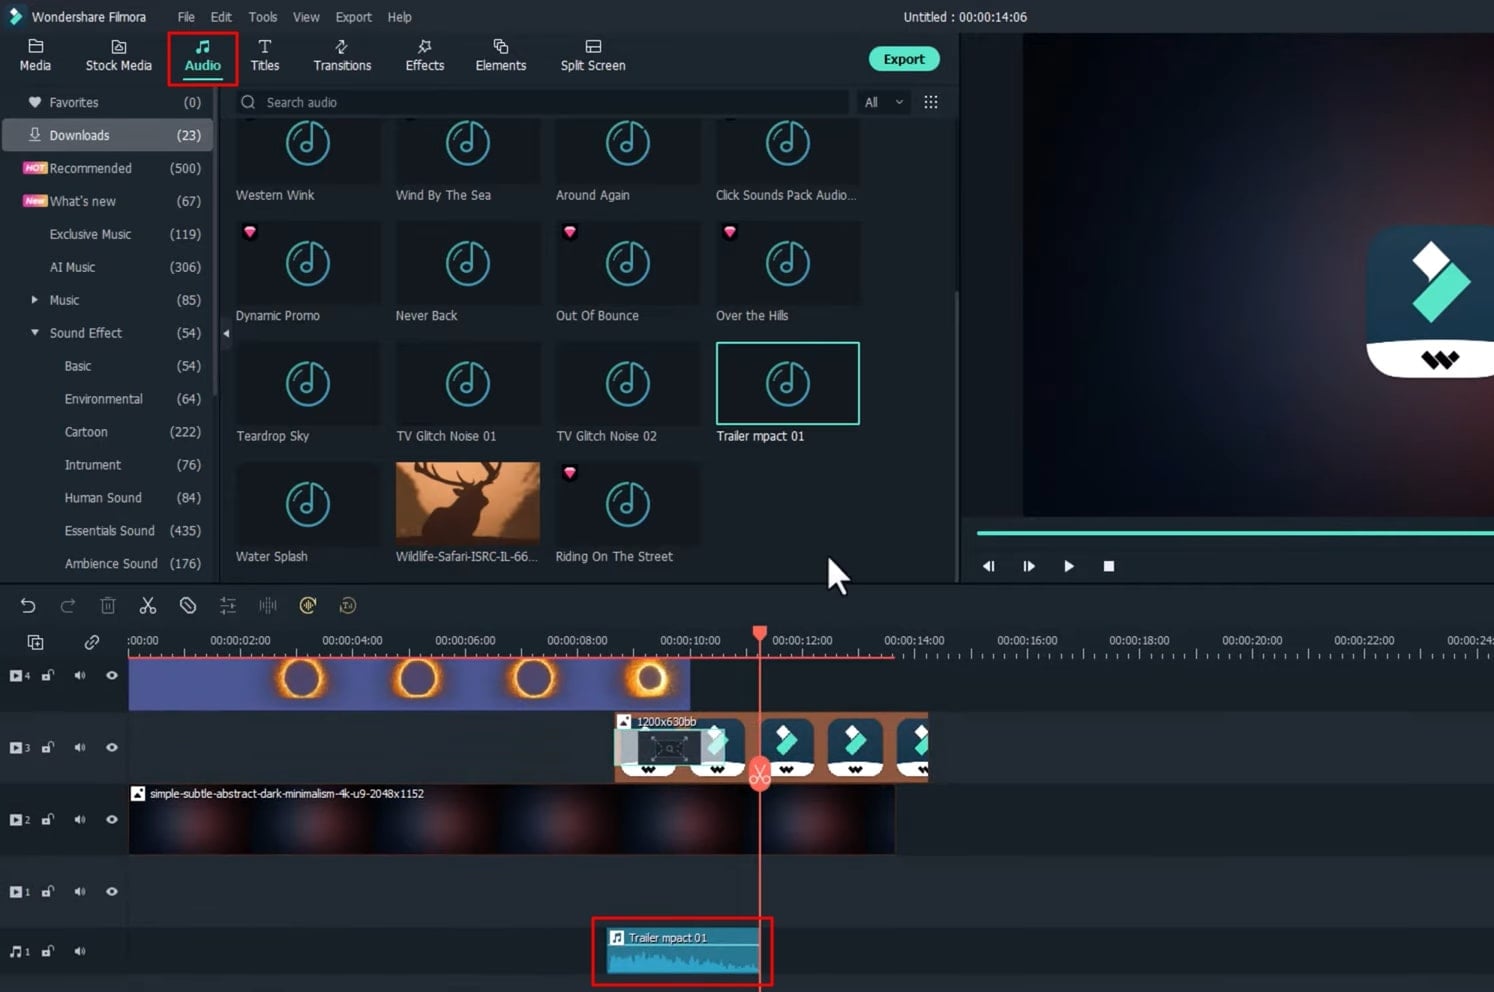
Use Interesting Audio inside the Video
Click on the “Audio” bar from the top of the screen, and you can select any audio from the available categories and options. For example, you selected "Traler mpact 01" and need to move that into the timeline. In addition, you can apply more audio if needed; for instance, adding “Thunder Before The Ran” would be perfect for the video. Adjust the duration of these tracks according to your requirements.
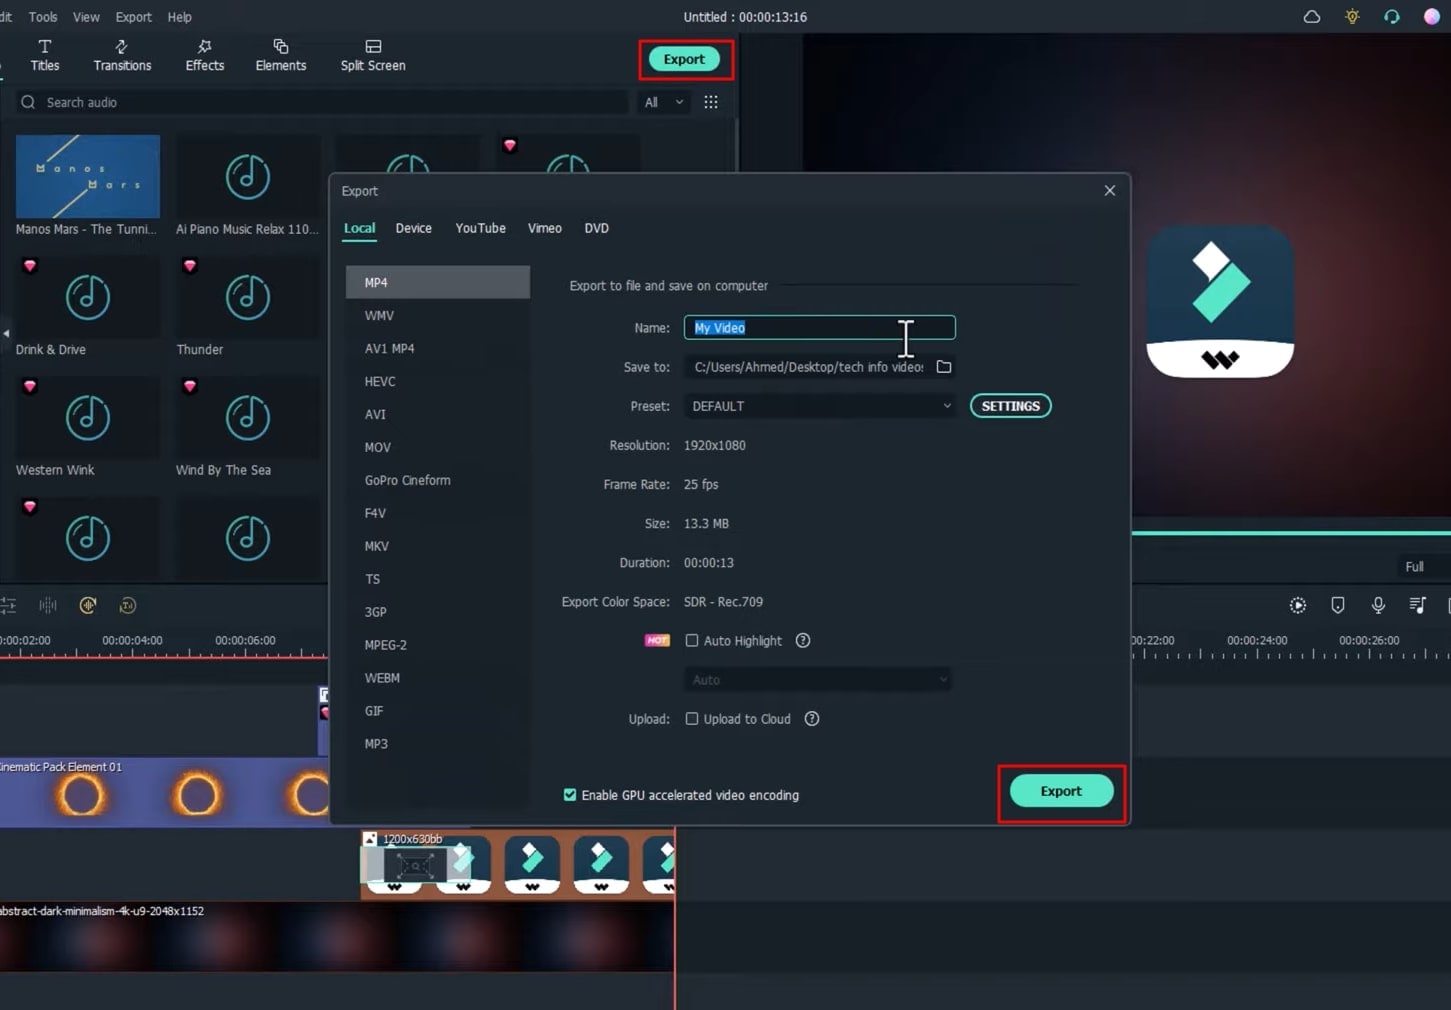
Save the Video on the Device
After all the editing, preview your work by clicking on the "Render Preview" icon. To save your video, click on the "Export" button from the top, choose the video name, and select the file location on the device to save your video.
By clicking on "Settings," you can also adjust the resolution and frame rate. Click "OK," and then press the "Export" button again to save your video permanently on your device.
Undoubtedly, Dr. Strange's effects are stimulating to watch as a viewer. The color combination of fire and blasting animation just develops an overwhelming combo, making the audience intact to their seats while watching the artistic display. For applying such effects to your videos, this Filmora tutorial is a great assistance to have. The steps are easy, straightforward, and precise.