Guide On Applying New 8 Tips, Tricks & Updates In Filmora
Are you a professional video editor on Filmora looking to improve your skills? Or are you just a newbie looking to learn some exciting video editing techniques? This tutorial on Filmora provides eight unique tips that will make your videos more engaging and interesting. The steps are clearly defined with easy-to-follow instructions.
Transcript
Today, in this video, we will get to know Filmora’s top 8 tips, tricks, and updates.
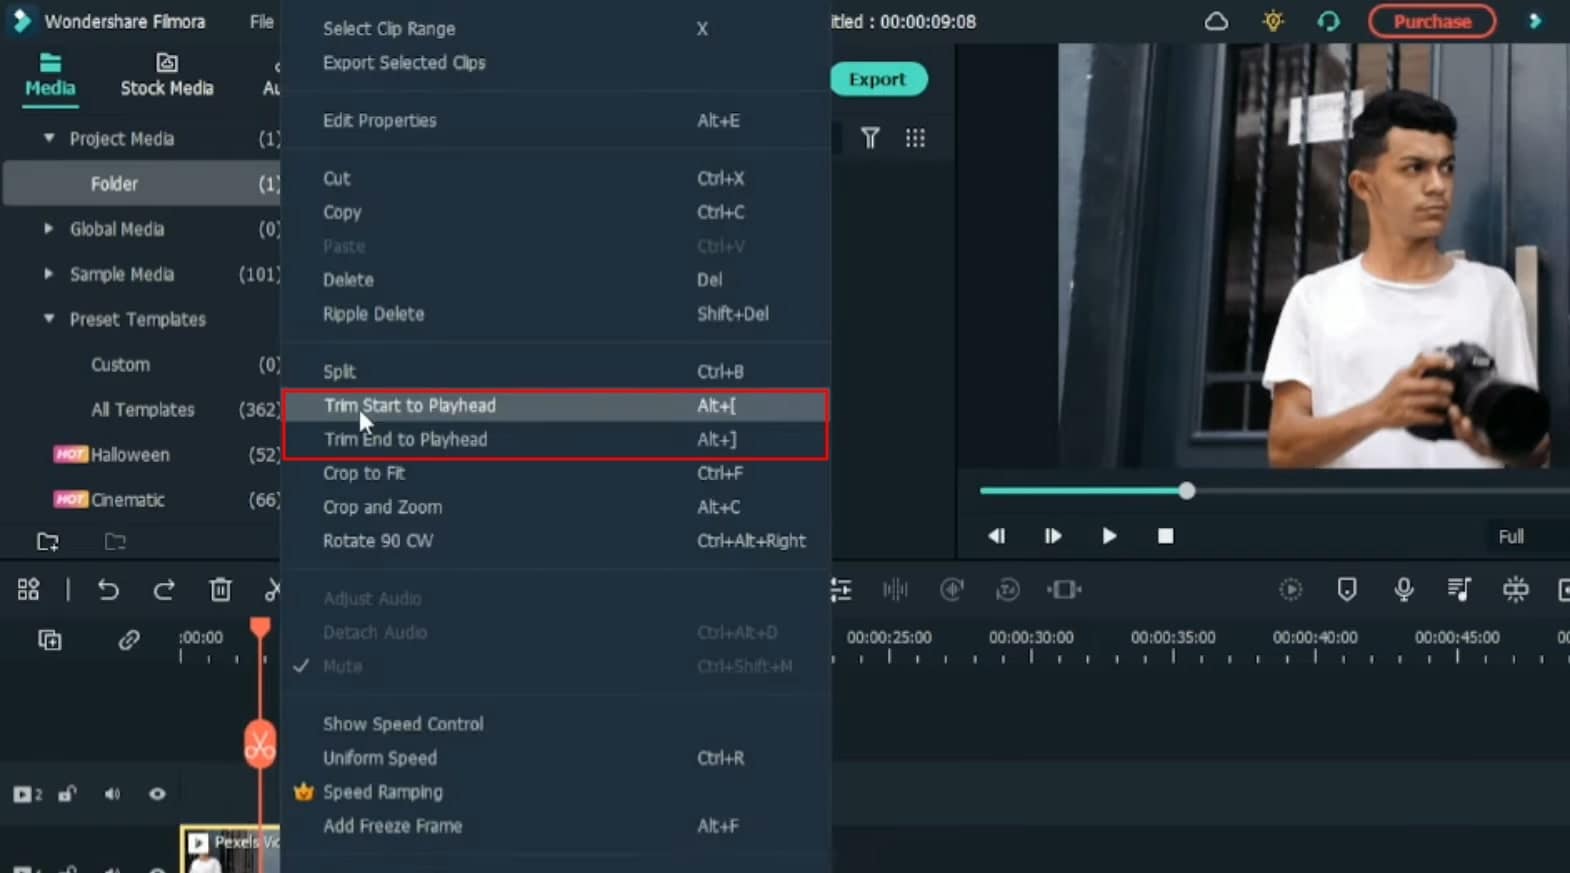
So, friends, the first update is related to video trim. So what used to happen previously was when you needed to trim any part of the video, you had to move the playhead to that part of the video and then click on the “Trim” to delete that part. But now you don’t have to do this. As where you want to trim the part, so you have to move the playhead there, then right-click on the mouse, and then select “Trim Start To Playhead" to trim the start of the part. Click on it; as you can see, the starting part of the video is now deleted. If you want to delete any ending point, you've to right-click and click the option "Trim End To Playhead." Thus, any part ahead of your playhead would be trimmed. So with this option, you can easily trim the video.
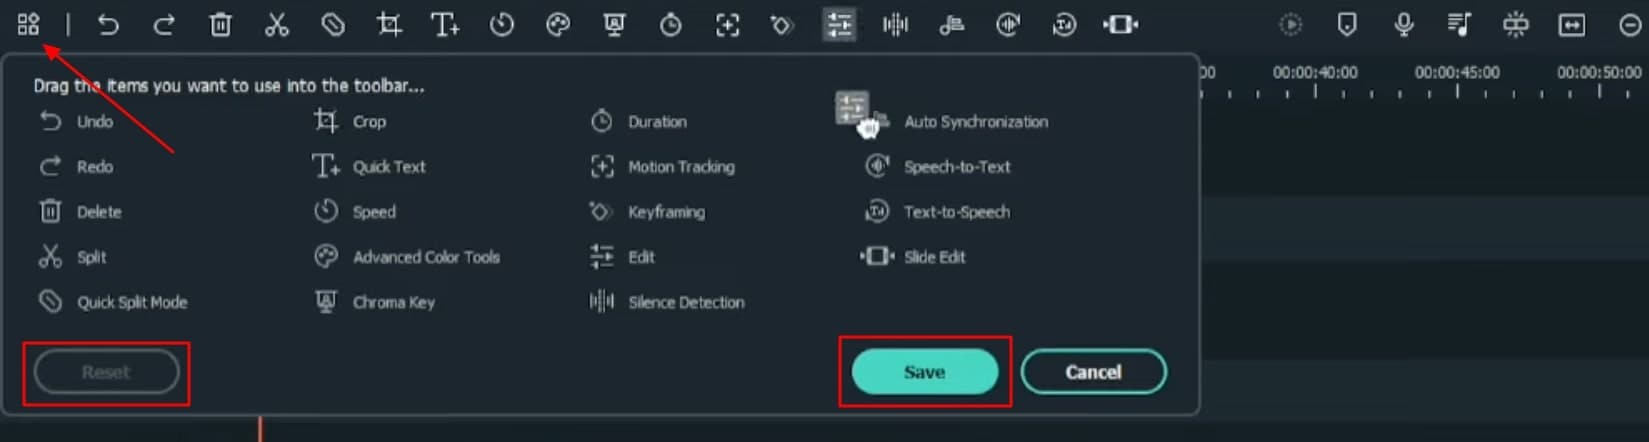
The second update is toolbar customization. So the toolbar that you can see on top, you can customize it. For this, you can see an option where you've to click, and a complete menu will open. Whatever you want to delete from the upper option, you've to drag it down, and that option from there would be deleted. If you want to add something, then you can drag the option in underneath by adding in line. If you want to change position, then by dragging like this, your position will be changed. So this way, anything could be added and deleted. When customization is completed, then it is saved by clicking on the "Save" option. If you don’t want to change and keep everything like before, click on "Reset." So like this, you can keep as many options as you want; the rest you can delete. Thus, a very good option.
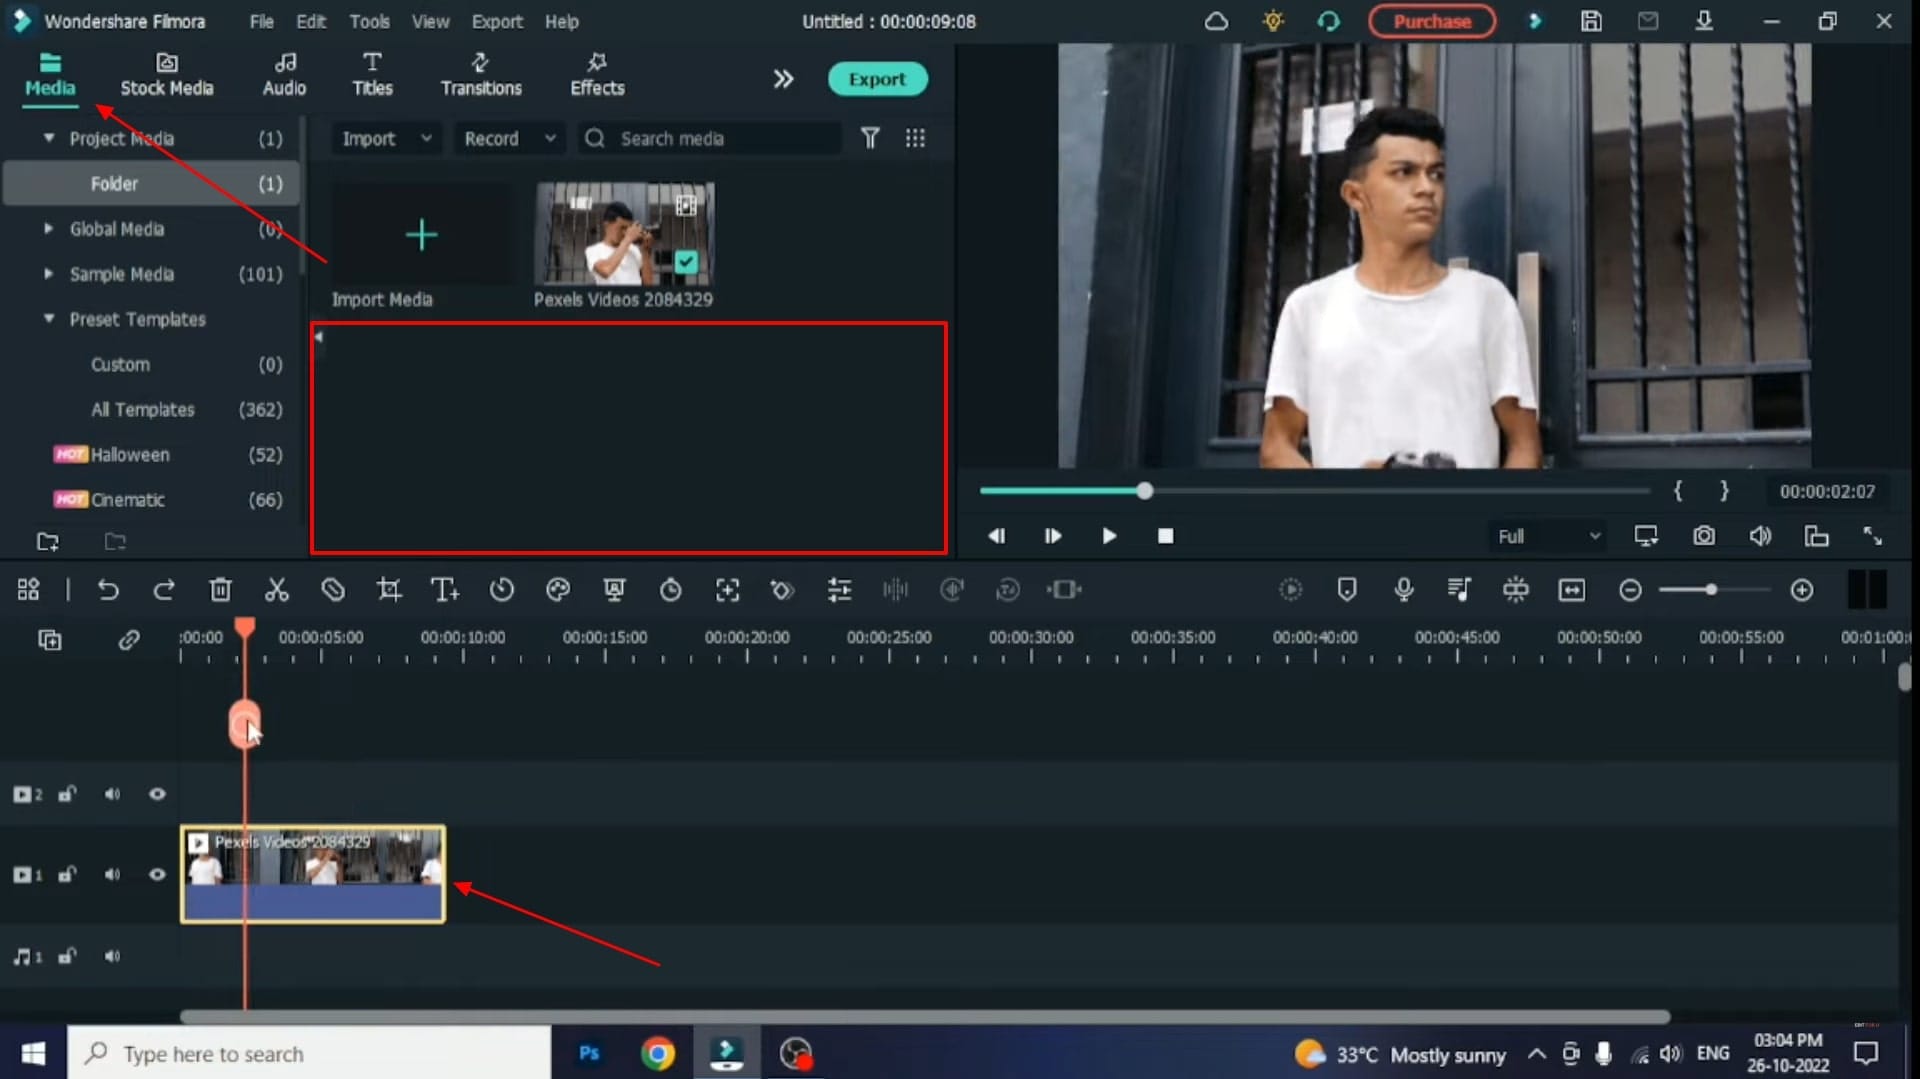
So the third trick is whenever you had to add a video to the timeline, you had to go into the “Import Media.” After that, you needed to select and open the video from here and afterward had to bring it into the timeline, which used to take a lot of time. But now you don’t have to do this. So what you've to do is double-click on the blank space visible here, and as you can see, a gallery will open for whatever video, image, or pic you want to add. So dragging like this, you can easily add. Thus, a very quick method it is. So if you want to edit any quick video, you can follow this process.
Now, we will find the fourth update. So previously, whenever you had to go into the layer's properties, you used to right-click and select “Edit Properties.” After clicking Edit Properties, you use to visit properties from here. But now, you don't have to do this. You can see an option here in the toolbar, so after clicking it, you can directly navigate into properties. You can edit any color, animation, or speed with properties opening. Hence, with a single click, you can open properties from here.
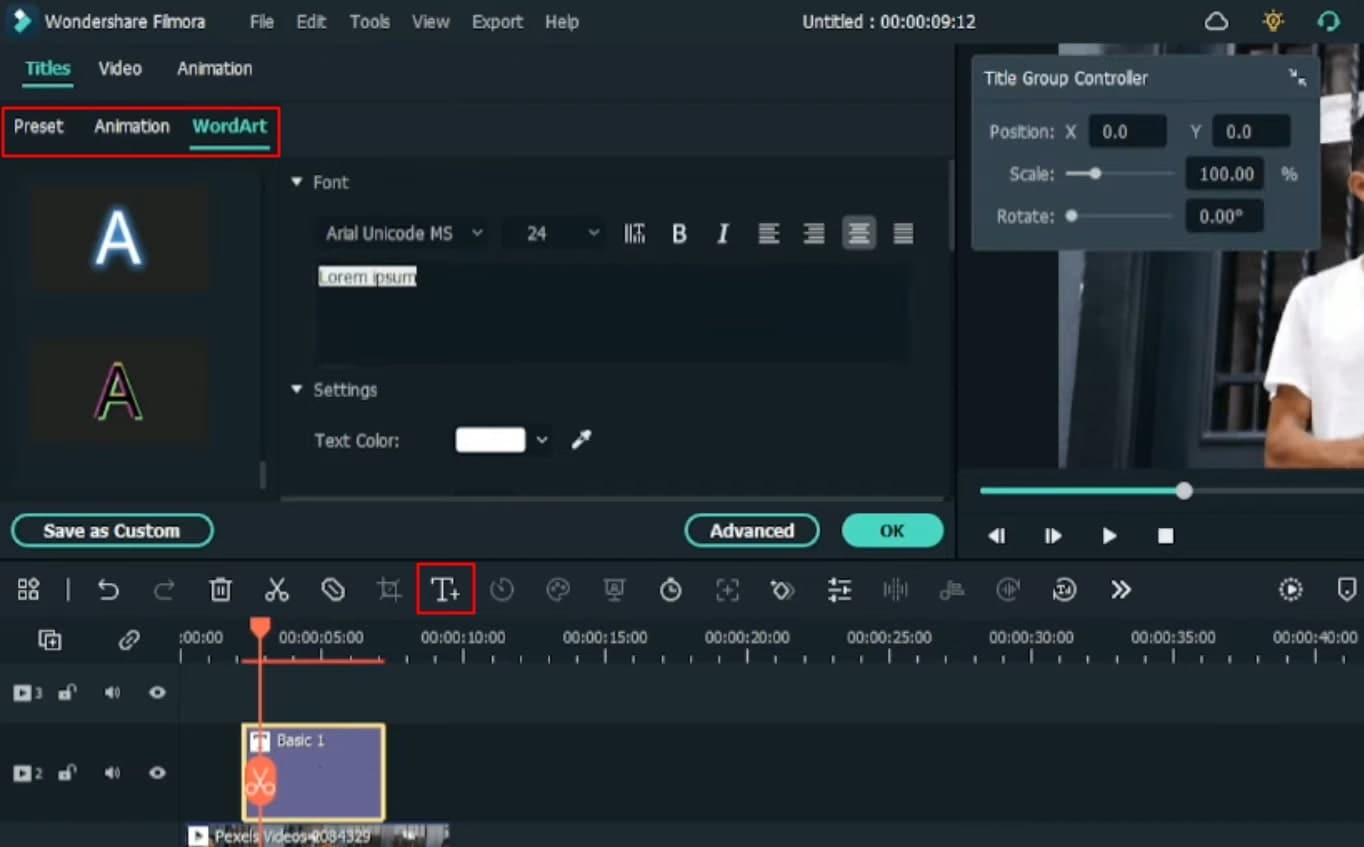
The fifth number update is about the quick text. So previously, if you wanted to add text to a video or image, you had to go into the text and select any text from here. But now you can add text with just one click. For this, you can see a sign of the "T" option in the timeline. You've to click on it, and you can see something like this text option will appear. You need to double-click on it, and from here, write anything you want. After this, you can also change the text color and change font here with respect to its size. By going into the font, you can also change the font from here, which will appear like this. At the top, you can see the option of “Preset” appearing, and when you click it, you'll see many effects. So you can select any effect. Next, you can see “Animation,” and if you want to add animation to the text, you can select from here. Next, you'll see the "WordArt" option, so if you want to add any WordArt effect, you can select this option. Thus, you can see how the text's effect will appear in front of you. Hence, with a single-click option on the quick text option, you can add any text.
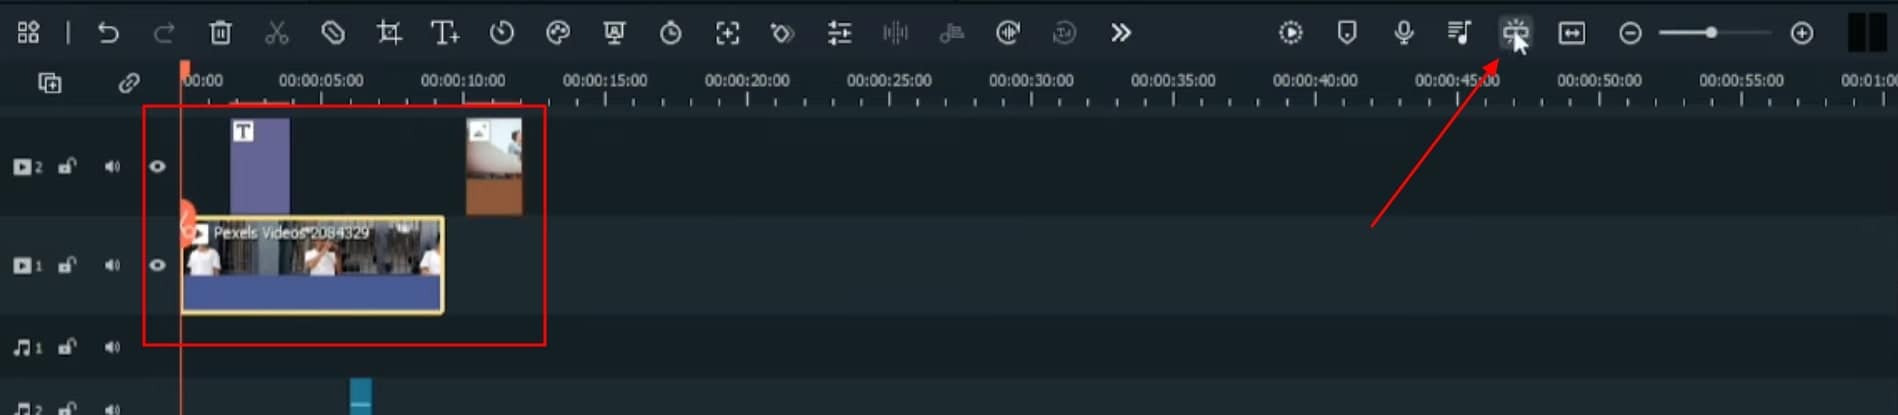
The sixth numbered update is on the snapping tool. So as you can see, there are many layers. Thus, you see, I want to perfectly match this layer with where the upper layer ends. So you can see, it's taking a lot of time to adjust. So you can see a “Snapping Tool” option, will click on it, and layers are traced now. As seen, where your upper or down layer ends, your layer will automatically be added straightly. The layer does not need to be adjusted but only dragged, and it will automatically be applied at the start or end of another layer with a snap.
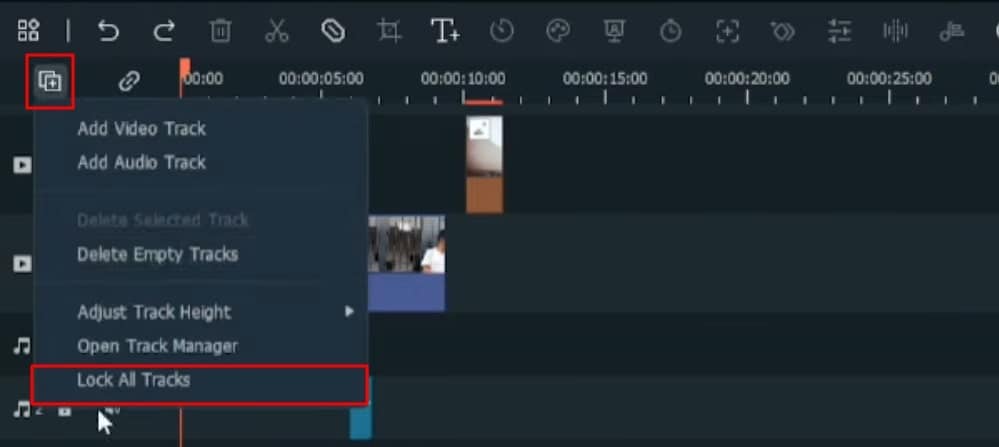
The seventh number update is the lock layer. So previously, if you wanted to lock any layer, you had to lock every layer one by one like this, which used to take a lot of time. But now, with one click, all the layers could be locked. For this, you can see an upper option here. You've to click on it, and from the last option, you need to click "Lock All Tracks." After clicking this, visible layers are locked, and you can now work in a good way. If you want to unlock it, so click on it, click "Lock All Tracks," and the layer will be unlocked. This way, you can lock and unlock your layer with one click.
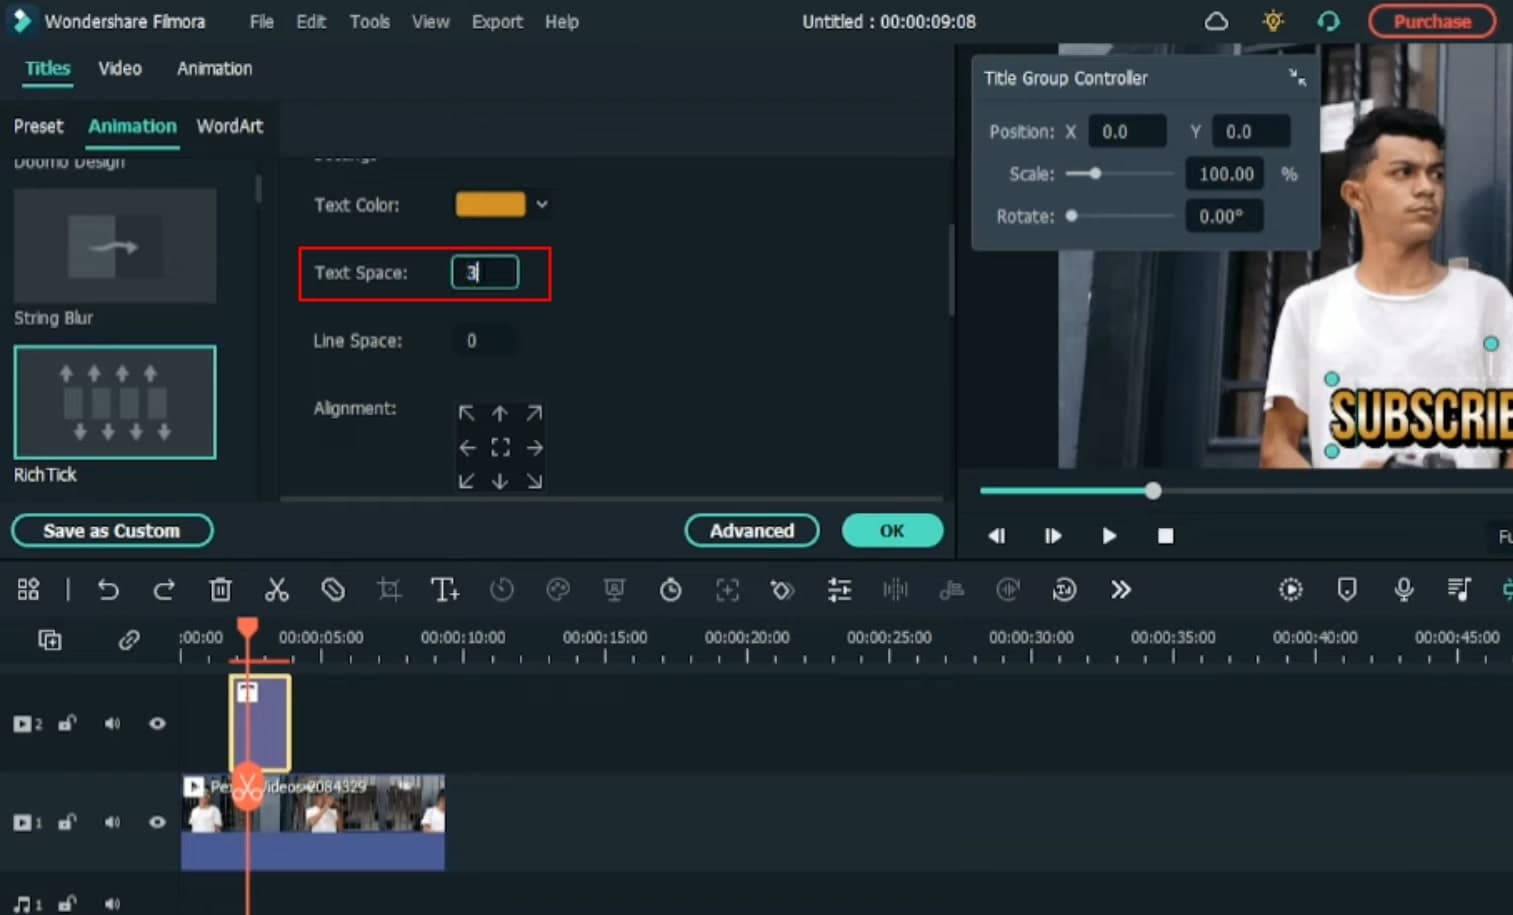
So last update is related to text spacing. If you want to give spacing within any letter, you don't need to give space like this within every letter. So what you have to do is scroll down. After scrolling, you'll get an option, "Text Space." So you've to click on it, and after clicking, you can set the amount of space you want. Let's keep it to 3, and you can see there would be little space like this. If you want to keep more space, then again, from the amount here, you can increase or decrease as per your requirements. Thus, like this, text spacing would be visible to you. If you want to give line spacing below, so beneath, you’ll see a line spacing, and you’ve to click on it. So like this, you can also add text spacing and line spacing.
Guide On Applying New 8 Tips, Tricks & Updates In Filmora
What you need to prepare:
- A computer (Windows or macOS)
- Your video materials.
- Filmora video editor
Import Video from Media
To begin your video editing on Filmora, you’ve to first import your video. To do this, you need to click the "Media" tab from the top-left and then press the "Import Media" button to import your required media.
Although this process is a bit time-consuming, as a tip, double-click on the blank space visible under the "Import Media" button and now select your desired video files. Make sure to drag and drop the video to the timeline below.
Trim Video into Parts
By moving your playhead onto the video and by using the trim function indicated in the “Scissor” icon, you can delete unrequired parts of your video. But this process takes a lot of time. Now, select your video, right-click, and choose "Trim Start To Playhead" if you want to remove the video part before playhead.
Repeat this process, and now select “Trim End To Playhead” if you want to delete that existing and ending part after the playhead.
Customize the Quick Tools on the Panel
Click the “Custom toolbar” from the left side of your screen, and you'll see many functions that could be applied to your video. If you want to add or delete functions from the toolbar, you’ve to drag and drop them on each other. This way, the unrequired functions will be removed from the toolbar, and only useful functions will appear there. If you want to undo the changes, click the "Reset" option.
Edit, Modify the Video Directly
If you want to edit and modify the properties of your video, you need to right-click the video and then select “Edit Properties” to customize and adjust your video. But this is a slow process, and to overcome this, you've to click the "Properties" icon from the toolbar. A window will open from where you can directly adjust the color, animation, and speed of the video.

Apply Text for Better Navigation
Now click the "Titles" tab from the top of the screen, and select your desired text title from the given options and categories. Whatever text title you choose, drag it to the timeline below. If you need to edit the text, double-click on the title track and edit accordingly from the open window. However, this is a very time-consuming process.
To be fast and efficient, select the title track, and click the "Quick Text" icon from the toolbar. A window will open where you can edit the text as required. You can write on the screen as needed or even change font layout, size, color, etc. In addition, you can also perform editing using categories like Preset, Animations, and WordArt. You can also apply "Advanced” editing as required.
Integrate Timeline Snapping
By dragging and dropping with your mouse, you can match the starting and ending points of your title track, video track, or other element tracks in your timeline. This is, however, a very time taking procedure. Therefore, click the "Enable Timeline Snapping" icon from under the screen and precisely place the tracks in the upside-down format while efficiently matching the ends.
Manage Tracks on the Timeline
Click the “Lock Track” icon on a particular track in the timeline, lock it up, and manage other tracks in the timeline conveniently. However, this process can take a long time if you lock and unlock different tracks.
Now click the "Manage Tracks" icon, select "Lock All Tracks," and all your tracks will be locked. By clicking the "Lock Track" icon on an already locked track, it will be unlocked, and you can continue editing it while others are still locked. If you want to unlock all tracks, click the "Manage Tracks" icon and press the "Lock All Tracks" option again.
Add Text Spacing in Characters
If you want to add spacing to your text, double-click the title track, and you'll see an editing window. Navigate into the screen, and by using the space bar, you can add space within the characters of your text. However, that's a time taking process. The quick and easy way is to choose "More Text Options," and then select "Letter Space," where you’ve to place any digit to set the spacing margin within the text.
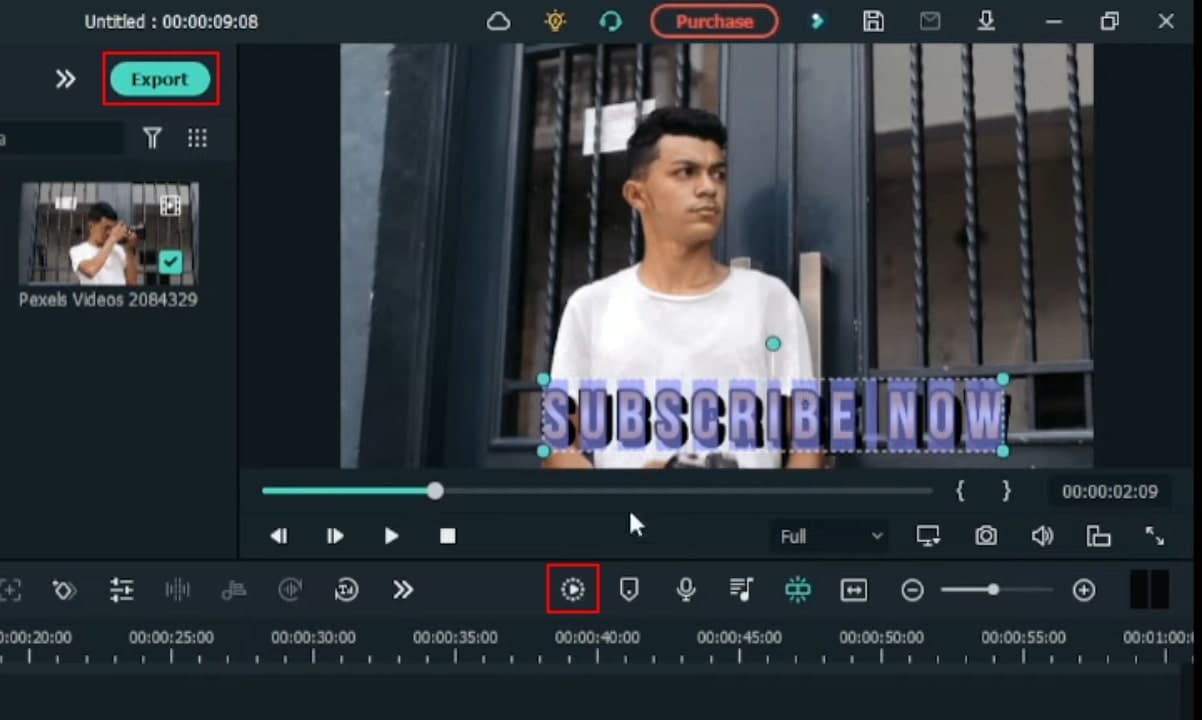
View Video and Export
To enjoy a smooth playback of your video, click the "Render Preview" button. If you feel satisfied with the video, click the "Export" button to export and save the video to your device.
Video editing is a great skill to have these days, considering the number of videos being produced on a daily basis. Apparently, a majority uses Wondershare Filmora for this purpose. Henceforth, this tutorial provides everyone a simple follow tips, tricks, and updates on using Filmora that can take your video editing to the next level.