
Language barriers and noisy environments can make understanding videos challenging. Subtitles bridge this gap by providing text-based transcriptions to ensure the content is accessible to everyone. When viewing international films or series in a crowded cafe, subtitles improve understanding, making video content more captivating for worldwide viewers.
Due to their extensive use, subtitles are now offered in various languages to serve a range of audiences globally. Filmora auto caption functionality provides a simple way to add subtitles to let creators enhance the accessibility and appeal of their videos. This article will explore different methods to add subtitles in Filmora, enabling you to reach a wider audience.

In this article
Part 1.Great Video Editor for Adding Subtitles - Wondershare Filmora
Wondershare Filmora is an excellent option for users seeking an advanced solution for adding subtitles to their videos. Users can transcribe video speech into text with a single click to save time. Moreover, the Filmora subtitle generator supports transcription in 27 languages, making it versatile for global audiences. It offers various methods for adding subtitles on a desktop, such as speech-to-text functionality and AI Translation features.
The Speech-To-Text feature allows AI to generate captions from the video's audio without manual effort. The AI translation feature translates your audio and provides captions at the same time, providing an efficient and flexible way to create subtitles. This feature is beneficial for users who deal with videos in different languages. Additionally, Filmora offers a Dynamic Captions feature that adds stylish, animated text that matches your video's theme.
Not only that, but users who like precision can manually add captions to their videos using the available title templates and presets. Apart from the software, users can also use Filmora's app to generate captions. It offers a convenient auto-caption feature that allows you to generate captions in different languages on the go.
Key Features of Filmora Auto Captions To Note
- Subtitle Options: Filmora auto subtitles allow you to export subtitles as an external SRT file. This can be useful if you want to keep the subtitles separate from the video file. You can also embed subtitles into the video as titles on the timeline.
- Customization of Subtitles: After generating subtitles, users can edit the text, change font color, and adjust opacity. Apart from that, you get access to various animation styles to add to the text to make it stand out.
- Bilingual Subtitle Transcription: With Filmora's subtitle generator, users can generate subtitles in two languages at a time. This enables seamless integration of both languages into a video, making content accessible to a broader audience.
- AI Text-Based Editing: In AI Text-Based Editing, the captions open in a built-in text editor, where you can edit, rewrite, or adjust them according to your needs. Users can then easily customize the subtitles or add animations to them as required.


Part 2. How to Add Subtitles to Your Videos Using Filmora On Desktop?
As discussed earlier, Filmora offers various methods for generating captions on a computer. After having a brief overview of the methods, we will now look at their detailed step-by-step guides for each in the following section.
Method 1. How to Generate Subtitles With Filmora's Speech-To-Text Feature?
Filmora offers a Speech-to-Text feature that generates subtitles from spoken words in your videos. Go through the detailed guide to execute Filmora auto-captioning for seamless subtitle creation:
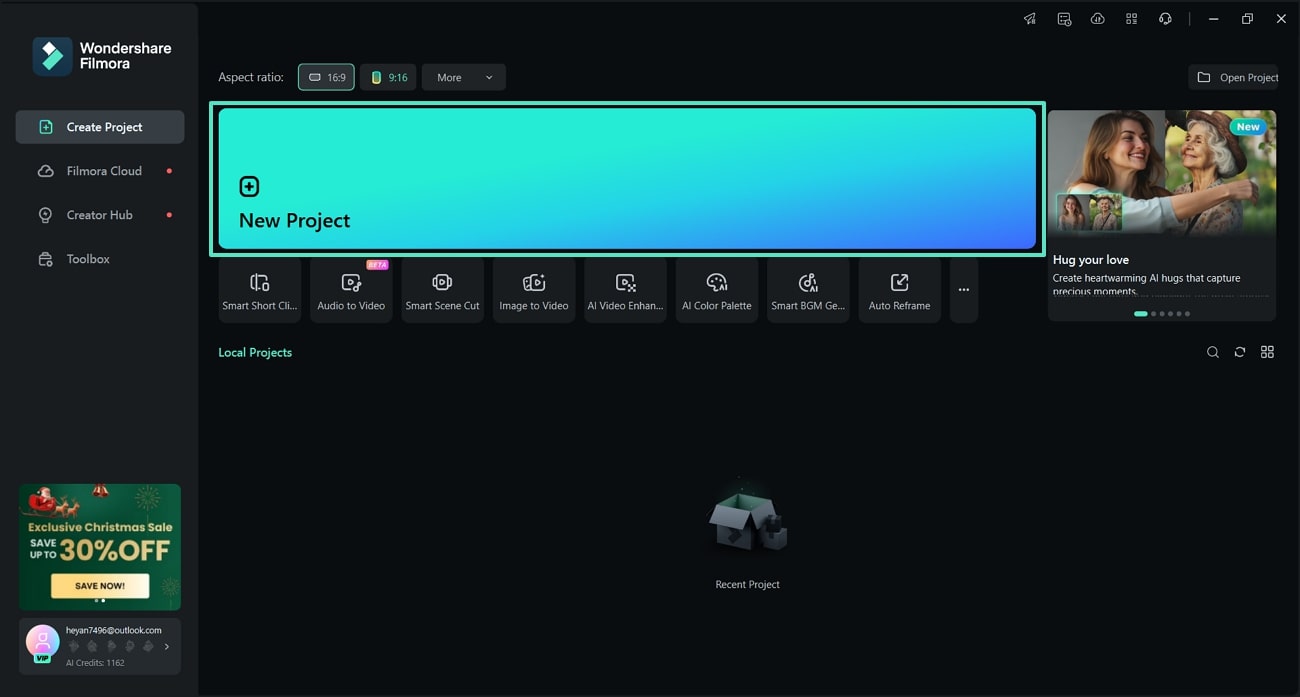
Step 1 Create a New Project To Enter the Editing Interface
Initiate by downloading and launching the recent version of Filmora from its official website. Click the "New Project" button from the home page to enter the editing interface.
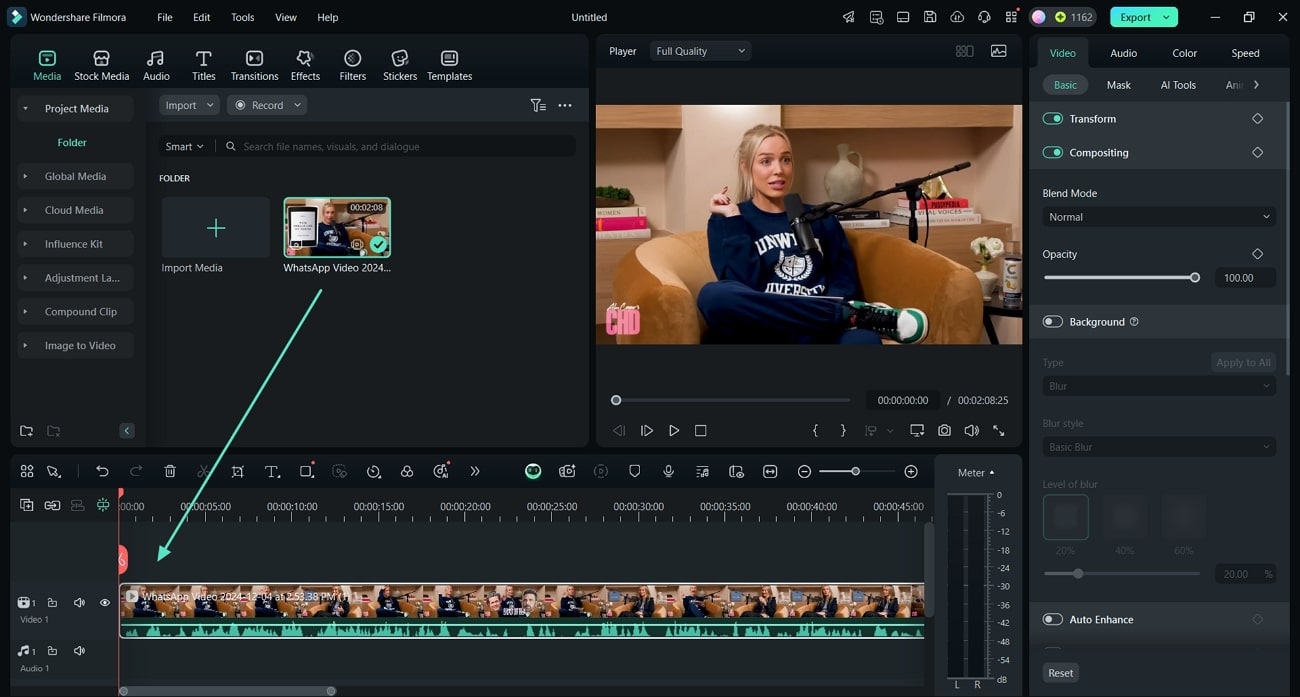
Step 2 Import the Video for Transcription
On reaching the main workspace, tap the "Import" button to add the video for transcription. As you import the video, drag and drop it to the timeline below to add synchronized subtitles.
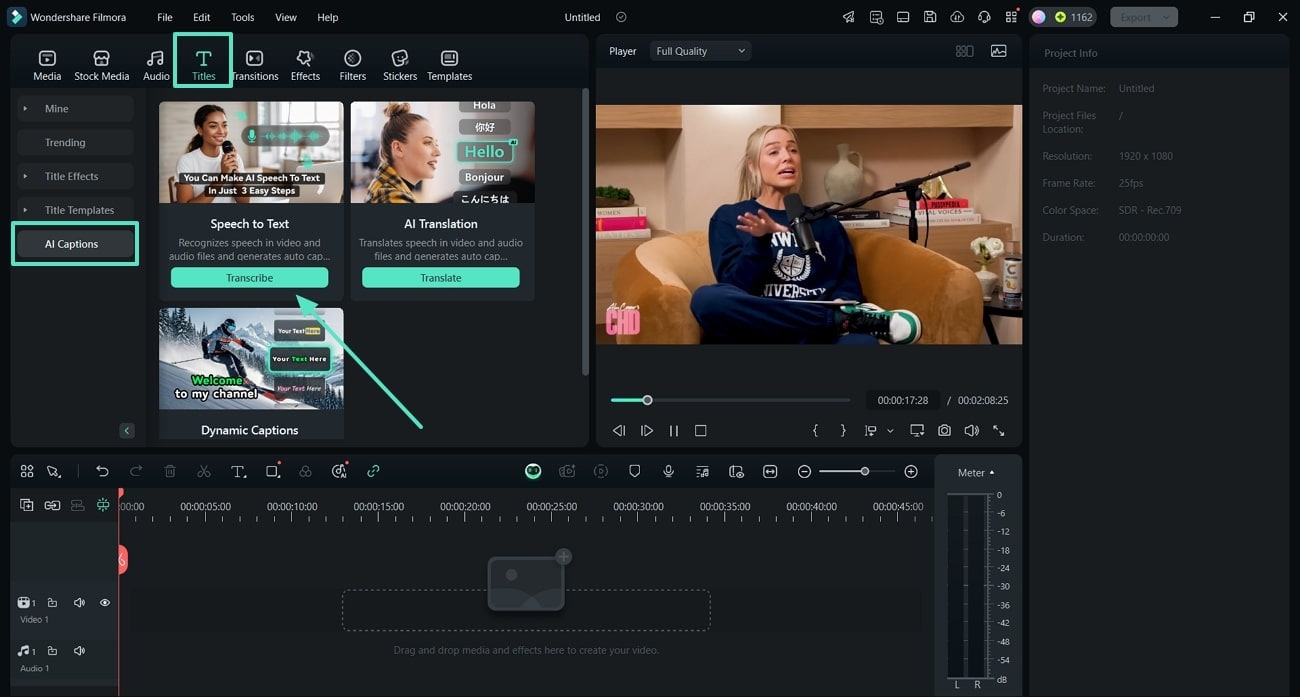
Step 3 Access the Speech-To-Text Feature
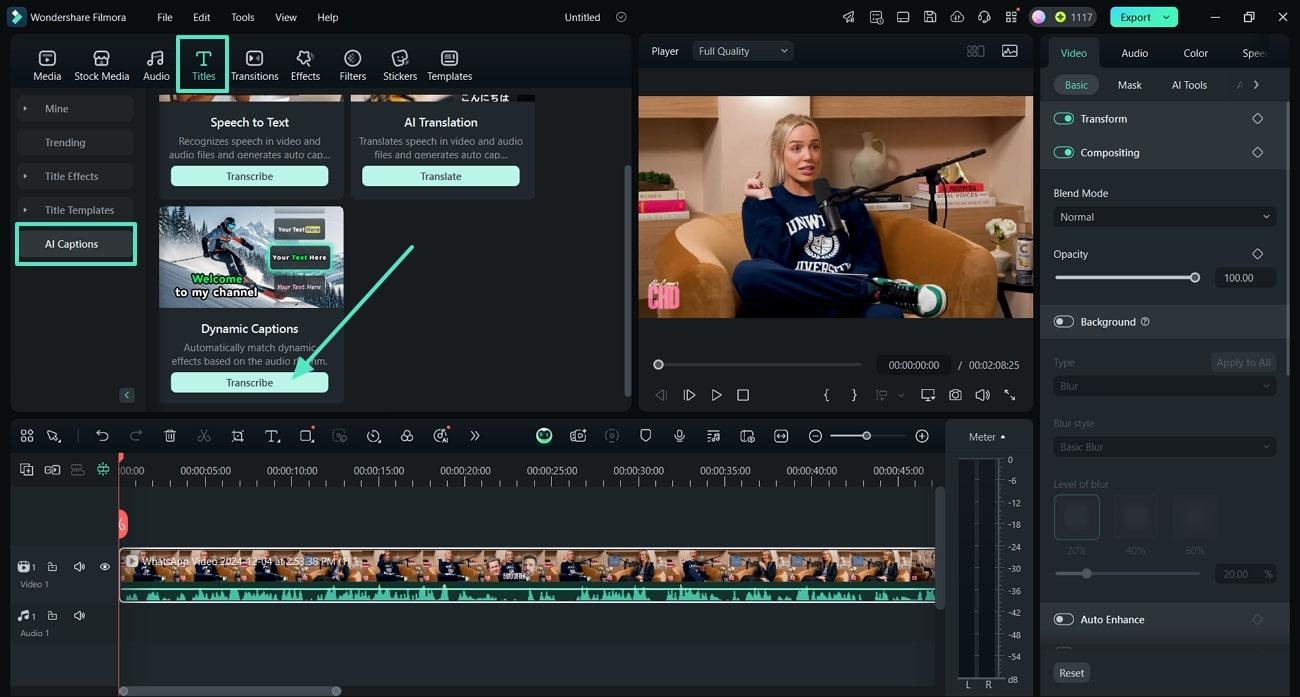
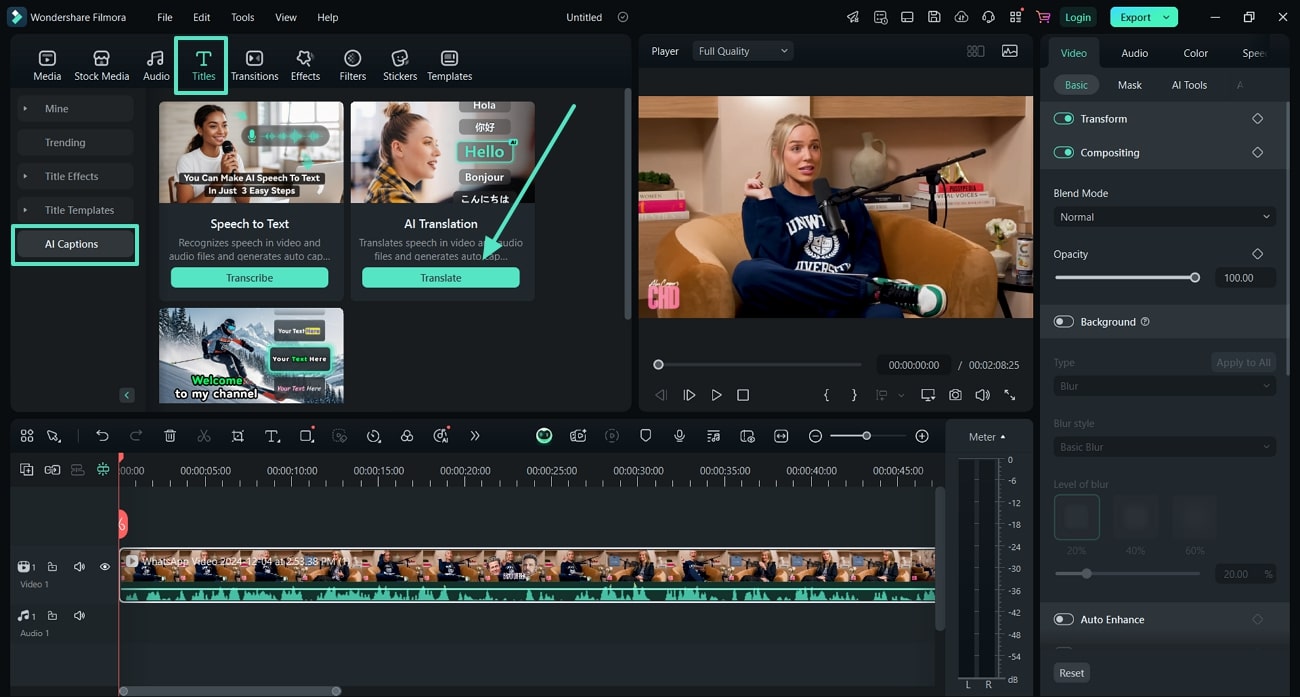
After dropping the video to the timeline, navigate to the "Titles" tab on the top toolbar. From the left-side menu bar, select "AI Captions" and tap on the "Transcribe" button within the Speech-to-Text feature.
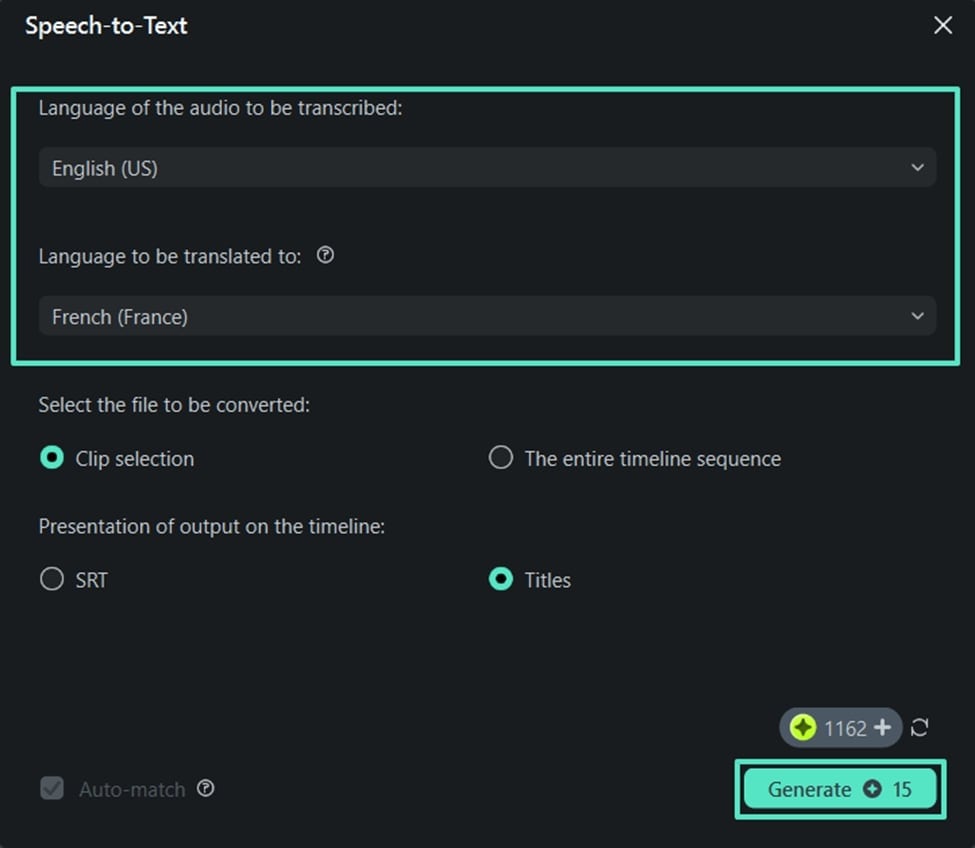
Step 4 Begin the Subtitle Generation Process
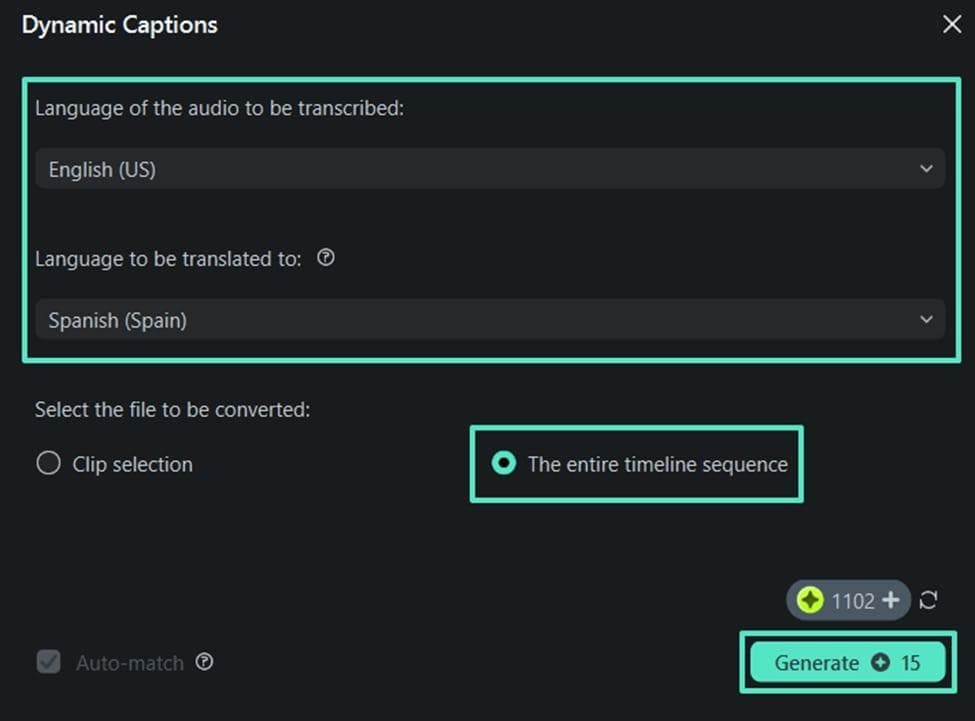
Expand the drop-down list under the "Language of the audio to be transcribed" section and select the source language. Similarly, choose the target caption language under the "Language to be translated to" section. Once you've chosen the languages, hit "Generate" to begin the subtitle generation process.
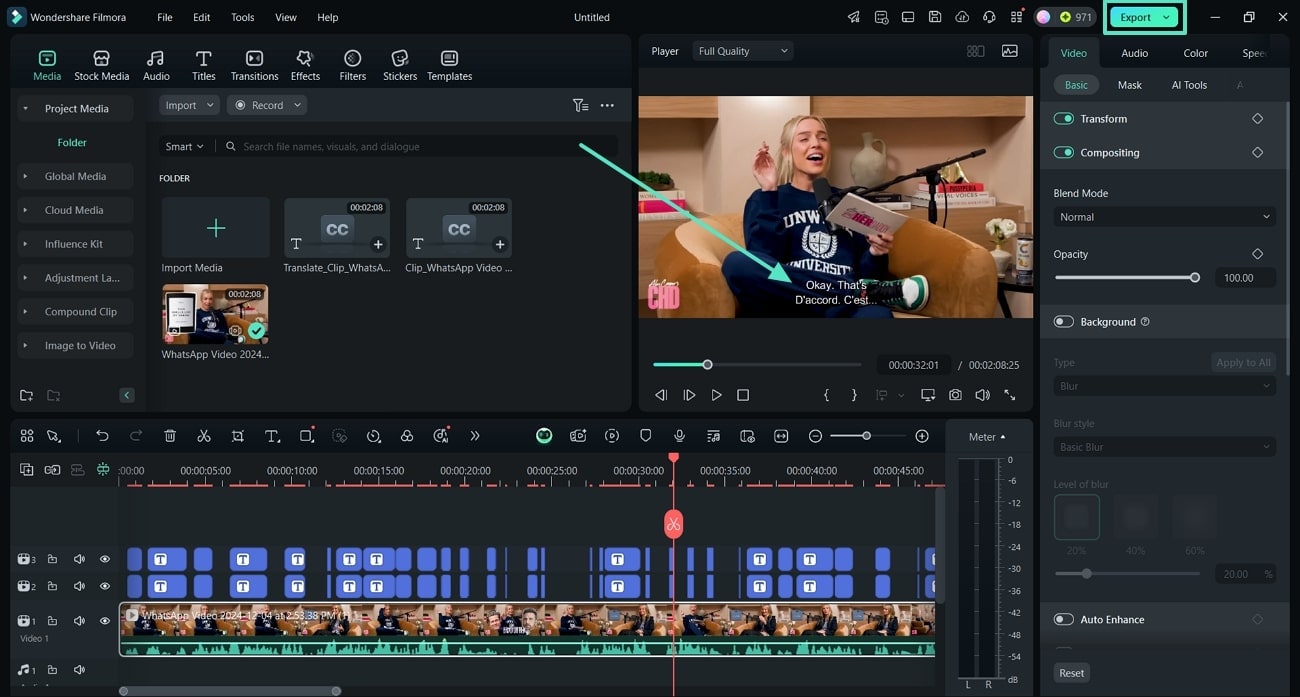
Step 5 Save the Output Video With Subtitles
As the speech-to-text conversion is over, you can view the generated subtitles within the video in the preview window. When content with the final look of subtitles, press the "Export" button at the top-right corner of the interface to save the output video.
Method 2. How to Insert Dynamic Caption to Videos With Filmora?
Now that you know how to utilize the Filmora auto subtitles function, learn another way to enhance your videos with attractive captions. We will walk you through the instructional guide on using the Dynamic Captions feature of Filmora:
Step 1 Find the Dynamic Captions Feature
In the "AI Captions" section within the "Titles" category, press the "Transcribe" button below the Dynamic Captions feature to open a new window.
Step 2 Select Languages and Generate Captions
Within the "Dynamic Captions" window, choose the source and target languages from their respective drop-down menus. After that, toggle the "The entire timeline sequence" option to ensure the captions are generated from the entire audio. Lastly, tap the "Generate" button to initiate the caption creation process.
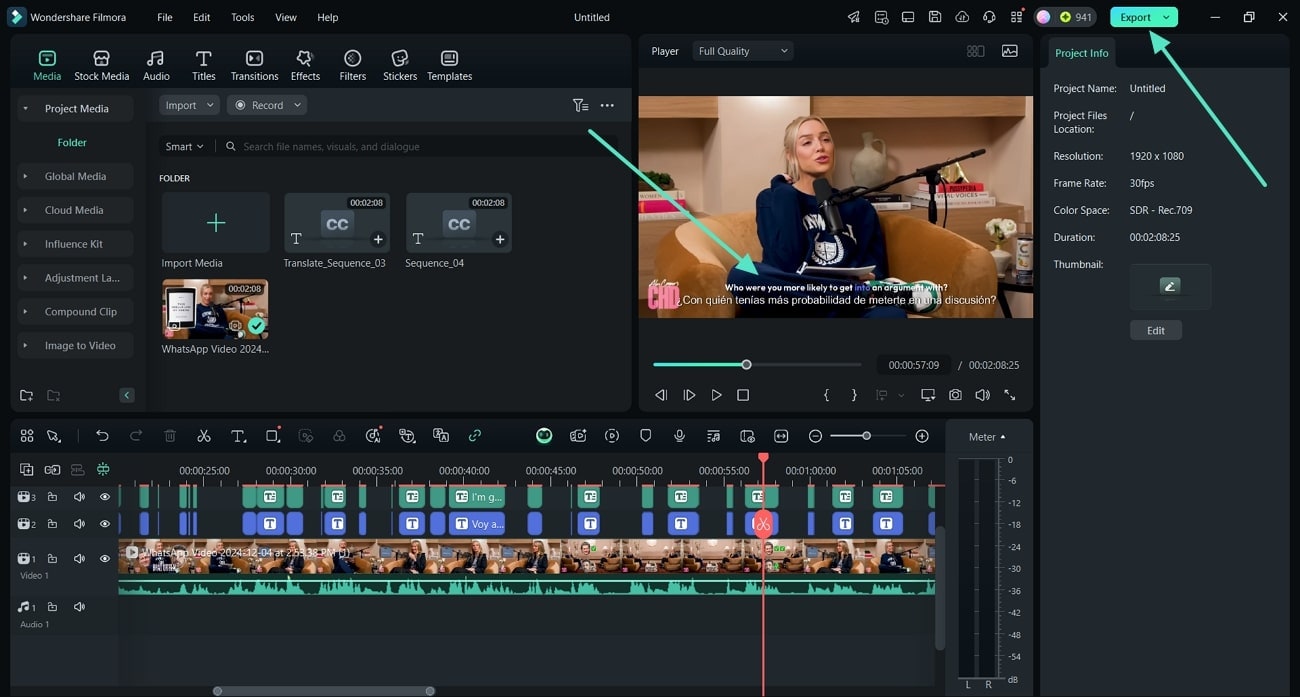
Step 3 Review and Save the Captioned Video
After the captions are created, play your video in the preview window to check the accuracy and readability of the subtitles. Once satisfied, hit the "Export" button and save the video on your PC.
Method 3. How to Use Filmora's AI Translation Feature for Subtitle Generation?
For creators targeting multilingual audiences, the Filmora add subtitles operation with AI Translation is an excellent tool. The steps to use this feature are presented in the following guide:
Step 1 Open the AI Translation Feature
Upon entering the AI Captions section, head to the "AI Translation" feature. Click on the "Translate" button within the AI Translation feature to open up a new window.
Step 2 Initiate the Caption Generation Across AI Translation
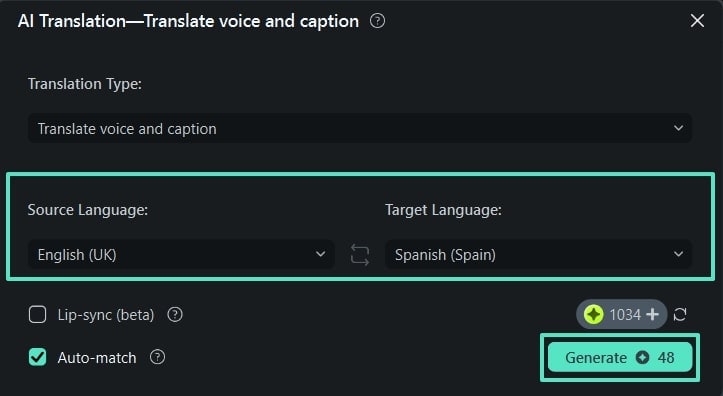
In the AI Translation window, choose the language in which the original video is by pressing the "Downward" icon next to the Source Language selection drop-down. In the same way, choose the "Target Language" and click on the "Generate" button to create the Filmora auto captions.
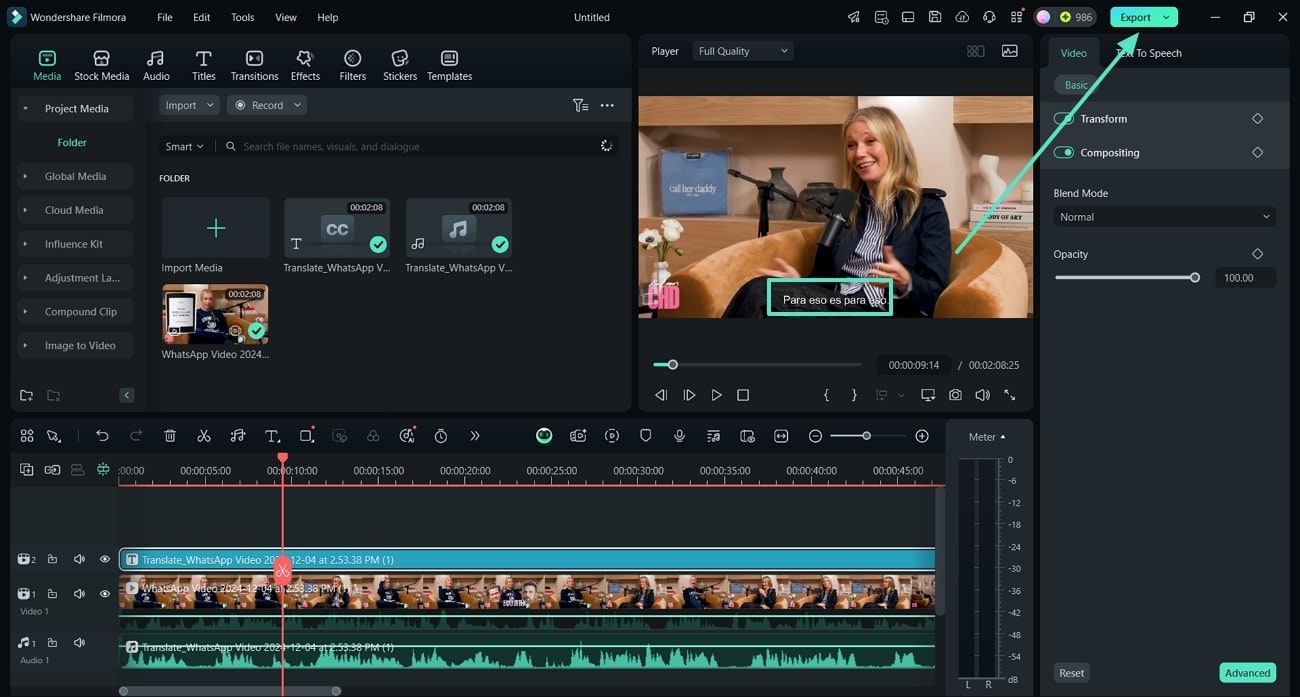
Step 3 Export the Subtitled Video Within Filmora
Once the translation is over, review the generated captions if you want to make any changes or remove unwanted parts. After reviewing the captions, move to the "Export" button to save the video to your device.
Part 3. How to Add Subtitles Using Filmora Mobile App?
Upon having a detailed overview of subtitle creation on desktop, let's shift our focus to the Filmora mobile app. Users who want to add subtitles in Filmora from their mobile phone can follow the outlined instructions to effortlessly enhance their video's accessibility to a wider audience:
Step 1. Import Your Video For Caption Creation
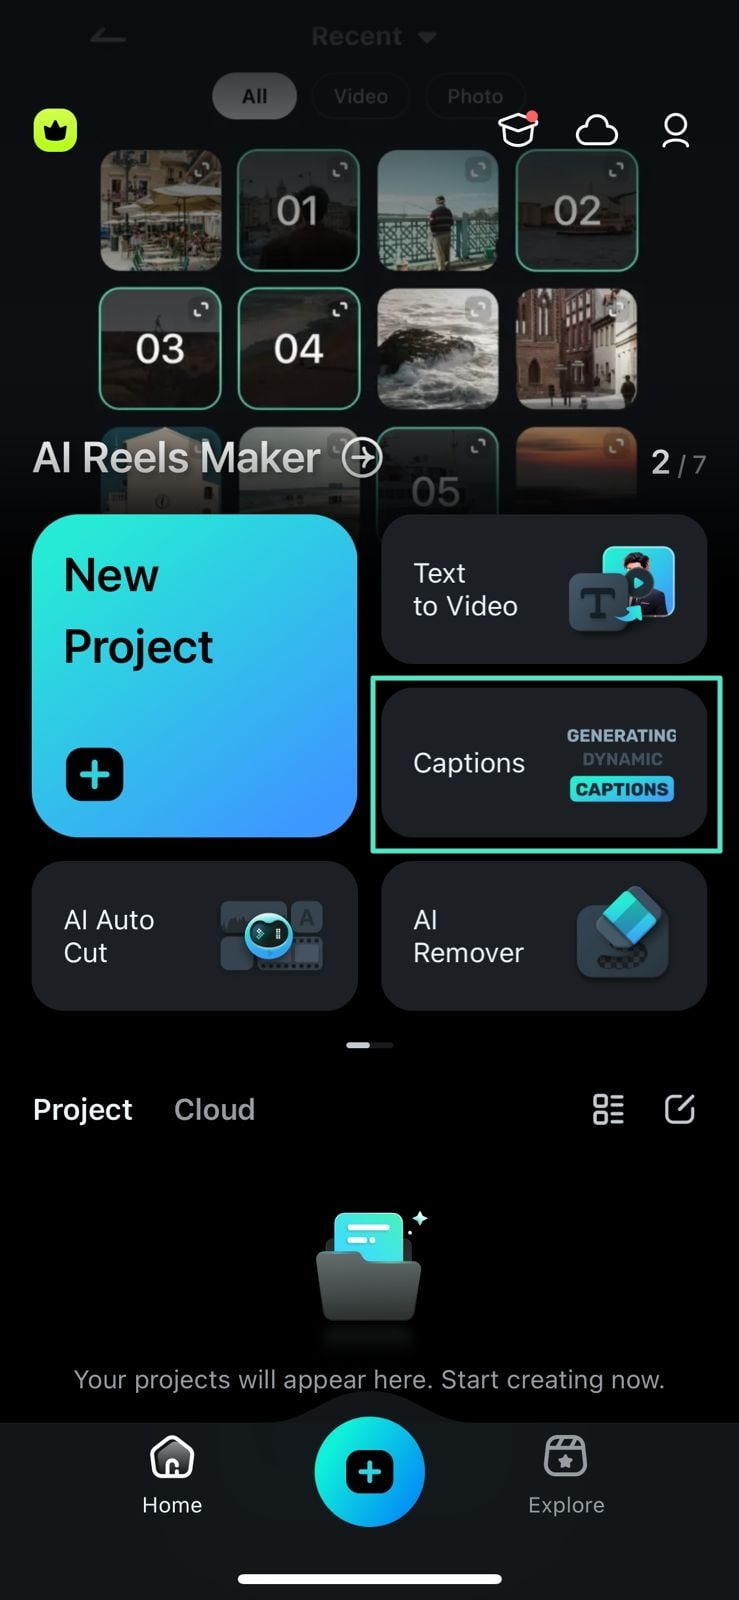
After opening the Filmora app, head to the "Captions" feature to add the video from your phone for caption generation within the homepage.
Step 2. Choose the Target Language and Generate Auto Captions
When your video gets imported, tap on the "Downward" icon within the "Select Current Language" section and choose the target language from its drop-down list. After choosing the language, tap on the "Add Captions" button at the bottom to add auto-captions to your video.

Watch the video below to get full understanding of adding subtitles on mobile device in Filmora!
Filmora for Mobile Filmora for Mobile Filmora for Mobile Filmora for Mobile Filmora for Mobile
Add Subtitles to Videos in Filmora
- • Powerful Brand New AI Features.
- • User-friendly video editing for beginners.
- • Full-featured video editing for professional.


Conclusion
Adding subtitles to the videos is useful for expanding the global reach to make content accessible to a wider audience. This drives the need for powerful subtitle-generation tools. This article explored Wondershare Filmora as a solution that offers AI-powered subtitle generation. With the ability to generate and customize subtitles on both desktop and mobile, the Filmora subtitle generator provides a comprehensive toolset to enhance video accessibility.
