Guide On How To Add Lyrics And Animation To Song Using Filmora
A song is a powerful media file that perfectly combines melodious music and audio effects. Unsurprisingly, we all love listening to songs to freshen our minds and body. However, we can make our favorite song more special by blending lyrics and animations into it. This tutorial on Filmora will teach you how to do it.
Transcript
In this video, I will show you how to add text or tiles to your songs, so you can see lyrics on the screen. There are three parts to this video. The first part is the graphics part, things like the waves and the background. The second part is matching lyrics to your song, so that part would actually take the longest, and finally, adding some final touches to your video in terms of the elements that have actually been included for you to download. Let's dive straight in.
The first thing to add lyrics to your song is to get your song. I'm just gonna drag the song onto the audio track. Now you may want to open up this track larger to see the waveforms. This will help you to add titles to your lyrics. Now there are two ways you can do this. One is to put your lyrics here and break them up. Alright, or you can do it later. But because for this video, there are animations, I choose to do my lyrics later. So I'm just going to set up the scene first.
I’m going to drag this image onto the track above to use as my background. Double-click on the image. I'm going to drag the corners of this image to make it larger. I'm creating a video that is low-resolution in a sense. Intentionally do not want things to be too sharp. Next, I'm going to drag the image for the entire timeline right up to the end.
Next, we will add waves, and I'm going to add three video tracks because the waves will be in three layers. Now, because the line isn't enough to change the speed. I'm going to change the speed to 0.77. Now you see their white background here. So what I'm going to do is to go to the video track. Go to your "Chroma Key" and select the white color. Next, we'll add another layer for the wave. Do the same double-click; I add Chroma Key and change it to white. So now you see the leaves, and you can adjust the position of your wave to be slightly higher or lower.
For this wave, I'm going to copy the earlier wave, and I'm going to paste it there and create a transition between these two waves to create a slightly different effect. I'm going to add a transition, and I'm just going to add a long "Fade" transition. I'm going to have it long, and I'm going to the same for the third wave level and making some slight changes in position, as well as the length of that transition. Right, so now you have so many layers of waves. Done. In the next step, we're gonna add a ship and a whale.
Now that the waves are done. The next step is to add the animation, and I think I'm going to add two video tracks. One track will be where the pirate ship will be, and the other one will be for the whale. So I'm going to add a pirate ship first to this track. Let me change this, and to change it, double-click it. I'm going to flip it in the other direction. Go to "Image," go to "Transform," go to "Flip," and make it smaller. Okay, something like this, and I'm going to drag this up because the ship will be for the entire video.
Sort of a transition to come in. Going to add the transition. I'm just going to add a simple "Dissolve." Let's put the dissolve here. See what it looks like. Alright, so it looks something like a ghost pirate ship. Next, I'm just going to double-click and keyframe the animation and make the ship move slowly across the waves.
Okay, to do that, click on "Animation," go to “Customize," and you can add a keyframe somewhere at the beginning here. Keyframe, and you can have the X and Y position to make this ship change. Add the necessary keyframes to make the ship move across the waves until the end of the video. Do the same with the whale, resize and position the whale and add the necessary keyframes to make the whale move. I'm going to also rearrange the tracks so that the whale track will be in front and the layer with the ship will be on top.
On track number 7, I'm going to add the "Titles," and you need to listen to your songs to get the timing right there. Alright, so somewhere here is there. I'm going to use my “Default Title.” Alright, now I have these lyrics here on my clipboard here that I have saved. I'm just going to copy it. I'm going to the “Default Title” and adding the title over here, and for the title, I'm just going to use Times New Roman and adjust the size of the font. You can use whatever font you like. Adjust the title position as necessary.
I'm just going to center it and head over to "Advanced" because I'm going to use a shadow. Adjust the shadow as necessary. You may choose to lift the shadow out, depending on the effect that you are after. You can also choose a different color for your shadow, depending on the type of music and the effect that you are going after.
I'm also going to use an animation here, and the animation for the first one is called "Evaporate" because I want to have this text or the title coming as if something a little bit pirate D. I'm also adjusting the delay where the title comes in and just by moving this purple bar to the right to have this slow kind of fade-in effect.
Next, I'm just gonna copy the first block of the title to the next set. The shadow settings will be the same. Okay, so I'm just gonna change this to the Billy-o-Tea. Right, if you go to the "Advanced" tab. However, I'm going to change the animation to a different animation. Yeah, two more designs. Click on "OK."
Next, if you want to have a similar animation, you can actually copy the entire thing and place it for the second part of the video. Okay, you need to adjust this and, of course, change the necessary animation for this section here. So here, I need to readjust the position over here at the top. Okay, so that's why for this project, I prefer to set all the animations first. So that I do not need to readjust the text a second time. Alright, now, if you don't have animations like moving along, and the animation is just in the background, then you may skip this step. You can do the tiles first and come to do this a little bit later.
We’re getting close to the end. I'm going to add a star somewhere here. I have a star animation. So anyway, I'm going to drag this down onto my track over here. I'm going to change the speed and slow it down. Just nice to stick it with the team. I'm going to add a blur effect to this. So just look for blur, drag this, and put it onto this star. Double-click it, and go back to your video. Go to the "Effect," go to your blur. I'm going to change the opacity, which means I don't want this blur to be too strong.
Okay, well, I think it's I want to make the star move across the sky, so that gives a sense of the passage of time. So I'm just going to double-click on the clip, go to "Animation," and go to "Customize." I'm going to add a keyframe here, and right at the end, somewhere here, I'm going to add another keyframe. I'm just going to change the position slightly. Alright, so isn't some it's not something that drastic. Okay, so we're just moving slightly, and there is a blur to this star. They give it a fine touch. Okay.
For this video track, I’m going to use it for “Elements," and I'm going to put a shooting star, and like a shooting star element created. So I'm just gonna drag this down, place it there and shorten this. So it looks something like this. Okay, now I need to reposition it.
Okay, let's see what it looks like. Okay, and I'm gonna copy this to another location. Let's say somewhere around here. Paste it there, and flip this. So that you will fly in the opposite direction. Okay, let me bring it down. Readjust the position. You can use as many shooting stars as you like to make the video interesting. I'm going to add some random lines, and this is the random line that I've created, and you can also use this animation. Okay, it looks like this. Let me just bring it over here. It’s not like a tornado.
The last thing to add is the harpoon where the ship shoots something at it. So I have a “Harpoon” animation here. It’s just a very short animation. Let me double-click on it. Okay, it looks like this. I'll keep the project. Position it so that it's like this to the beginning.
Guide On How To Add Lyrics And Animation To Song Using Filmora
What you need to prepare:
- A computer (Windows or macOS)
- Your video materials.
- Filmora video editor
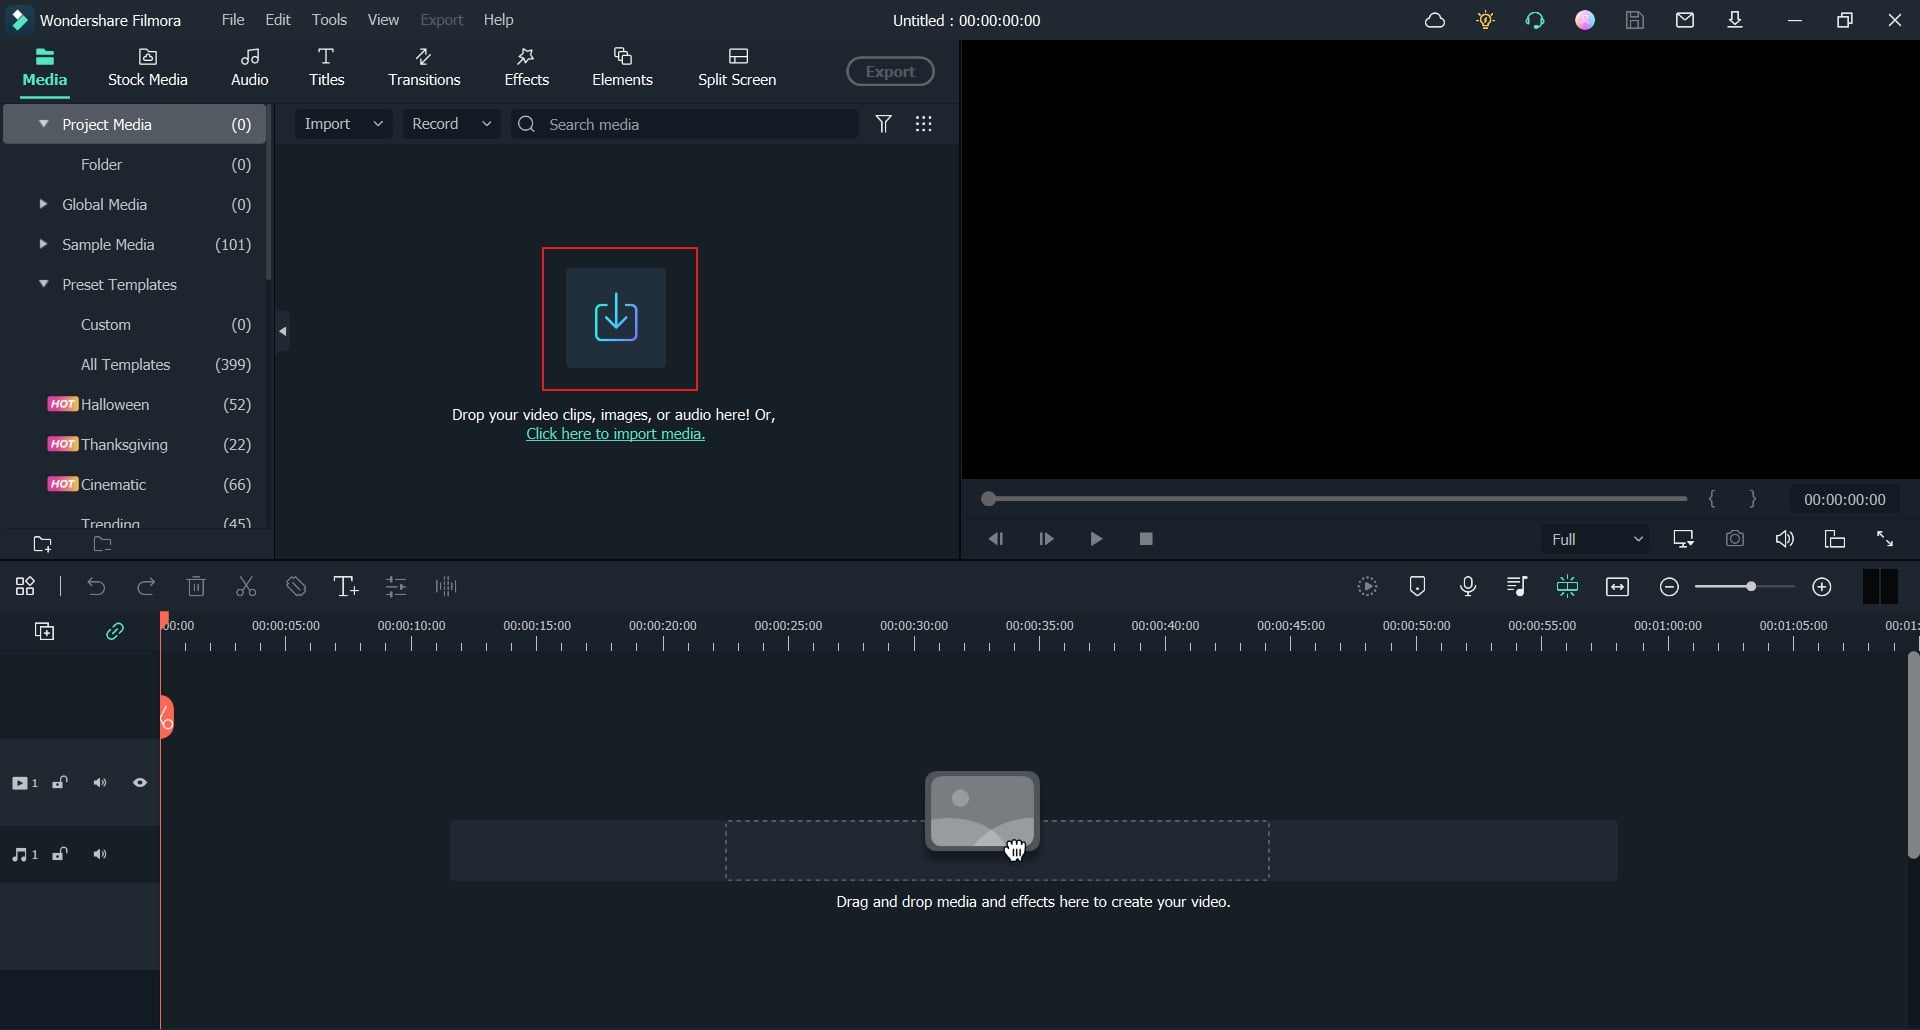
Open Filmora and Import Media
Open the Filmora software on your device, and import all your audio and video files for the project. For this purpose, click the "Media" tab from the top-left side of the screen, and again press the "Import Media" button to import your required media files.
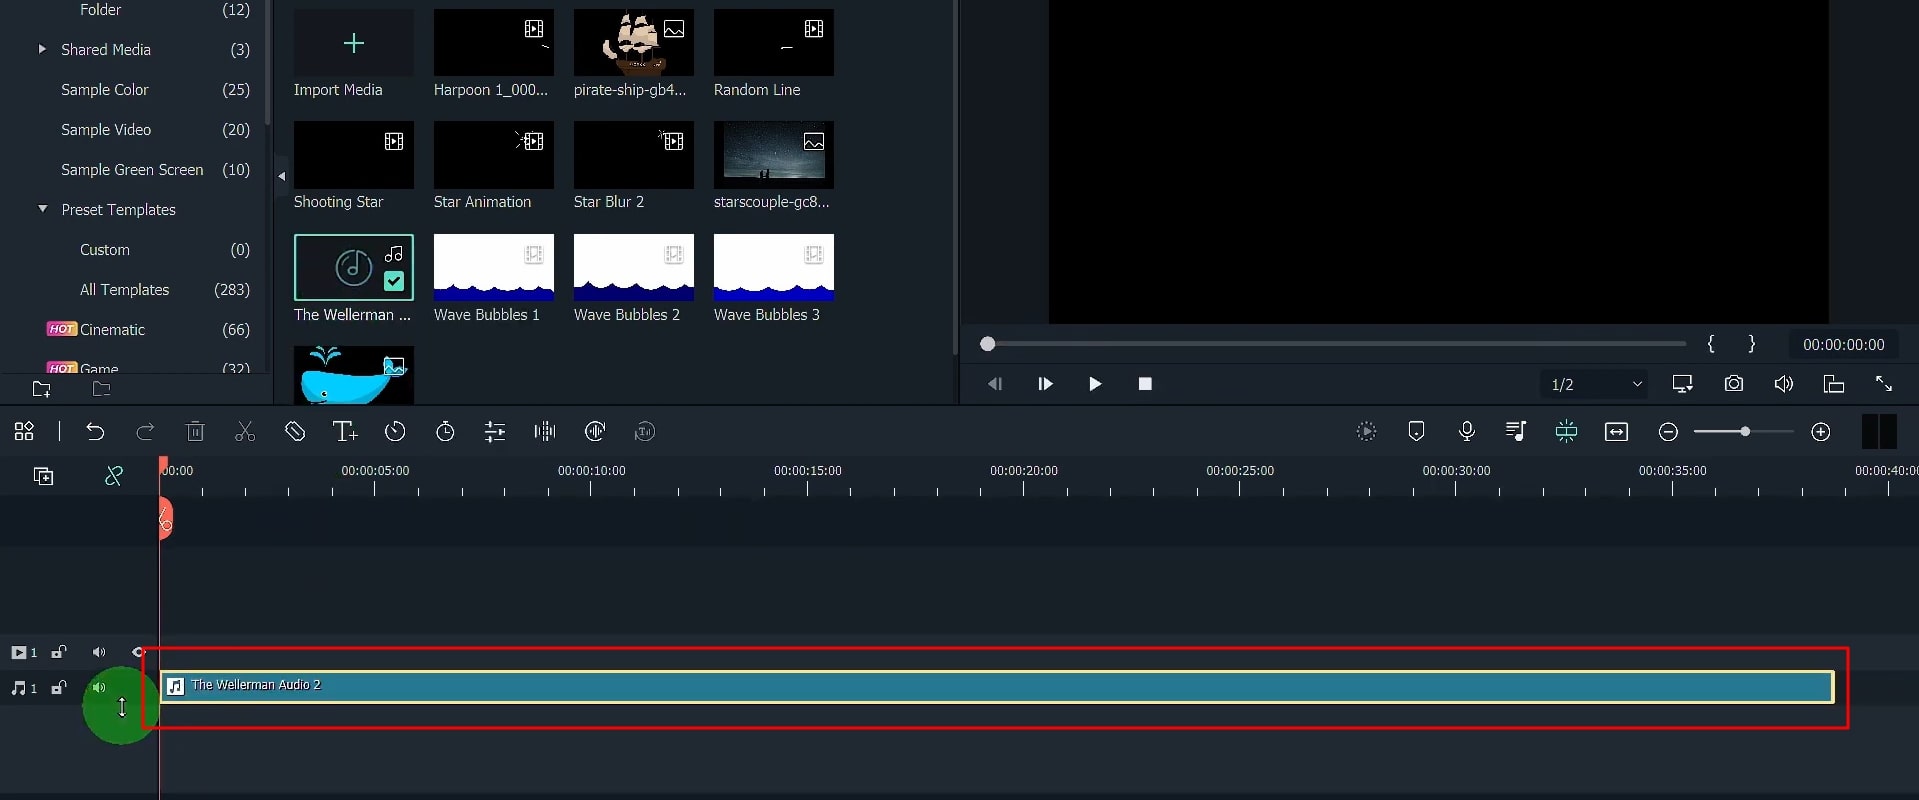
Move Audio to Timeline
Once your audio is imported, drag it to the project timeline below. To see the waveforms clearly, you can also increase the height of your audio track. You can do this by clicking and holding the audio track on your playhead, then moving it upside down using the mouse cursor.
Set and Adjust Background Image
You may have already imported your background image to your media folder. If not, you need to click the "Media" tab again and press the "Import Media" button. If you require a ready-made background image, you must navigate into the “Stock Media” tab from the top-left side of the screen and choose your desired background from the given options.
Afterward, drag your background image to the timeline and set its duration similar to the audio duration. To edit the background image, double-click on the image track, and a window will open before you. Now you can adjust the size of the image, adjust margins and positions, and edit opacity.
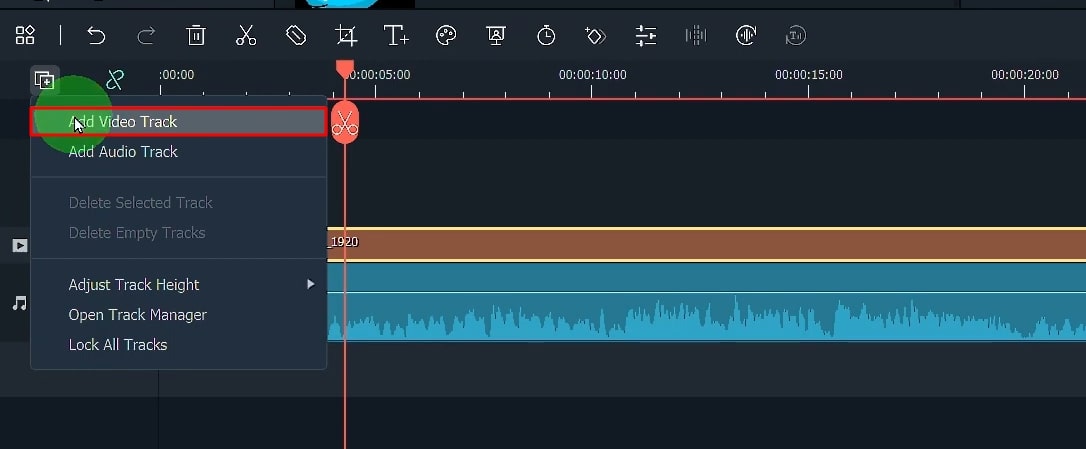
Add Video Tracks for Waves
The wave animation will be in layers, so add more video tracks for this purpose in the timeline. Click the "Manage Tracks" icon and select the "Add Video Track" option. Repeat this process according to the required number of waves, e.g., if there are three waves, then you need three layers and, thus, three additional video tracks.
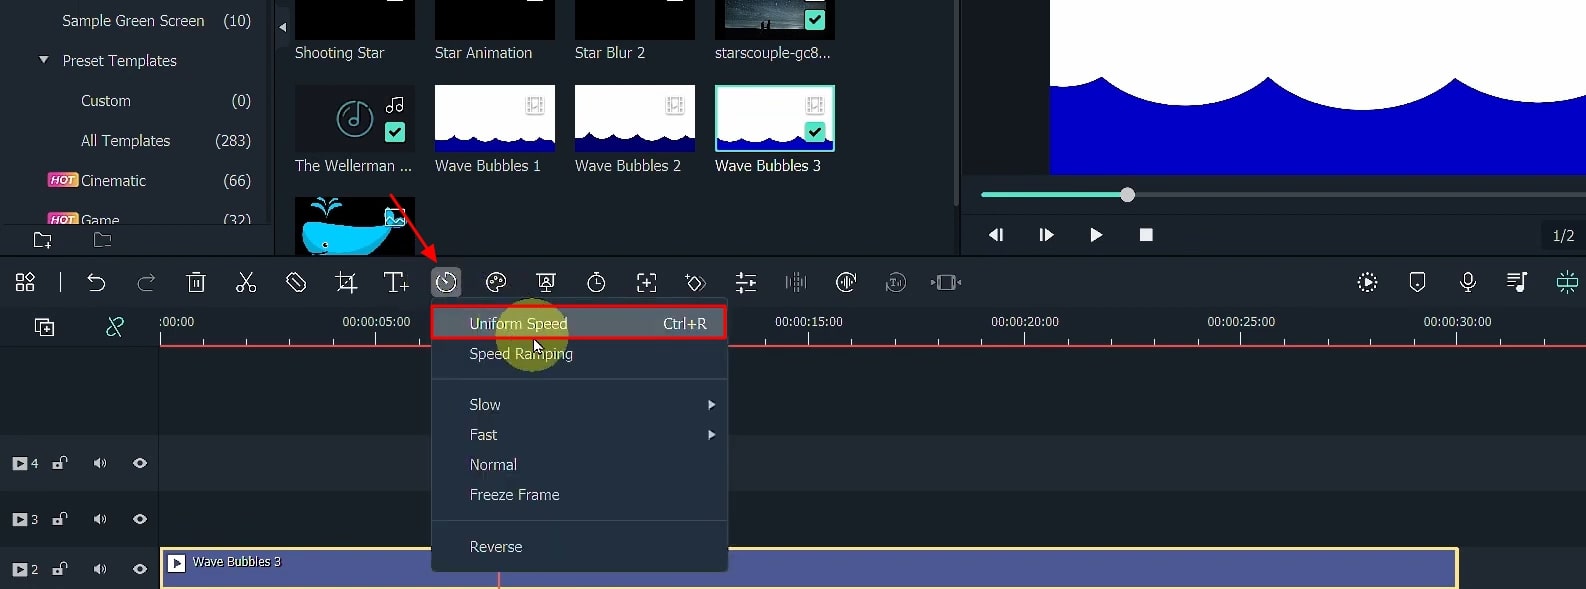
Add and Adjust the Speed of Wave Video
Now you've to add a wave video to the first additional track. Navigate into the "Media" tab and click "Project Media" if you already have imported your wave video. Drag and drop it into the timeline. If you've to adjust the speed of the wave video, click on it, press the "Speed" icon, and then select "Uniform Speed."
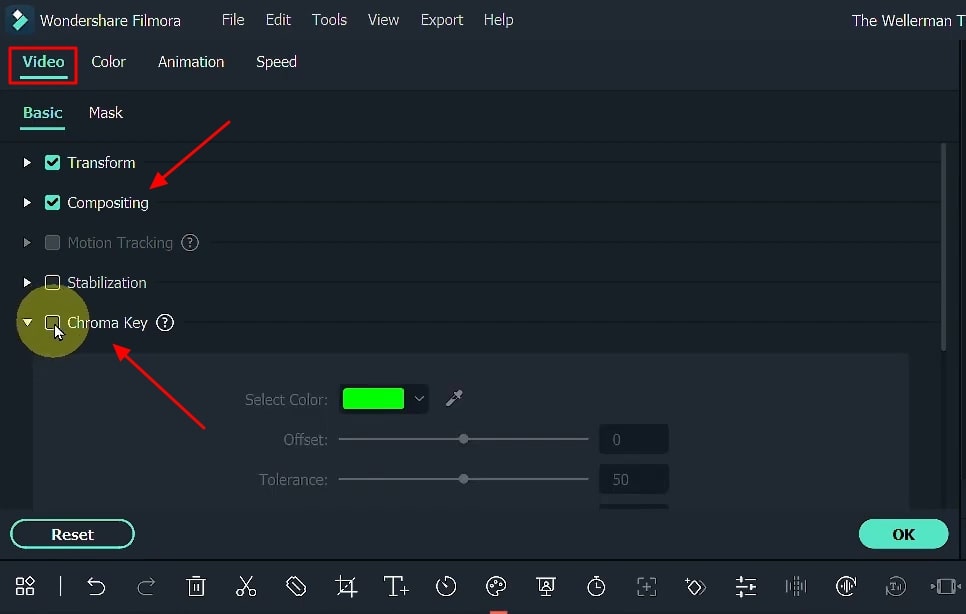
Make Further Edits on Wave Video
A window will open up, where you can adjust speed as required. For further editing of the wave video, click on "Video," then press "Basic," and apply changes with respect to transforming, compositing, stabilization, and chroma key. Repeat the same process for other layers.
Use Transitions for Video Flow
Now click on the "Transitions" tab from the top and select your transition from the options. Make sure to drag and drop the transition to the timeline and into your chosen track. Play the video by clicking on the "Play" button, and you'll see the transition applied. You can apply multiple transitions in different wave tracks.
In addition, If you want to add transition on multiple waves in a single track, you’ve to copy a different wave track and paste it in front of the chosen track. You can do this by right-clicking on the track and choosing "Copy" and then by going in front of chosen track, right-clicking and choosing "Paste."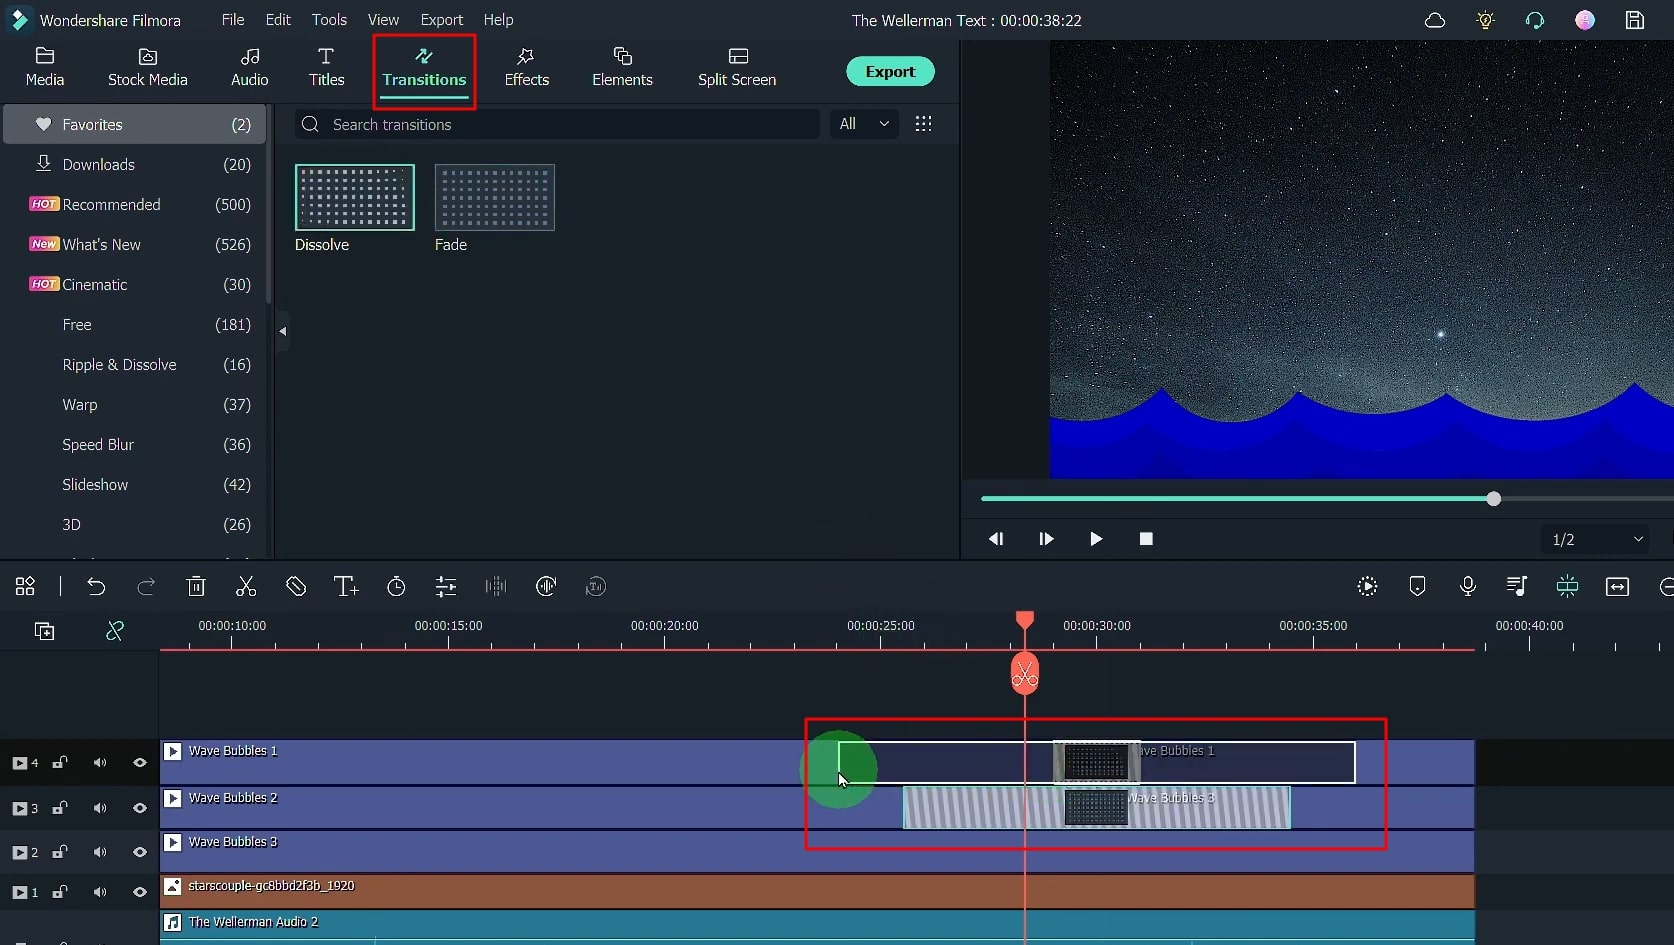
Apply Object with Animations Effects
If you want to add an object and apply animations to it, first, you have to add a new video track in the timeline. Click on the "Manage tracks" icon and select the "Add Video Track" option, and a new track will be added.
Now drag and drop your object file from the “Project Media” to the new track if you've already imported all your files. Repeat the step if you've more than one object. Make sure to set the timeline duration of this object as per video playback requirements.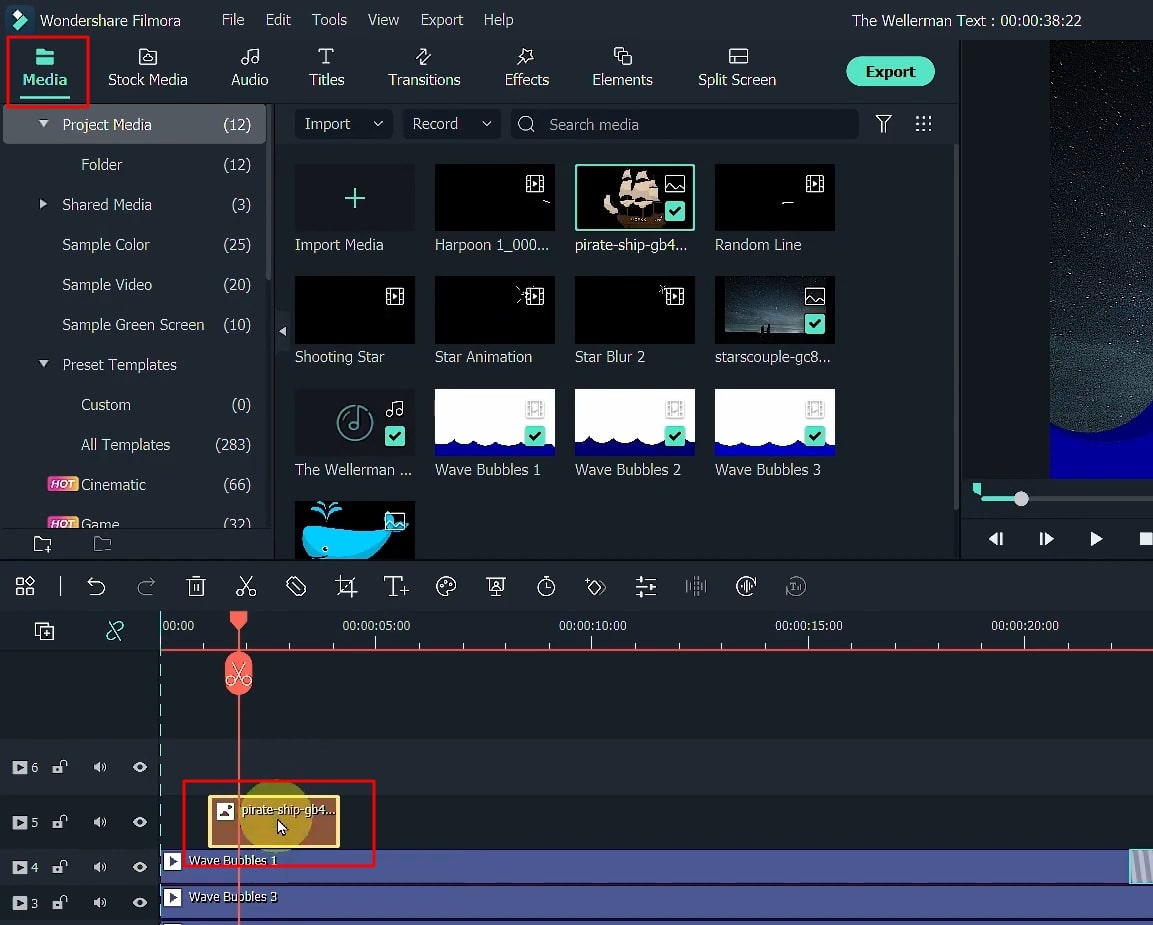
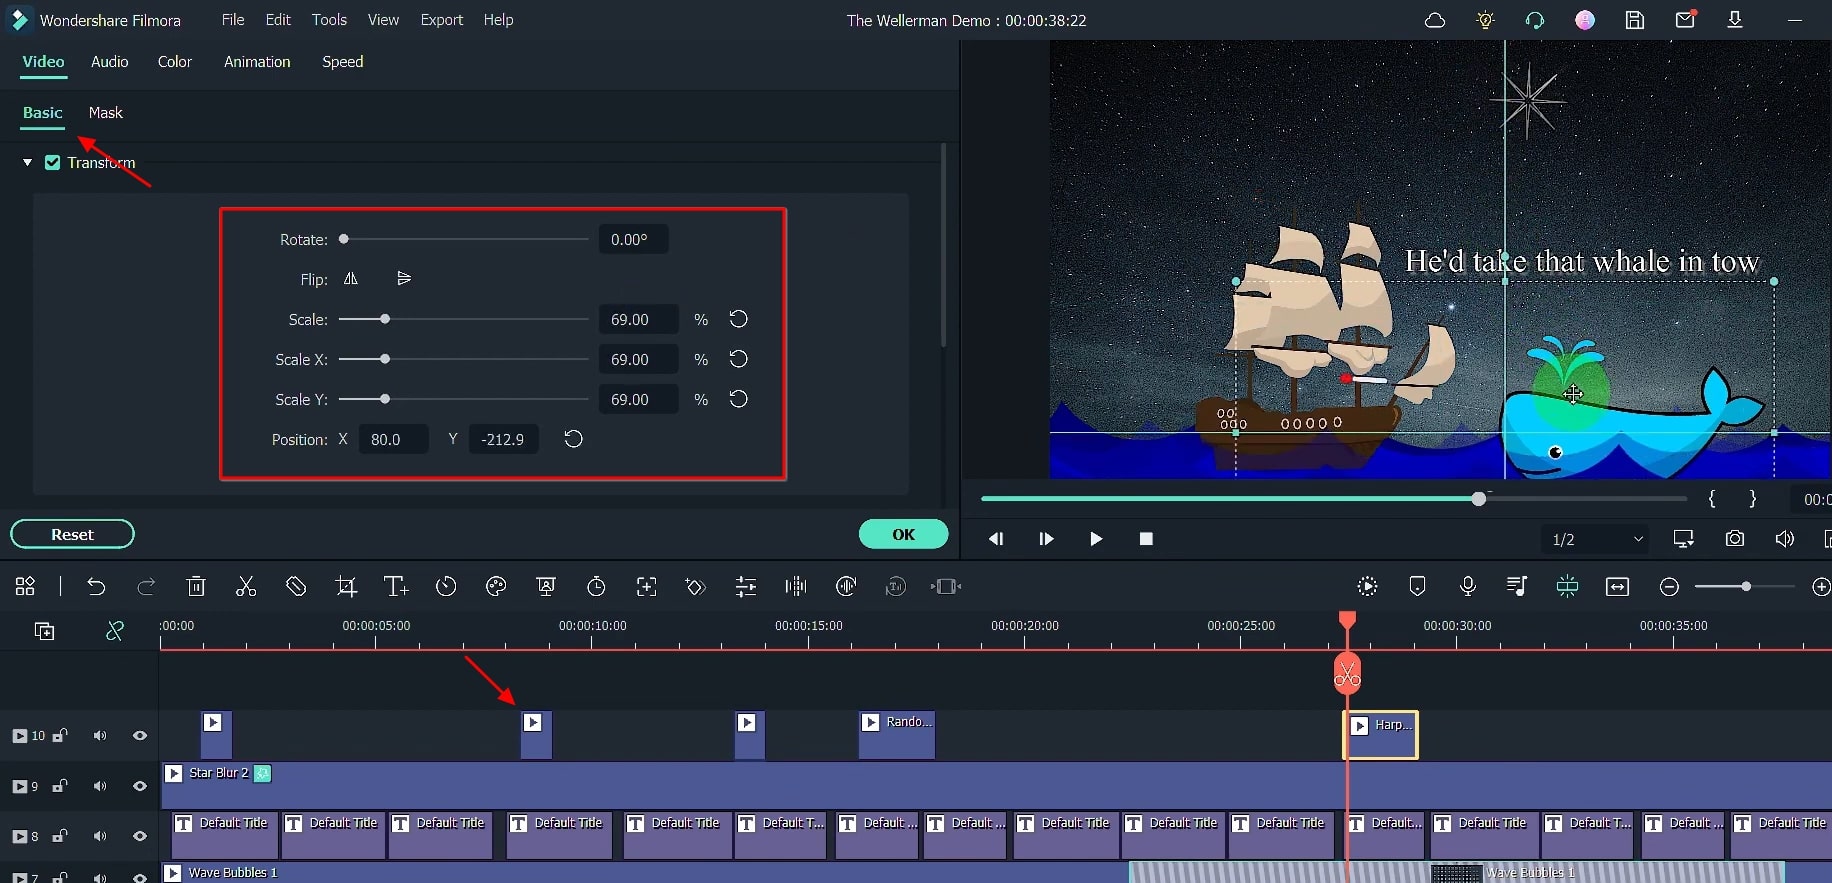
Edit and Adjust the Object With the Required Parameters
To edit the object, double-click on it, and a window will open where you need to select "Image," then "Basic," then go to "Transform" to adjust the size of the object. You can also apply a transition to this object if required, which is possible by clicking the "Transitions" tab from the top, then choosing the desired transition, and then dragging it to the object tracking.
In addition, you can also apply different effects to your object by clicking on the “Effects” tab from the top and editing it accordingly by double-clicking the effect.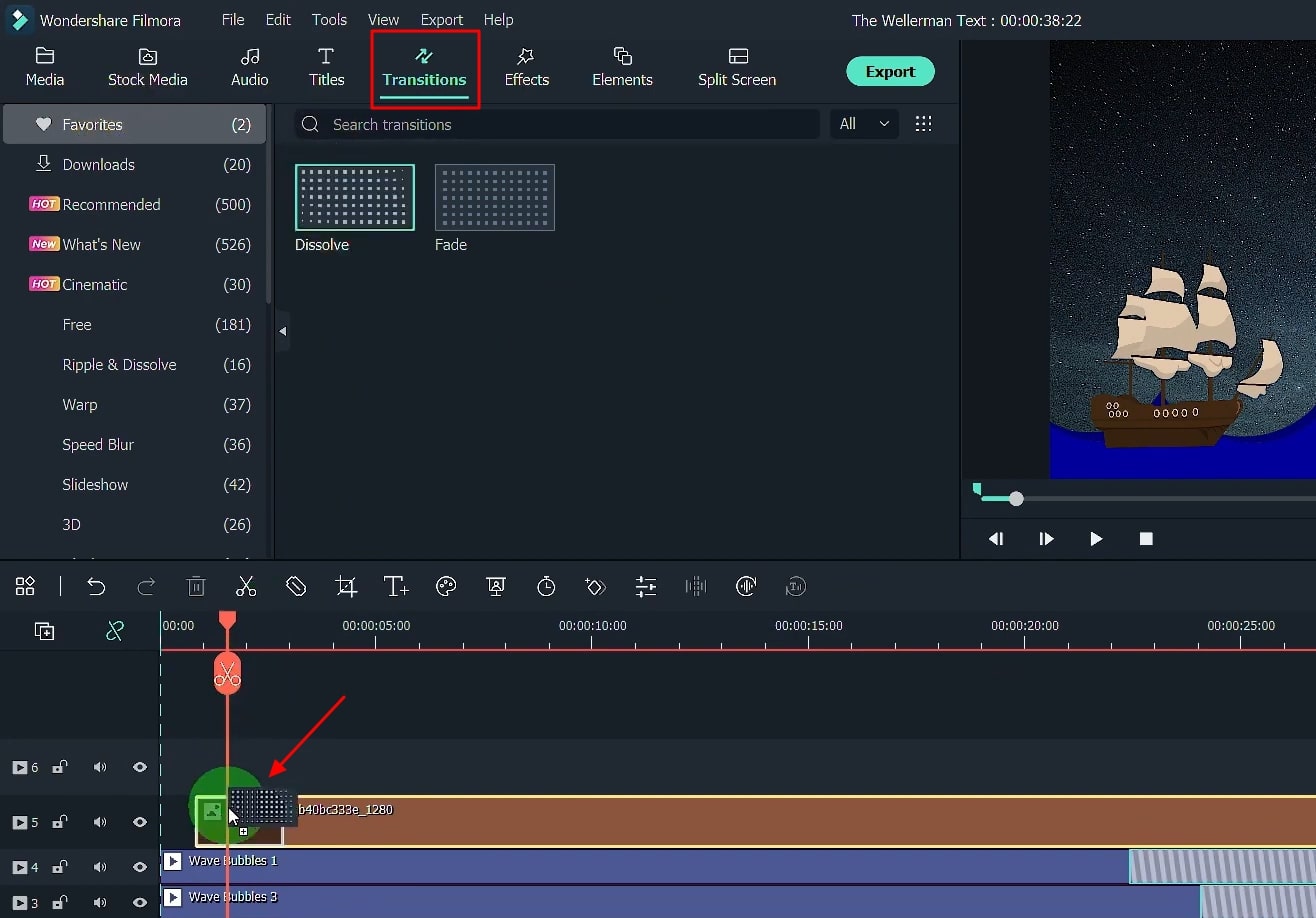
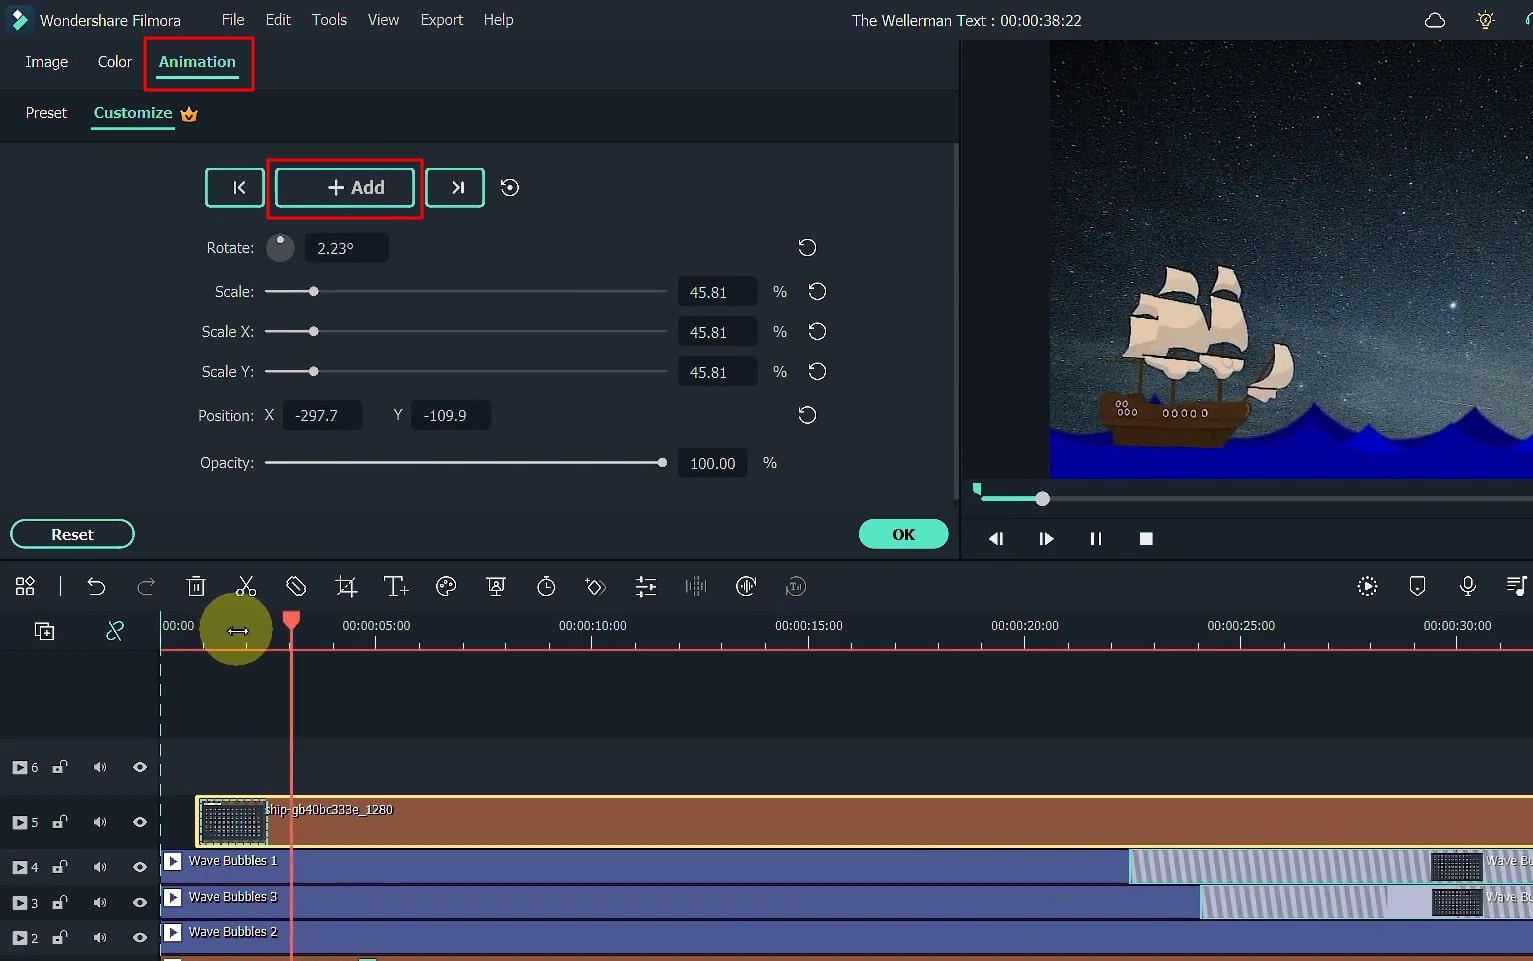
Animate the Object in the Video
Now you have to keyframe the animation to the object to make it move. Double-click on the object from the timeline, select "Animation," go to "Customize," and click on "Add" to apply the keyframe to your object using the playhead. With the parameters available on the window, you can also adjust the animation. Apply as many keyframes as required.
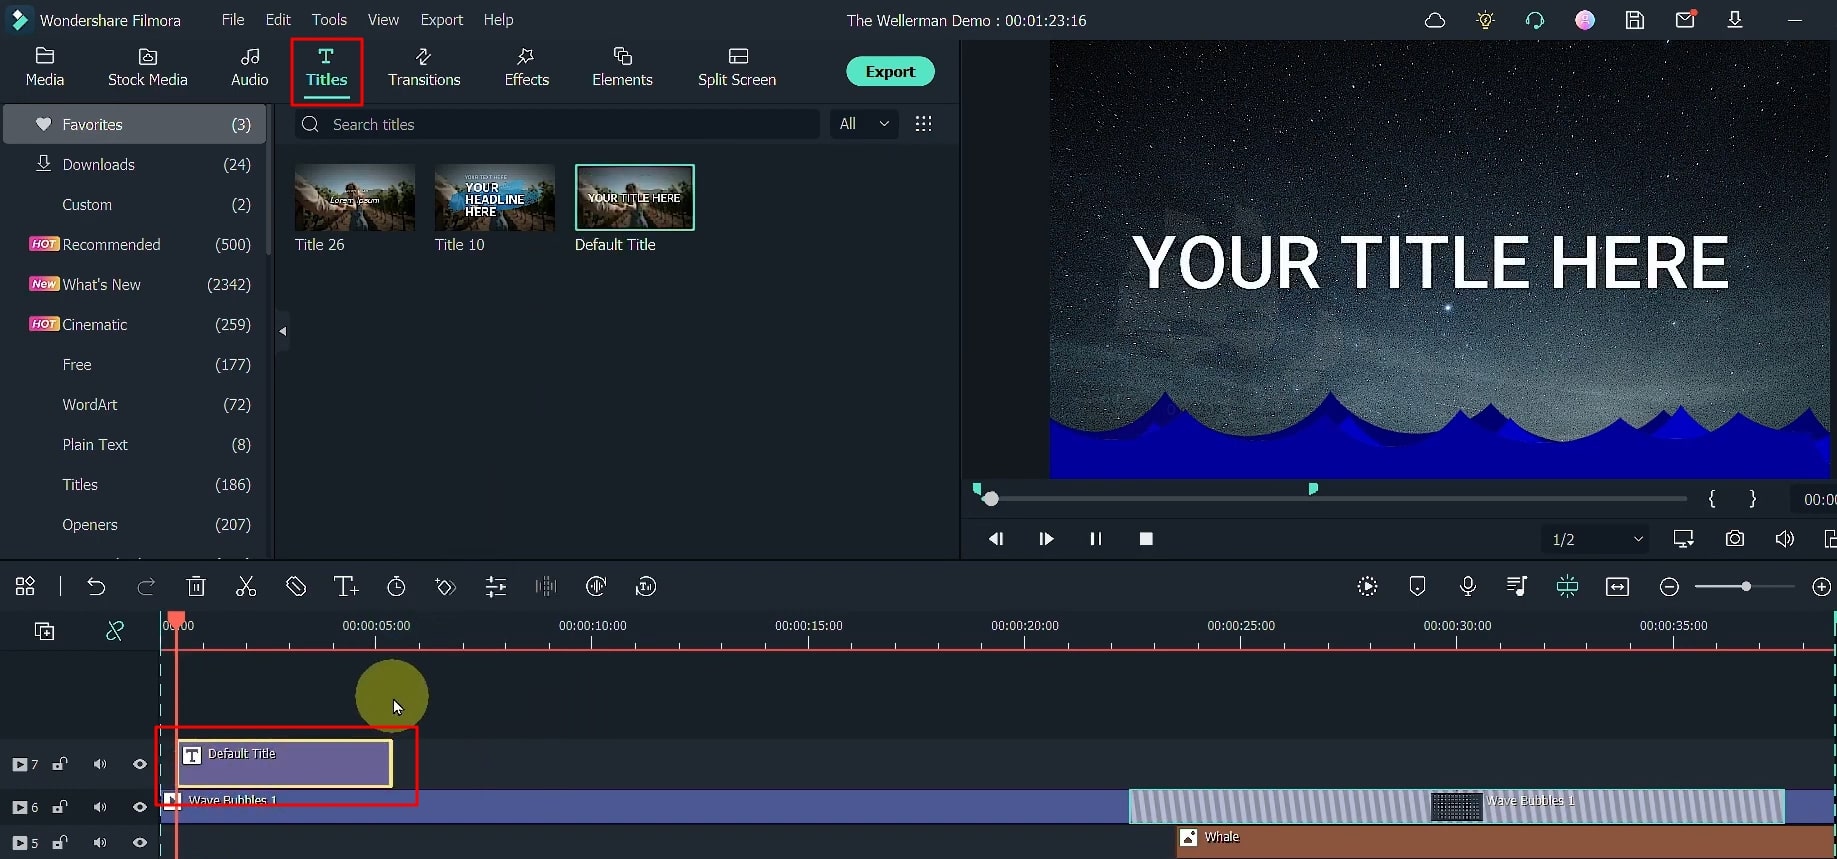
Integrate Titles as Audio Subtitles
Select the "Titles" tab from the top of the screen, and choose the desired title from the given options. Drag it to the timeline below and adjust its duration as required. You can also apply multiple title texts in your timeline as per requirements.
Edit the Title Texts and Manage Advanced Settings
To edit the text, double-click its track and edit it accordingly on the given window. You can write anything, adjust the text size, style, font, color, layout, and positioning, and make many more changes. If you want to apply a shadow to your text, click on "Advanced," then press "Customize," and select "Shadow." You can adjust the shadow as required from the given customization.
If you need to apply animation to your text, click "Advanced" again, now select "Animation," and choose your desired text animation as needed.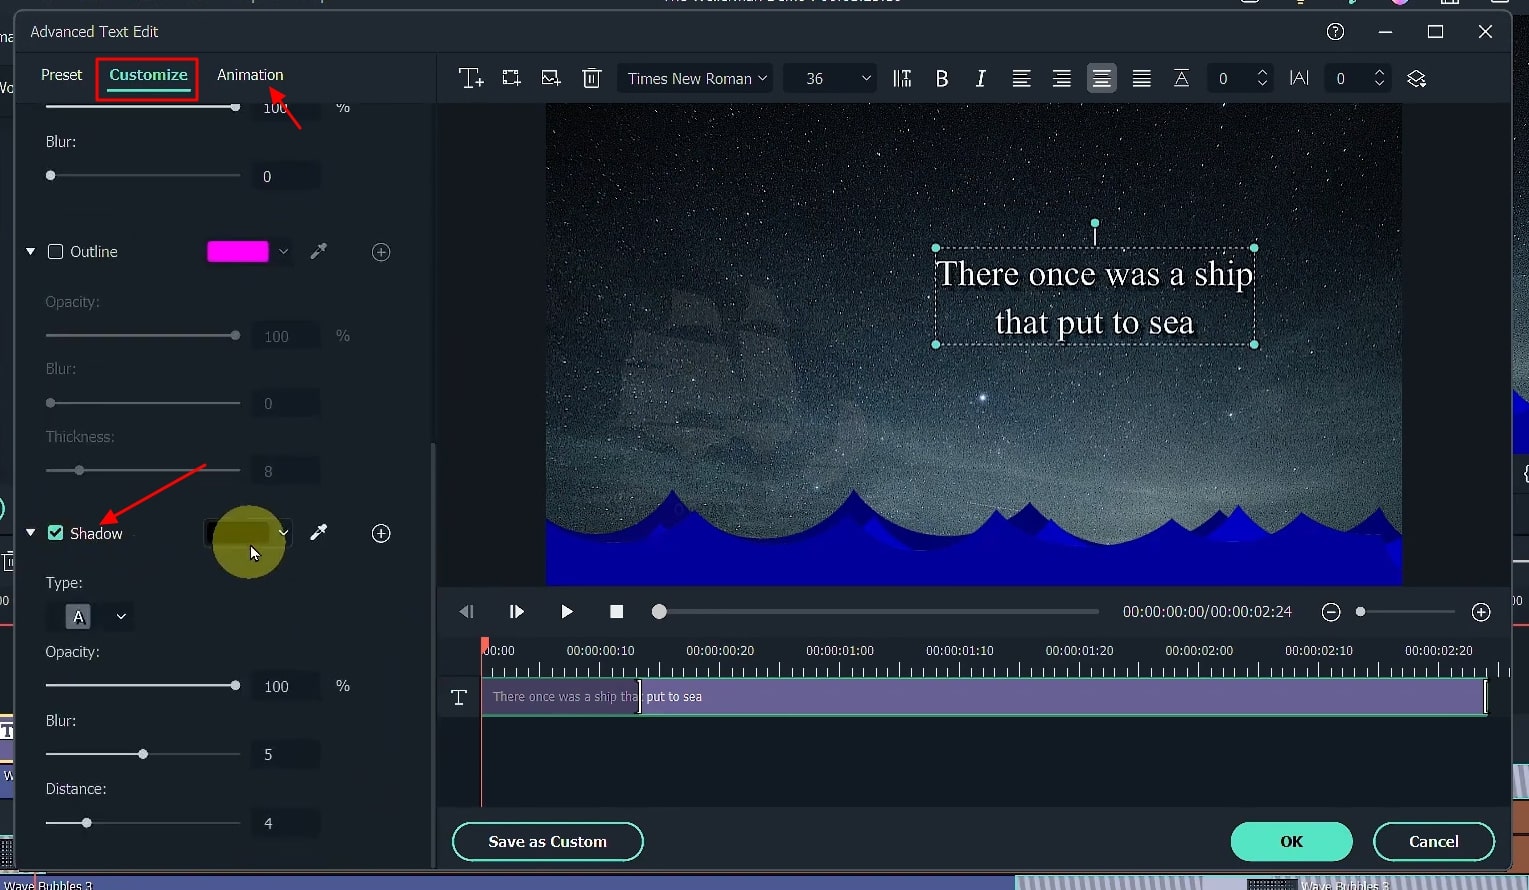
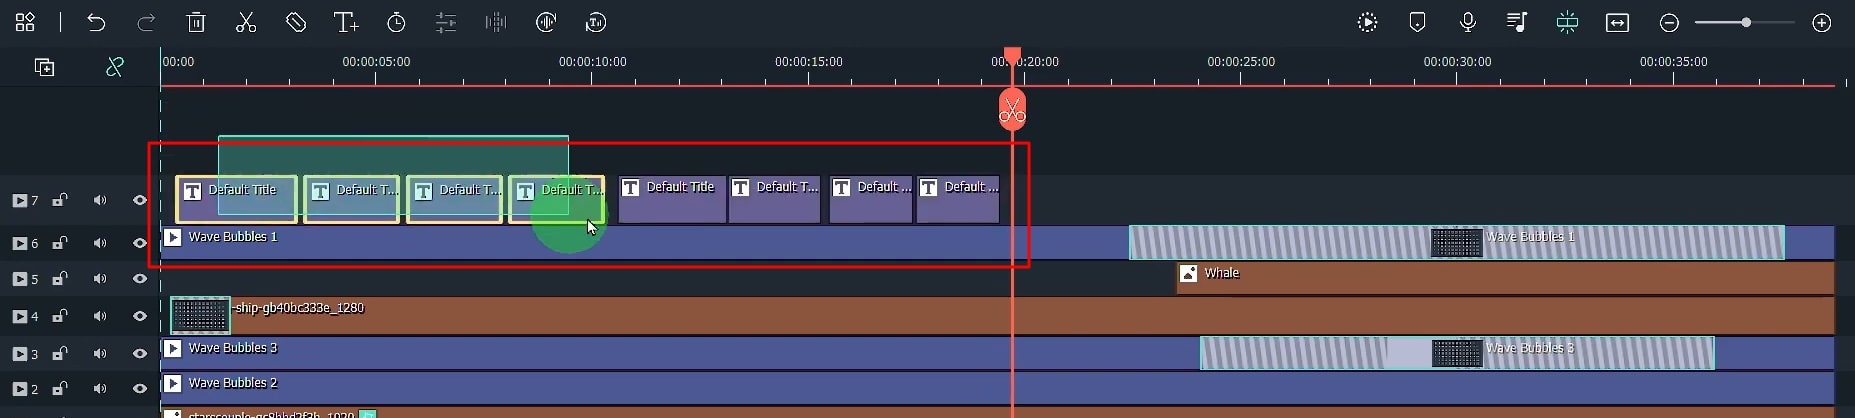
Add Multiple Titles as Subtitles
So you can make multiple titles and add different text with various effects. Place them in different intervals of the video in the timeline. Hence, when a video plays, only that subtitle appears, which was placed during that specific duration.
Include Effects on the Animations
Drag down the rest of the animations from the “Media” section and include effects within it. You can find your required effects from the “Effects” tab. On adding the effect, double-click the animation to proceed to its settings. Access the “Effects” tab from the “Video” section. Manage multiple parameters, including “Phase Increment,” “Zoom Rate,” and “Opacity.”

Add Required Elements to the Song
Continue with adding multiple elements into your video and adjust their transformation settings. Open the “Basic” tab from the “Video” section for every element that is added. Set the appropriate scale, axis, and rotation angle for them.
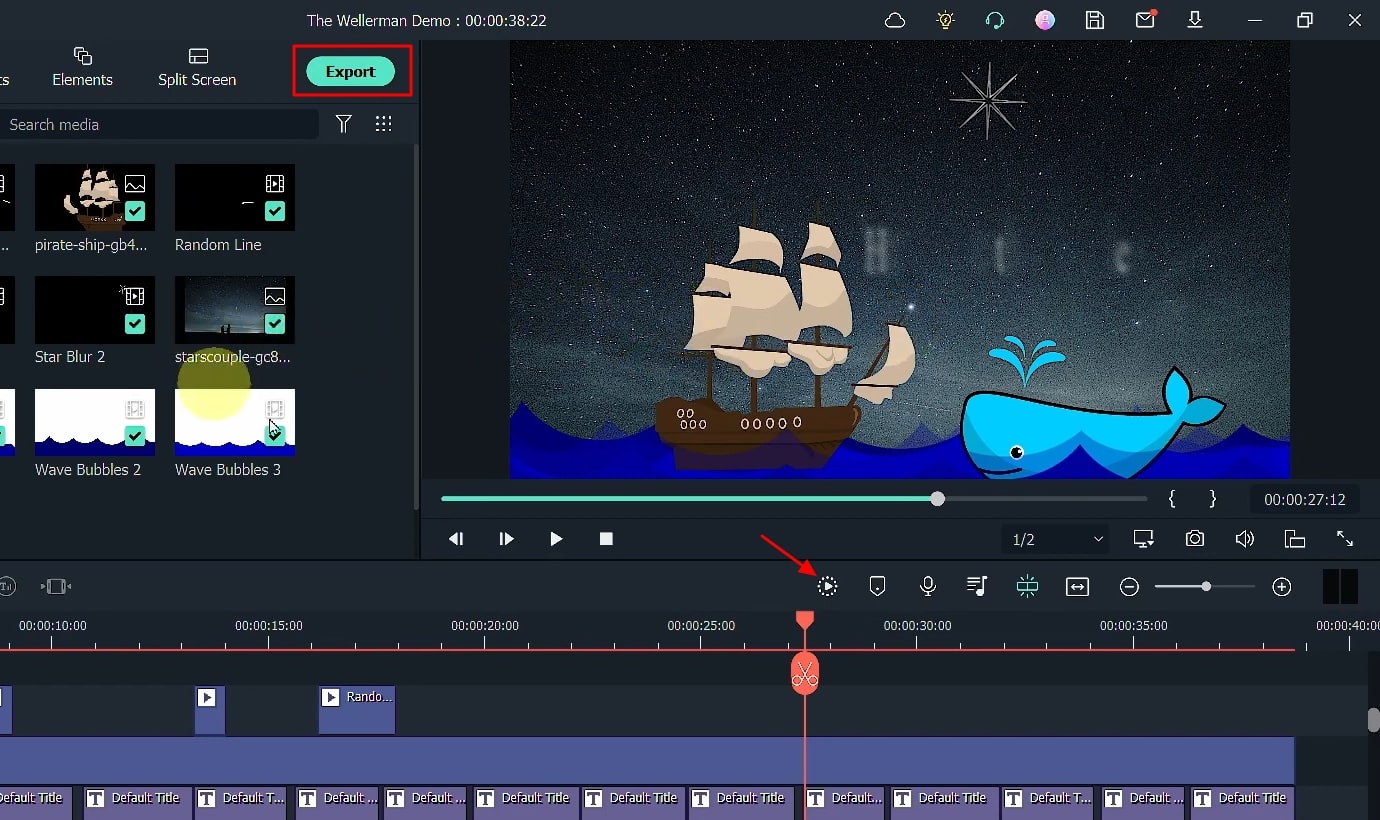
Observe Results and Export the Final Video
Press the “Render Preview” icon and witness a smooth playback of your audio animation. If satisfied, click the "Export" button from the top of the screen, select the file location, and download it to your device.
Animations are a great tool to make your audio and videos more interesting. So, If you need to make your audio animation with lyrics, this tutorial on Filmora is your trusted learning solution. The steps are easy to follow throughout the process, and even people with minimal knowledge of video editing will ease this animation stage.


