Guide On How To Edit An Audio Like A Pro In Filmora
Audio issues are common in several videos that we encounter in our daily lives. Considering how important some videos are to us, it's annoying and problematic. With this tutorial on Filmora, you'll learn professional audio editing tips and techniques that will help transform the audio quality of your visual media.
Guide On How To Edit An Audio Like A Pro In Filmora
What you need to prepare:
- A computer (Windows or macOS)
- Your video materials.
- Filmora video editor
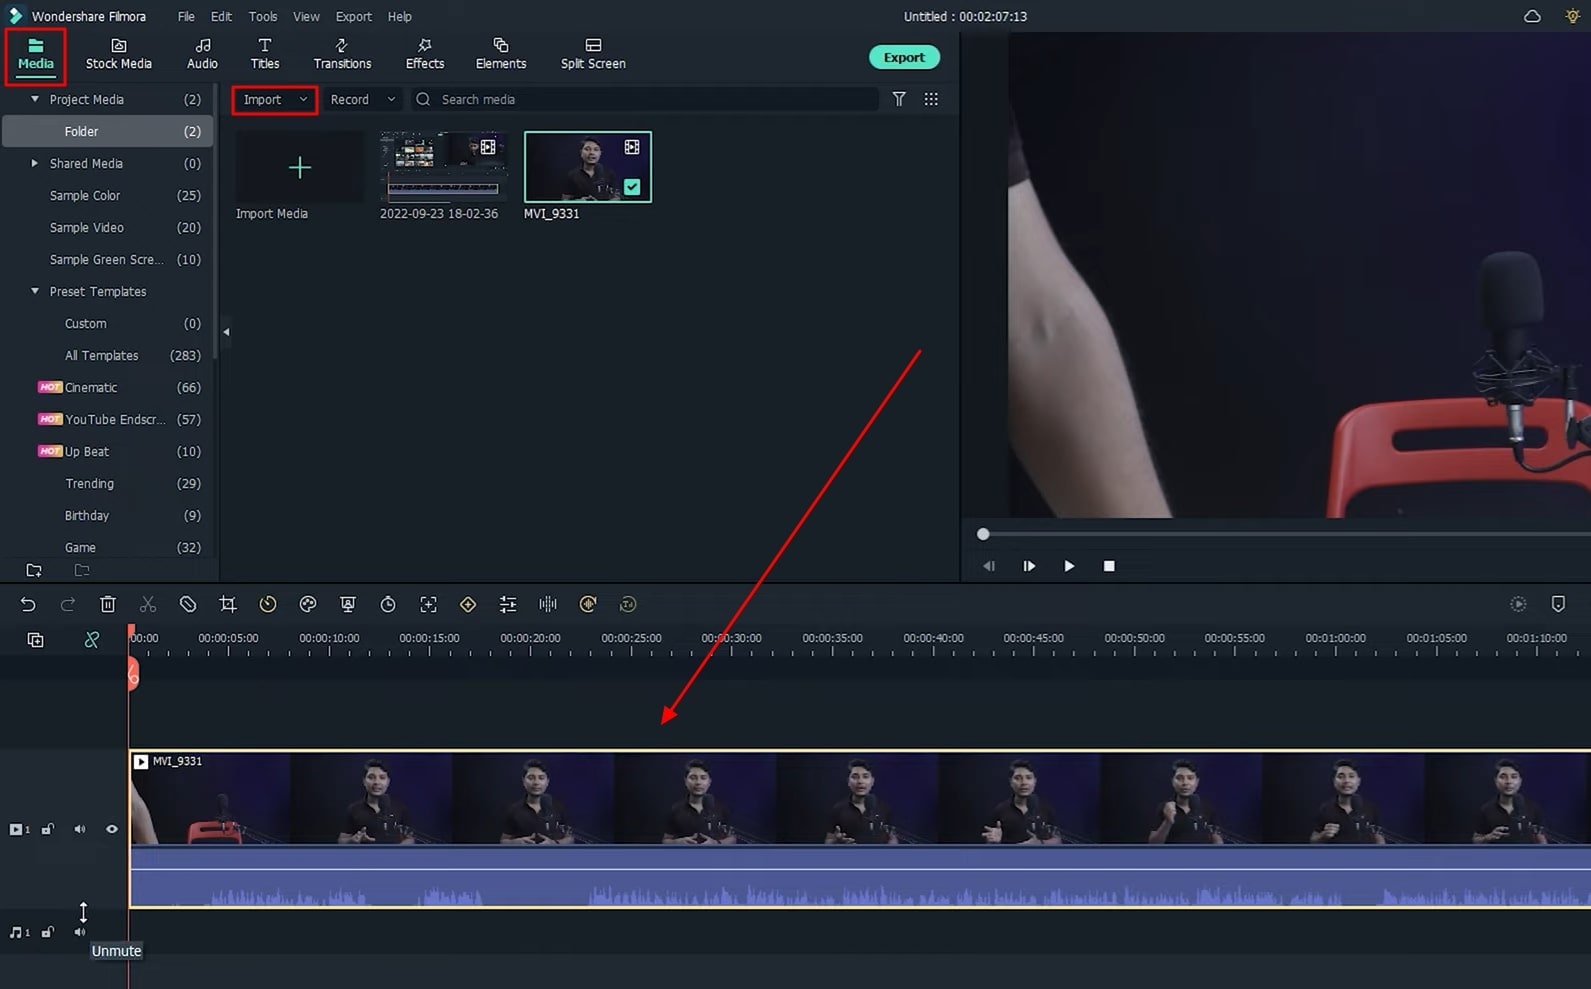
Import Video to Adjust Audio
Click the "Media" tab from the top-left corner of the screen, and then press the "Import Media" button to import your required video to the Filmora editing environment. Afterward, drag your video to the project timeline below and adjust its duration as required.
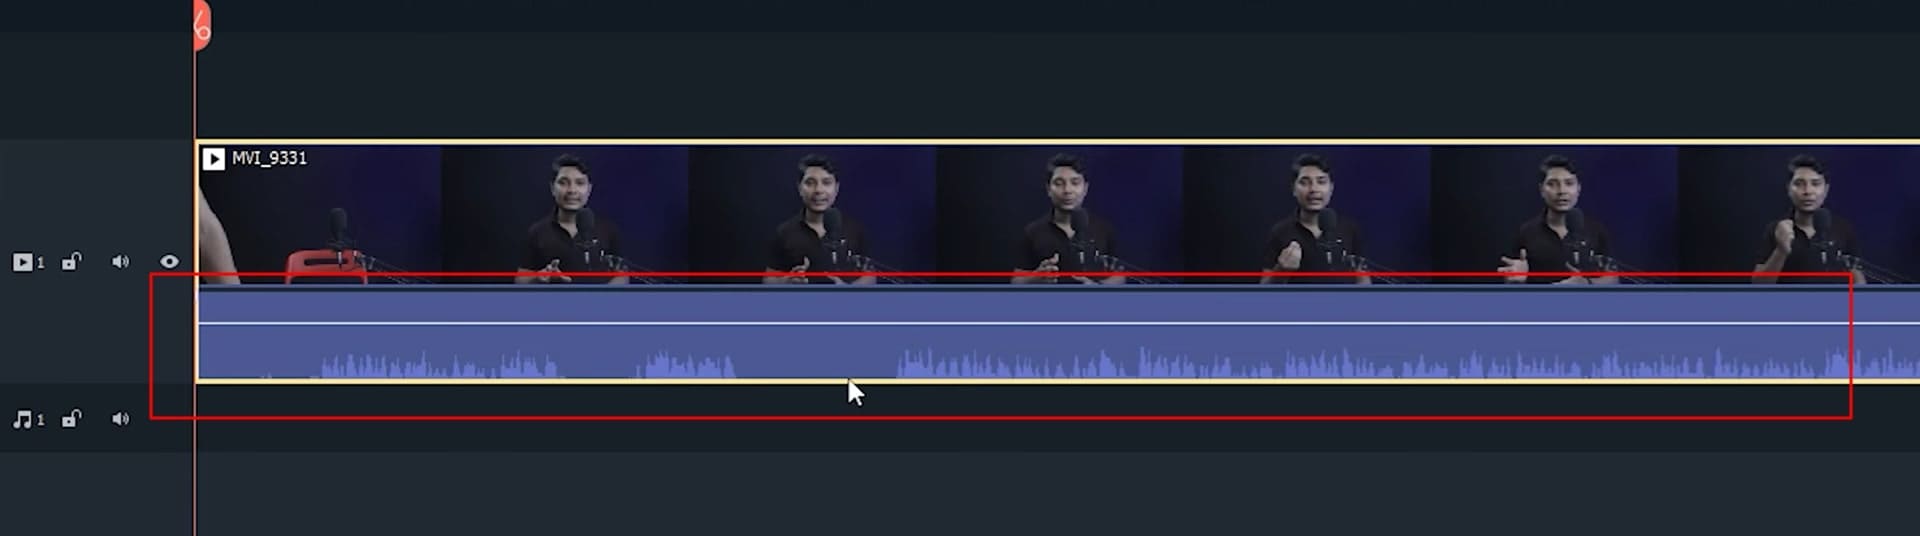
Pull the Video Track Above
Now your video is in the timeline, and you need to display its audio as well. For this task, you've to pull your audio track above using your mouse, and simultaneously the audio track will start appearing underneath.
Adjust Audio and Remove Background Noise
Double-click on your video track, and a tab will appear on your screen. Move into the "Audio" category, and now adjust the audio intensity and dB from the scale on the left.
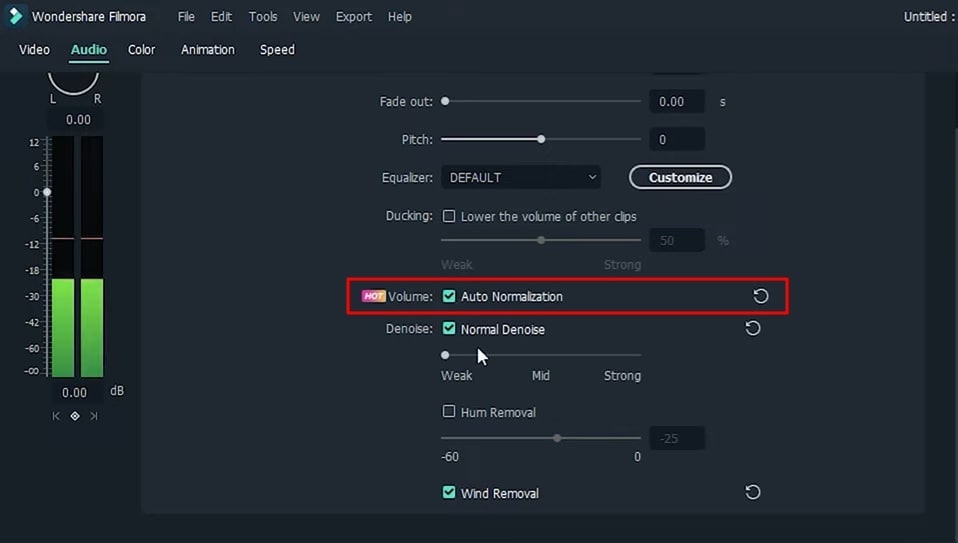
If there is a noise issue in any part of your video, move the playhead there, and press the “Hum Removal” option if there is a background noise issue. If your audio has a wind noise issue, click on the "Wind Removal" option by moving the playhead there. You can also adjust the settings of both from the provided scale. In addition, if you have personally recorded audio or video, which is also a victim of background noise. Then you can also rectify that by clicking the "Normal Denoise" option from the "Denoise" adjustment.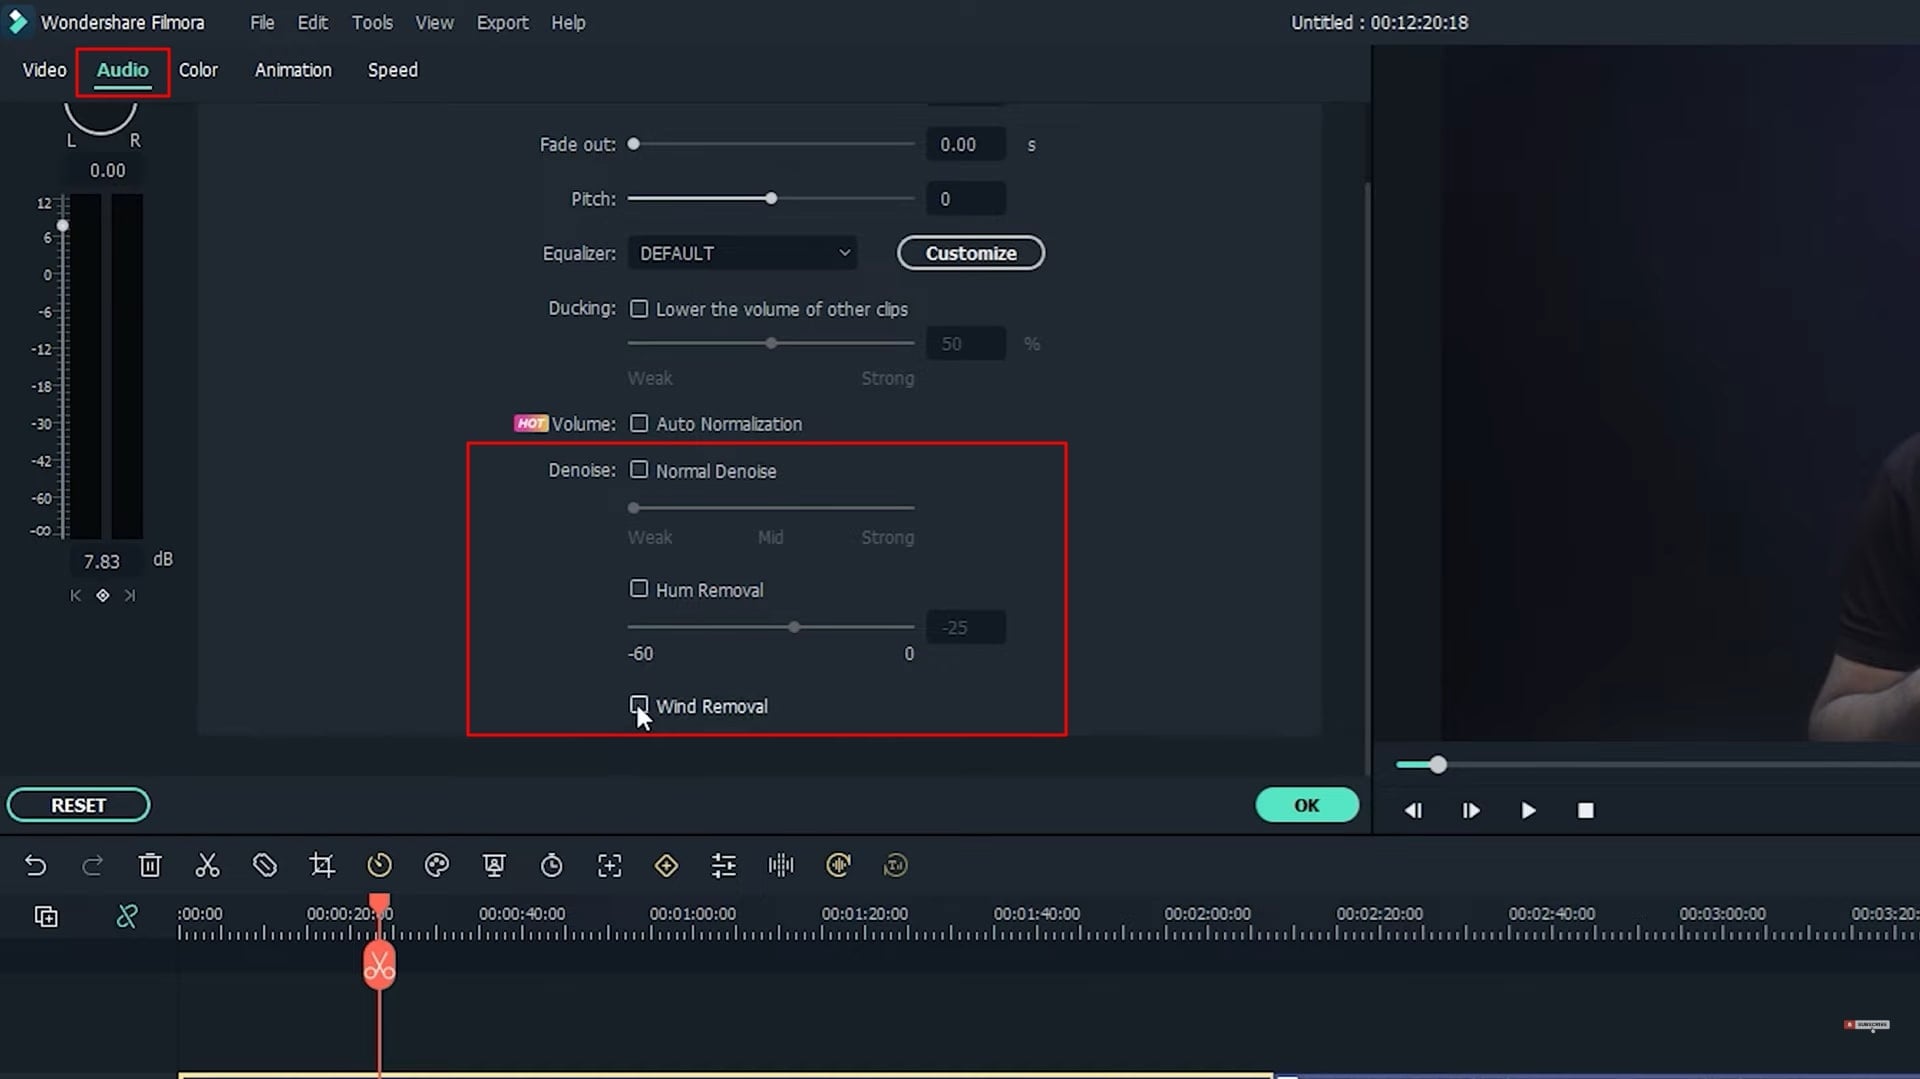
Revamp Sound Intensity Levels
If your audio has different sound intensity levels on different parts and you want to adjust them to standard loudness levels, click on the "Auto Normalization" option from the "Volume" adjustment.
Set Sound Loudness as Required
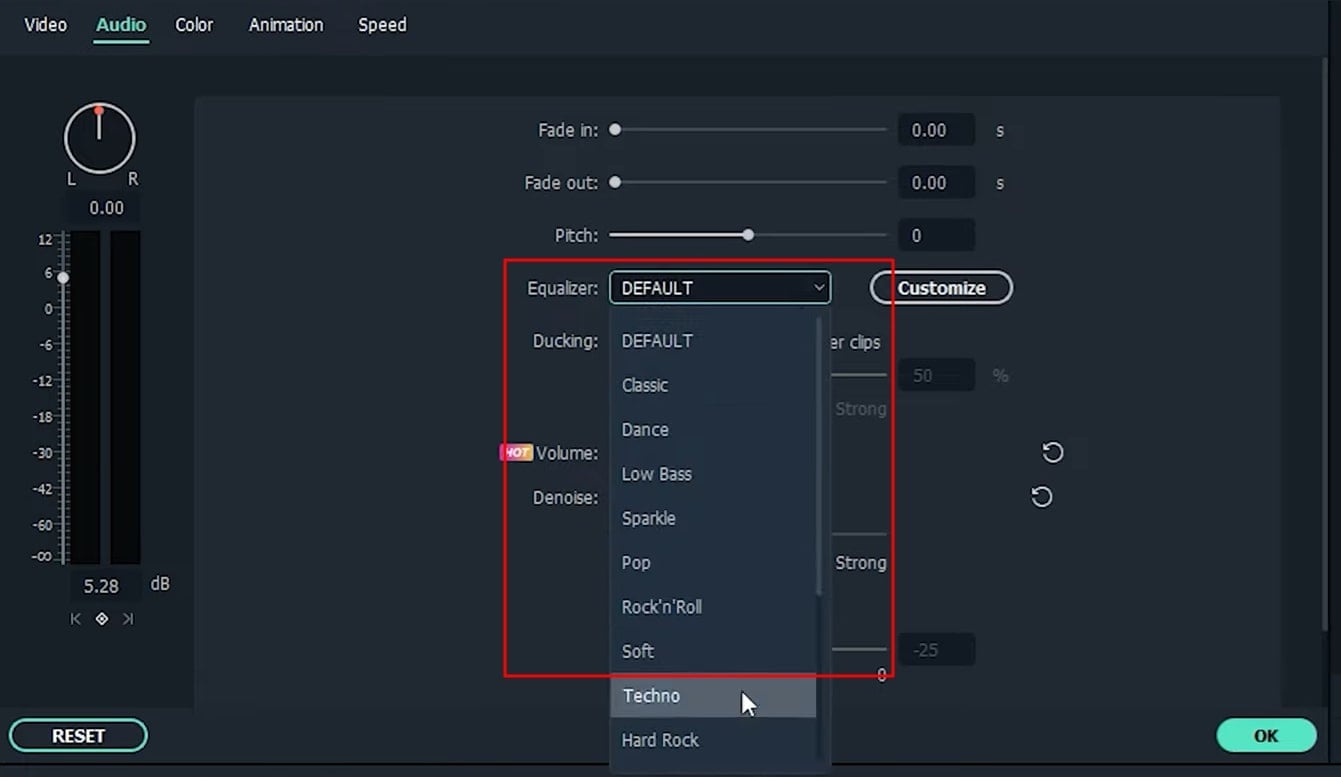
By clicking the "Equalizer" sound adjustment, you can raise or lower the sound of the audio. By pressing "Customize," you can adjust “Equalizer” as required with manual customizations. You can also adjust it from the given dropdown menu. The customization possibilities also include adjustments in "Pitch," "Fade In," and "Fade Out."
View and Play Final Project
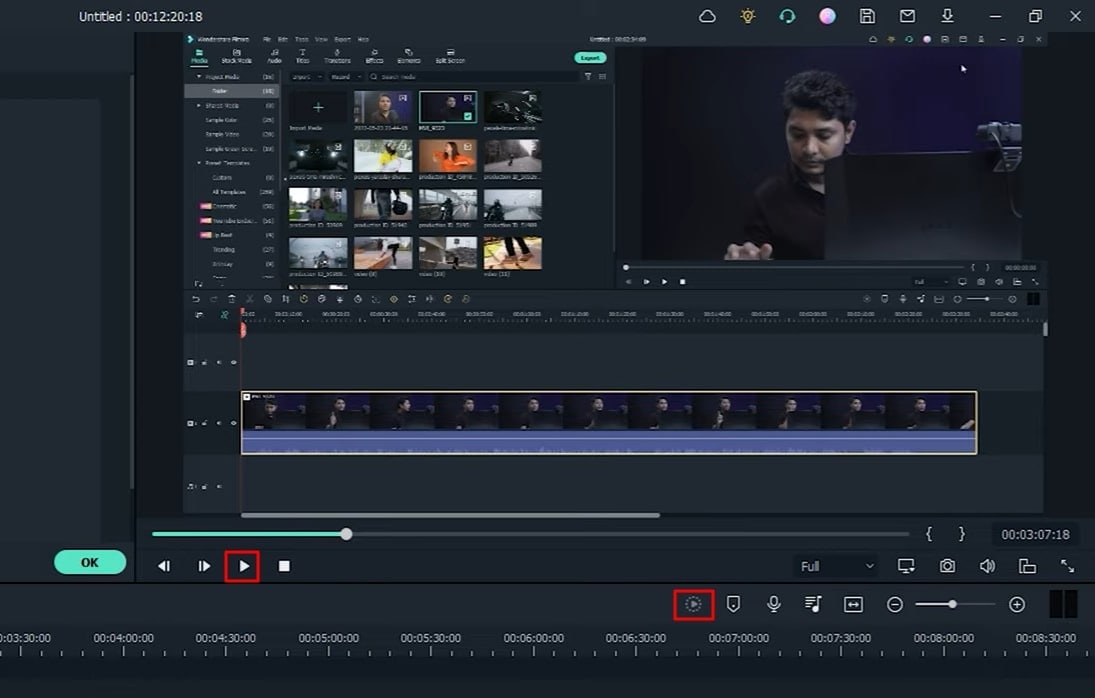
Now click on the "Play" button to enjoy your new video with audio adjustment. For smooth playback, click on the “Render Preview” icon.
Save into the Personal Device
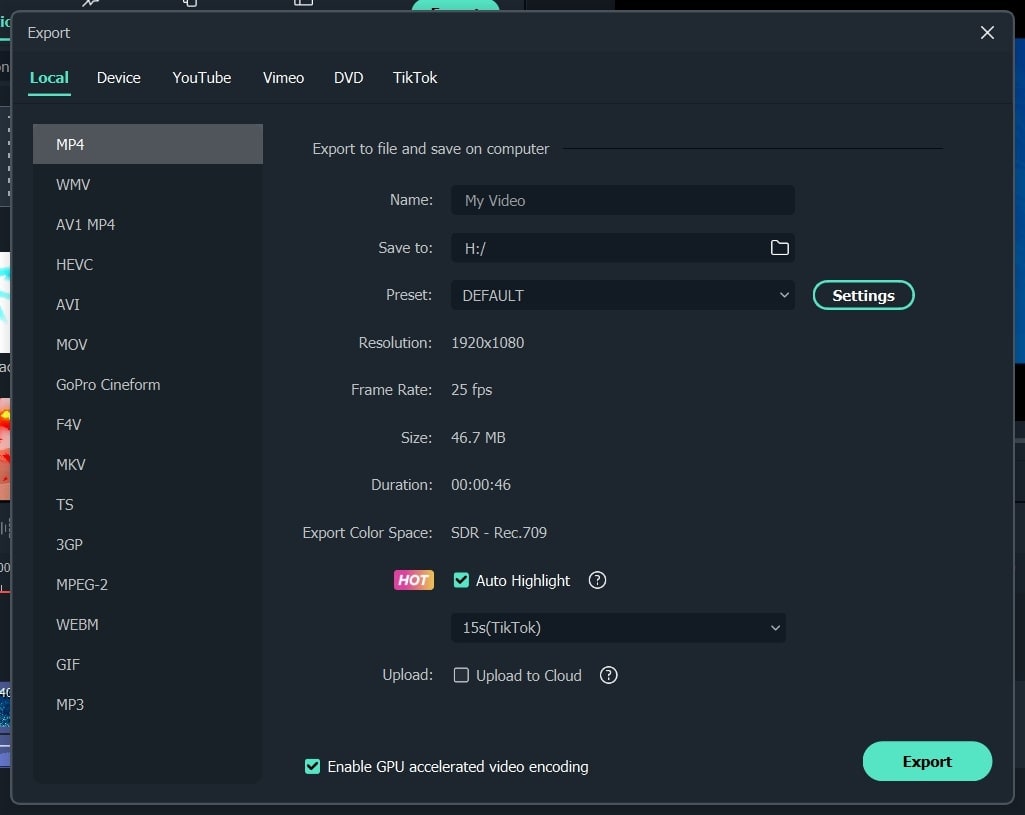
Press the "Export" button from the top of the screen, and select your file name, as well as the file location where you want to save the video. Then click "Export" again to save the video to your device.
Videos can be affected by faulty audio due to multiple reasons, but this is surely not a thing to be worried about. This tutorial on Filmora discussed ways through easy-to-understand steps that will allow you to fix audio problems within a video in a quick solution.