-
Guide On How To Create Dr. Strange Effect In Video Through Filmora
-
Guide On How To Create Audio Visualizer in Filmora
-
Guide On How to Add Smoke Effect in Filmora
-
Tutorial On Smooth Blur Transition in Filmora
-
A Simple Photoslide Tutorial With Slideshow Effects In Filmora
-
Isolate Color Effect Or Selective Color Effect In Wondershare Filmora
-
Guide On How To Add Dr. Strange Effect In Video
-
How To Make Snap Video – Filmora Tutorial
-
Tutorial – How to Make Fast Speed Effect Like The Flash With Filmora
-
Guide On How To Edit Coin Magic Tricks With Filmora
-
How To Get Explosion Effect On Your Video Using Filmora
-
Creating Seamless Typography Animation with Filmora 1202:11
-
Tutorial - Create 3D Photo Zoom Effect in Filmora02:11
-
Filmora Tutorial – Setting Up The New Dynamic Countdown Timers02:11
-
5 Essential Video Editing Tips You Must Know On Wondershare Filmora02:11
-
Performing Next-Level Editing With Ready-Made Templates on Filmora 1202:24
Transcript
Drag down the text title, and extend it to 10 seconds or more. Click and edit accordingly.
Now, animate accordingly.
Export. Just change the text color to any color of your choice.
Export again. Delete and import the two exported files. Drag down a white color as the background.
Drag down the first import, apply a single line mask, and adjust accordingly on the screen.
Drag down the second import, and copy and paste the masking effect from the first import in the preview. Drag up with your keys for smooth editing and preview.
Apply the “Reverse” effect and preview. Now further copy and paste, and adjust as provided on the screen interchangeably.
Delete the white background and export. Delete.
Import the exported file; drag it down. Apply the "Enlarge” effect to give it a slant look.
Go to the “NewBlue FX,” download, and apply the “Ripple” effect accordingly.
A Guide to Creating Looping Text Animation With Wondershare Filmora
What you need to prepare:
- A computer (Windows or macOS)
- Your video materials.
- Filmora video editor
Create A New Project After Launching Filmora
Once you have downloaded this looping text animation tool on your device, explore the homepage of the tool and locate the “New Project” tab.

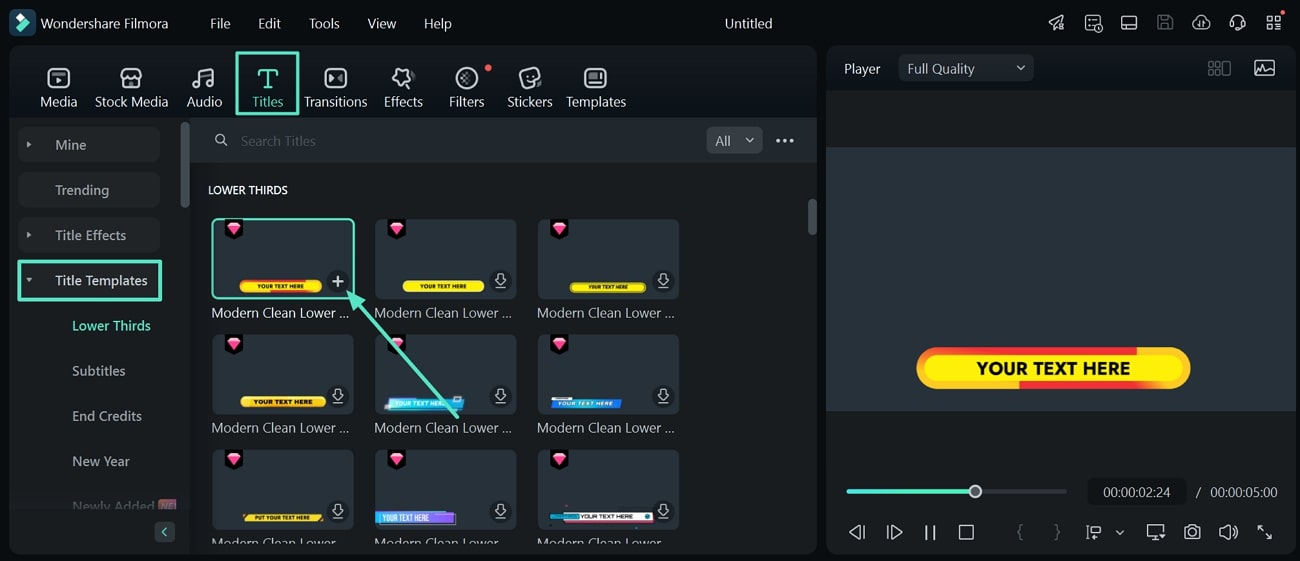
Acquire the Titles Option
After the project is created successfully, head to the toolbar and opt for the “Titles” menu. Here, expand the “Title Templates” and select your desired template. Click the “+” icon or drag it to the timeline to incorporate the text template into your video.
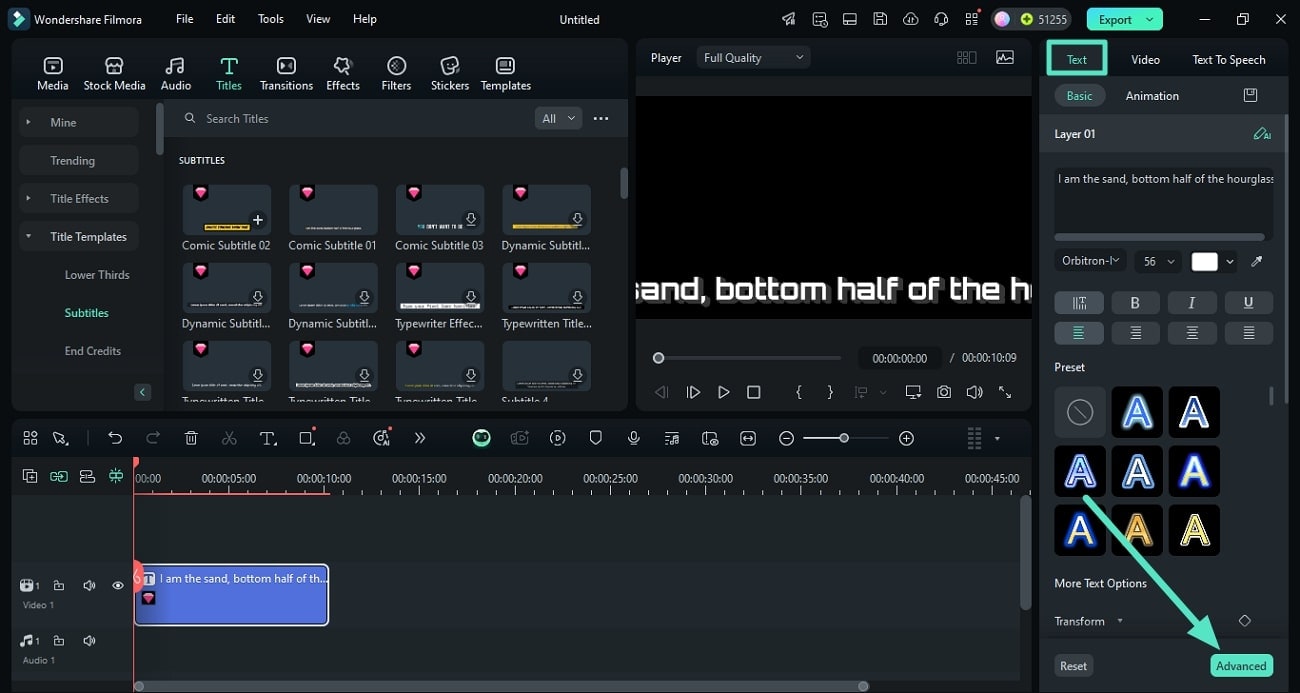
Edit the Title Text
Continue further into the “Text” panel for adding more relevant text within the available area. Proceed towards the “Advanced” settings on the bottom to make more changes.
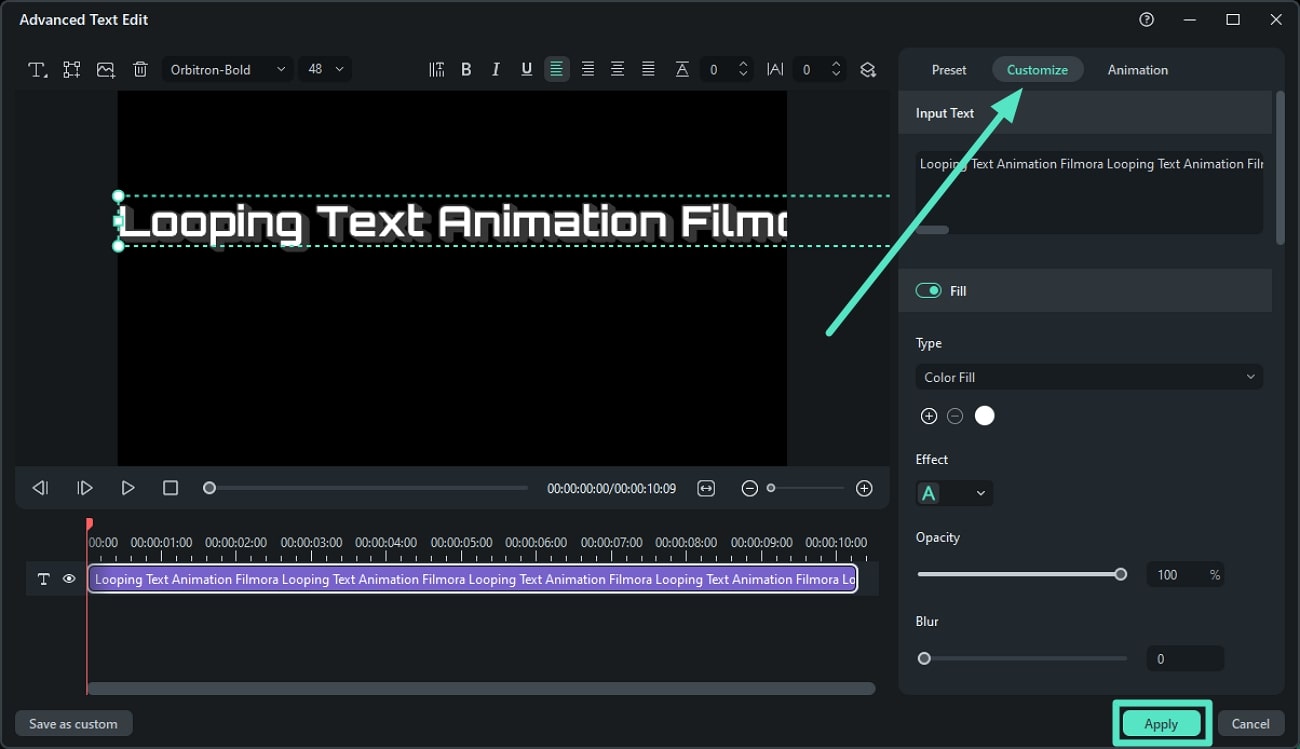
Customize the Text Using Advanced Settings
Copy the text and paste it across the text box multiple times under the “Customize” section. Make changes to the size, font, color, and style using the toolbar available on the top of the preview window and press “Apply.”
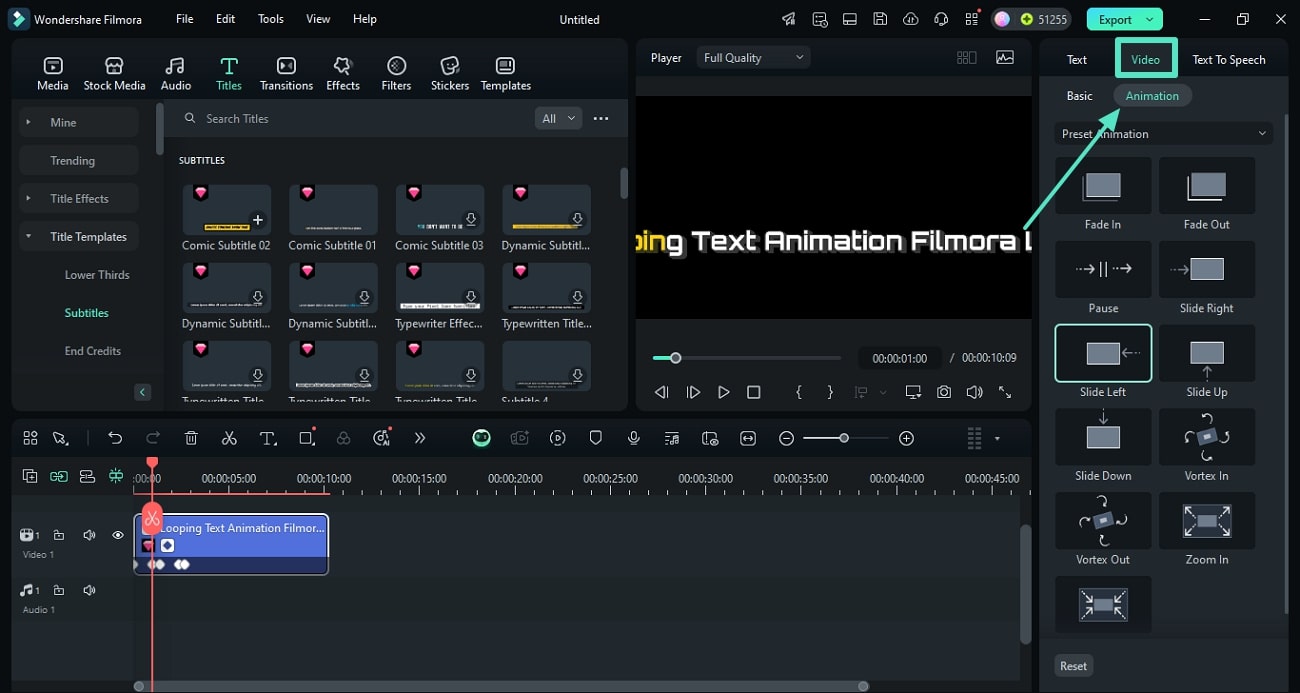
Add Animation to the Text
Once the text is added and customized successfully, head to the “Video” panel and access the “Animation” section. Select the animation for the text and apply it by sliding it through the video track on the timeline.
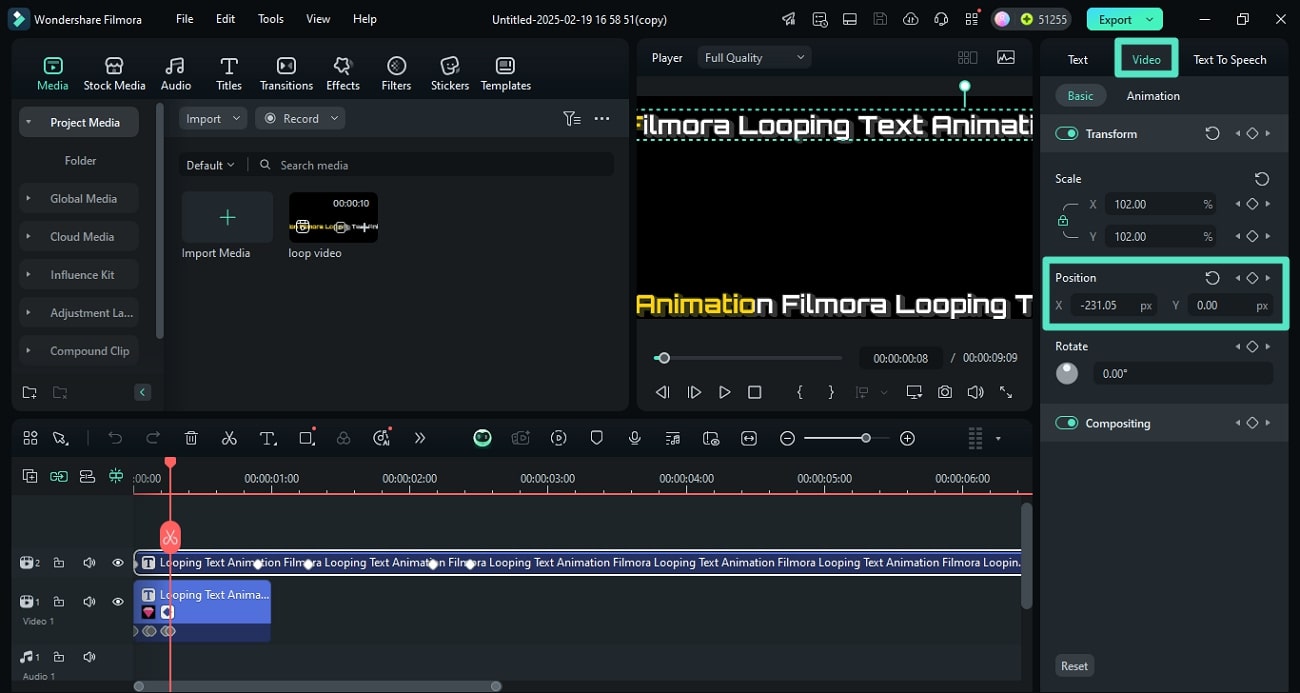
Set The Loop Position
After the text animation loop is added, access the “Position” section under the “Video” panel and set up the left position according to your preferences.
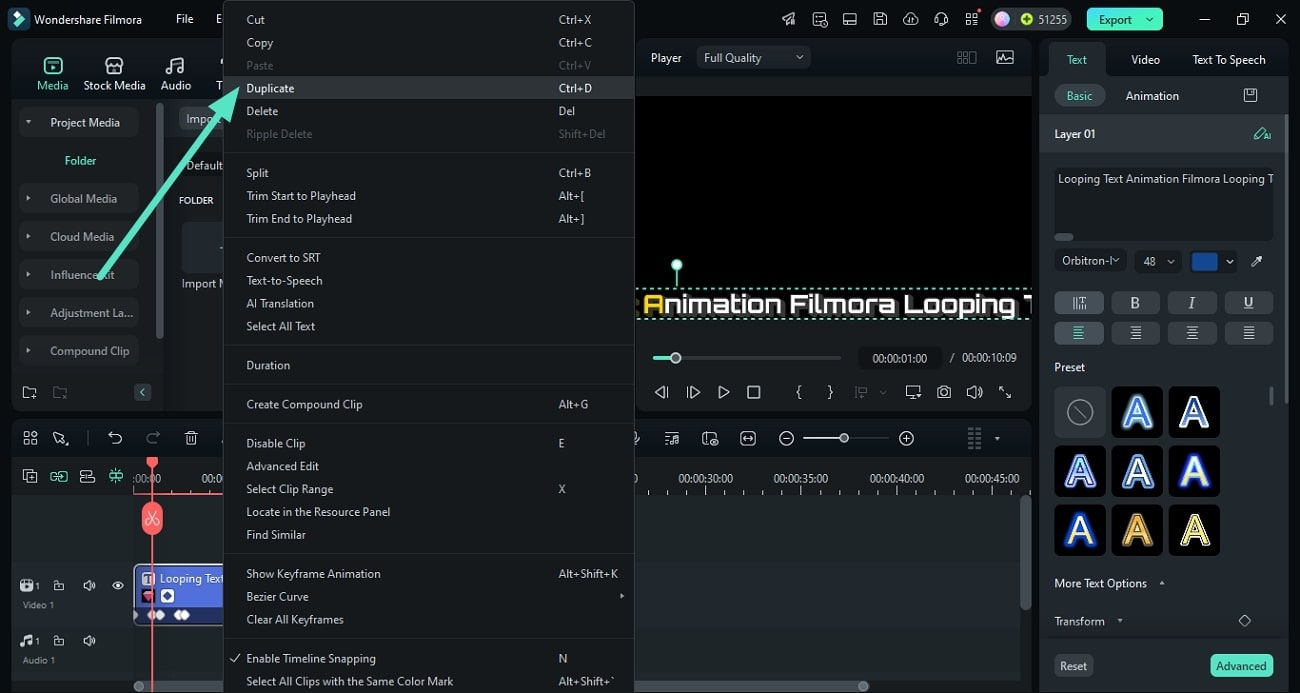
Create Duplicate Text Animation
When a single text loop is created successfully, access the video track on the timeline and right-click on it. Now, select the “Duplicate” option from the extended list to create a copy of the text animation. Repeat the process for as many loops as you want.
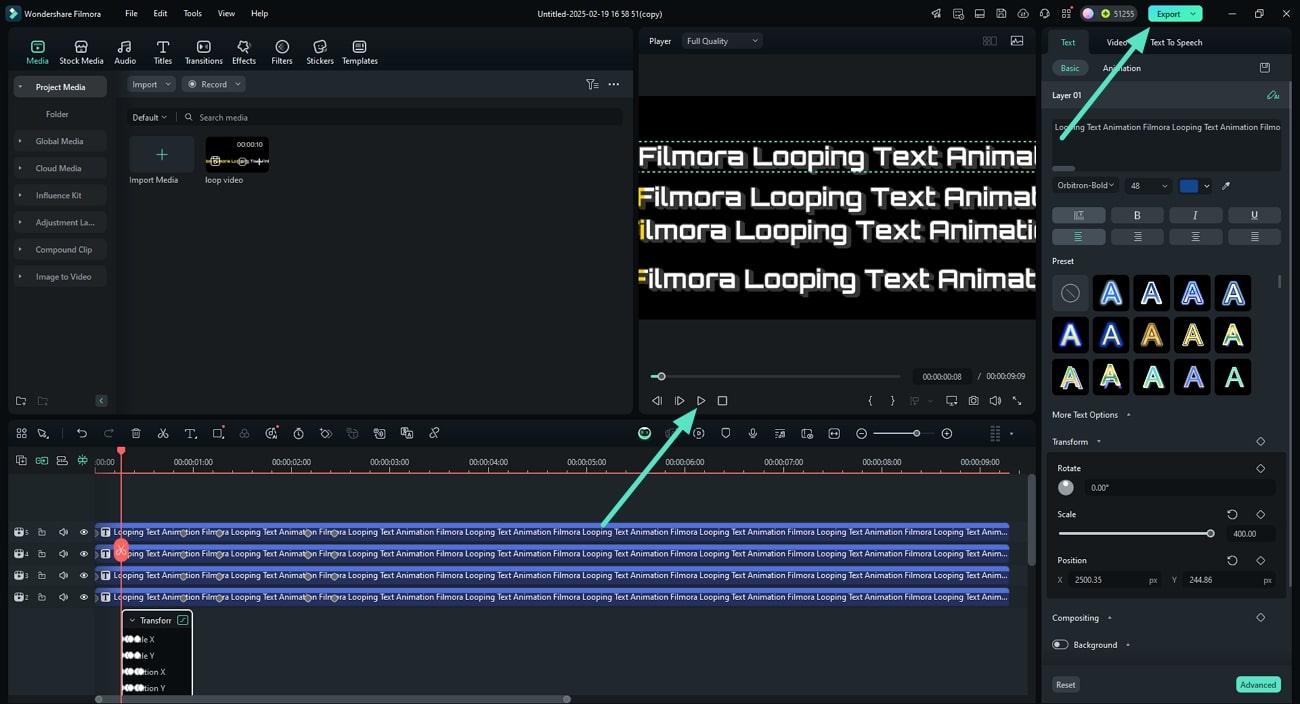
Reposition Each Text Animation
Reposition each loop within the preview window and click the “Play” button to observe the animation. Finally, head to the top-right corner of the interface and press the “Export” button.
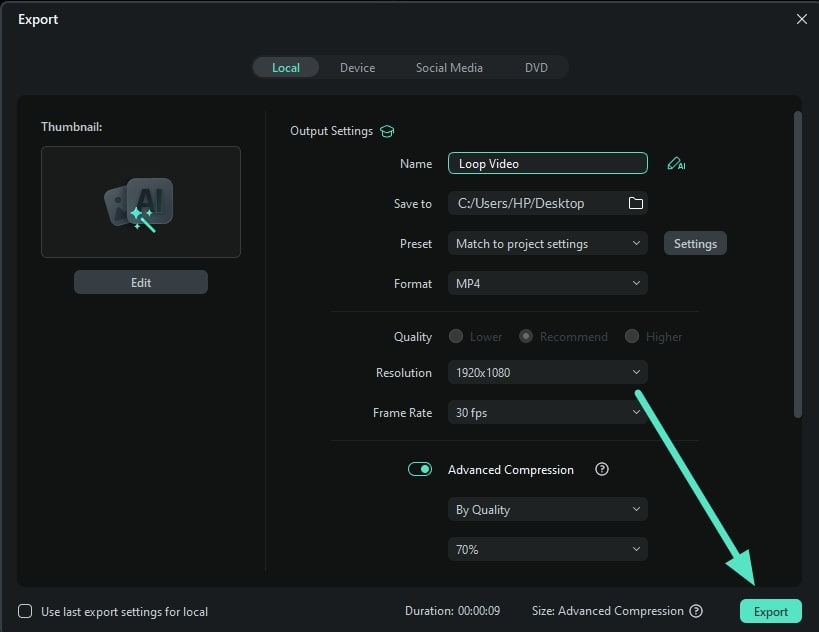
Export Your Loop Text Animation
In the “Export” window, rename the animation and configure other output settings. Once done, hit the “Export” button to finally save the looping text animation video to your device.
Although creating looping text animation may look like a difficult task at first sight, this is not true. Wondershare Filmora makes video editing of all types easier and more convenient for everyone. Moreover, with the help of this tutorial, you can easily use Filmora to design your favorite looping text animations and ultimately enhance your content creation art.