Guide On How To Create Audio Visualizer in Filmora
Do you face audio problems within your important videos quite regularly? Think of audio-video synchronization problems, noise issues, and other sound distortions. You need not worry! This tutorial on Filmora discusses ways to create and implement an audio visualizer to your videos, which provides audio rectification solutions in a smart way.
-
Guide On How To Create Dr. Strange Effect In Video Through Filmora
-
Guide On How to Add Smoke Effect in Filmora
-
Tutorial On Smooth Blur Transition in Filmora
-
A Simple Photoslide Tutorial With Slideshow Effects In Filmora
-
Isolate Color Effect Or Selective Color Effect In Wondershare Filmora
-
Guide On How To Add Dr. Strange Effect In Video
-
How To Make Snap Video – Filmora Tutorial
-
Tutorial – How to Make Fast Speed Effect Like The Flash With Filmora
-
Guide On How To Edit Coin Magic Tricks With Filmora
-
How To Get Explosion Effect On Your Video Using Filmora
-
Creating Seamless Typography Animation with Filmora 1202:11
-
A Guide to Creating Looping Text Animation With Wondershare Filmora02:11
-
Tutorial - Create 3D Photo Zoom Effect in Filmora02:11
-
Filmora Tutorial – Setting Up The New Dynamic Countdown Timers02:11
-
5 Essential Video Editing Tips You Must Know On Wondershare Filmora02:11
-
Performing Next-Level Editing With Ready-Made Templates on Filmora 1202:24
Transcript
Today, in this video, I am going to tell you how you can create an audio visualizer of your own.
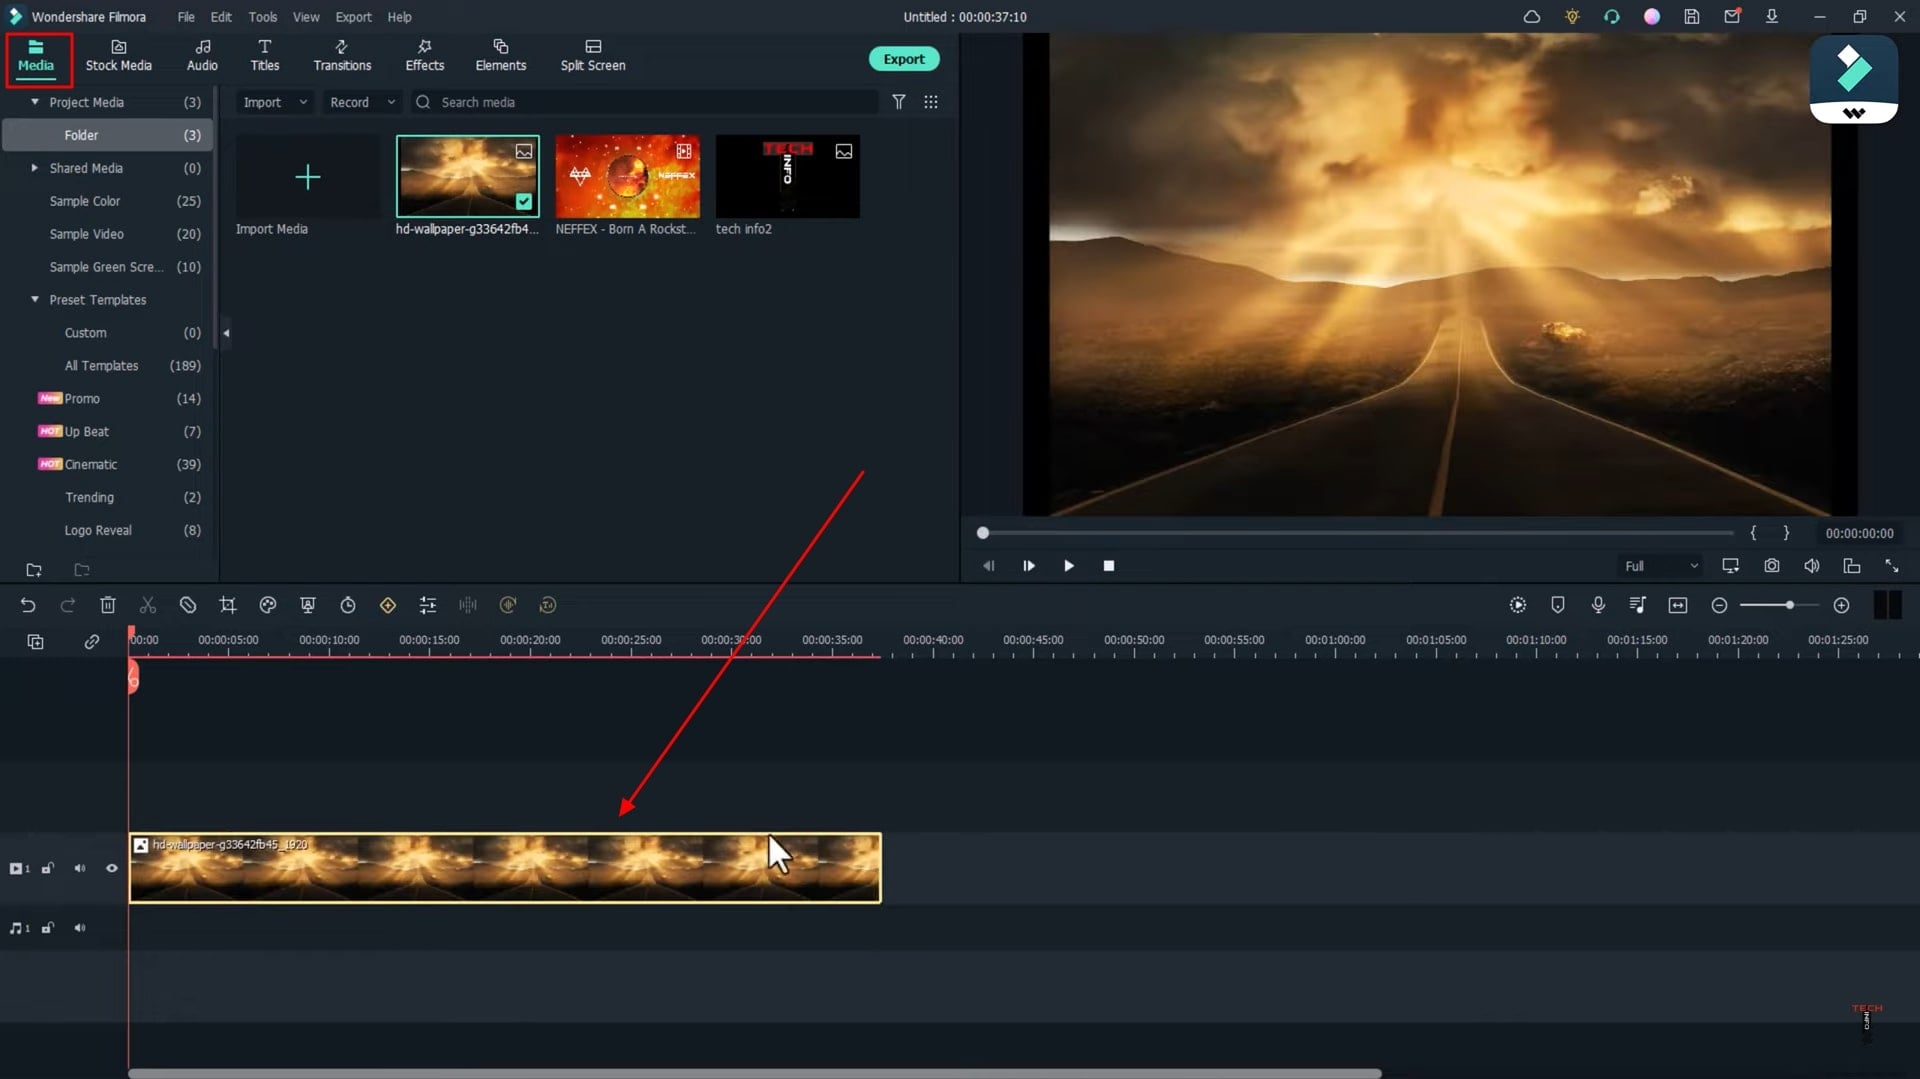
For creating an audio visualizer, first, you've to take a background. After this, you've to add music. You can also use their music and even apply your music. Now you’ve to take another photo which you would have to add to the audio visualizer that you’ll create.
Now you’ve to add background to your timeline, and you have to add the length of your background wallpaper. After this, you need to adjust your wallpaper from here if it’s not set.
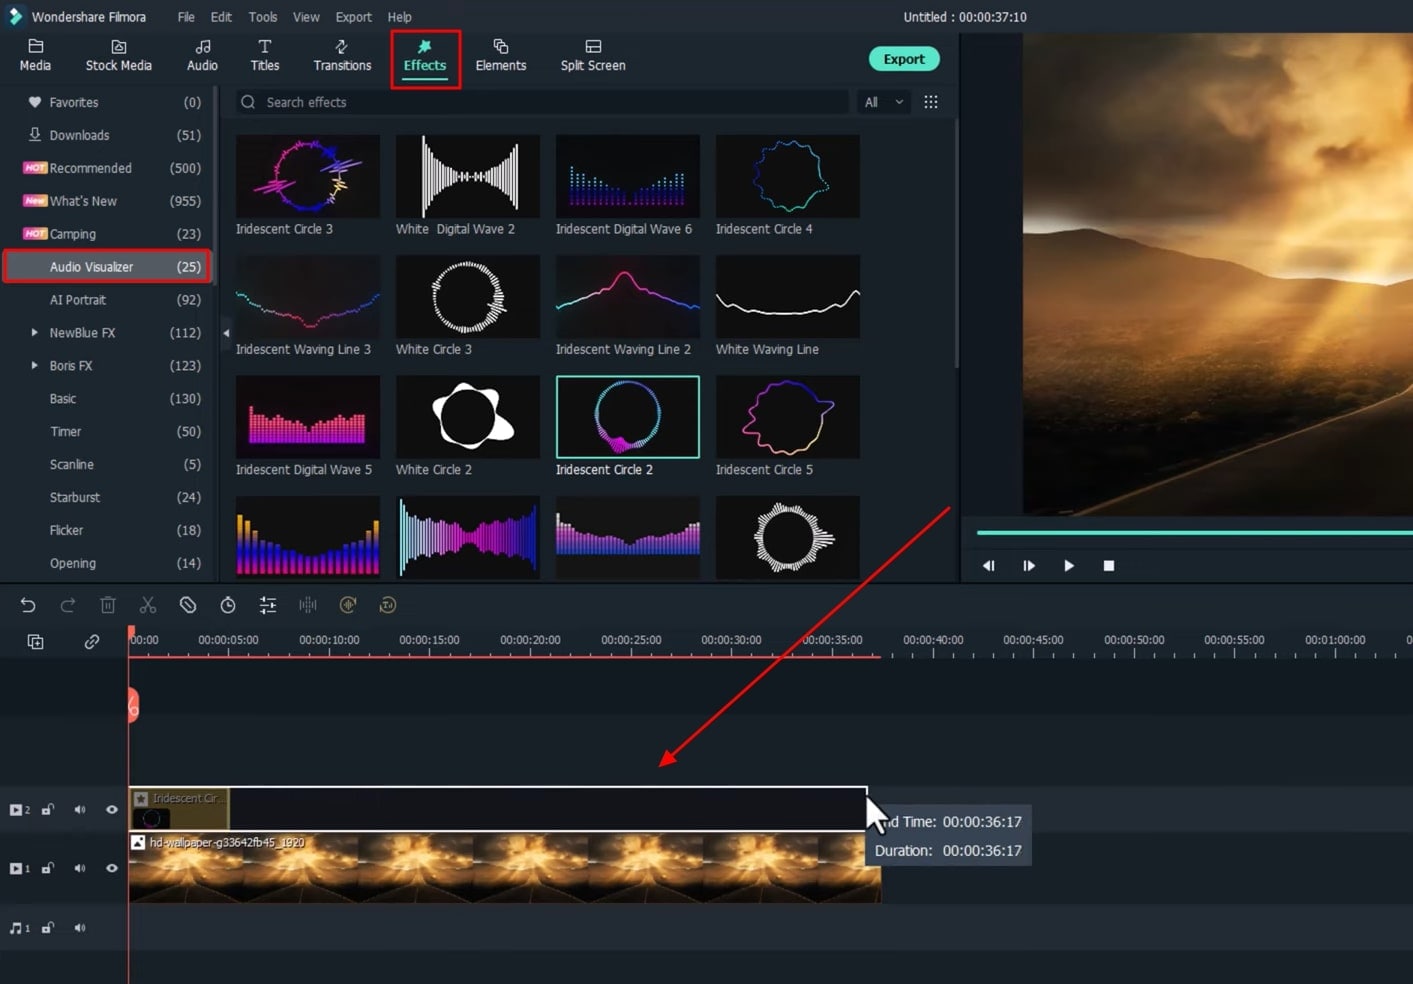
Afterward, you've to navigate into the "Effects," and here you'll get a category named "Audio Visualizer," on which you need to click. Here a lot of audio visualizers would be now visible. So, what is an audio visualizer? You would have seen music on social media where wallpaper exists in the background, like there is a small audio visualizer on it. As the music gets played, the audio visualizer also keeps moving.
Hence, with these options, you can create an audio visualizer for yourself. So here, you'll find many audio visualizers, and the one that you need, you've to add to the timeline. After this, you need to adjust its length according to the video.
After this, you've to move into "Audio." As I have already told you earlier, you can also add your audio or music. You can also take their music. So here I have a video file of music, so let’s add it to the timeline and separate its music. Afterward, you've to take a photo. You can also take a logo, as I have also used a logo for my channel.
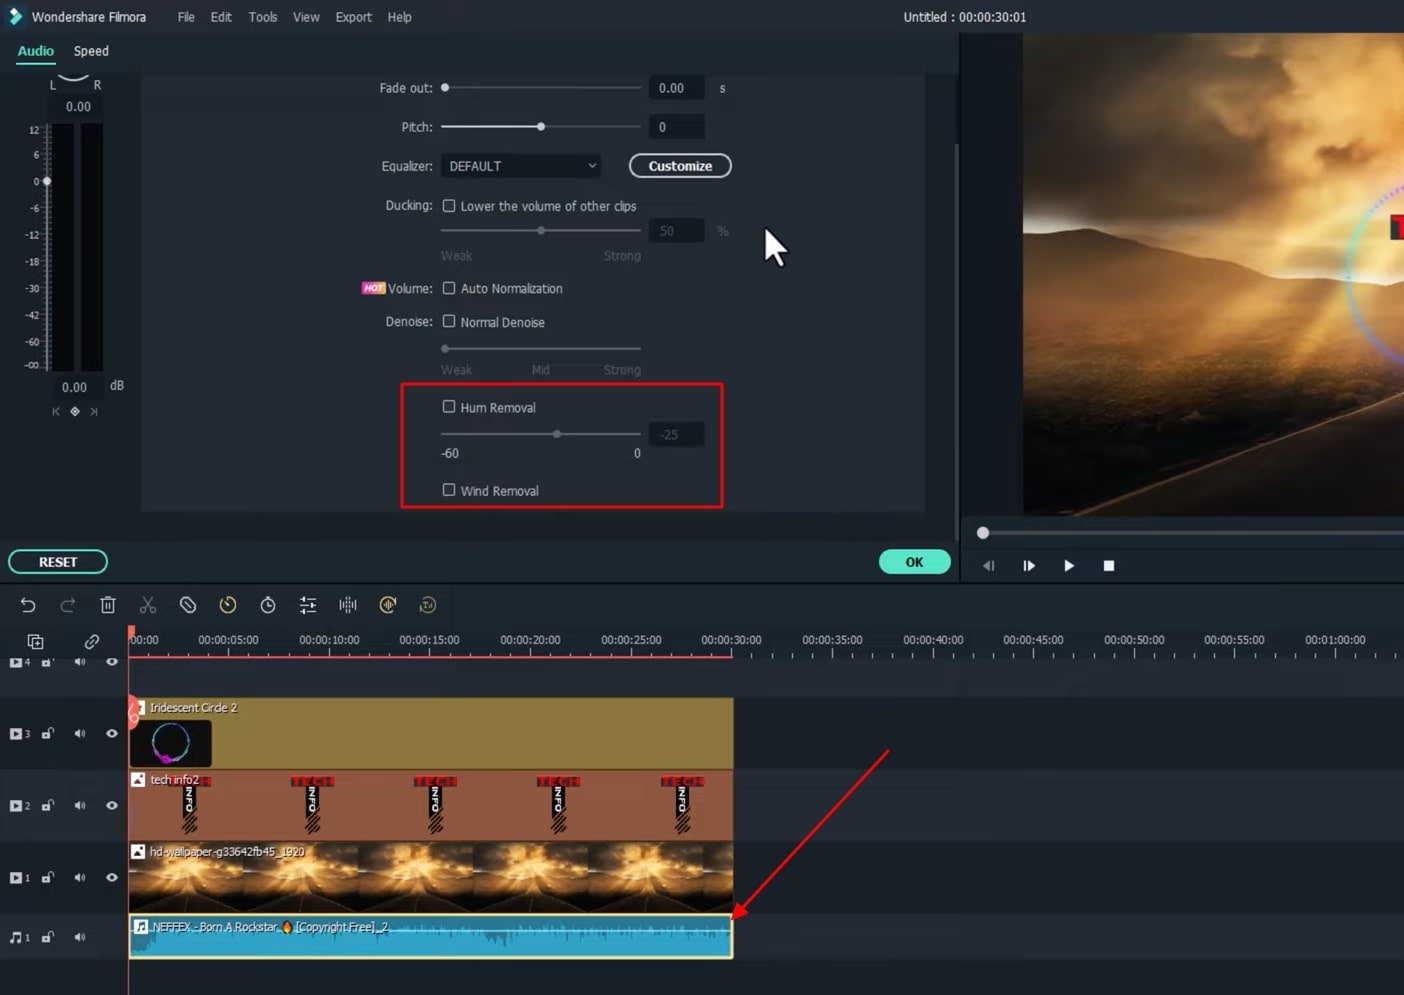
If, after creating an audio visualizer, you want to add effects to it, you have to double-click it. After this, a lot of options will open in front of you. So here, the two options are visible, and you've to turn them on. But only at that time, when you're recording, or when there's a noise of air within music, or when you want to remove noise completely; so that time you would use these two options.
After going into "Audio," you can "Fade in" and "Fade out." Afterward, you customize it. From going here, you can adjust its volume as low or high.
Now how you've to write text here, you've to click on the "Titles," and here you'll get to see many categories, you'll get to see many titles. The title which you want to add to your video, so you've to download and add it to your timeline.
If you want to add any text to your text or write anything you like, you need to double-click, and after that, write the text which you want. And from here, you can change the color of the text. From here, you can make it bold or italic. From going here, you can add effects to your text.
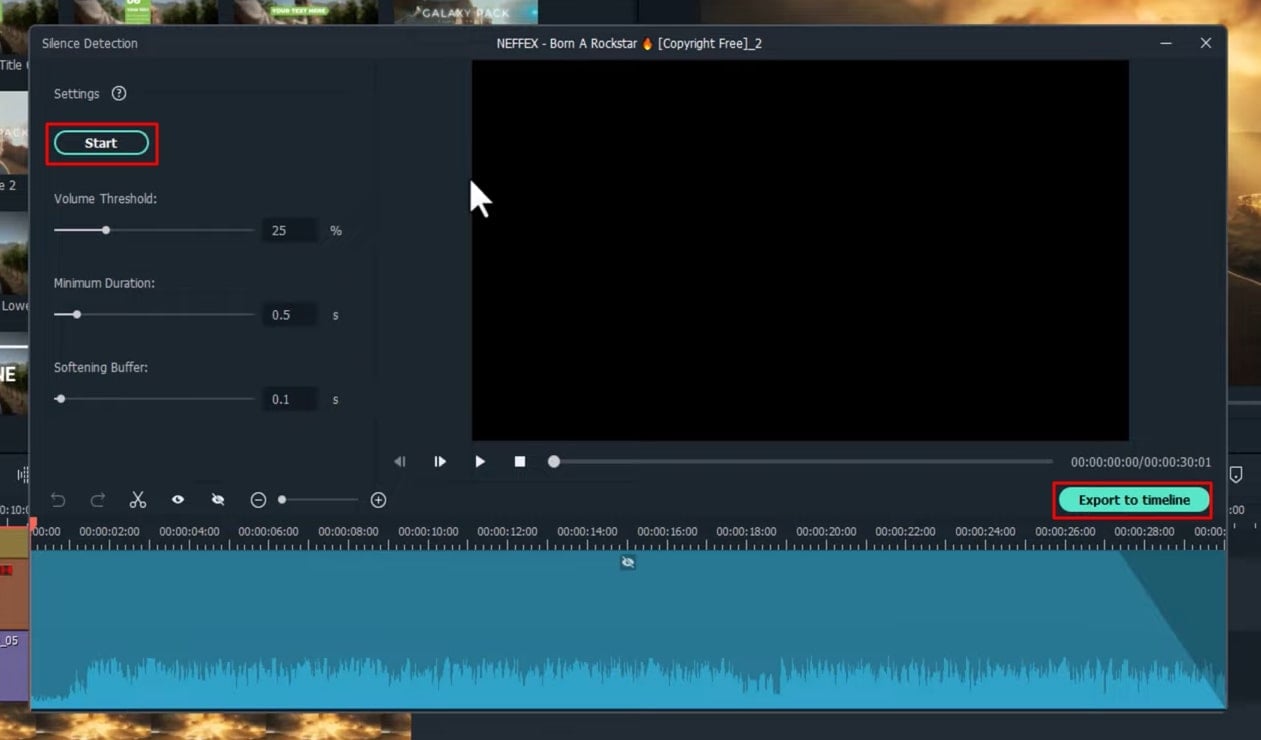
After this, friends, a huge update has arrived in this software. That if you click on it, you’ll get to see an option of “Silence Detection," and you need to click on it. What happens with it is that when you do any recording or add any music to the timeline. If you click on the "Start" button, then if there is any silent part on your audio or music, it will automatically detect that. Thus, as per your requirements, you can delete that.
For example, if we start it from here, you can see the audio here is empty. Now if we click on the "Export to timeline," these two parts will automatically get deleted, and this area will be added to our timeline. Thus, by going here, you can also adjust your audio. Now, click on "Export to timeline," and the same video will be added to the timeline.
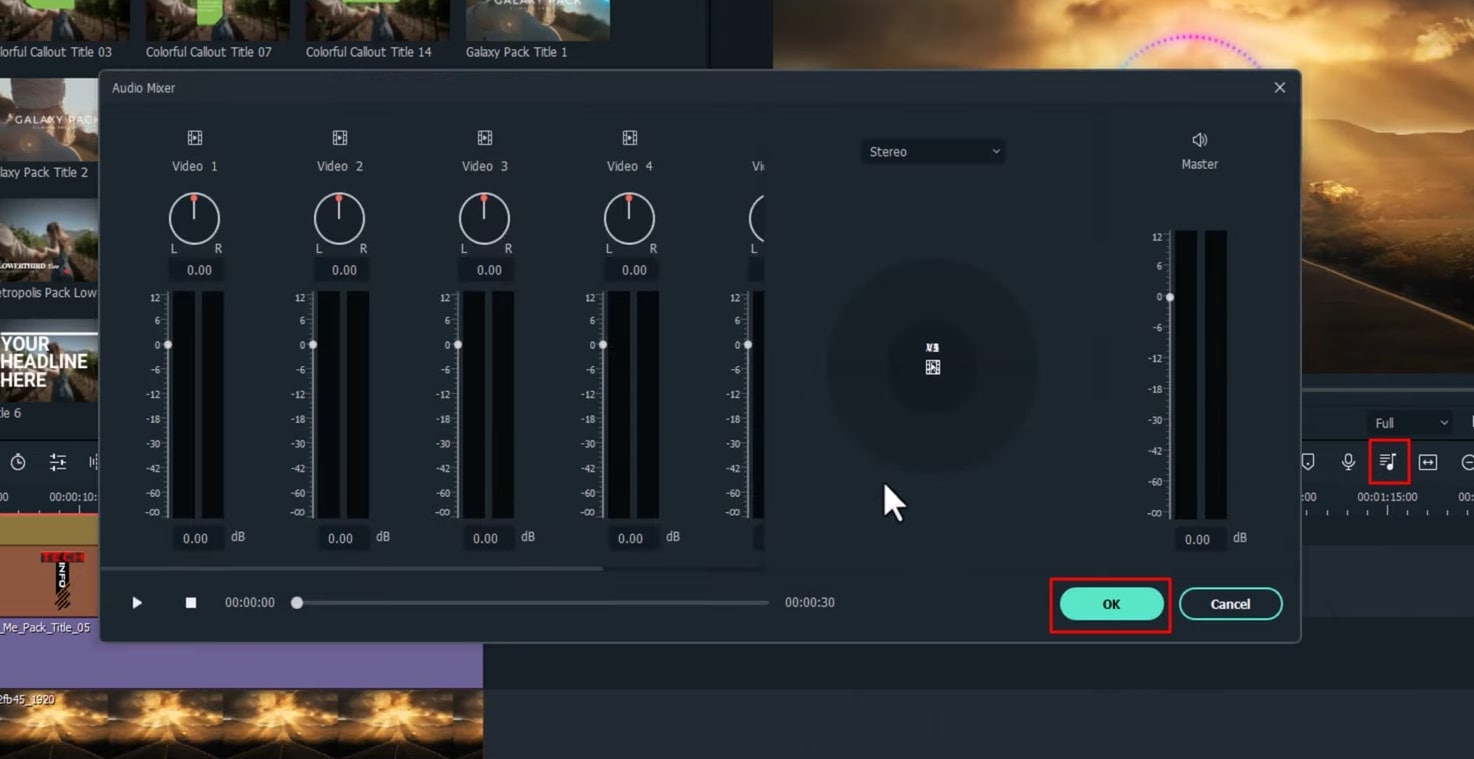
Afterward, you'll get to see an option of "Audio Mixer." What happens with it is that if you have music or audio, then you can make it beautiful, can mix one voice into another. So let’s preview our audio visualizer video to see how our video is made. Thus, like this, friends, you can make an audio visualizer for yourself.
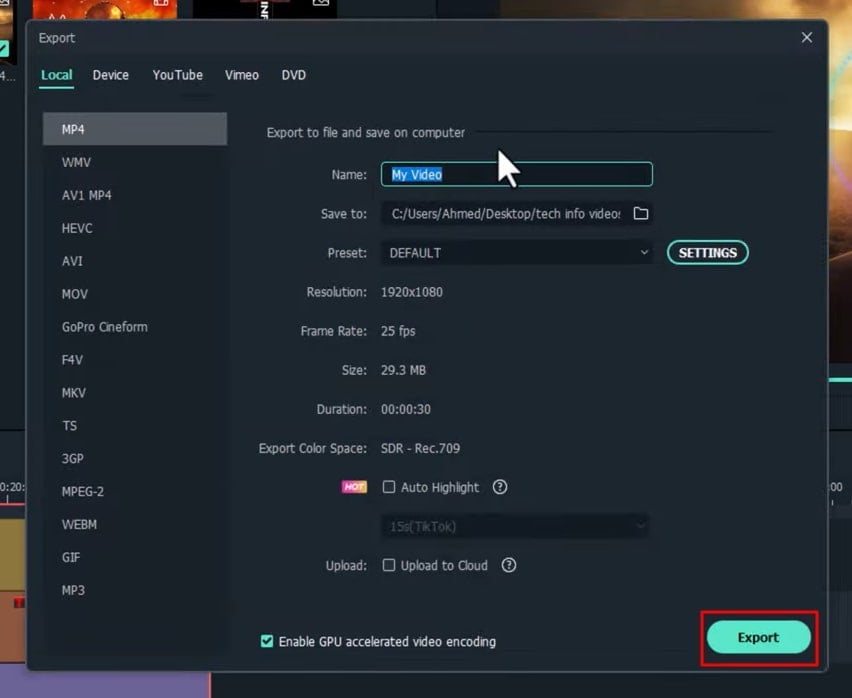
So, let's preview the video by exporting it. You've to click on the "Export" button. So here, first of all, you need to write the name of your file and set the location where you want to save your video. By going into "Setting," adjust its resolution and frame rate. After this, you've to click on "Export" again.
Guide On How To Create Audio Visualizer in Filmora
What you need to prepare:
- A computer (Windows or macOS)
- Your video materials.
- Filmora video editor
Add Media for Filmora Editing
The first thing is to import your background image and audio files to Filmora. For this, you've to click the "Media" tab from the top left and press the "Import Media" button to import all your required media from the device. After this, drag both audio and background image files to the project timeline below.
Apply Audio Visualizer Effect
Now navigate into the "Effects" tab from the top of the screen, and from the left available categories, press the "Audio Visualizer" category. You'll see many options here. Select your desired audio visualizer and drag it to the timeline below. Adjust its duration according to the length of your image and audio track.
Customize Audio Track
If you want to edit your audio, double-click the audio track from the timeline and adjust the audio settings from the available editing tab. You’ll see multiple customization options and therefore edit audio as required.
In addition, if there is a noise problem within your audio or when you're recording, you've to turn on the options "Hum Removal" and "Wind Removal" to overcome audio issues.
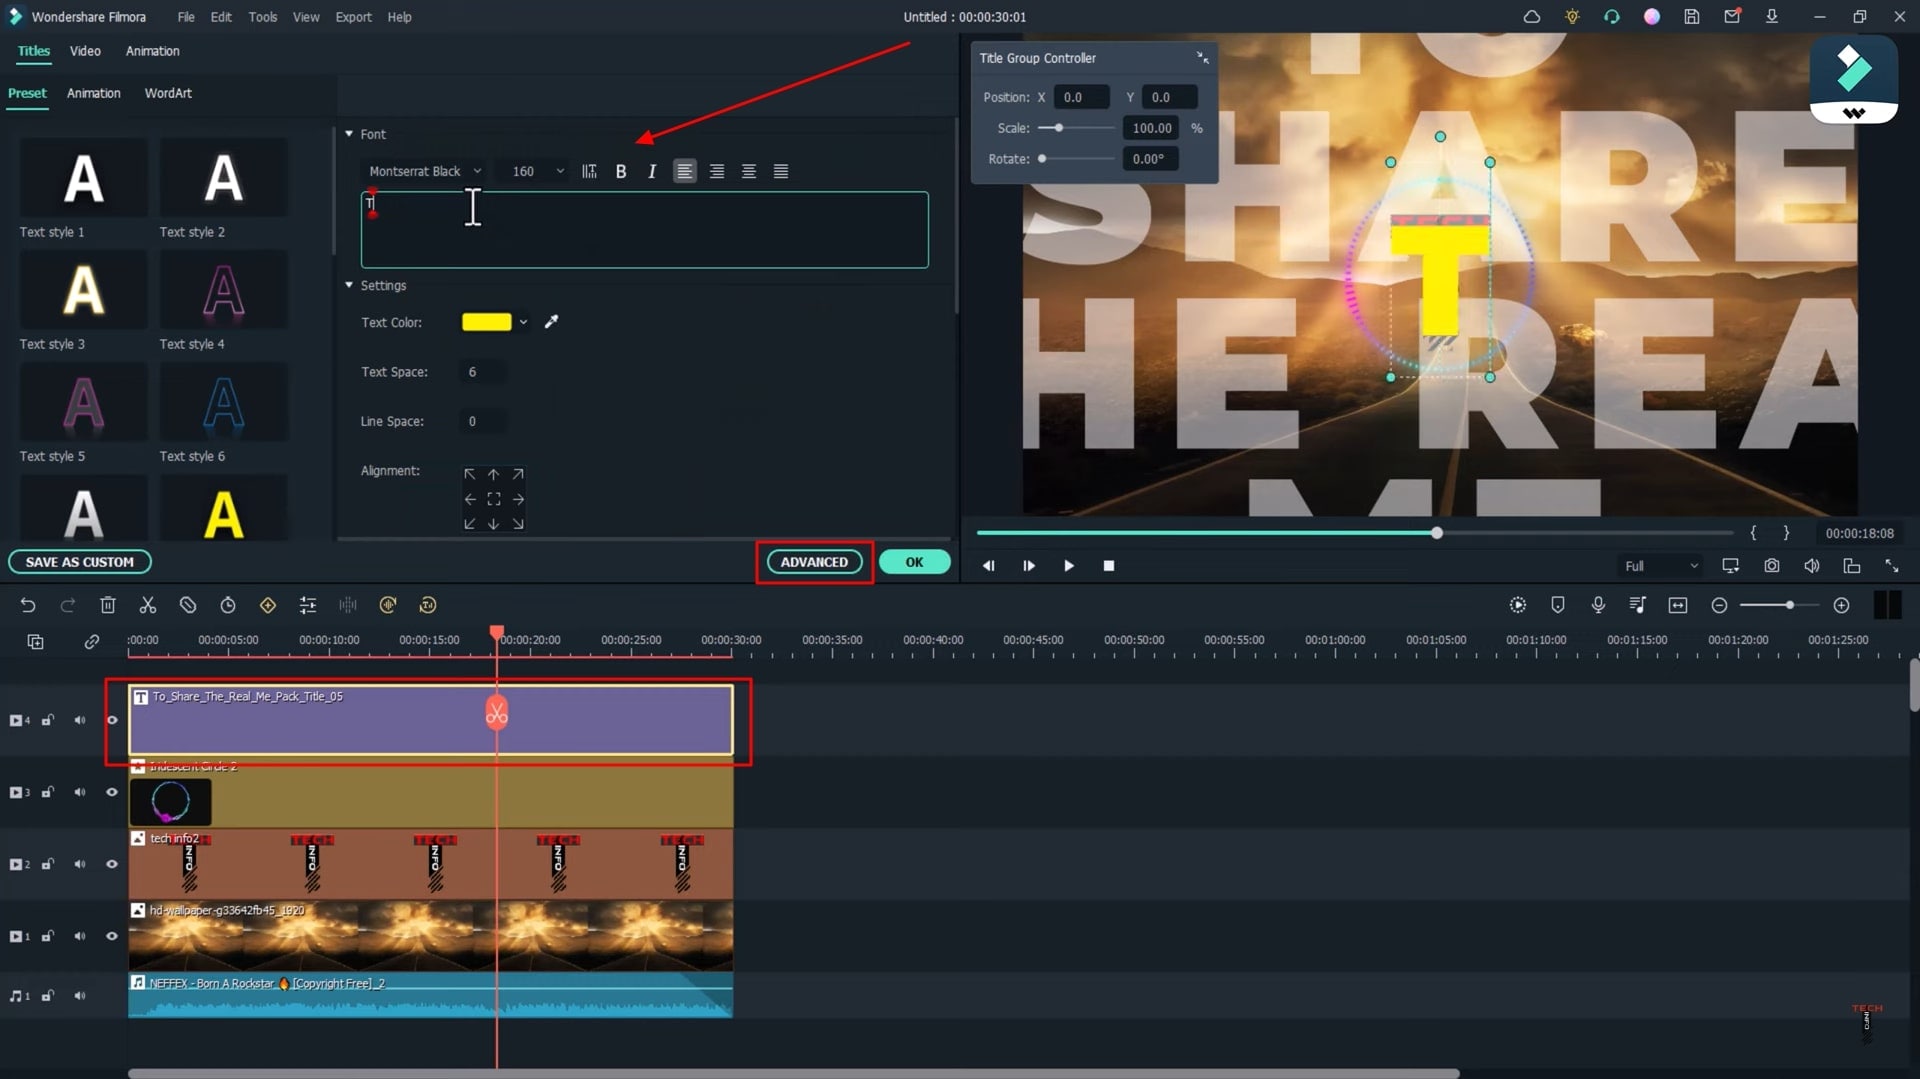
Implement Text Titles to your Video
Click the “Titles” option from the top menu, select your required title from the given options of categories, and drag the title to the project timeline below.
To modify the text, double-click on the title track from the timeline and then edit it as required from the available window. You can write whatever you want in the text, change text layout, size, color, and style or add animations or effects. You can also perform advanced editing by clicking the “Advanced” button.
Eliminate the Silence Part from Audio
f your audio has a silent or low voice part anywhere in the track you want to delete, click the “Silence Detection” icon from the panel bar. A window will open where you need to press the "Start" button to automatically adjust the sound on that particular part. Finally, click on "Export to timeline" to export your updated audio to the timeline.
Beautify your Audio
Upon clicking on the "Audio Mixer" icon from the timeline panel bar, you can also beautify voice in music. You can also mix the voice of one audio into another. After adjusting through customizations, click “OK” to proceed further. Click the "Play" icon to view your final video with the audio visualizer.
Export and Save into Device
Click on the "Export" button, and from the available window, set the video name, select the file location to save onto the device, and press "Export" again.
An audio visualizer is a great solution to sound problems within videos of different types. Since videos are very close to us in terms of desired visual content they provide, an audio visualizer is a perfect addition to improve the overall quality of videos. This tutorial on Filmora discusses the implementation of audio visualizer tools alongside other special features.