Transcript
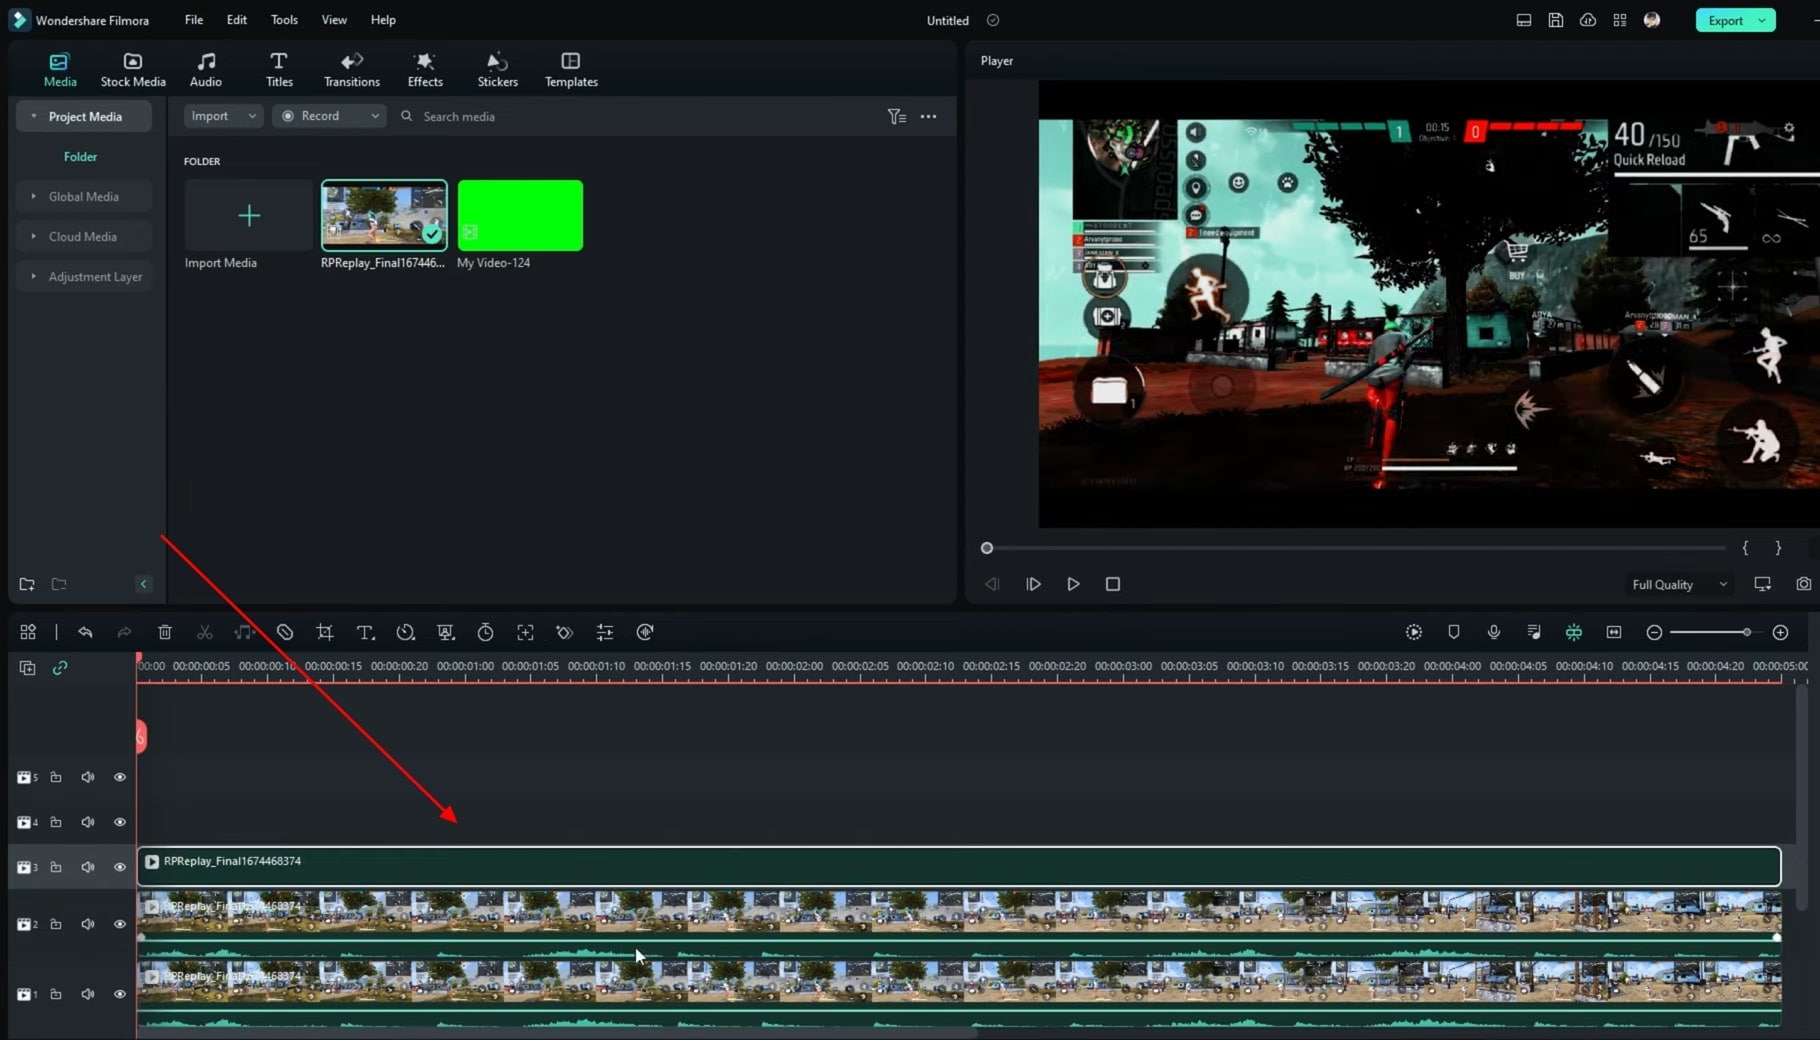
Guys, first of all, take your gameplay and this flicker effect. And there is one snow effect that you'll get in a pack; try that as well because it looks much better. So, after adding, you've to add your gameplay first, then add or cut the clip as required.
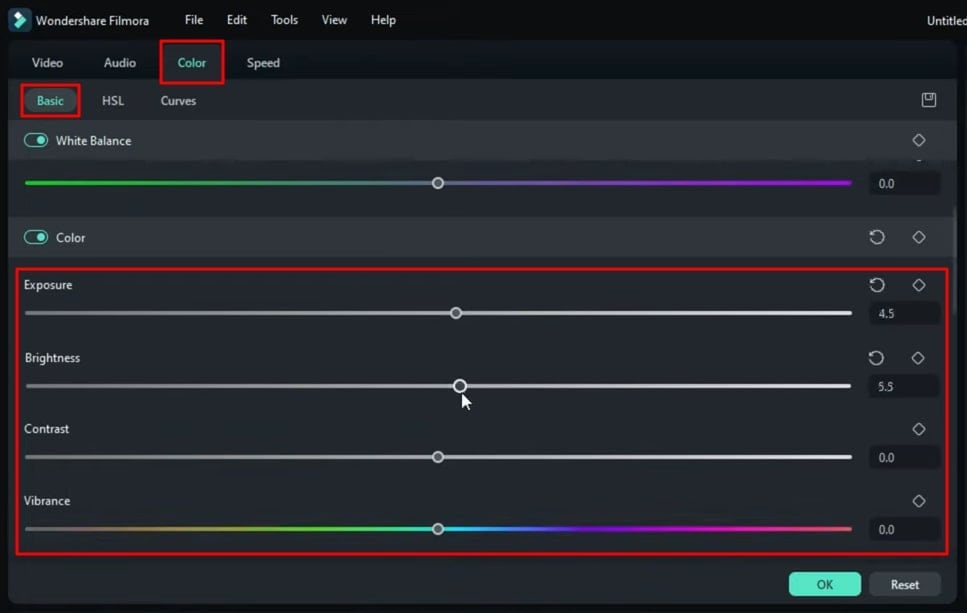
After adding, you've to come into "Color." In simple meaning, you've to set “Exposure” to up to 4 and increase our “Brightness” from up to 4 to 5 and decrease the “Contrast” like keeping it under 30, under -30, I mean. Rest keep “Highlights” and “Shadow” low simply by decreasing them, which will help you to see a better output.
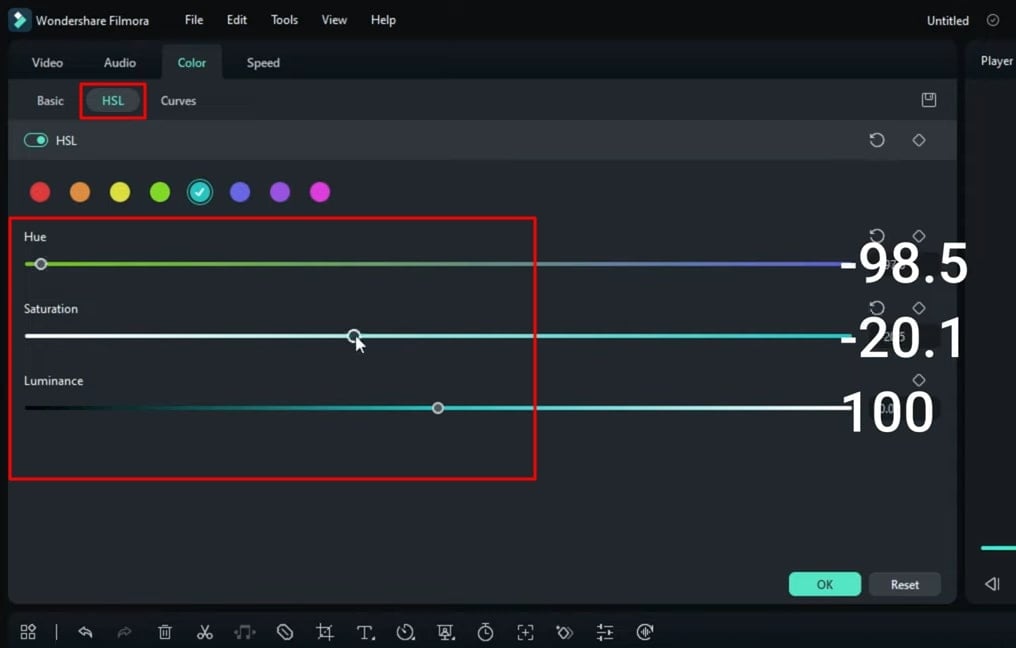
Now the main part is here, as you've to come into the "HSL." So, guys, keep the same settings as I am keeping, and you can add those numbers, due to which the color grading is perfectly implemented into your gameplay. So, guys, I have provided you with all the numbers here, so you can write them by seeing them.
So, guys, as you can see here, your color grading is almost completed. T-line orange looks would appear in front of you. Copy and paste it onto the top layer and multiply it. And guys, again, copy it and paste it onto the top layer. Make three or four layers like this and keep pasting on all the layers. Continue adding and repeating this process until only the sky appears while the rest is blackened.
After adding, you’ve to move into “Recommended” and search here “Geometric Hexagon,” and you’ll find this one. Add this, and after adding, export it to your gallery where you want it to export. So, I will export it to my gallery. So guys, export it in 60 fps high-quality resolution and don’t export in low resolution.
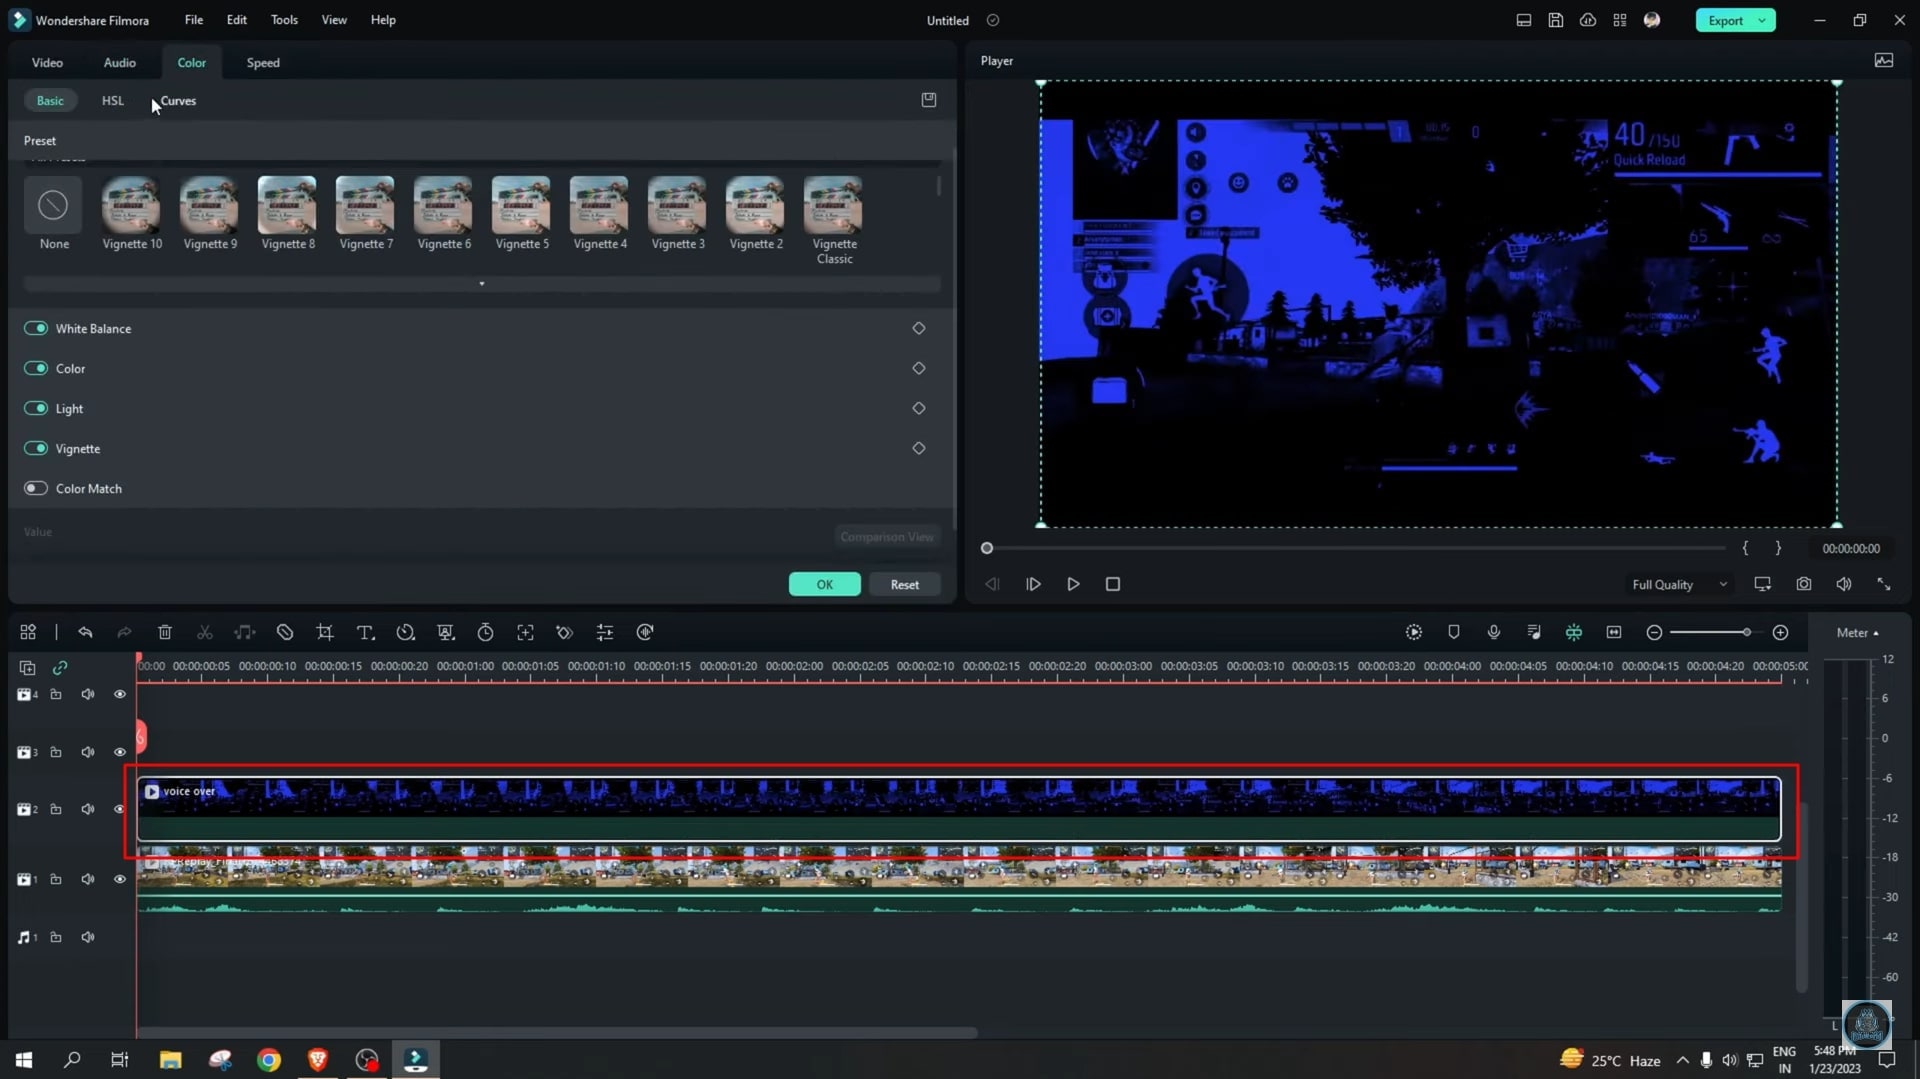
Guys, delete the rest from here and import our main video in which we have added our hexagon. After importing it, you need to decrease the saturation of the blue color. You can also add any color you want. Since I need black and white, so I will decrease the saturation.
And here, guys, you've got to add "Square Blur." Then come into size, keep its size to 30, which is Square Blur's size, and ultimately screen it. So as you can see, guys, your sky blue has been added. And, guys, copy it once and paste it. So if you need more sky color, your sky color will increase, as you can see. We will take another part at the top of this layer and apply a flicker effect to it, which you will get from the pack, and you can download it. And we'll keep its opacity between 3 to 5.
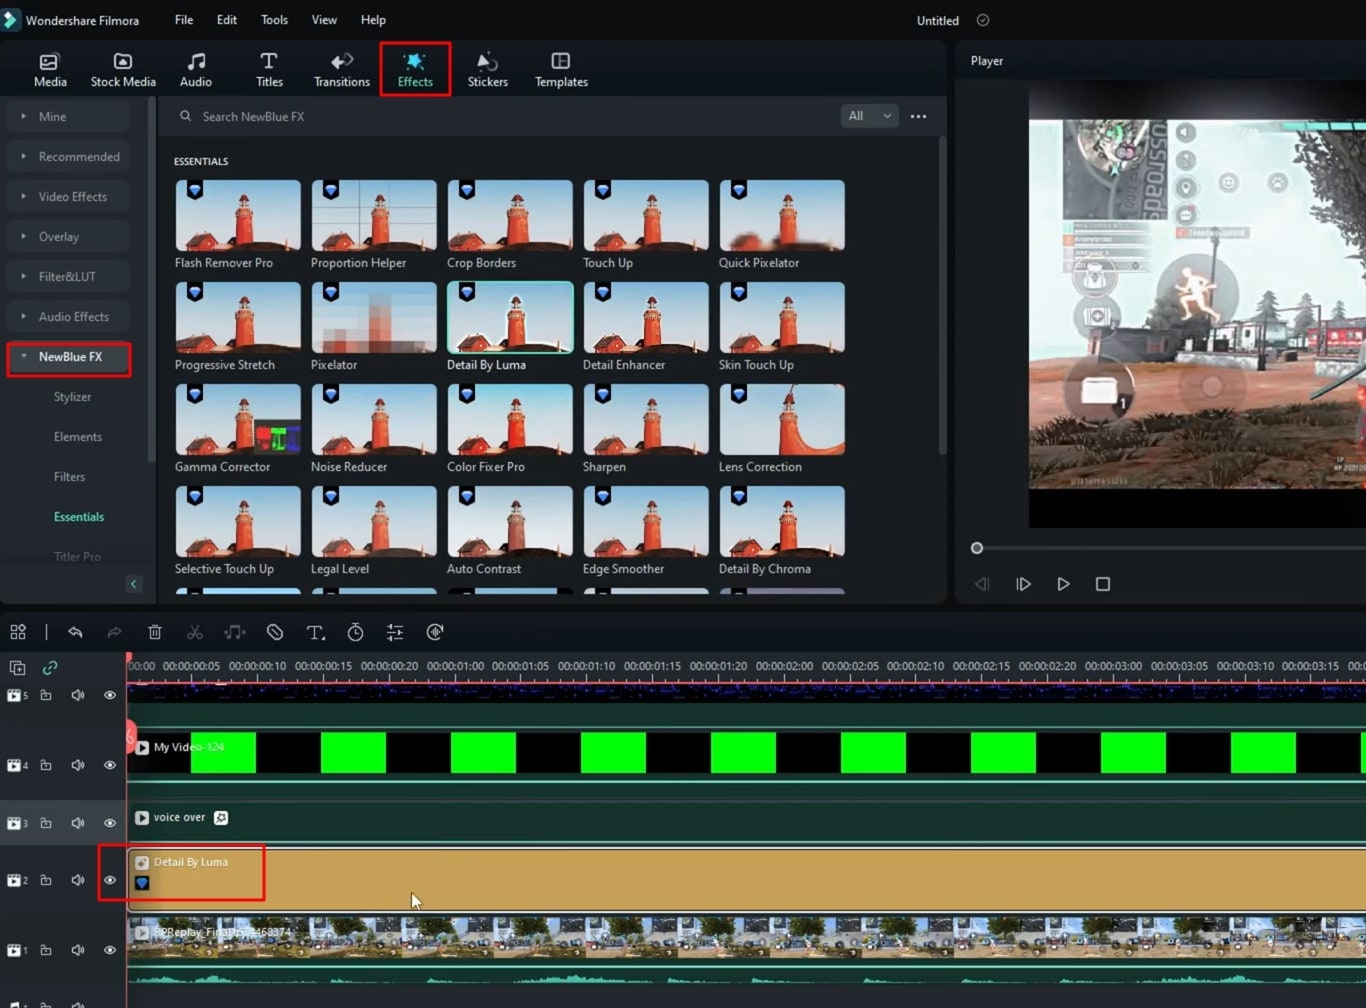
Now you’ve to go into “NewBlue FX” and add “Detail” by Chroma or Luma, and your HDR effect will be applied.
Guide On How To Add HDR, Color Grading & Sky Glow Using Filmora
What you need to prepare:
- A computer (Windows or macOS)
- Your video materials.
- Filmora video editor
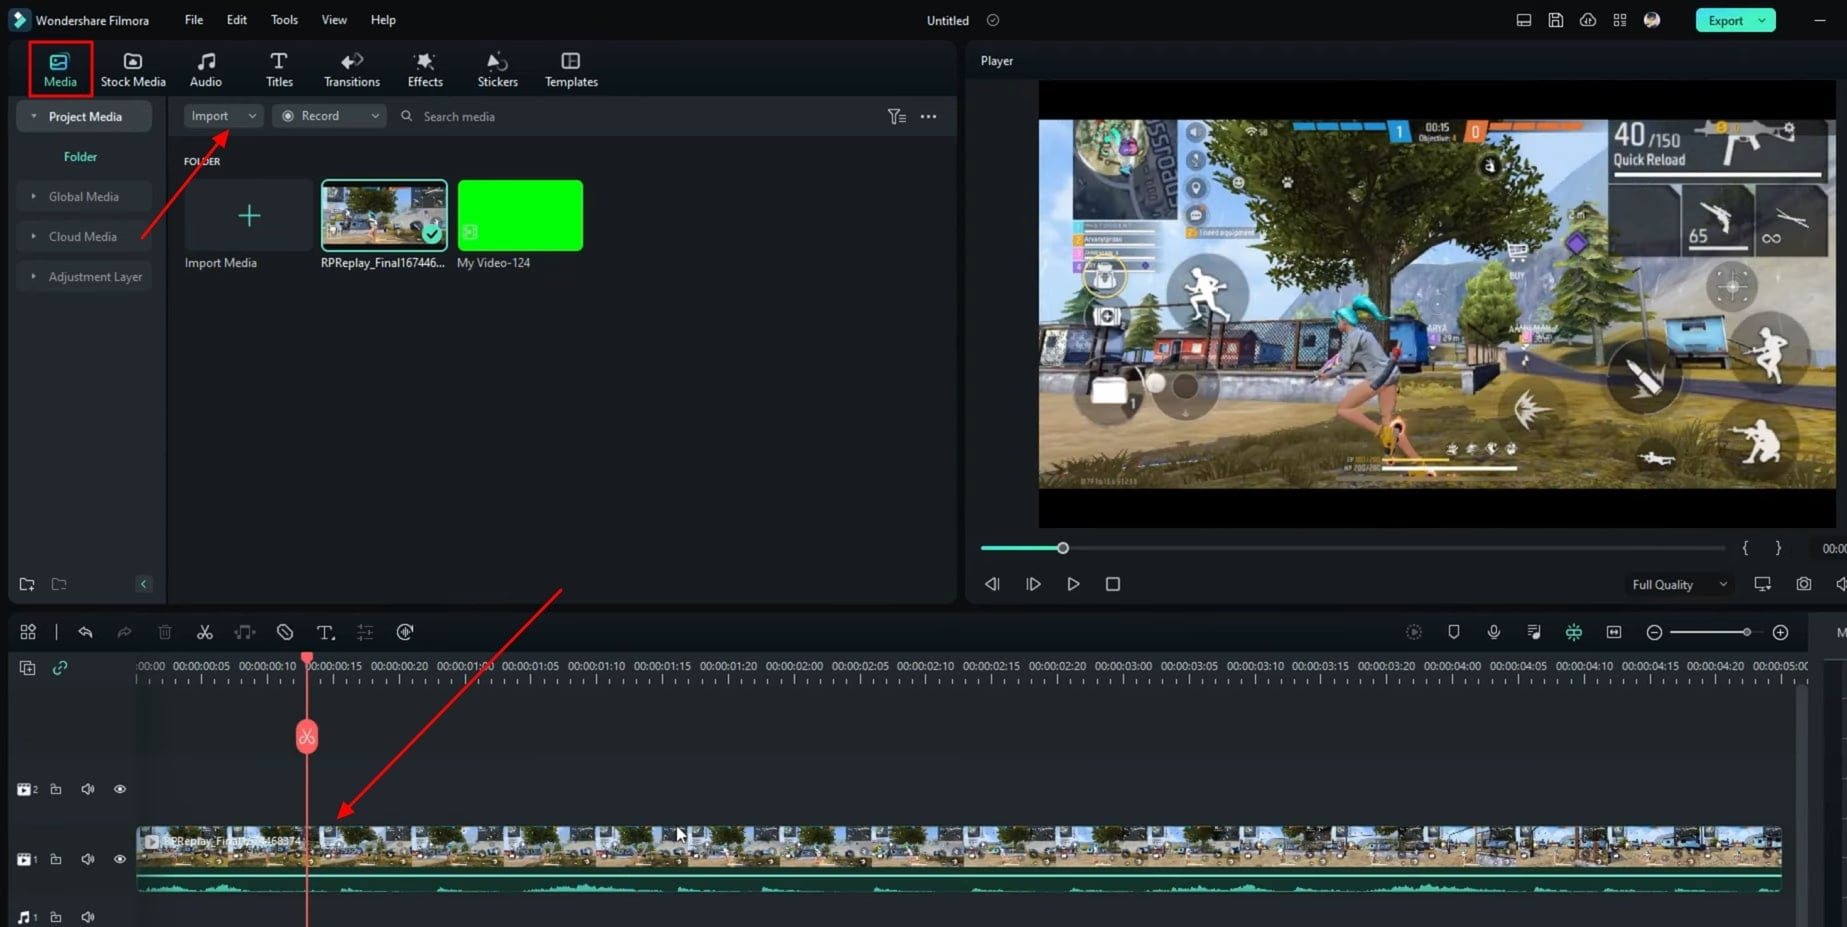
Start Filmora and Import Media
Once you start the Filmora application, proceed further by importing your required media. For this, you need to click the "Media" tab from the top-left side of the screen and then press the "Import Media" button to import your video or any effect as required. After this, drag your imported video or other files to the project timeline below.
Perform Modification Of Video Colors
Double-click on your video track from the timeline, and a window will open right before you. Select the "Color" menu from the top, navigate into "Basic," and finally turn on the "Color" option, where you can adjust color contrast and grading within different parameters on multiple scales. In addition, you can also adjust colors with respect to "Light," "Vignette," and "Color Match" customizations.
For further and advanced color grading, click the "HSL" menu from the top, choose your desired color, and adjust it using customizations like "Hue," "Saturation," and "Luminance."
Copy and Add More Layers
Press “Manage Tracks” from the panel bar, and click “Add Video Track” to add another layer to your timeline. Copy your video track by right-clicking and selecting "Copy" from the options, then move into your new layer, right-click, and now choose "Paste." Continue to repeat this process until only the sky exists in your video and the rest is blackened.
Implement Effects for Color Visualization
Navigate into the "Effects" tab from the top, move into the "Recommended" category from the left side, and search and select the "Geometric-Hexagon-2" effect. Move this effect into the project timeline below. You can add more effects as well; lets for say you add the "Square Blur" effect to your video. To edit the effect, double-click on it and customize it as per requirements from the available tab.

Delete Project Video and Import
Click on “Export” and save your video to your device. After this, select the entire timeline, right-click, and press the "Delete" option. Move into the "Media" section again and click “Import Media” to import your newly exported video.
If you wish to further edit the video concerning color contrast and grading, double-click on your video track and adjust it as required from the open window.
Apply HDR Effect
Click the "Effects" tab from the top, select the “NewBlue FX” category, choose its HDR effect, and add it to your timeline into the video track.
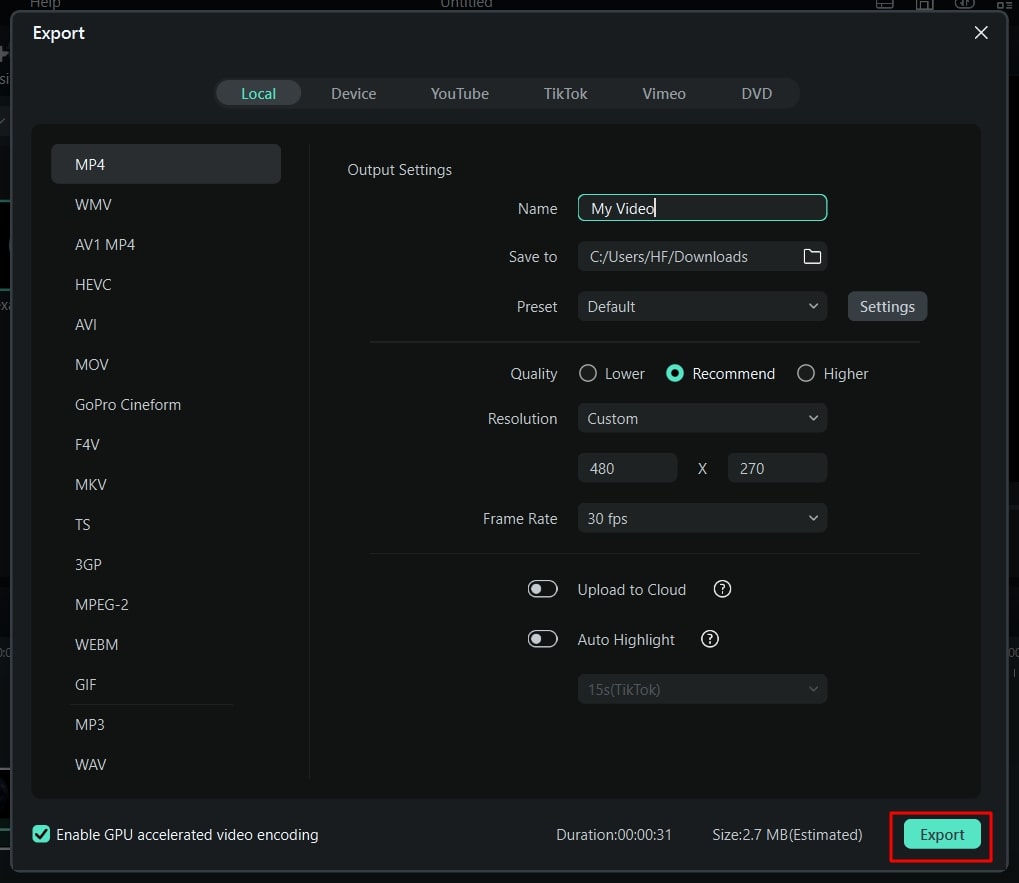
Save the Video Project on the Device
Now play your final video by clicking on the "Play" button. If satisfied with the project, move further to save the video to the device. To do this, press the "Export" button from the top, choose the file name, select the saving location on the device, and click "Export" to enjoy your video on your device.
Just like a human is nothing without a soul; similarly, colors are the heart and mind of any visual content. Everyone is attracted to colors, irrespective of age. Thus, colors play a significant role in enhancing the visual quality of your media. With this simple coloring tutorial of Filmora, you can visualize your videos within creative parameters.