Transcript
So, viewers, today, in this video, I will tell you how you can use Filmora 11 for the type of text shown on my screen. How can you add it to your video? This means how you can add a water-rippling effect to your video.
After this, you have to go here and add the video in which you want to apply the ripple effect. As seen from "Stock Media," I, for example, need to add a shark video, so I will add only a water-related video because the ripple effect would look better only in it.
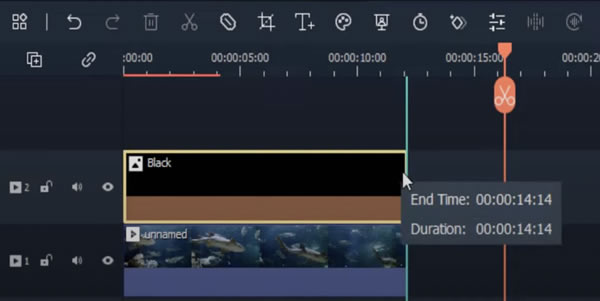
So, let's add our video to the timeline. Afterward, we've to go into "Media." From here, move into "Sample Color," and from here, a solid color means I will select a black color which I will add to my timeline.
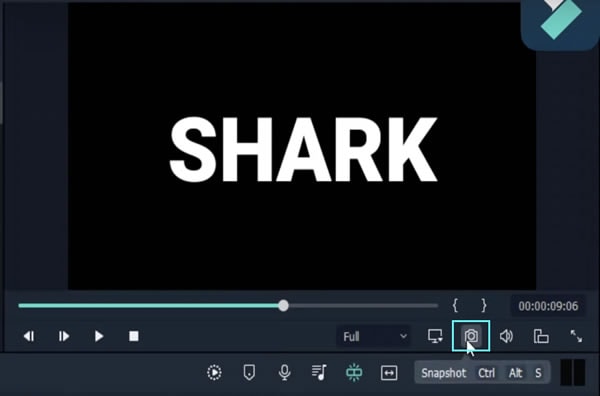
After this, I will go into "Titles." From here, I will select "Default Title." Thereafter, I add this Default Title to my video. And I will write “Shark.” Afterward, you've to select "Roboto Black" from this and increase its size.
Thus, like this, first, we take its screenshot. Make sure it stays in "PNG" format. So as seen, my screenshot has arrived in the media. So I will delete it from here and add this picture to my this video.
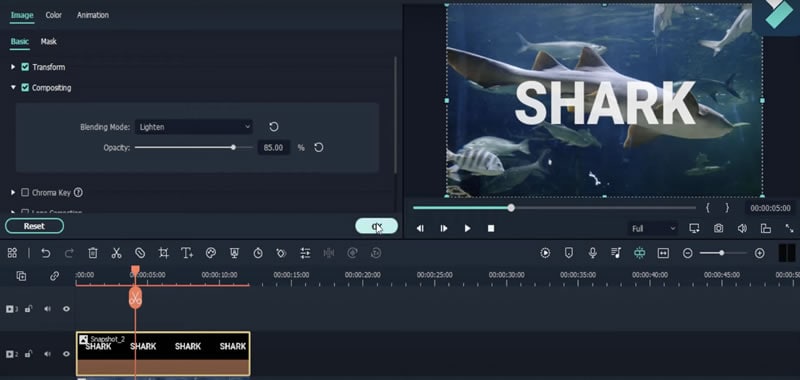
Afterward, to remove this black effect, I will double-click on it and then navigate into "Compositing." Click from "Normal" to "Lighten," and set the opacity to 85%.
After this, now we’ll move into “Effects” like this effect is "Water Ripple," so you've to add to this picture. So like I will show you by playing it. Or if you want to add only the "Water" effect in it, so you can add it as well.
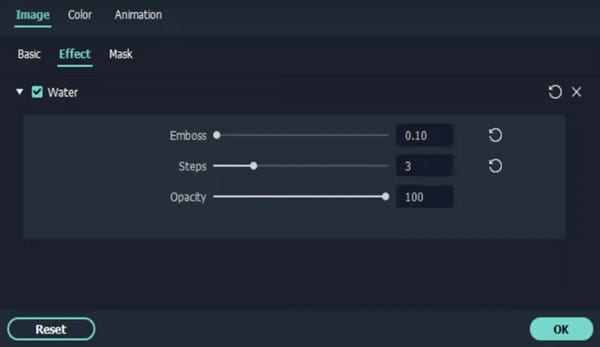
As you can see, the water is getting a lot shaky due to this. For this, you've to double-click on it, then navigate into “Effects,” and here you've to adjust the level. Here you’ve to change its Emboss to 0 and Steps to 3. So here, you can see a water ripple effect like this would be added to your video.
So you can create a beautiful intro for the start of your video or create many other effects like these using Filmora 11.
Guide on Making Cinematic Titles in Filmora
What you need to prepare:
- A computer (Windows or macOS)
- Your video materials.
- Filmora video editor
First off, go ahead and download the Filmora video editor and install it on your computer. Once you’re done with that, open the app and click on the big Create New Project button.
For the background of your cinematic title, you can import any image or video you want, or you can use the unique and creative stock media from Filmora. It’s totally up to you. Once you find your ideal clip, simply click and drag it to the Timeline at the bottom.
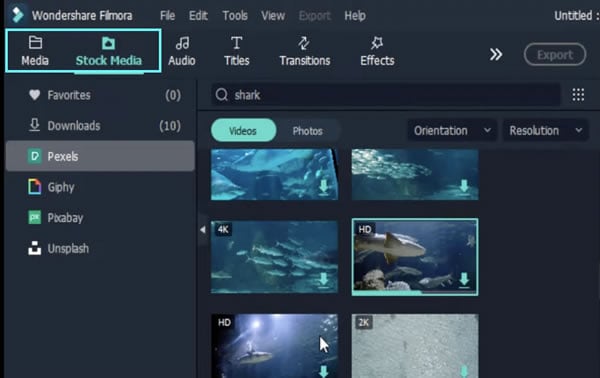
Next, go to Media → Sample Color and drag the Black Sample Color to the Timeline, above the video clip you dragged before this. Now, drag the Sample Color clip to match your video clip in length.
Now, head over to the Titles tab and select a title you like. Drag the Title to the Timeline and place it above the Black Sample Color clip. Then, in the top-right corner of the screen, type in the text of your Title. On the left side, you can change its color, size, font, and so on.
Take a snapshot of the Title you created. Then, delete the Title and Black Sample Color clips from the Timeline. Next, from the Media tab, import and drag the Title snapshot you just created. Place it above the background video clip.
Double-click on the Title snapshot clip on your Timeline. A settings panel will open up. Check the Composition checkbox, click on the drop-down arrow next to it, and change the Blending Mode to Lighten. You can also lower the opacity to about 85% for a more natural look.
Finally, go to the Effects tab and find an effect to apply to your title. For example, let’s use the MWater Ripple effect. Simply drag the effect on top of the Title clip on the Timeline and it will instantly apply.
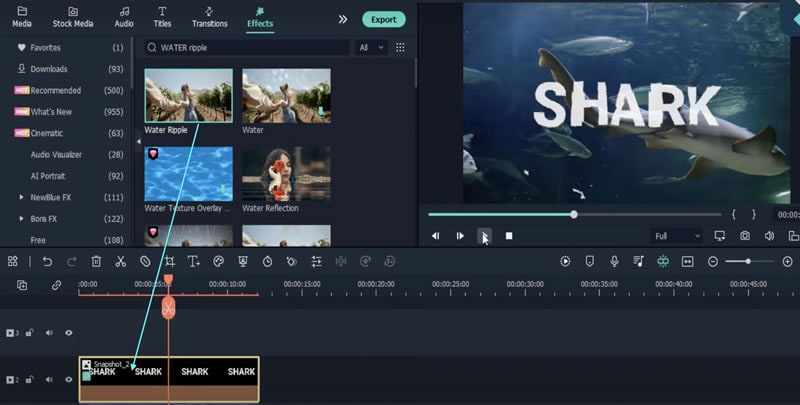
You can also adjust the level and other features of the effect itself. Simply double-click on the Title tab again, click on Effect, and play around with the sliders from that settings panel. Once you’re happy with the adjustments, click OK.
Now, simply render the video and you’ve got a professional title that won’t look cheap or stock.
With this knowledge, you can create unique and highly professional titles for any video you want. You can control how the title looks and apply any effect on it you wish.


