-
Guide On How To Create Dr. Strange Effect In Video Through Filmora
-
Guide On How To Create Audio Visualizer in Filmora
-
Guide On How to Add Smoke Effect in Filmora
-
Tutorial On Smooth Blur Transition in Filmora
-
A Simple Photoslide Tutorial With Slideshow Effects In Filmora
-
Isolate Color Effect Or Selective Color Effect In Wondershare Filmora
-
Guide On How To Add Dr. Strange Effect In Video
-
How To Make Snap Video – Filmora Tutorial
-
Tutorial – How to Make Fast Speed Effect Like The Flash With Filmora
-
Guide On How To Edit Coin Magic Tricks With Filmora
-
How To Get Explosion Effect On Your Video Using Filmora
-
A Guide to Creating Looping Text Animation With Wondershare Filmora02:11
-
Tutorial - Create 3D Photo Zoom Effect in Filmora02:11
-
Filmora Tutorial – Setting Up The New Dynamic Countdown Timers02:11
-
5 Essential Video Editing Tips You Must Know On Wondershare Filmora02:11
-
Performing Next-Level Editing With Ready-Made Templates on Filmora 1202:24
Transcript
Okay, guys, you can see I already add some images to this. So, I made these images using Photoshop. Also, you can make your own. Also, you can make this in Filmora too. Okay, next, I add this image to the timeline and increase the duration to 10 seconds. Then I go the “Transform” and increase the image scale.
Then I create a keyframe from the start and move this image up. Then go to the end and move again this image down. Okay, now it looks like this. Then export this project. Now, I delete this layer and add second image to the timeline. Then I create the same animation for this layer. Also, I export this project as well.
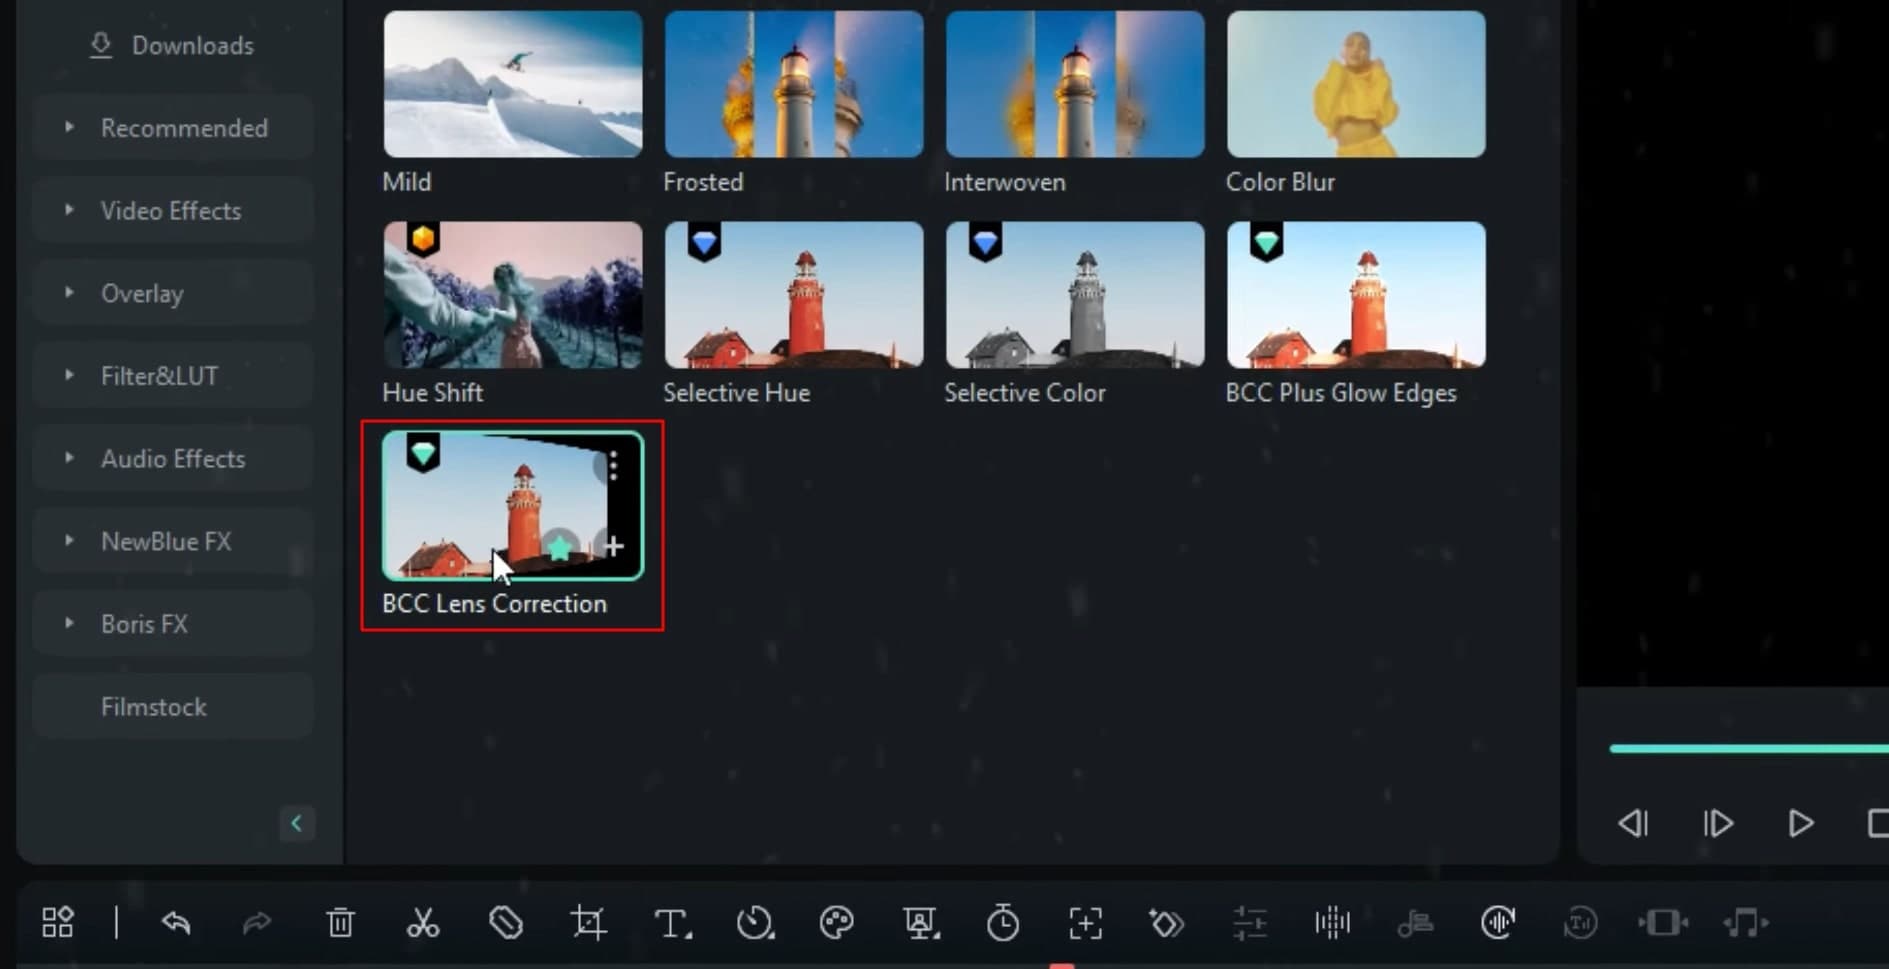
Then I add the exported video to the Filmora and delete the old images. Okay, now I add this clip to the timeline. Then I go to the “Effects” tab and search the “BCC Lens Correction.” Then I add it to this layer. Okay, now it looks like this.
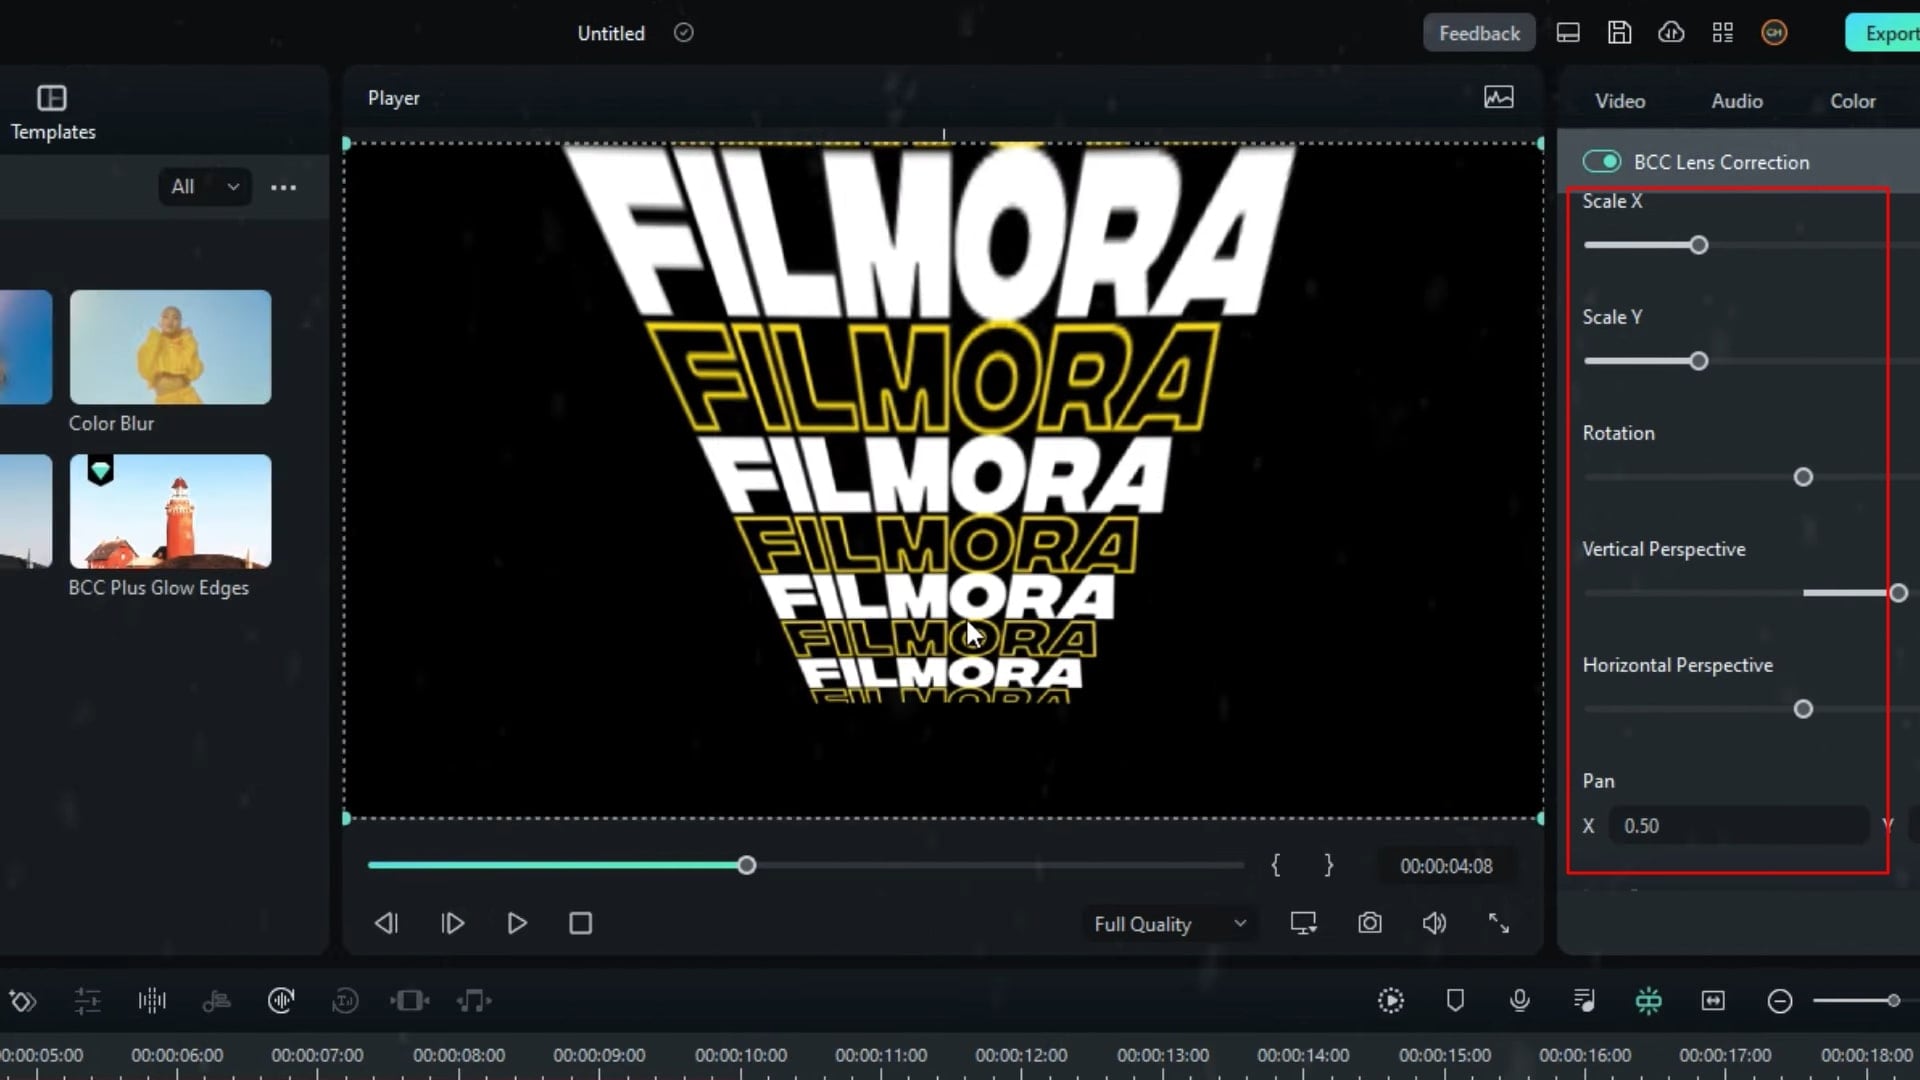
So then I go the “Effects” settings, select the Correction, and change the Correction value to -100. Okay, I hide this layer for now. So next, I add my second clip to the timeline. Then I add a lens correction effect to this layer. Then I go the “Effects” settings and change the correction value to 10.
Then scroll down and select “Vertical Perspective,” and I change it to 45. Then move it up. Now it gives an angled look. Then I select the layer and take a copy, and paste it on the top layer. Then I go again to the vertical perspective setting and change it to -45. Then drag it down like this.
After that, unhide this layer. Then I adjust this layer a little bit like this. Okay, now we want to scale this layer, so I go to the correction settings and select “Scale X”. Then I adjust the value like this. So, I do the same thing for second layer. Okay, it’s done.
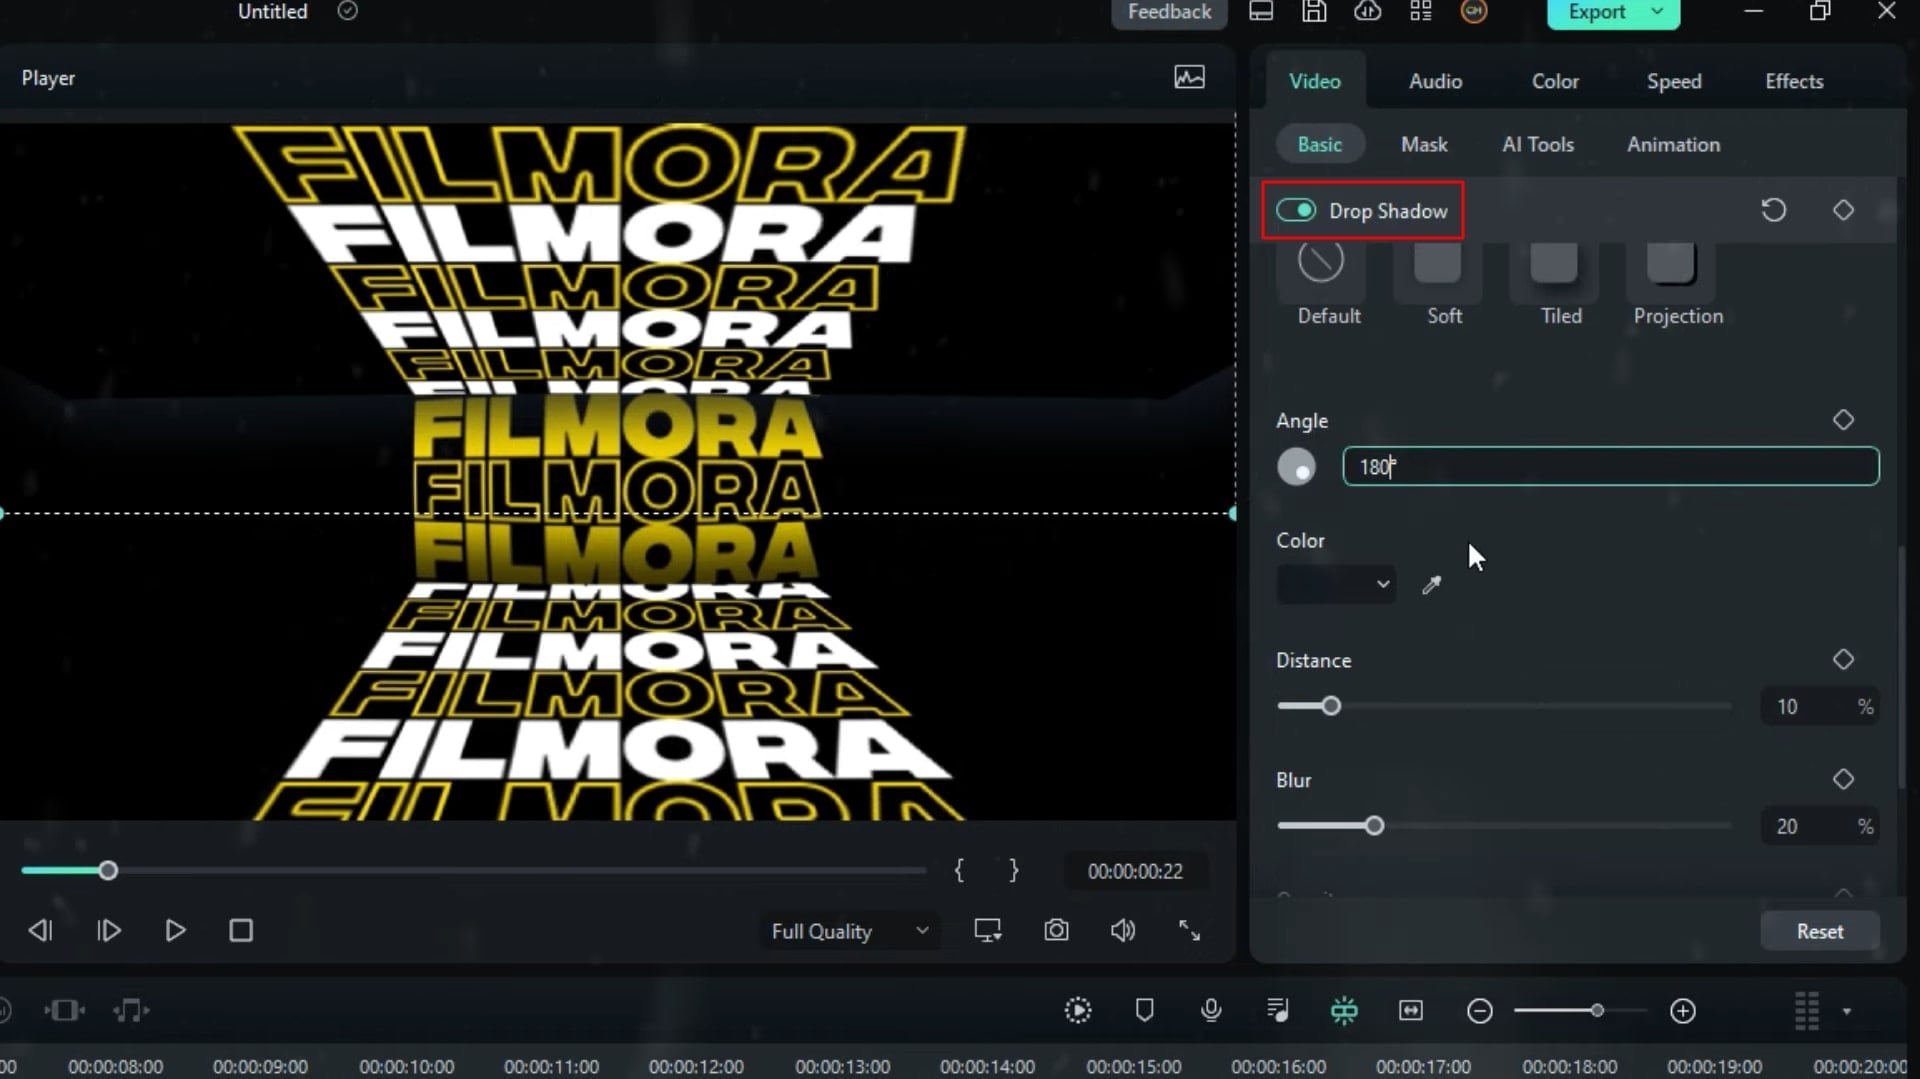
Let’s add some shadow for this. First, I select this layer and enable “Drop Shadows.” Then I set the angled value to zero, the color to black, and keep the default settings. So, I do the same thing for second layer. Okay, guys, now it looks like this. So let's add some shadows for these layers too.
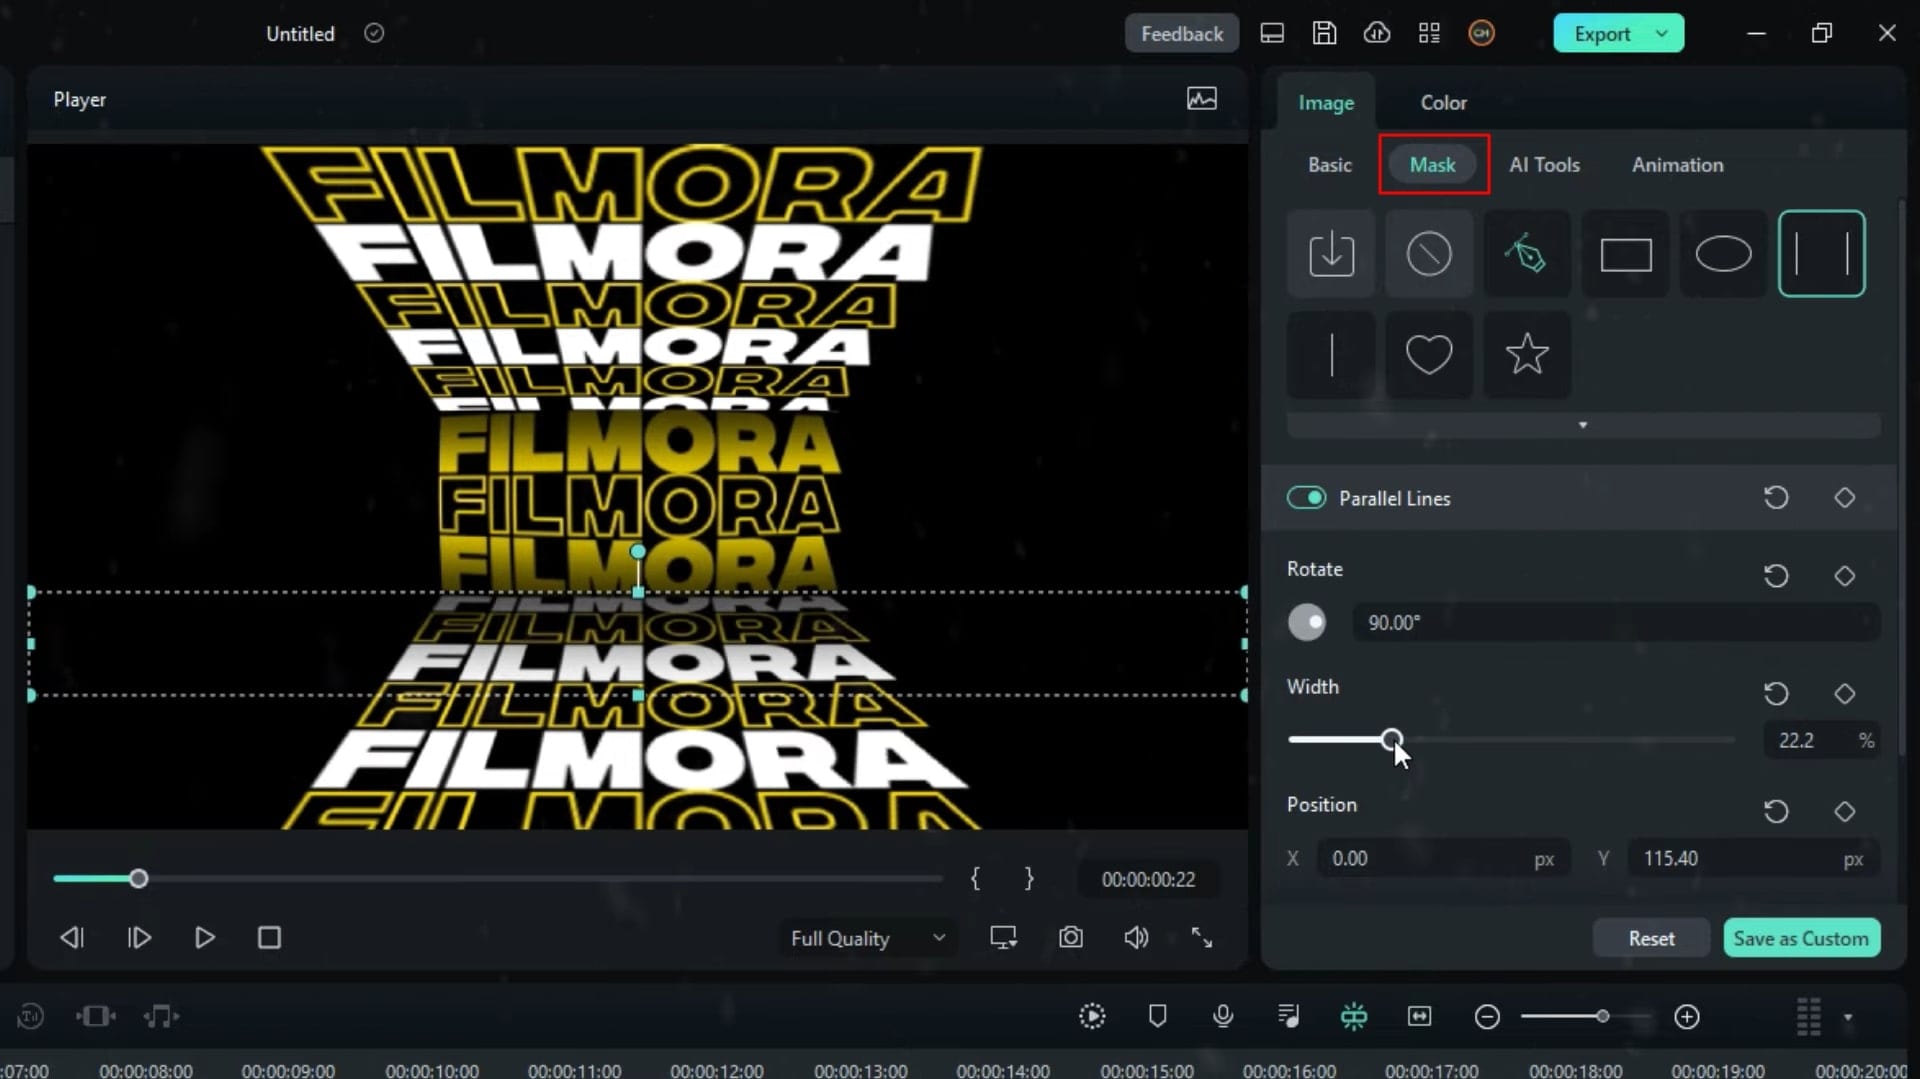
So I go to the stock media and select black color, then I add it to the timeline. Then unlink the scale, and adjust it like this. Then I go the “Mask” and select this “Mask.” So you can easily copy my settings for this. Okay, then I get a copy of this layer and paste it here. Then I adjust it like this.
Okay, guys, it's all done with our animation. Let's see how its looks. So, guys, finally, you can see all layers moving in the same direction. So, let’s make the middle layer moving the opposite direction. So, select the middle layer, and click “Speed," then select “Reverse.”
Okay, now it looks like this. Okay, guys, this is how to make a seamless topography animation using the Filmora 12.
Creating Seamless Typography Animation with Filmora 12
What you need to prepare:
- A computer (Windows or macOS)
- Your video materials.
- Filmora video editor
Start Using Wondershare Filmora 12
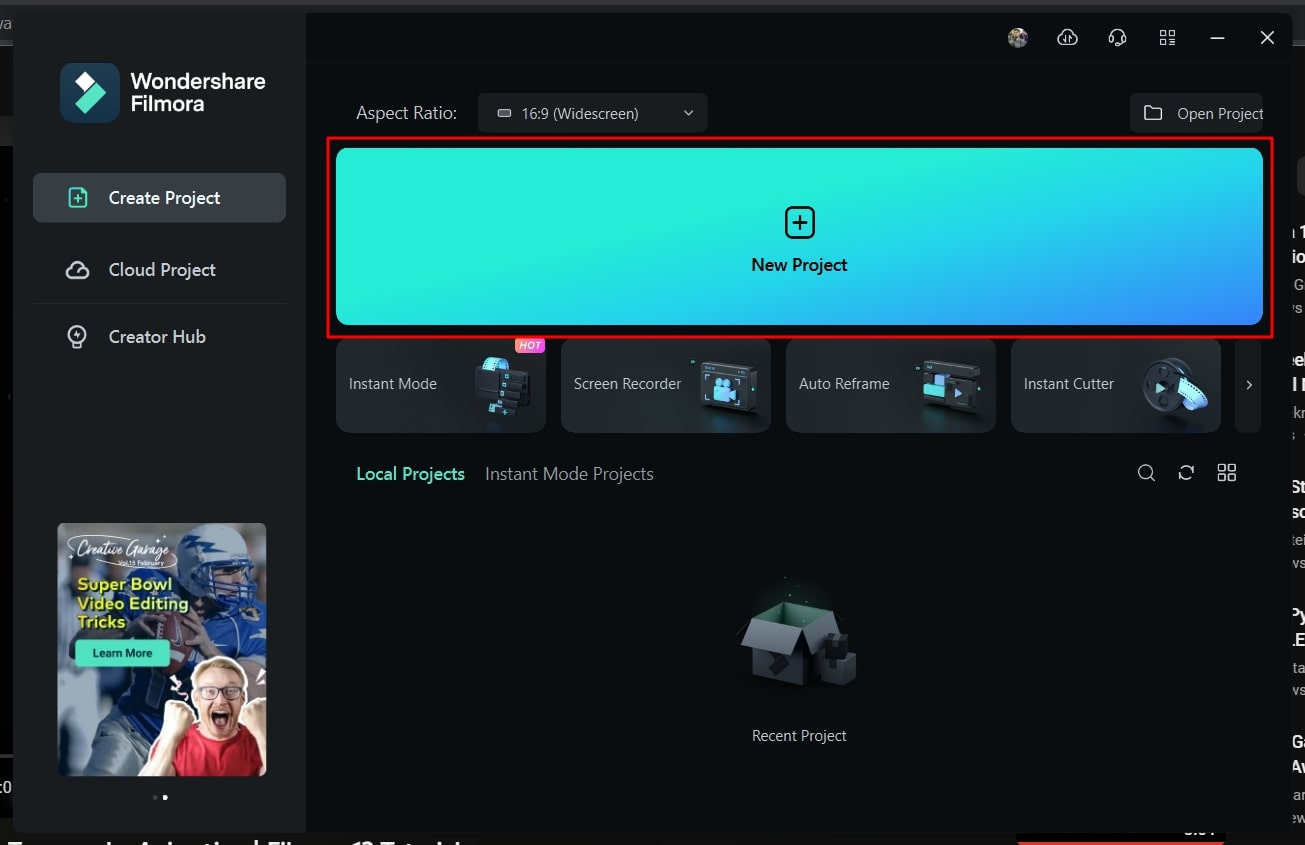
You'll need to download and install the Wondershare Filmora on your device. After this, a very attractive UI will appear when you open the software. As you've to make a topography animation, you'll choose "Create Project" from the left tab and press the "New Project" button to open a window.
Import Typography Images
You’re now required to add your typography images to the Filmora. For this purpose, click on the "Media" section on your top left. You're required to press the "Import" button and select the "Import Media Files" option from the drop-down menu. Subsequently, you’ll import all your required typography images here.
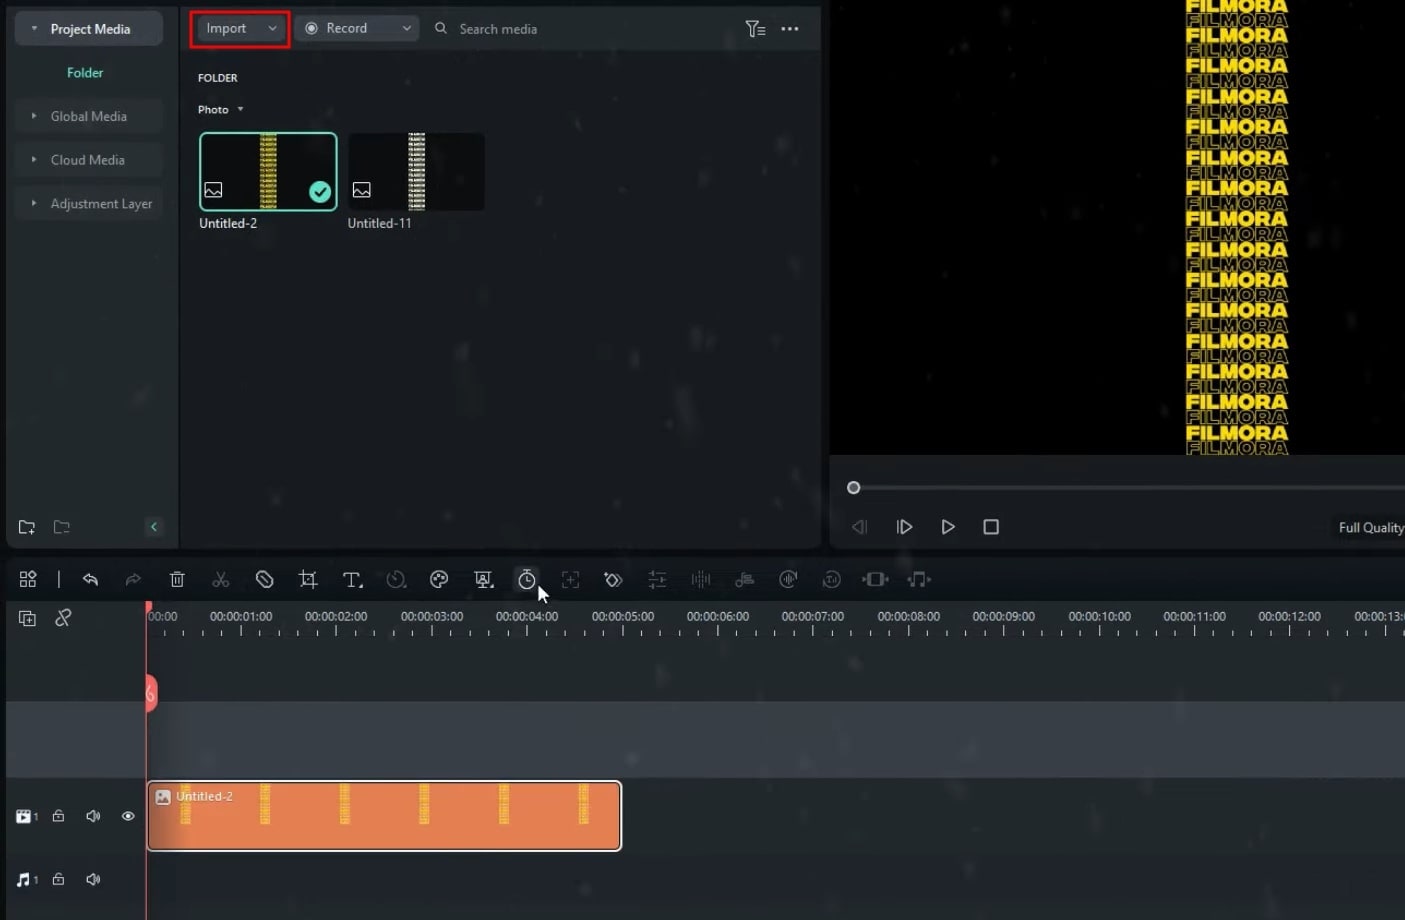
Add Typography Images To Timeline
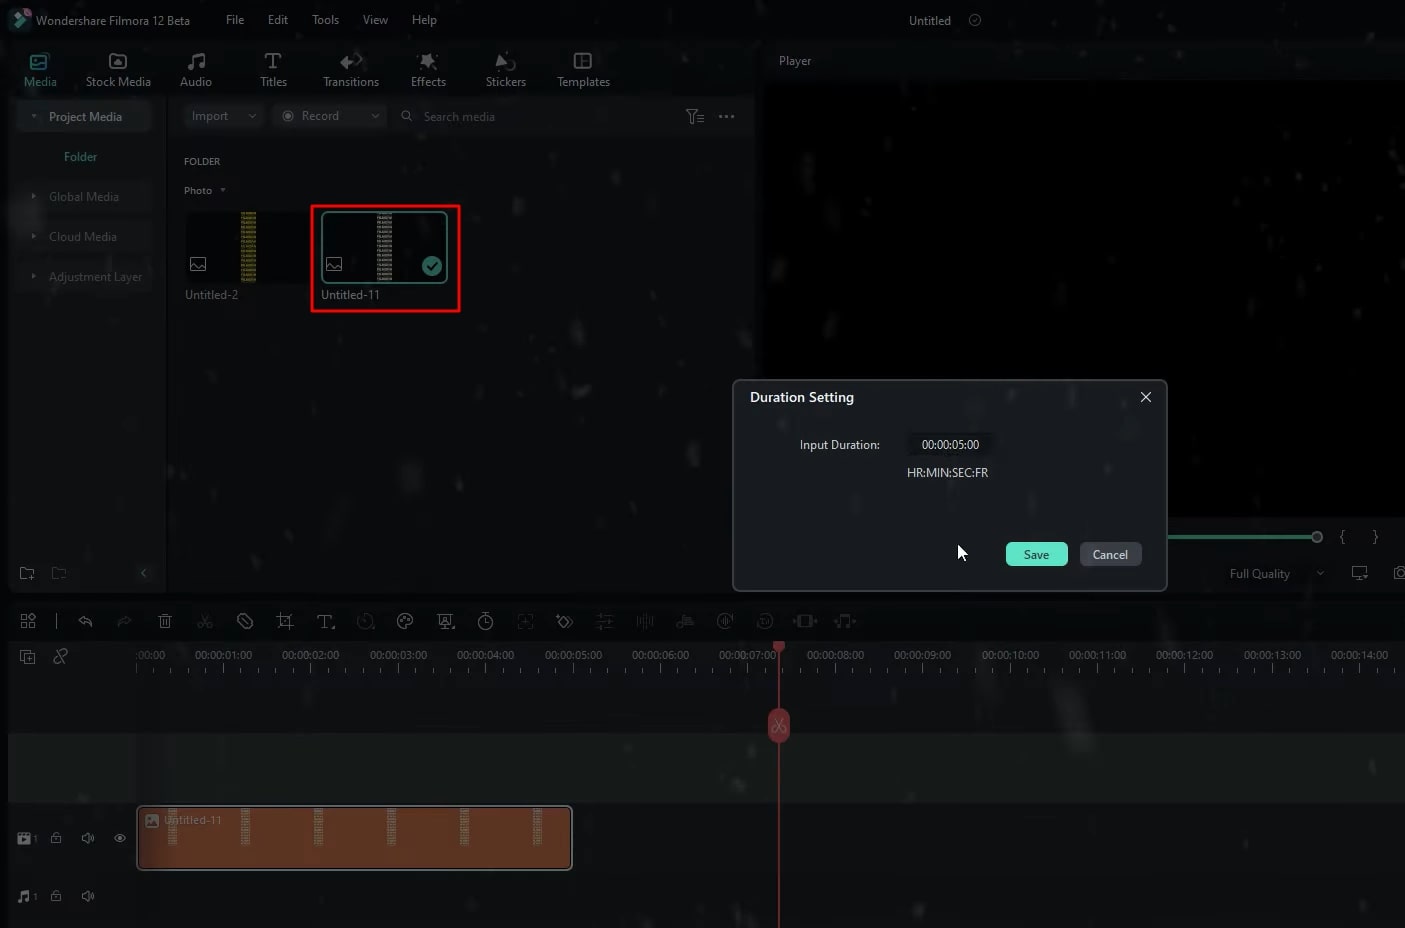
Now, you have to add these images to the project timeline. This is done by simply dragging the imported images to the timeline. Make sure to increase the duration to 10 seconds.

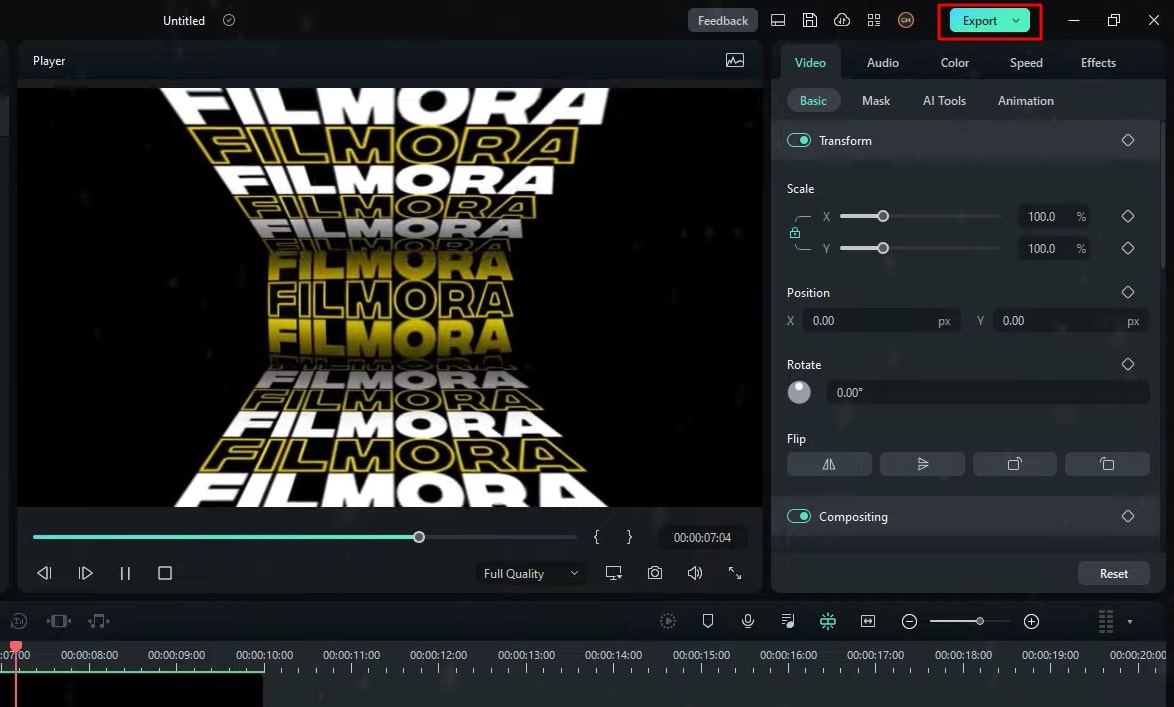
Set The Layout
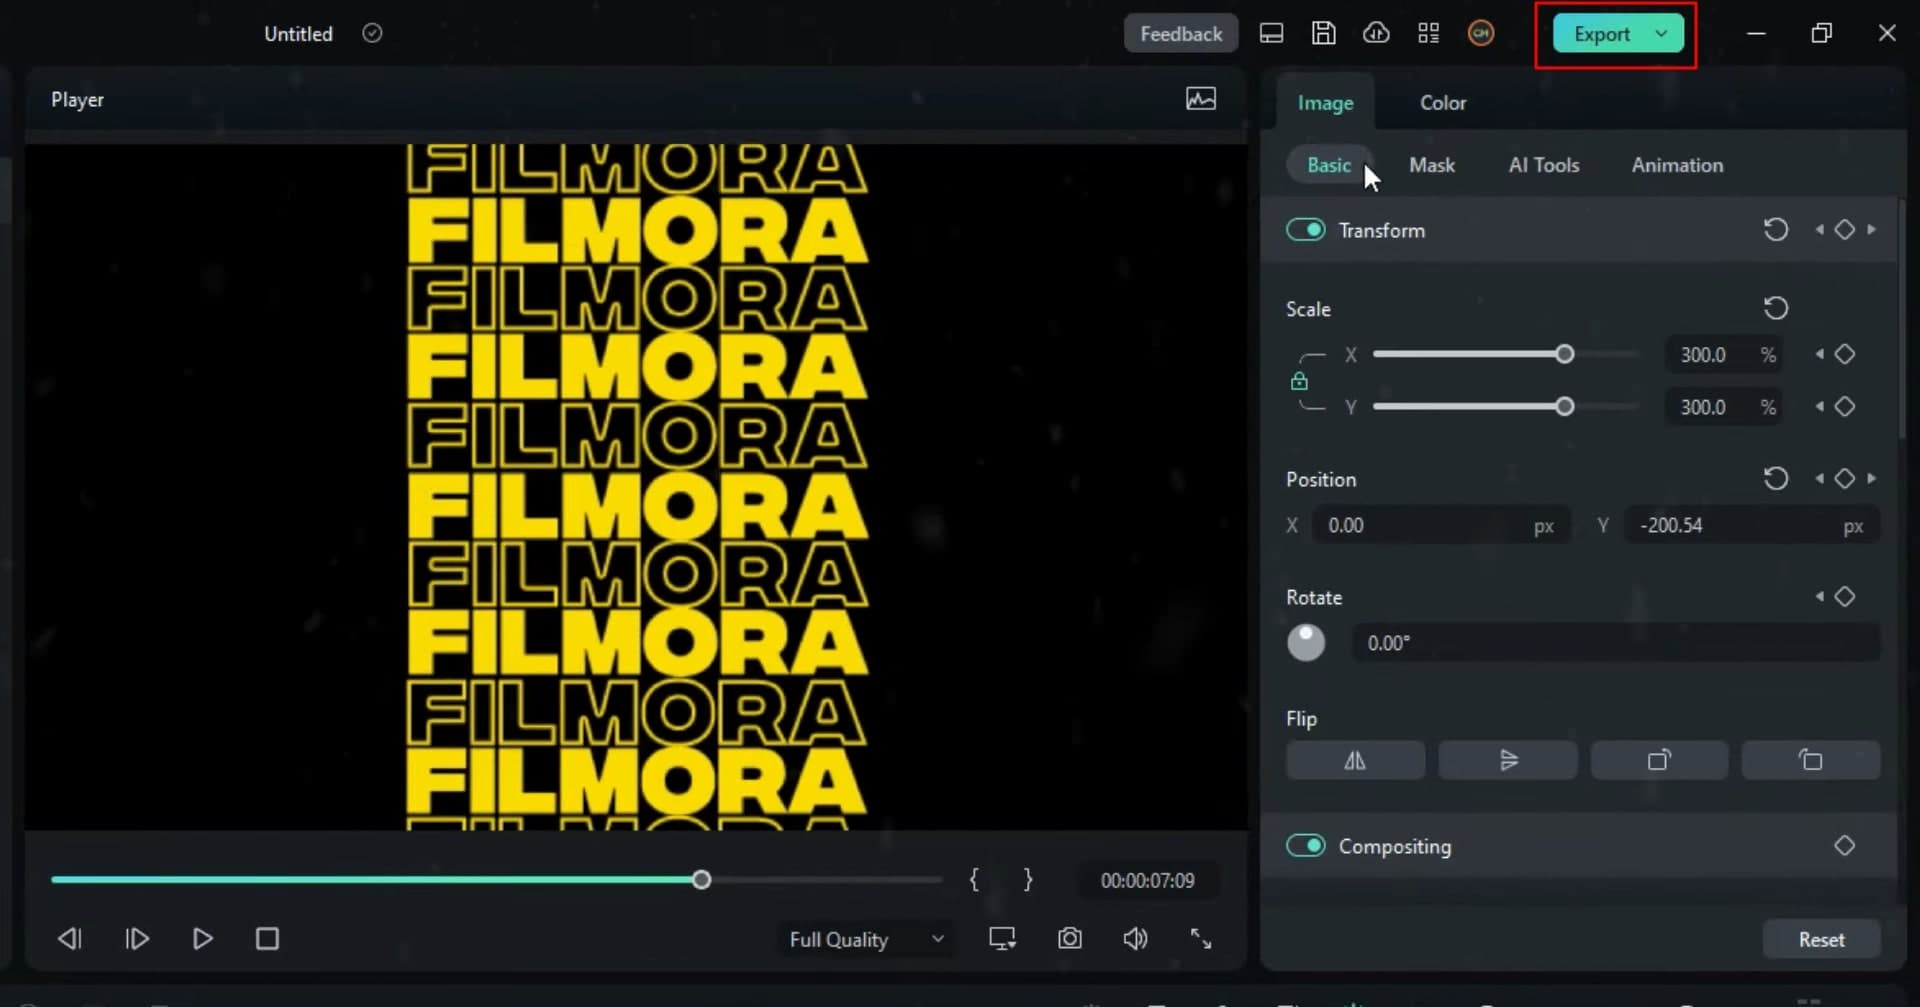
Press the "Transform" menu on the right side of the screen and adjust the x and y-axis scale. Also, you'll have to add a keyframe from the “Star” icon in the panel above the timeline. Move the image upside down as required and export your animated project to your desired location on the device by clicking on the "Export" button.
Import The Videos Again
Since you've already created and exported your animated videos from the images, now, you've to import all these media files to Filmora. This is again done by visiting the "Import" menu and pressing the "Import Media Files."
Add Video and Effects To Timeline and Include Effects
Once your videos are imported, drag and drop them into the project timeline. Proceed to the "Effects" tab at the top and press the "BCC Lens Correction" to add it to your video timeline.
Adjust The Settings Of Effects
As you've already added the effects, you need to edit them as required. For this, you'll navigate to the "Effects" settings on the top right menu of your screen. Here you can adjust the layers of your typography animated videos. Filmora provides options for adjusting the “Correction,” “Scale Master,” “Scale X,” “Scale Y,” “Rotation,” “Vertical Perspective,” “Horizontal Perspective,” and “Pan.” Set these adjustments as per your interest.
Add Shadows to Enhance Outlook
To enhance your video effects, you're required to add shadows. This is done by pressing the "Video" menu from the right side of your screen, where you've to click the "Drop Shadow" button. Of course, you can adjust the layout of shadows with respect to angle, colors, distance, blur, and opacity. Moreover, you can also add your personalized shadow colors to the project timeline by pressing the “Stock Media” button from the top left side of the screen. Set the margins and layout for personalized shadow colors.
Select Masking For Improving Outline
To make your animation effects more appealing to the eyes, you can perform masking. Press the "Image" icon from the right side of your screen and click on the "Mask" menu, where you will select the line mask. Apparently, you can add a line mask within any part of your animation video. Edit the margins and parameters of the line mask as per your requirements.
Preview Render
For smooth playback of your new typography animation project, render the project by pressing the "Preview Render" icon. This way, you can enjoy your new video in an optimal way. In addition, if you require a reverse effect in your video, click on the "Speed" icon and press the "Reverse" effect. You can adjust the presence of the reverse effect through the project timeline. Finally, again render the project for previewing the video.

Download Your Typography Animation
If you’re satisfied after rendering and previewing the video, you can download and save it in the desired location of your device by simply clicking on the “Export” button.
Typography animation may look like a very difficult video editing process, But it's surely worth it, considering its benefits to the marketing and advertisement industry. This tutorial has briefly listed easy-to-understand steps for initiating your typography animation. Thus, anyone with minimal digital knowledge can design their own typography animations and add brand value to the business.


