Text Animation Bar - Bottom of the Screen - Filmora - Tutorial
The text animation bar is a perfect way of Call-To-Action marketing strategy that many industrial outlets use. The fact is people watch product or service videos, and they are processed further to purchase through the provided contact details in text animation bars. This tutorial on Filmora will provide steps to create such text animations with ease.
-
The Basics of Creating Typewriter Effect in Premiere Pro
-
Contextually Understanding All Techniques to Create Text Typing Animation
-
3D Text Animation Making Made Easy Finding the Best Solutions!
-
Guide On How To Blur Background Of Vertical Video Using Filmora
-
Guide On How to Blur Background of Any Video In Filmora
-
Guide On How To Add Video Watermark Animation In Filmora
-
How To Make Travel Maps Animation In Filmora | Step-By-Step Tutorial
-
Tutorial - How To Make Magnify Animation On Filmora
-
Tutorial | How to Fake Camera Movement with Filmora 12
Text Animation Bar - Bottom of the Screen - Filmora - Tutorial
What you need to prepare:
- A computer (Windows or macOS)
- Your video materials.
- Filmora video editor
Import Video and Move it into Timeline
After opening and starting Filmora on your device, the first thing you need to do is import your video. To do this, click the "Media" tab from the top-left corner of the screen, press the “Import” button, and from the dropdown menu, select "Import Media Files." After importing your video, drag and drop it into the timeline below.
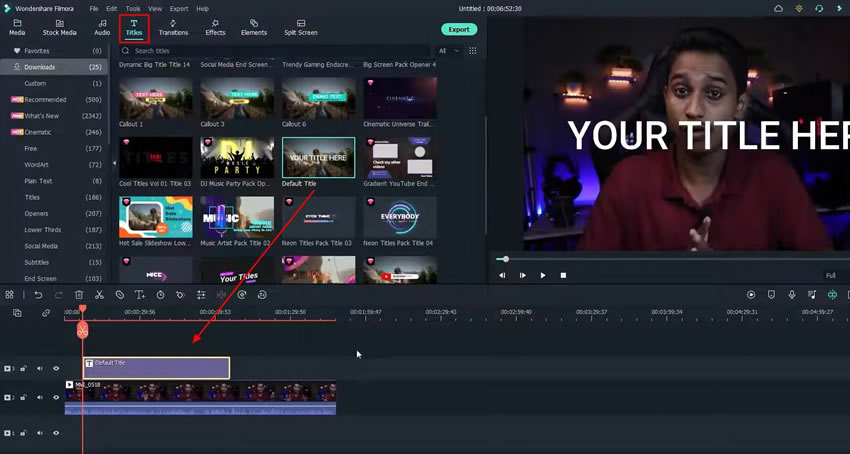
Use Text Titles for your Video
Access the “Titles” tab from the top, and from the available title categories, select your desired text title template. Afterward, drag it to the timeline below and adjust the duration as per your needs.
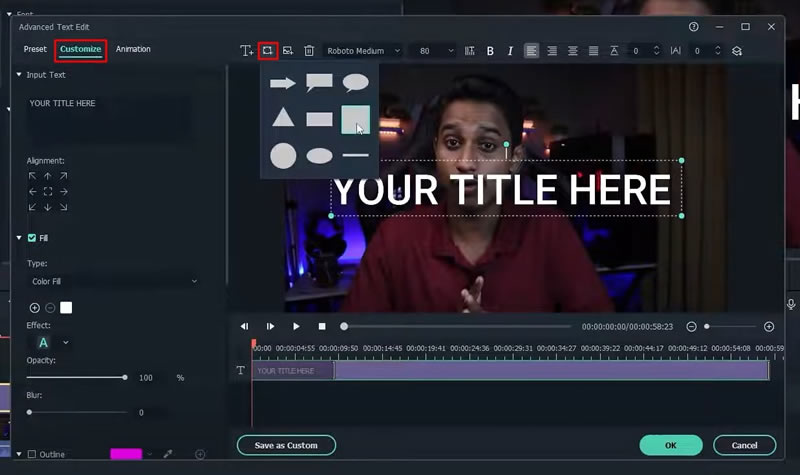
Modify your Title Layout with Box
If you need to modify your title, double-click on it, and from the available window, customize your title text, font, size, layout, and margin.
While if you want an advanced modification of the text by placing a text box, click on the "Advanced" button, then select the "Add Shape" icon, and choose a rectangle. Your text box will now be visible on the screen on the right, and you can adjust and reduce its size. Now, you've to move the box at the bottom of the video by dragging.
From the window, now move into "Customize," write the text in the provided text box, and edit it as required from different text customizations. If you need to change the color of the text box, scroll down and select "Shape Fill," and choose your desired color from the "Color" category.
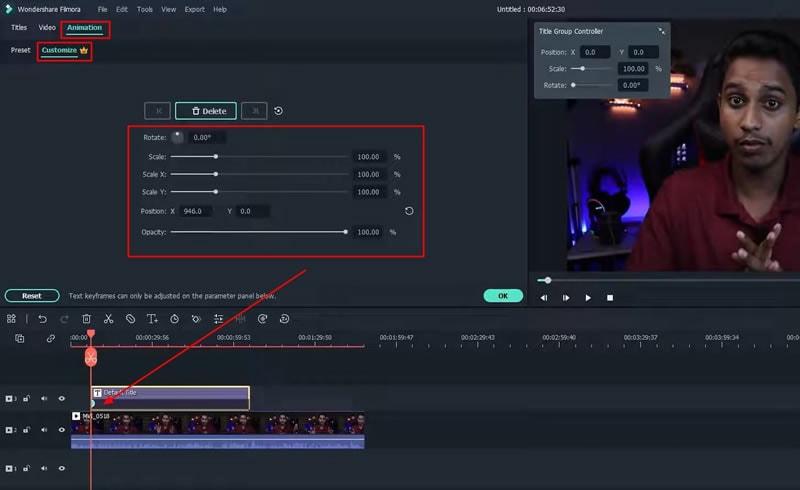
Integrate Keyframe Animation into Text
To apply animation to your text, double-click on your title track from the timeline, choose "Animation," then "Customize." Now you need to move your playhead to the part of the title track where you want to apply a keyframe. Once done, click on the “Add” button.
Now you can adjust the keyframe animation with customization options like "Rotate," "Scale," "Scale X," "Scale Y," "Position X," and "Opacity." Click "OK" once you are done with the changes. Moreover, you can also increase or decrease the length of your keyframe on your title track. For this purpose, you just need to drag the keyframe with your mouse.
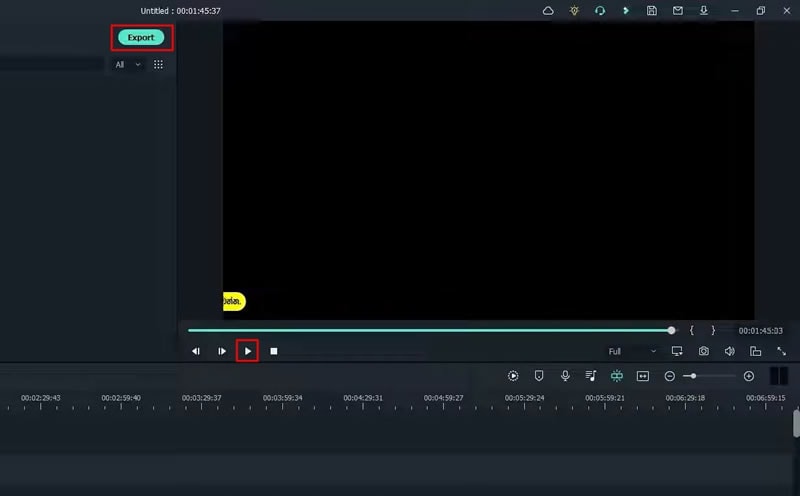
View Text Animation and Export
Click on the "Play" icon from under the screen to enjoy the final playback of your designed text animation on the video. After this, click on the "Export" button to save the video to your device in the desired file location.
Text animations are always a great illustration of your intended message to the target audience. Meanwhile, placing them in a specialized text box within a video allows you to leverage perfect marketing content with a subtle tone. By following this tutorial on Filmora, making text animations would become a piece of cake for you, as the steps are easy and precise.