Guide On How To Create An Interesting Instagram Story In Filmora
What you need to prepare:
- A computer (Windows or macOS)
- Your video materials.
- Filmora video editor
Set Up New Project for Creating Instagram Story
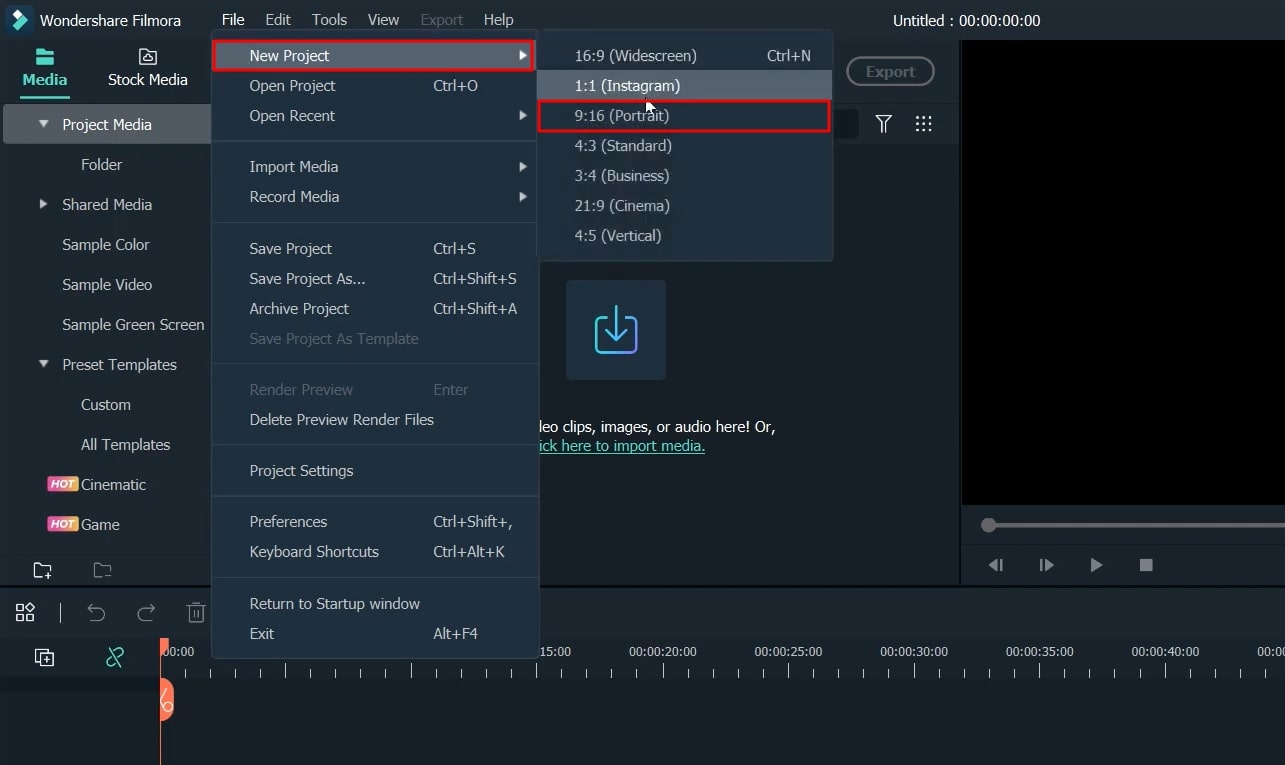
After starting Filmora, the first thing you need to do is to create a new project with your respective screen layout. Click on the "File" menu from the top panel bar, press "New Project," and select "9:16 (Portrait)” from the given options.
Select Images and Drag To Timeline
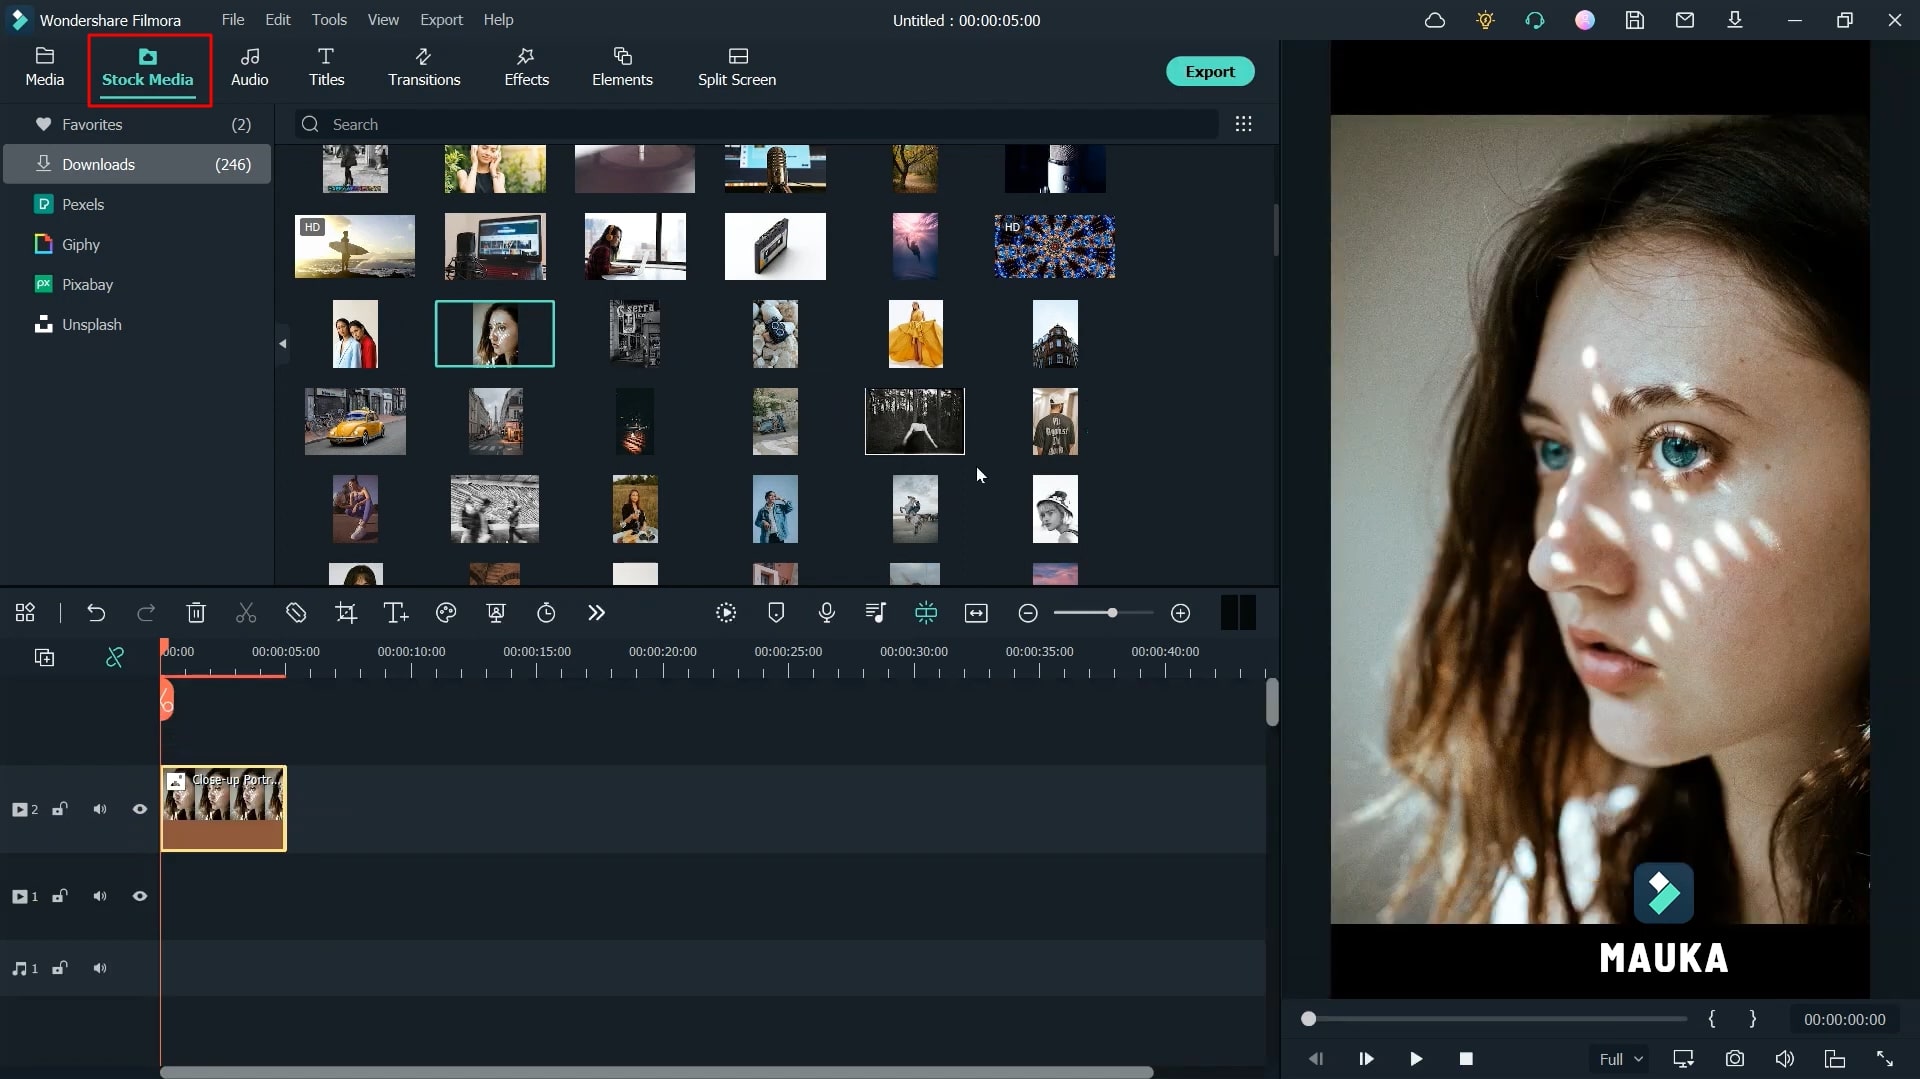
Click on the "Media" bar from the top-left side of your screen and press the "Import Media" button to import all your images to the Filmora editing environment. To select random pictures for your Instagram story, press the "Stock Media" bar from the top and choose your ready-made images from the options. Whatever media option you choose, drag your images to the project timeline below.
Integrate Visual Effects for Enhancing Outlook
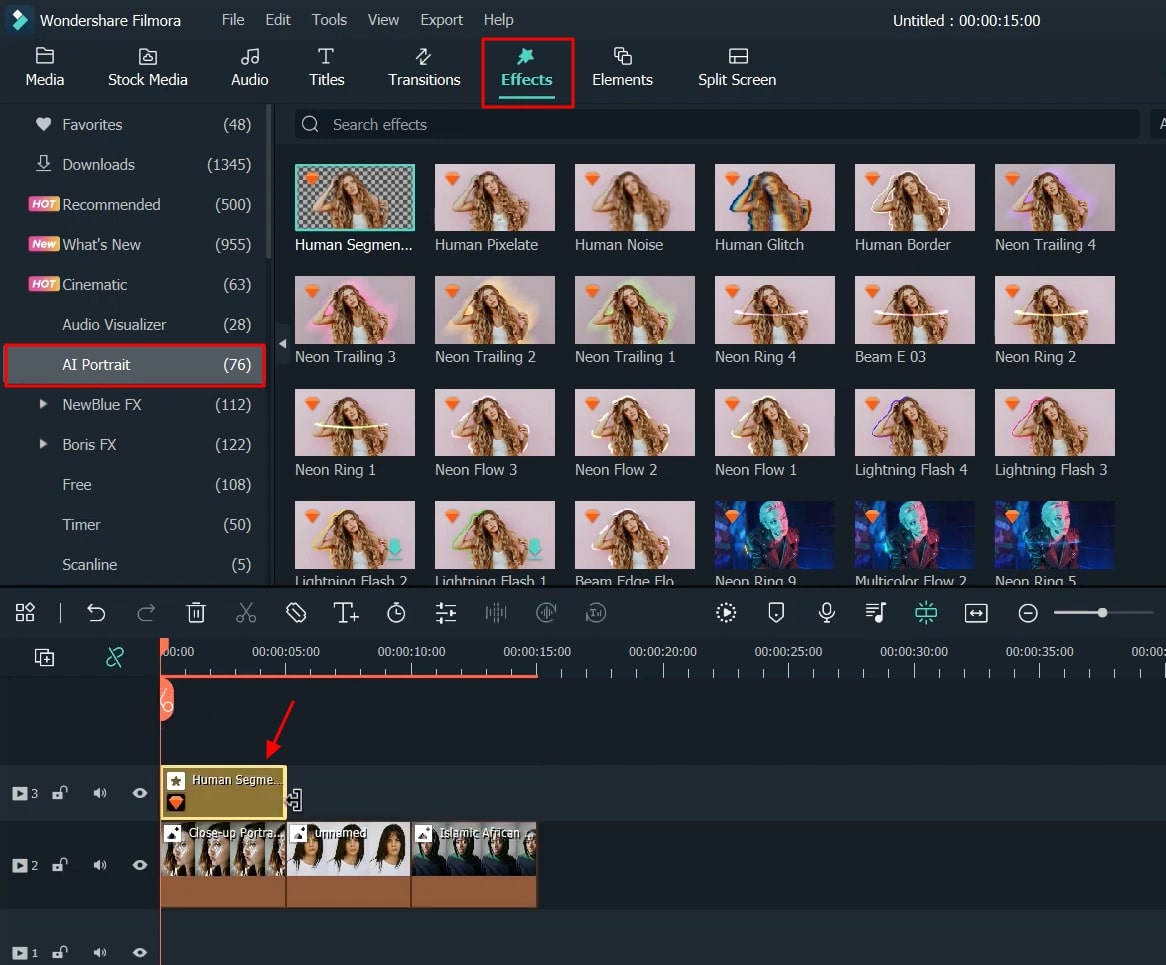
Move ahead by adding visual effects to your images. To do this, you’ve to navigate into the "Effects" tab from the top side of your screen. After this, you’ll see many categories of effects on the left side. You can choose any category, e.g., "AI Portrait," and select your desired effect. Make sure to drag the effect to the project timeline and set its duration similar to the duration of your images.
Choose a Same Snapshot Format for Images
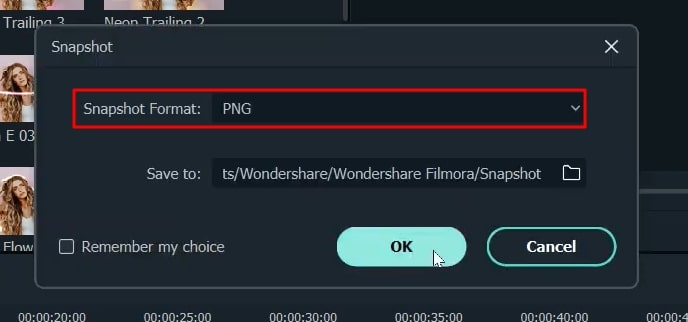
You’ve to keep your images in the same format. For this, click your image from the timeline and press the "Snapshot" icon from the right side of your screen. A window will open where you must select “Snapshot Format” and choose “PNG” as your format. Click “OK” to proceed further.
Delete Current Media from the Timeline
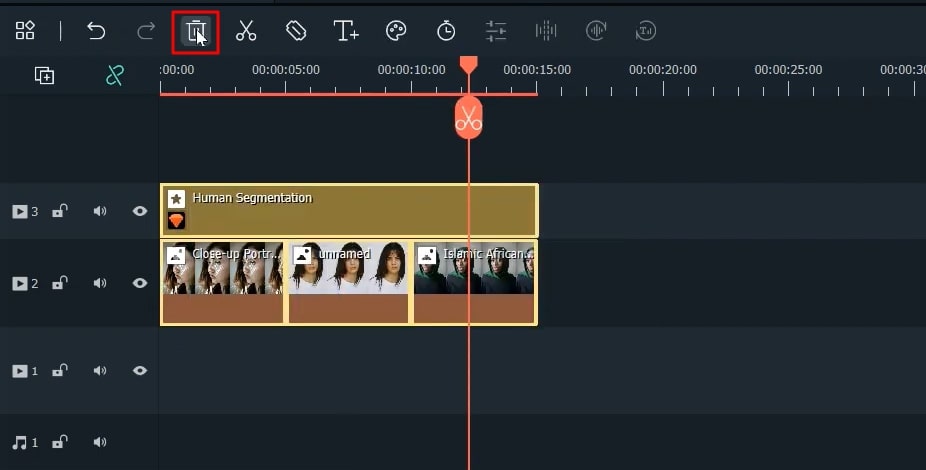
Your new images are now in the same format inside your folder in the "Media" bar. Now select your old images from the timeline, right click and then press "Delete." Proceed further by dragging your first image to the timeline below.
Add and Adjust the Background Color in Instagram Story
Click on your first image, navigate into the "Media" bar from the top left, and select the category "Sample Color," and you'll see different background colors. Whatever color you choose, drag it to the timeline below and set the duration like other tracks.
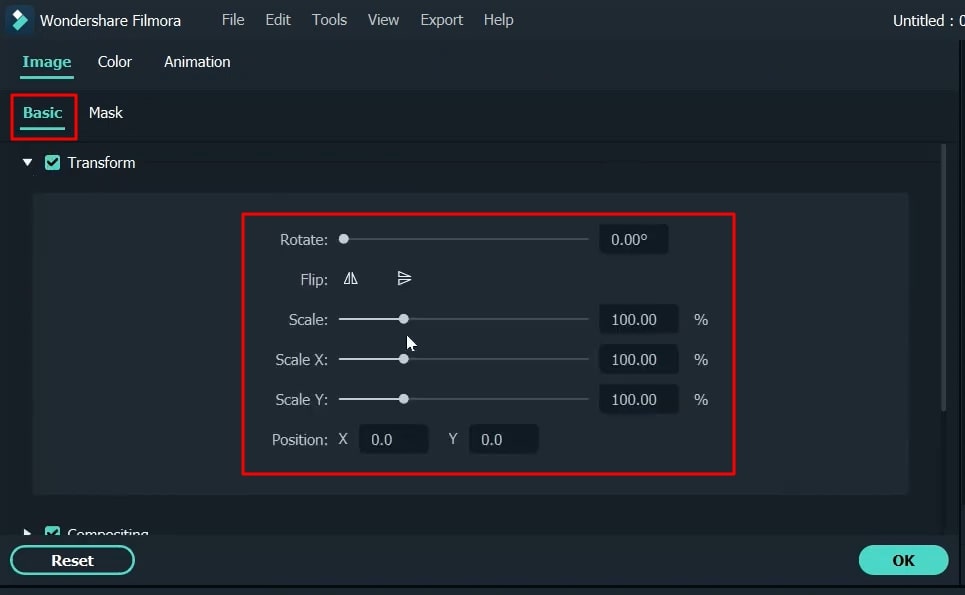
Now double-click on the color from the timeline, and an editing bar will open. Select "Image," proceed to the "Basic" section, and then click "Transform" to set the margins of your background from different parameters.
Apply Mask to the Background for Aesthetics
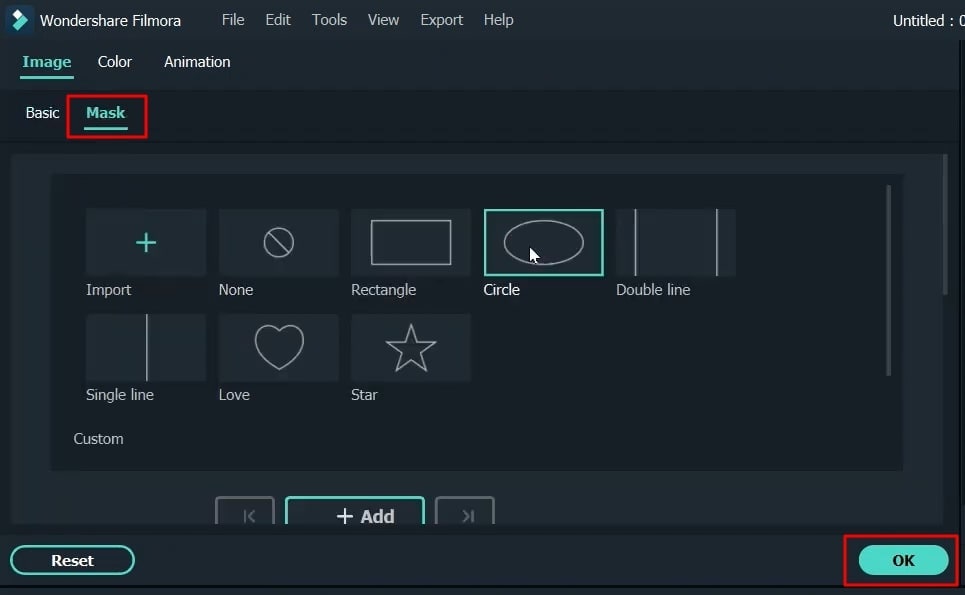
In addition, you can also apply masking edit to your background. To do this, you've to click "Mask" that is on the right side to "Basic" edit. Select your desired mask and edit its layout accordingly from the given screen on the right.
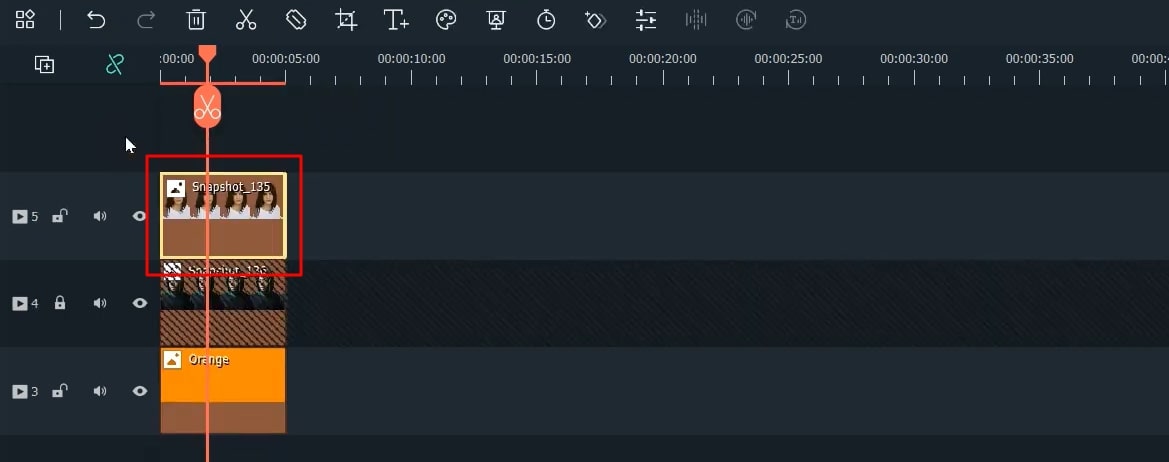
Combine Photos into Single Frame
You’ve already edited your first image, which is your main image. Now add other images to make a single photo. To do this, navigate into the "Media" bar from the top-left, press "Folder," select your second image and drag it to the timeline on top of your first image.
Hence, your second image will be added to the first image, where you can edit its margins from the screen on the right side. Continue the same process for the third image and so on.
Blend Background Elements and Customize
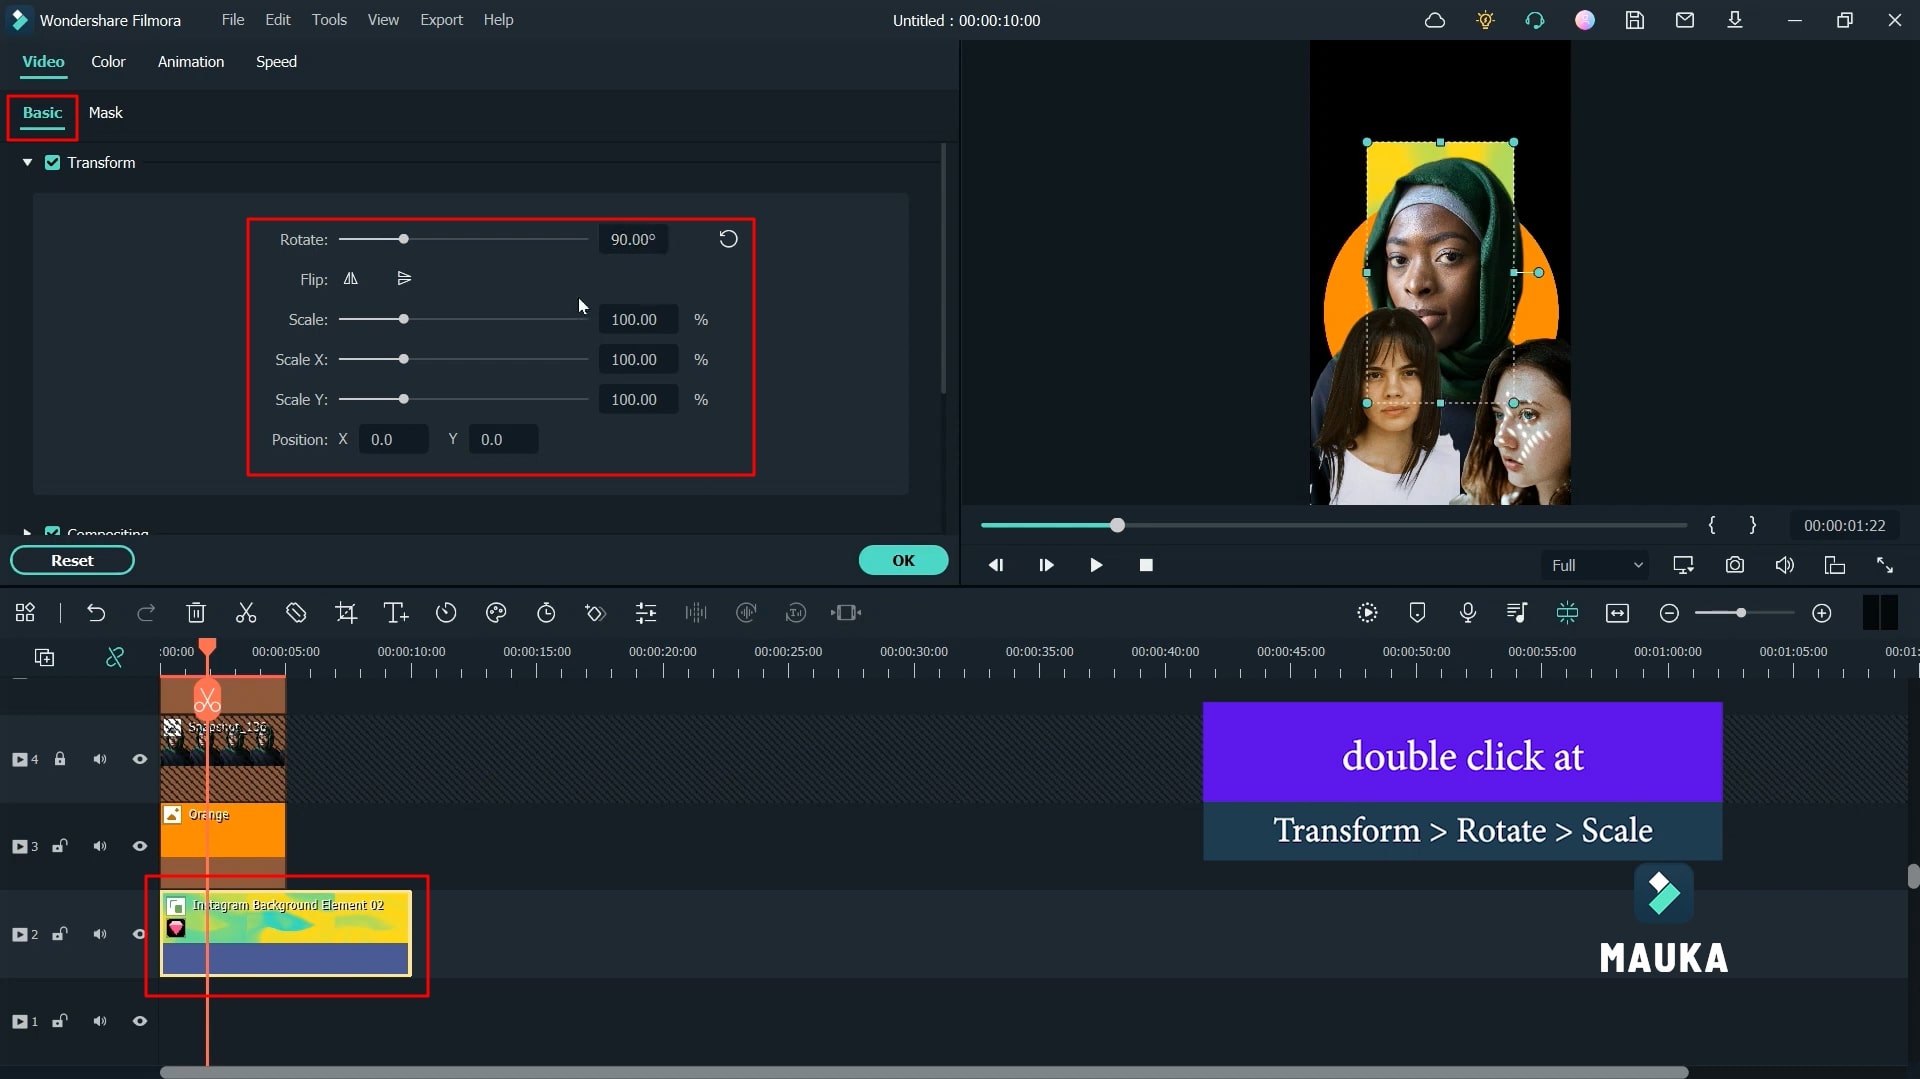
Now add a specialized background to your collective image. Click on “Elements” from the top of the screen, navigate into “Background” from the left side, choose your desired background, drag it to the timeline, and set the duration like others.
To edit the applied background, click on it, and a window will open. Navigate into "Video" from the top, redirect to the "Basic" section, and choose "Transform." Set the background's margins and layout as required from the given parameters.
Apply Effects and Titles for Better Visualization
Select the "Effects" bar from the top, and on your left side, different categories of effects will appear. You can select whatever effect suits best to you. Also, drag it to the timeline and set the duration like the rest of the tracks available.
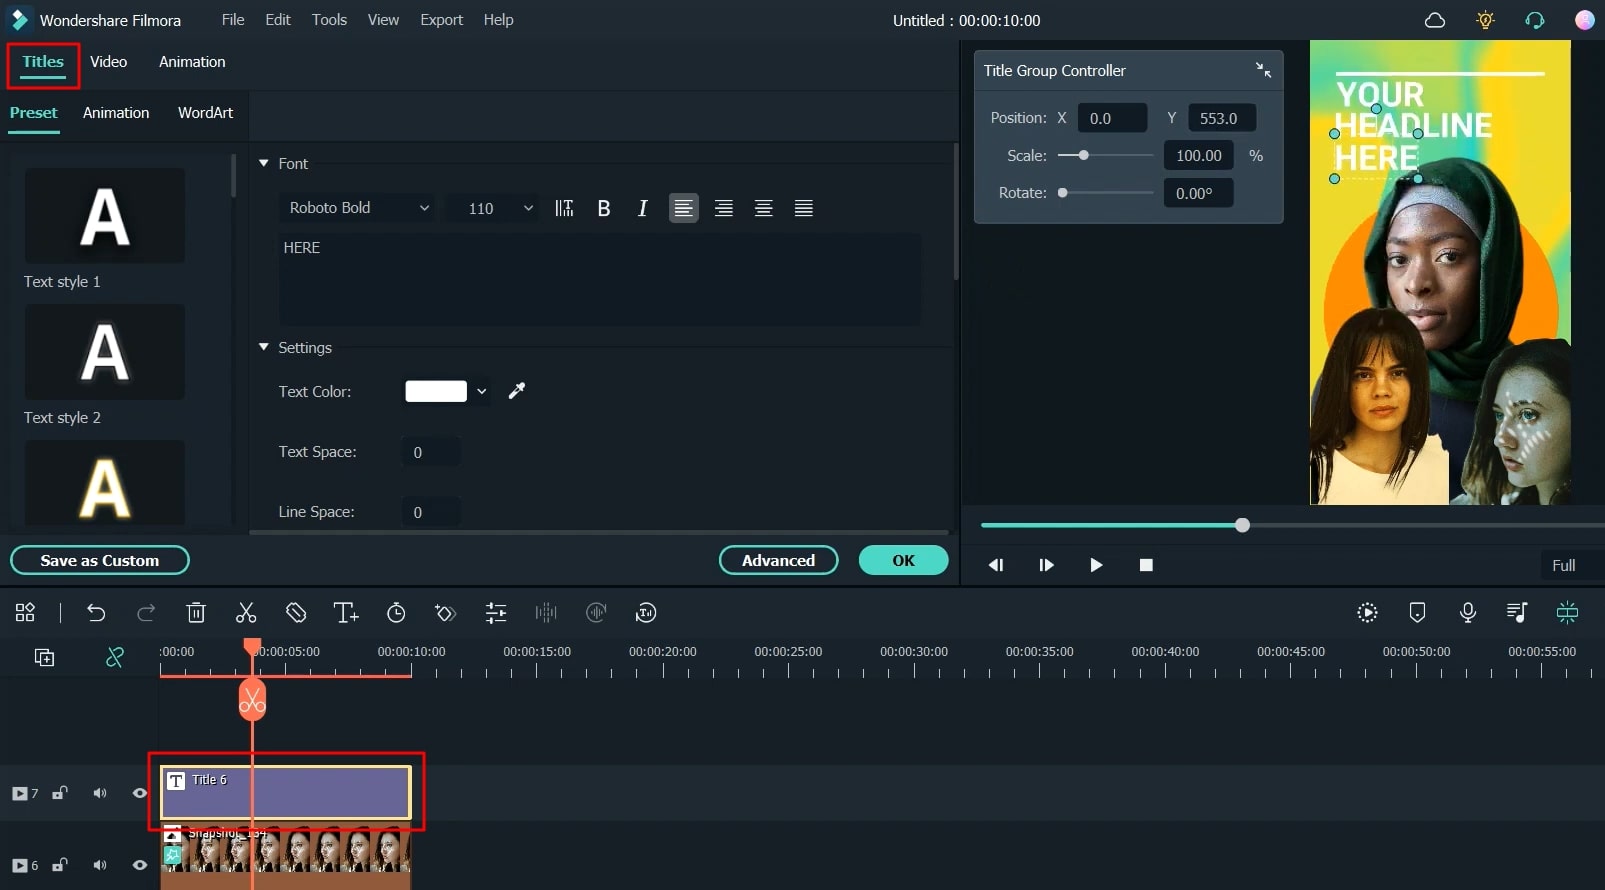
The next thing is to add a text title to your Instagram story. For this, you need to click the “Titles” bar from the top of your screen, select the title category from the given options and drag it to the timeline and keep its duration like the rest. You can add multiple titles to the timeline if you want. By double-clicking the title track, a window will open, and you can customize the title by writing anything, and you can also adjust its layout, size, style, color, etc.
Use the Audio Visualizer Effect
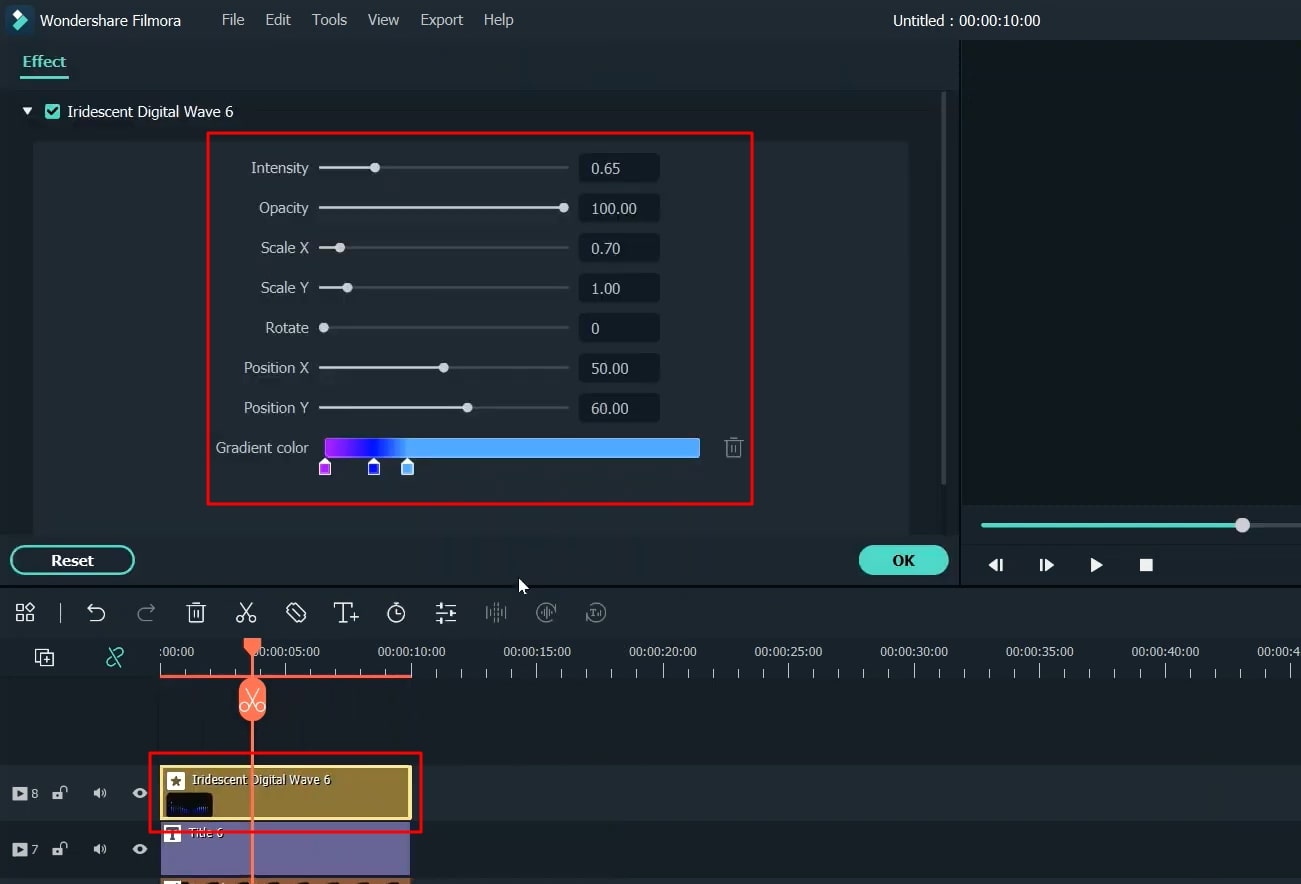
To apply the audio visualizer effect, click on the "Effects" bar from the top of the screen, navigate into the “Audio Visualizer” category from the left side, and choose the required option. Make sure to drag it to the timeline below and adjust its duration like the rest.
If you need to edit your audio visualizer effect, double-click on it, and a window will open that allows you to adjust different matrices for that effect, which includes gradient color, position, opacity, and many more. Click “OK” once with changes.
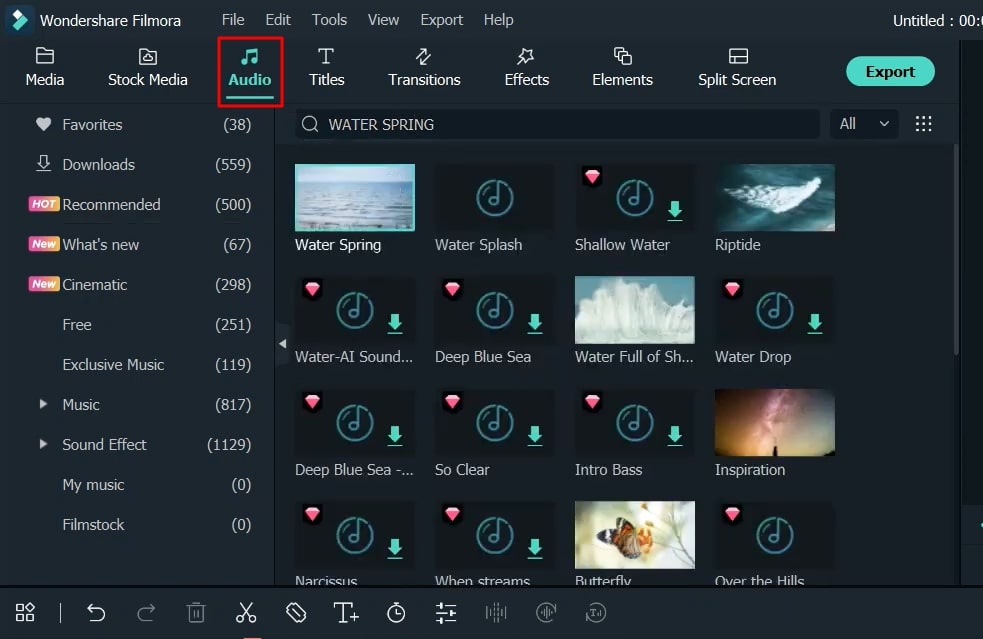
Apply Audio for Background Music
Now click on "Audio" from the top side of the screen and choose your desired background music. You can also search the music, e.g., "Water Spring," select it, and then add it to the timeline below. Finally, set its duration like other tracks.
In addition, you can also apply your background voice-over clip to the image. To do this, you’ve to import it first by clicking “Media” and then clicking on the “Import Media” button. Once you've imported, drag it to the timeline and set the duration like the rest. You can also adjust the voice-over clip by double-clicking it from the timeline and setting up different parameters from the given window.
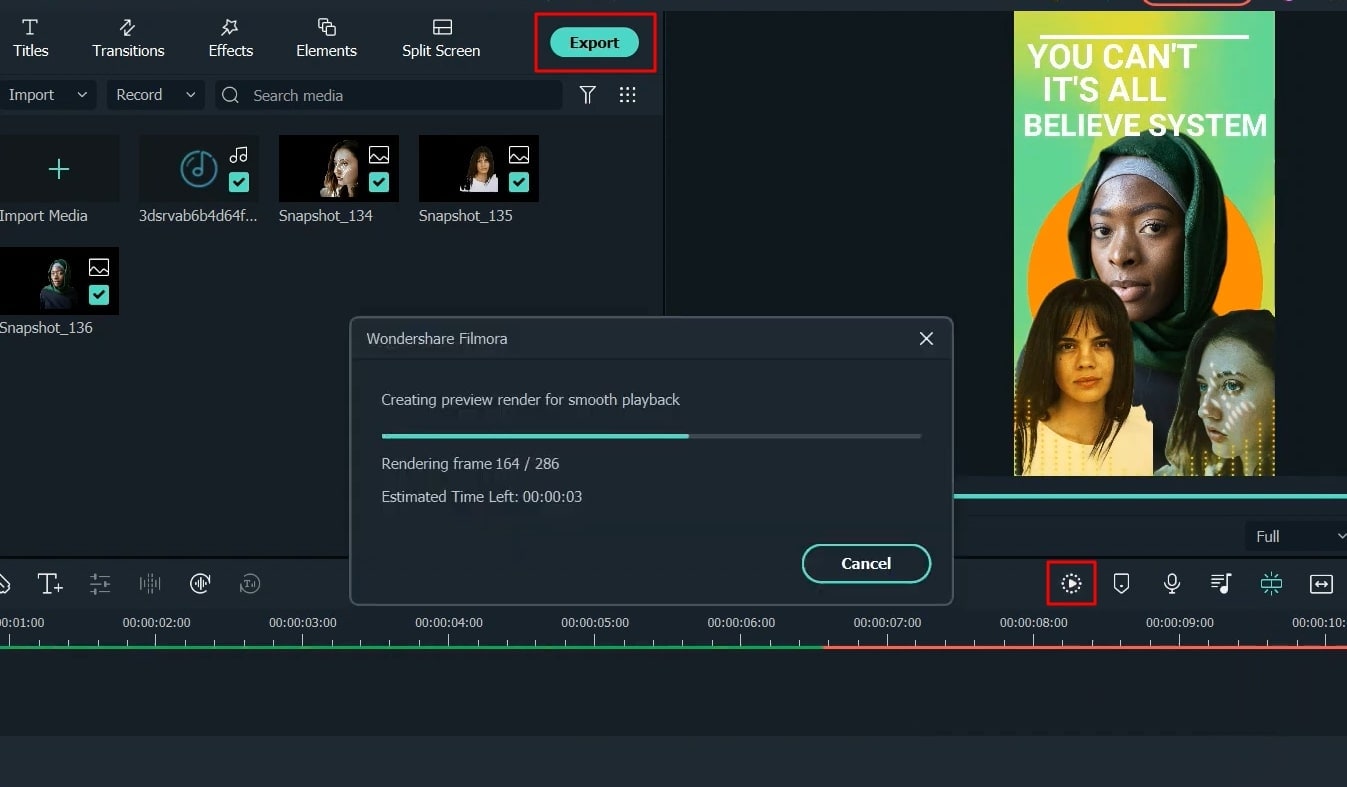
Preview Your Video and Export
Your Instagram story is finally created, and now you can preview it. Press the "Render Preview" icon and enjoy a smooth video playback. Click on “Export” and set the desired location on your device. Finally, your video is saved to your device.
Creating and uploading Instagram stories is the best way to show your creativity to friends or close ones. A majority is indulged in sharing this form of visual media these days. By following this Filmora tutorial, you can efficiently design and create more artistic Instagram stories by using different photos. The tutorial is simple and easy.