Guide On How to Create a Glitch Effect in Filmora
Videos are very important to all of us, from business, professional, or even personal perspectives. However, some videos miss out on that unique, engaging factor, which makes them boring and causes us to completely ignore them despite knowing how special that video is. This tutorial on Filmora teaches you the implementation of special glitch effects that transforms your content with a futuristic feel.
-
Guide On How To Create Dr. Strange Effect In Video Through Filmora
-
Guide On How To Create Audio Visualizer in Filmora
-
Guide On How to Add Smoke Effect in Filmora
-
Tutorial On Smooth Blur Transition in Filmora
-
A Simple Photoslide Tutorial With Slideshow Effects In Filmora
-
Isolate Color Effect Or Selective Color Effect In Wondershare Filmora
-
Guide On How To Add Dr. Strange Effect In Video
-
Tutorial – How to Make Your Face Beautiful in the Video with Filmora
-
How To Make Snap Video – Filmora Tutorial
-
Tutorial – How to Make Fast Speed Effect Like The Flash With Filmora
-
Guide On How To Edit Coin Magic Tricks With Filmora
-
How To Get Explosion Effect On Your Video Using Filmora
-
Creating Seamless Typography Animation with Filmora 1202:11
-
DIY Home Green Screen Setup | Filmora Edit Tutorial02:11
-
A Guide to Creating Looping Text Animation With Wondershare Filmora02:11
-
Tutorial - Create 3D Photo Zoom Effect in Filmora02:11
-
Filmora Tutorial – Setting Up The New Dynamic Countdown Timers02:11
-
5 Underrated Effects Like After Effect | Filmora Tutorial02:11
-
5 Essential Video Editing Tips You Must Know On Wondershare Filmora02:11
-
Performing Next-Level Editing With Ready-Made Templates on Filmora 1202:24
Transcript
So, friends, in this video, I will tell you how you can add glitch effects to your videos. If you do video editing and you want to add glitch effects to your video or text, or if you’re creating an intro where you want to add a glitch effect, so we’ll use Wondershare Filmora Video Editor.
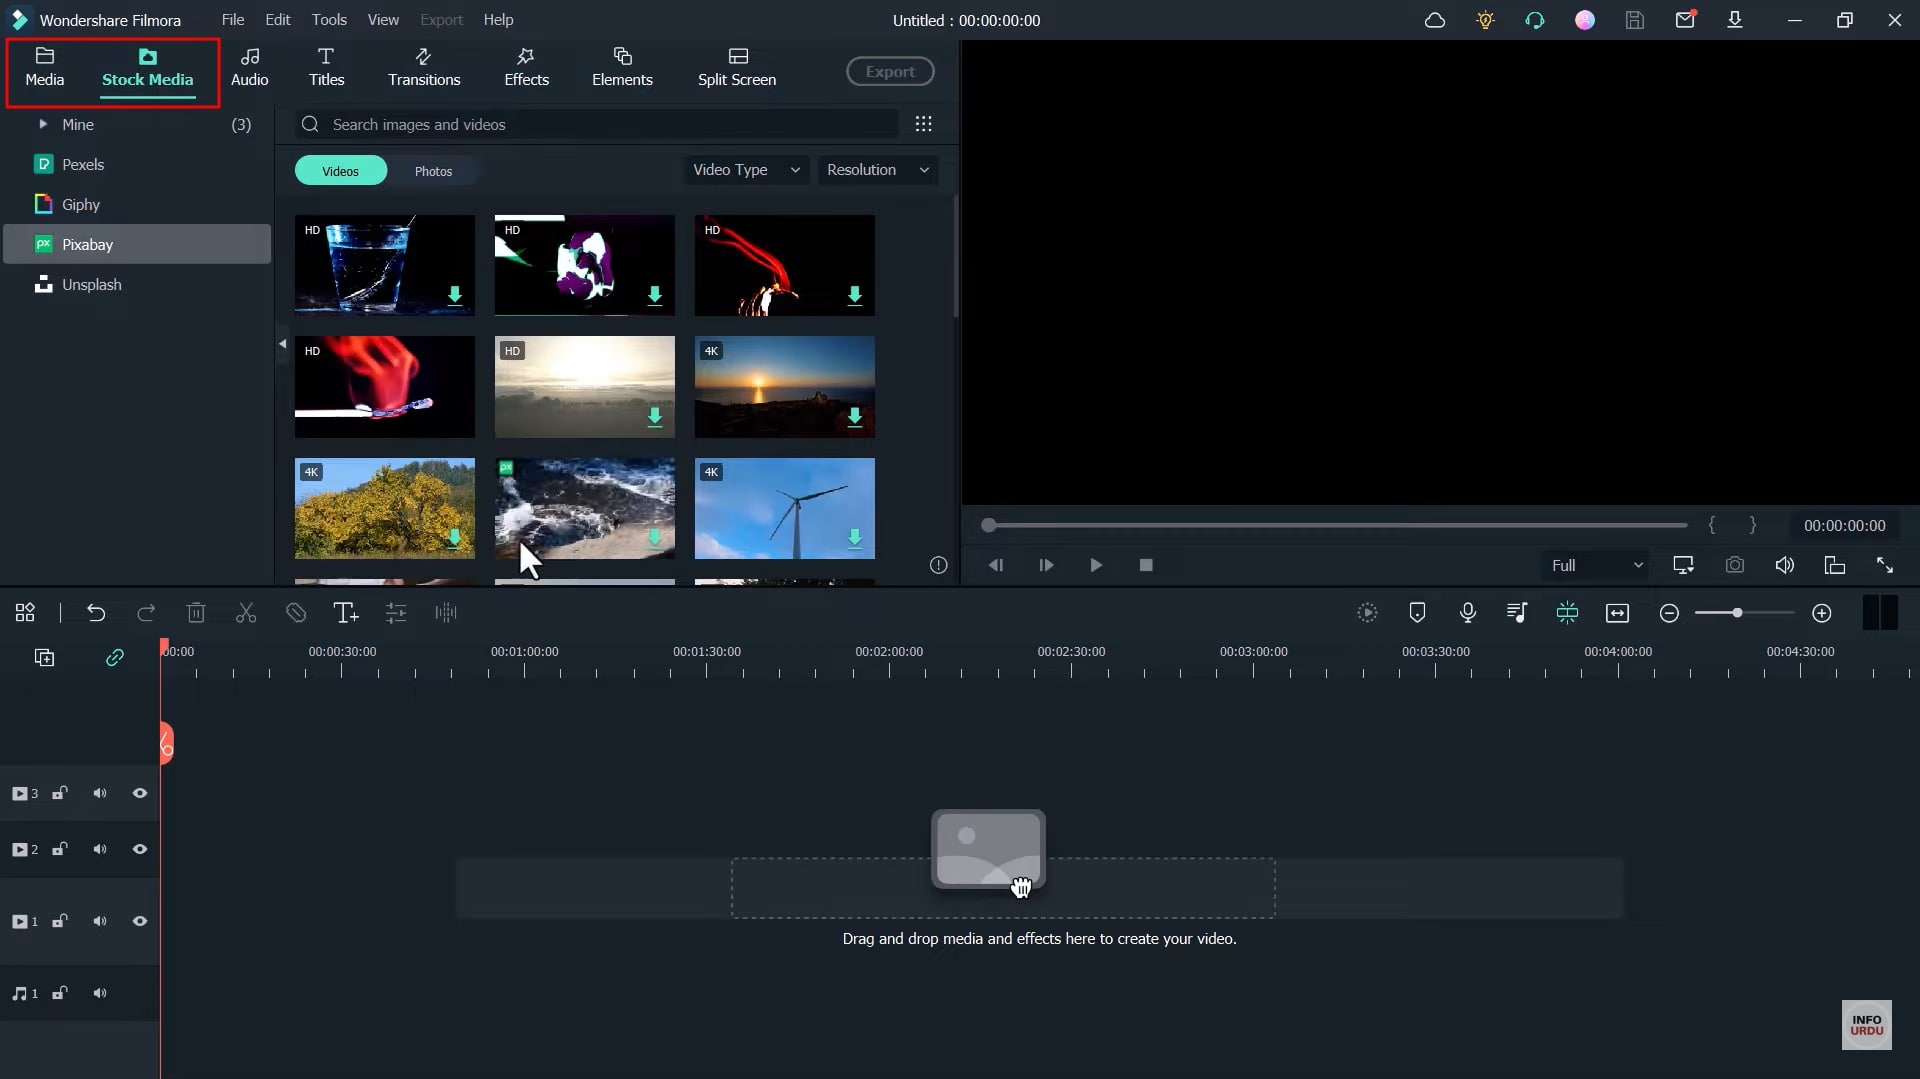
After downloading and installing, so you’ll get this type of interface. So here you’ve to import that video in which you want to add a glitch effect. Here you’ll click, and a box will open. After this, you can import your videos from here. Or if you click “Stock Media” from here, you’ll see many videos you can use. For example, I want to use this video, so I click on it. Hence, this video is added to our timeline. Now we will watch it by playing it.
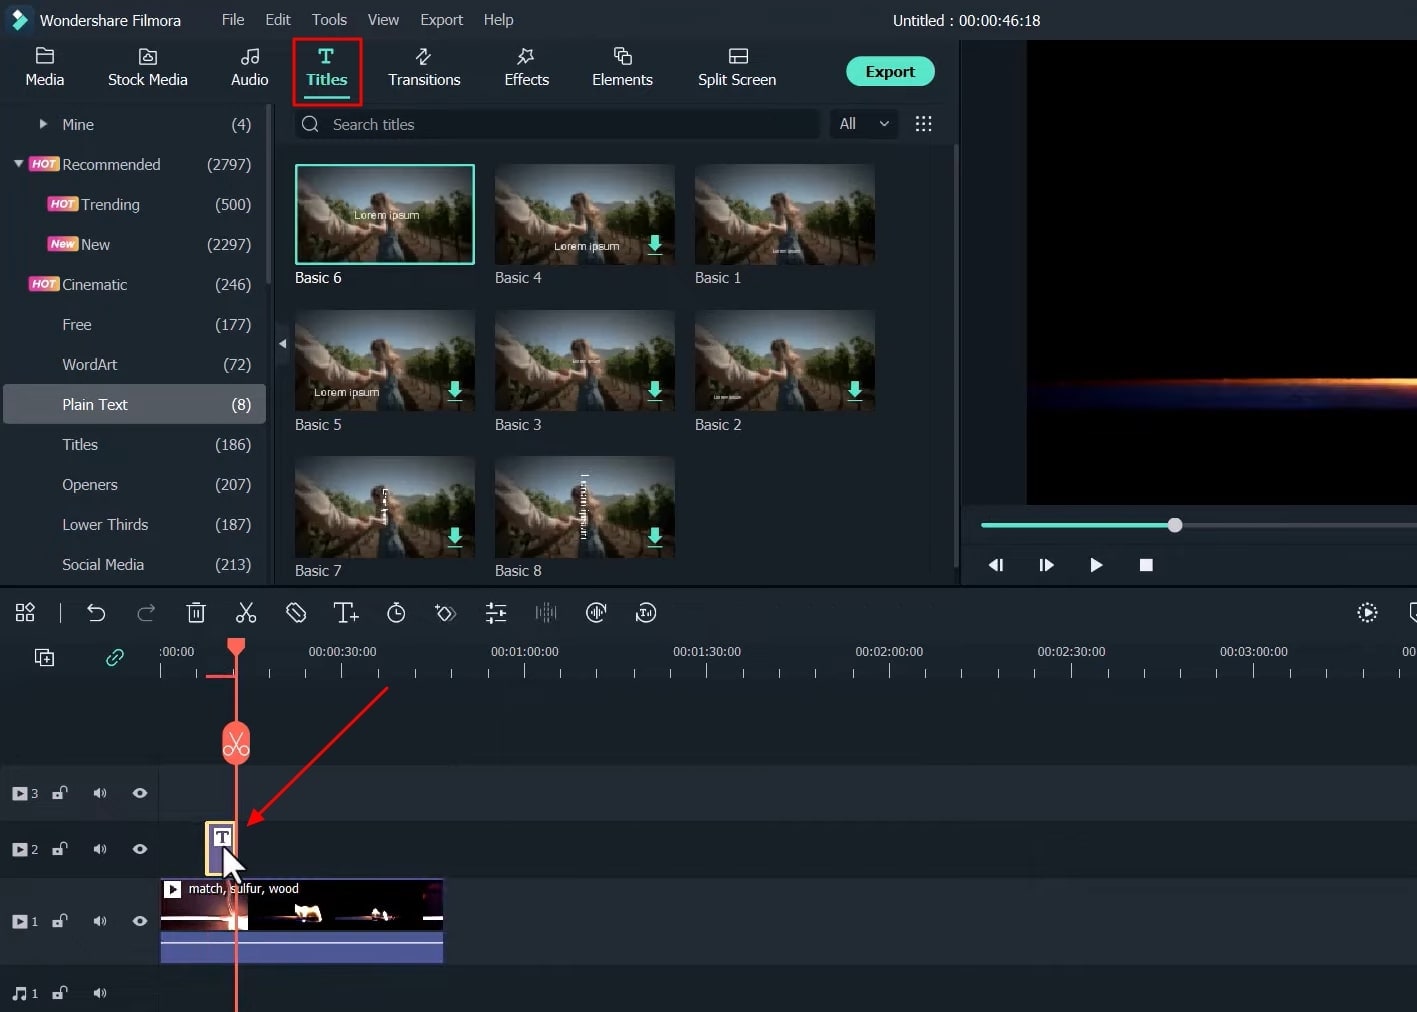
After this, you've to click on the "Titles" button and add "Plain Text" from here. Double-click on it, and its properties will open up. Navigate into "Titles," and write your name here where you want to add the text. You can also change its font. After this, you can also increase its font size. Click on the "OK" button after this.
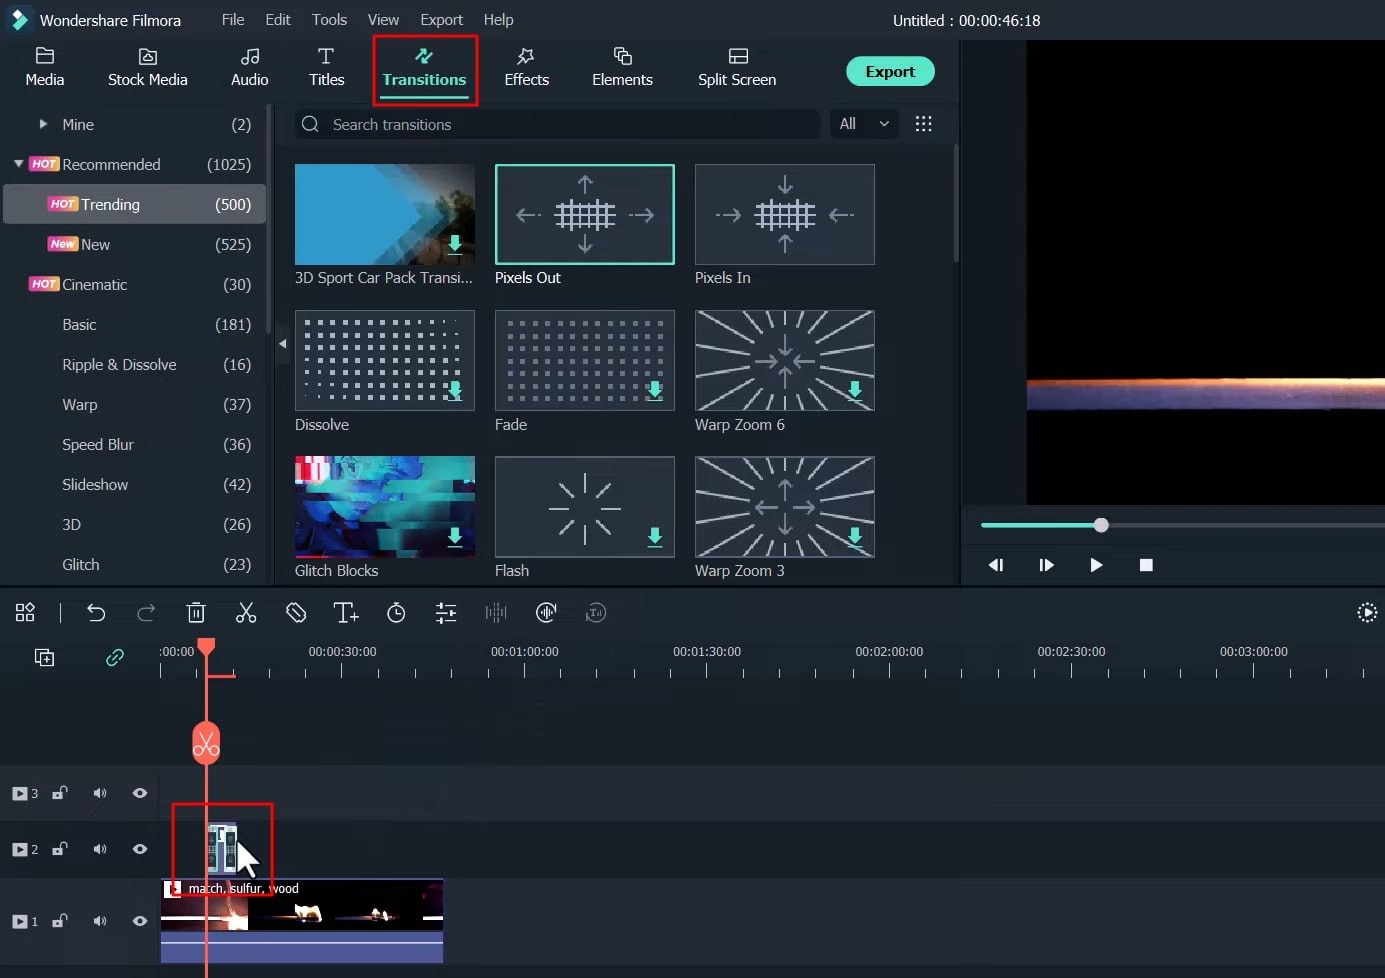
Afterward, you've to come into "Transitions." From here in starting, you need to add "Pixels In" and then "Pixels Out." If I show you by playing it, that's how it will play.
After this, if you want to add effects, glitch effect. Click on the "Effects" button and search here, glitch, and enter. Thus, a lot of glitch effects would arrive here. Whatever glitch you want to play, click the "+" button on it. For example, I click the "+" button here. I want to add a glitch effect in its starting. So I will copy it and put it here. Now, I will show you by playing it.
Its duration can also be increased or decreased. For example, if I move it here and now show you by playing it. If you think this glitch effect is more, you can reduce or increase its duration. So now I will show you after playing it.
When your video editing gets completed, click on the “Export” button from here, choose the file name, click on the "Export" button, and it will be saved to your computer.
Guide On How to Create a Glitch Effect in Filmora
What you need to prepare:
- A computer (Windows or macOS)
- Your video materials.
- Filmora video editor
Open Filmora to Import Videos
When you open Filmora, the first thing you need to do is import your videos. For this purpose, click the "Media" tab from the top-left side of the screen, press the "Import Media" button, and ultimately import your required videos from the device. If you don't have your video, you can get ready-made videos after clicking the "Stock Media" tab from the top left.
Move the Video into the Timeline
After you’ve imported or selected your video, move further in your editing process by dragging the video to your project timeline.

Apply Titles to Video
Access the "Titles" tab from the top, and select your desired text title from the given categories. For example, you choose the "Plain Text" category and select the "Basic 6" title template from it. After this, click the "+" icon on the title to add it to the timeline below. You can also drag and drop your title to the timeline below.
Edit Text Titles as Required
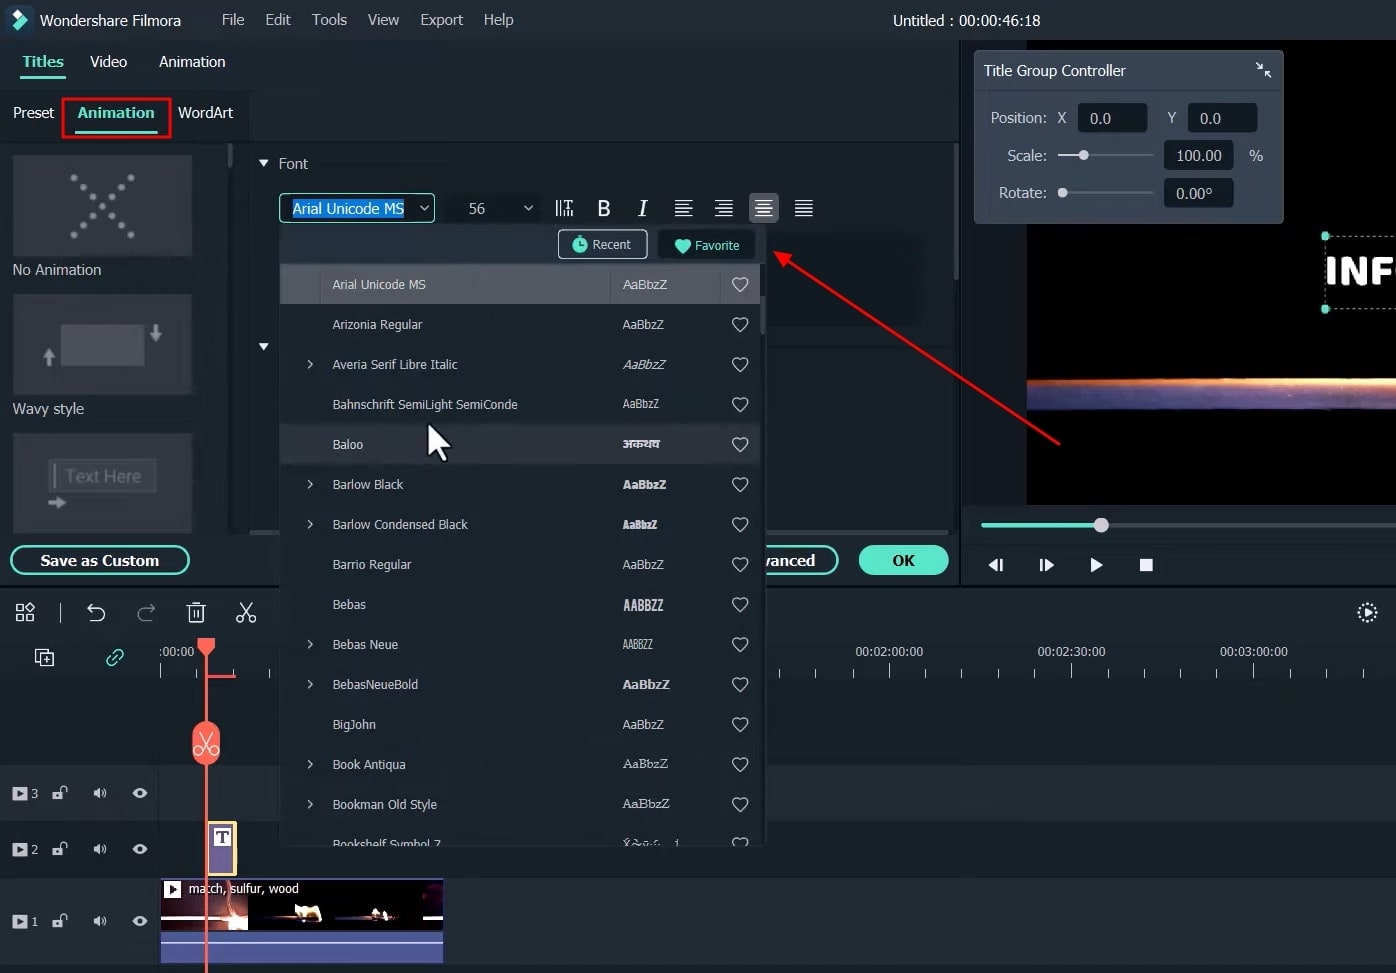
Double-click on your title track in the timeline, and a window will open from where you can navigate into "Animation" and edit the text as required. You can write whatever you want and set font size and style. You can also perform many other customizations from the given categories. Click “OK” once text editing is completed.
Implement Transitions into the Project
Navigate into the “Transitions” tab from the top, and you’ll see a range of options available. Select your desired category and choose your transitions from there. For example, select two transitions, "Pixels In" and "Pixels Out." Now add them to the timeline below on top of your video track.
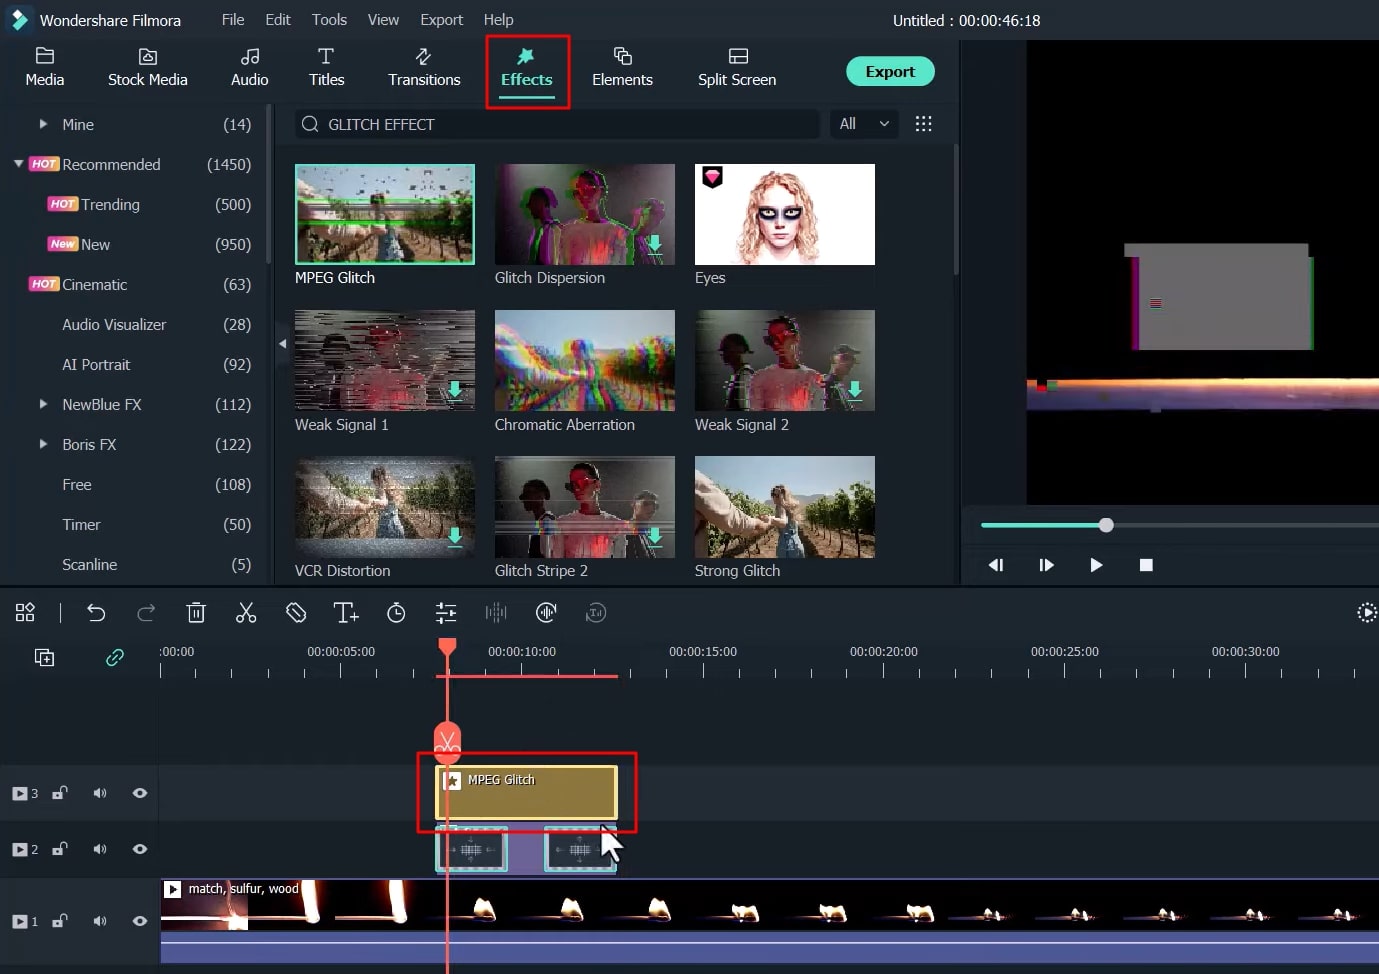
Use Glitch Effects
Press the "Effects" tab from the top, search “Glitch” in the available search box, and select your desired glitch effect from the options. Make sure to drag and drop the selected effect to the timeline in your desired position and adjust its duration as needed using the playhead on the timeline.
Render a Preview of the Video and Export
Render a Preview of the Video and Export

A glitch may sound like a problem in the real world, but in video editing, the glitch effect is well-known for adding retro animated styling to the simplest of videos. While this makes them look high-profile, many people seek a way to implement it. With this tutorial, you can apply glitch effects to your videos easily and efficiently.


Speak Your Mind