-
Guide On How To Create Dr. Strange Effect In Video Through Filmora
-
Guide On How To Create Audio Visualizer in Filmora
-
Guide On How to Create a Glitch Effect in Filmora
-
Guide On How to Add Smoke Effect in Filmora
-
Tutorial On Smooth Blur Transition in Filmora
-
A Simple Photoslide Tutorial With Slideshow Effects In Filmora
-
Isolate Color Effect Or Selective Color Effect In Wondershare Filmora
-
Guide On How To Add Dr. Strange Effect In Video
-
Tutorial – How to Make Your Face Beautiful in the Video with Filmora
-
How To Make Snap Video – Filmora Tutorial
-
Tutorial – How to Make Fast Speed Effect Like The Flash With Filmora
-
Guide On How To Edit Coin Magic Tricks With Filmora
-
How To Get Explosion Effect On Your Video Using Filmora
-
Creating Seamless Typography Animation with Filmora 1202:11
-
DIY Home Green Screen Setup | Filmora Edit Tutorial02:11
-
A Guide to Creating Looping Text Animation With Wondershare Filmora02:11
-
Tutorial - Create 3D Photo Zoom Effect in Filmora02:11
-
Filmora Tutorial – Setting Up The New Dynamic Countdown Timers02:11
-
5 Essential Video Editing Tips You Must Know On Wondershare Filmora02:11
-
Performing Next-Level Editing With Ready-Made Templates on Filmora 1202:24
5 Underrated Effects Like After Effect | Filmora Tutorial
What you need to prepare:
- A computer (Windows or macOS)
- Your video materials.
- Filmora video editor
Begin Filmora Application and Import the Media
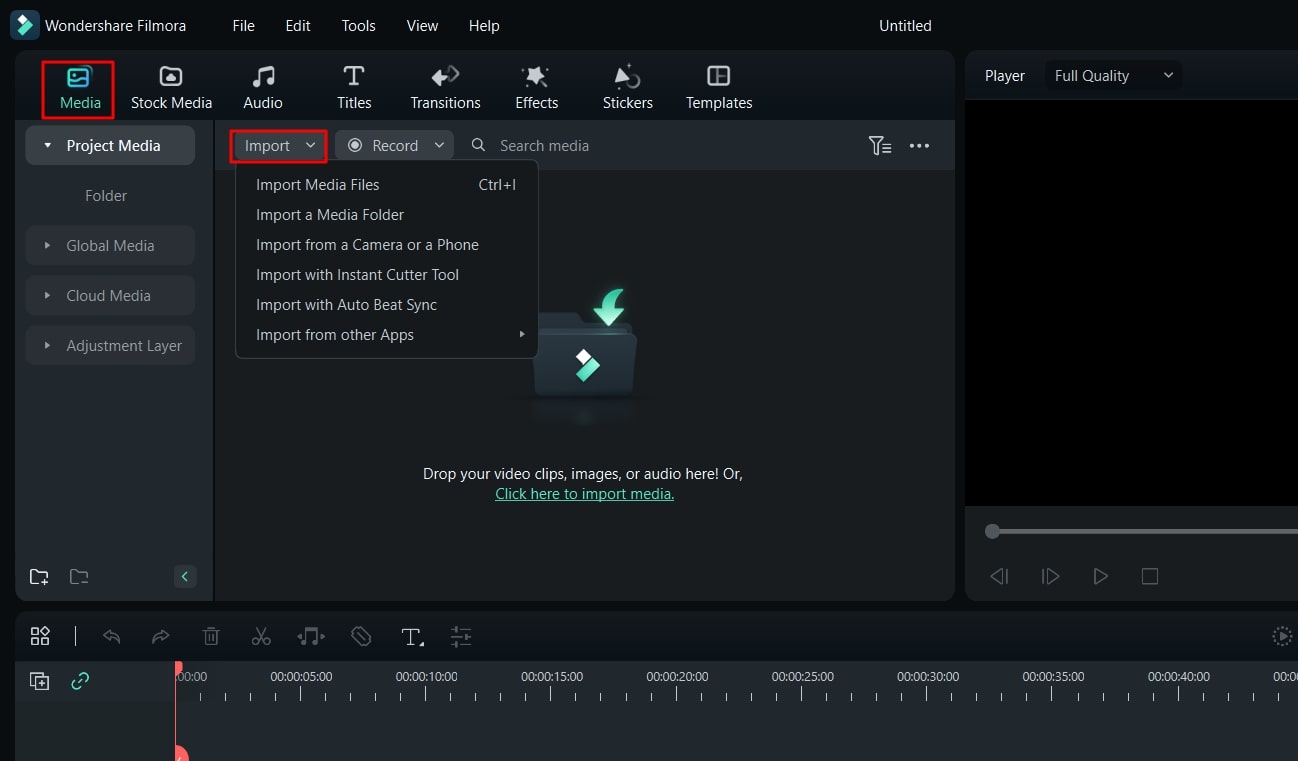
The first stage of your video editing process is to import the media files after you start Wondershare Filmora on your device. To import items, you have to click the “Media” bar from the top-left side of the screen and press the “Import” button. Your required video or videos will be successfully imported.
Move Your Video to the Timeline
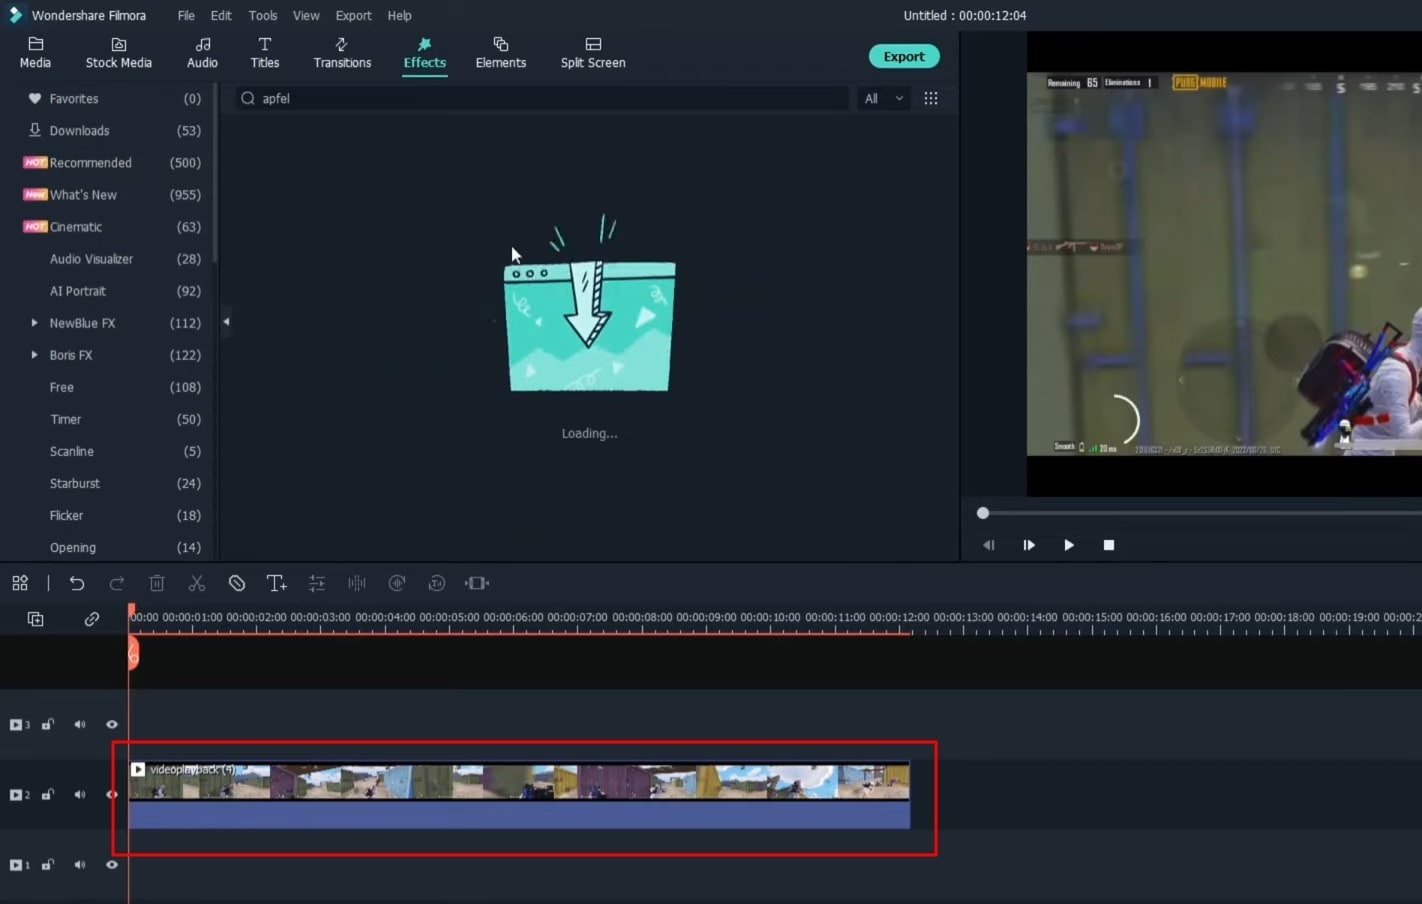
When you’re done with video import, move ahead by dragging your video to the project timeline below.
Merge Effects into the Video
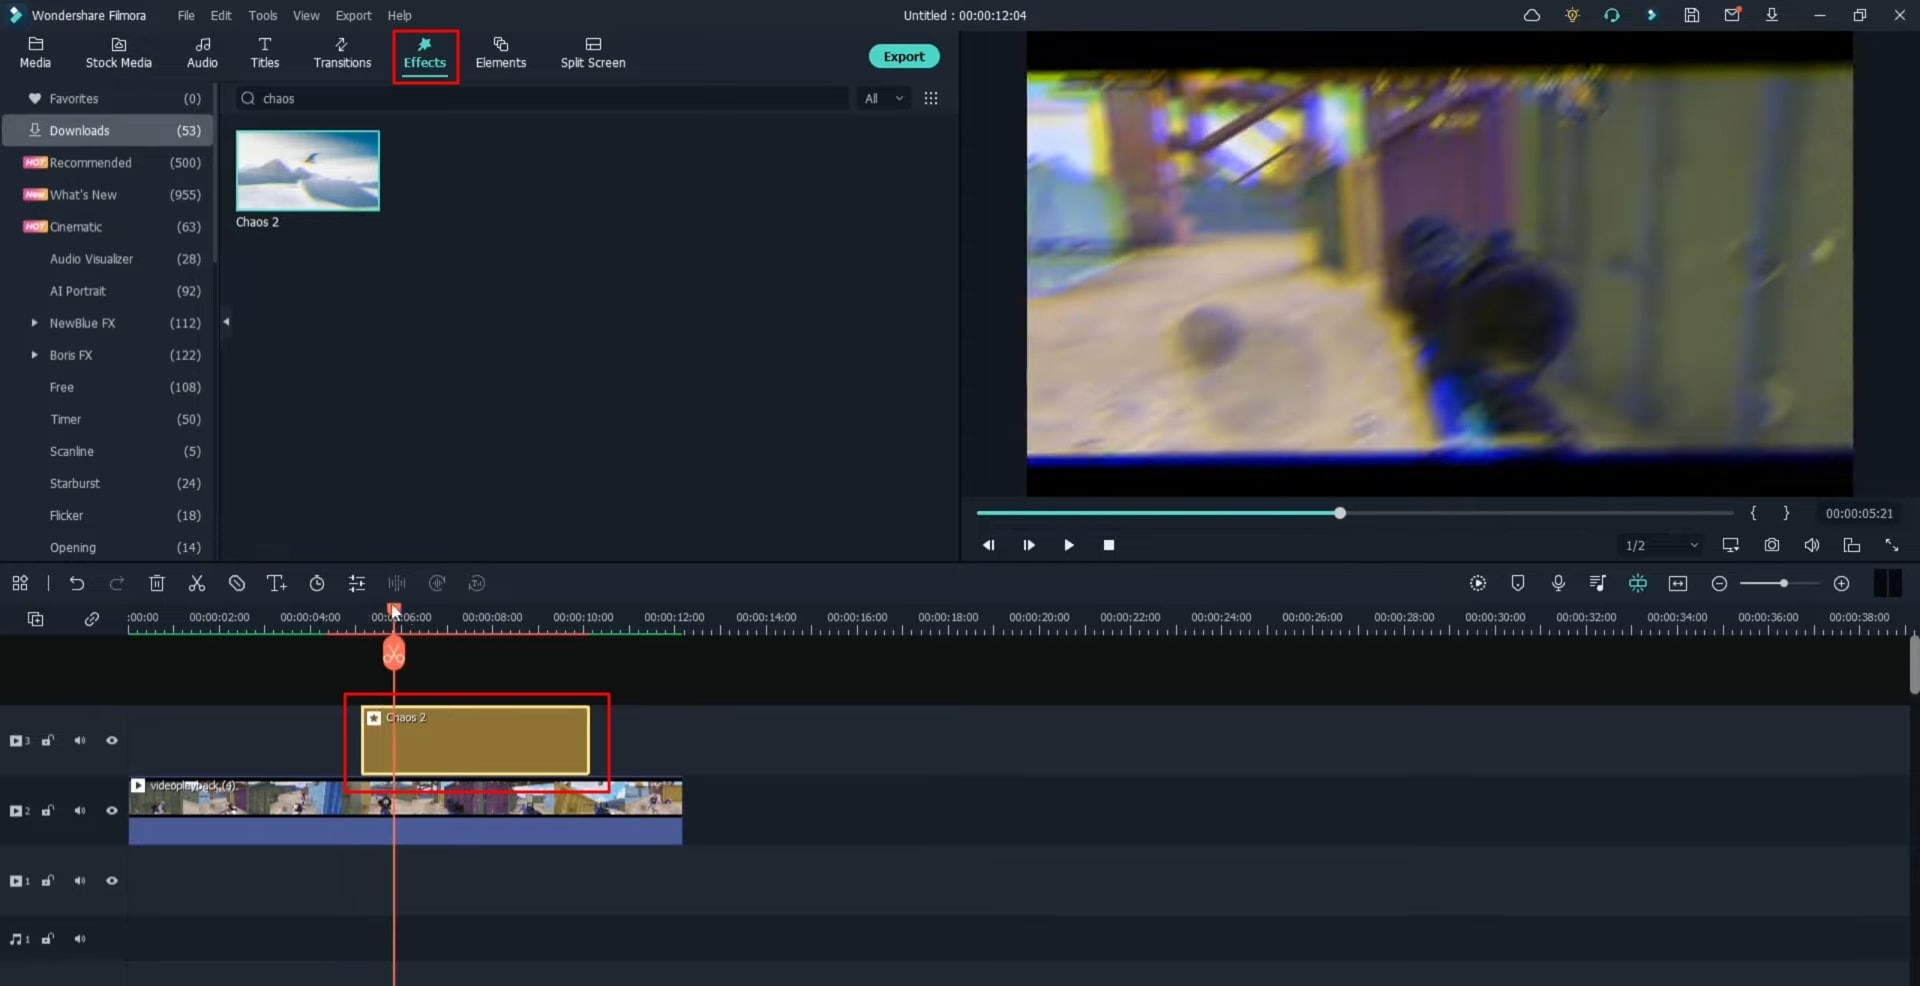
Now arrives the main step of this type of video editing. Click on the "Effects" bar at the top, search and select your first underrated effect, "Apfel," and drag it to the project timeline below. Set the duration of effect as required. Click the "Play" icon to see whether the video synchronizes with the effect.
Repeat the process by searching and applying “VCR Distortion” as a second underrated effect, “Old Video” as a third underrated effect, “Water” as a fourth underrated effect, and "Chaos 2" as a fifth underrated effect.
Modification of Different Effects
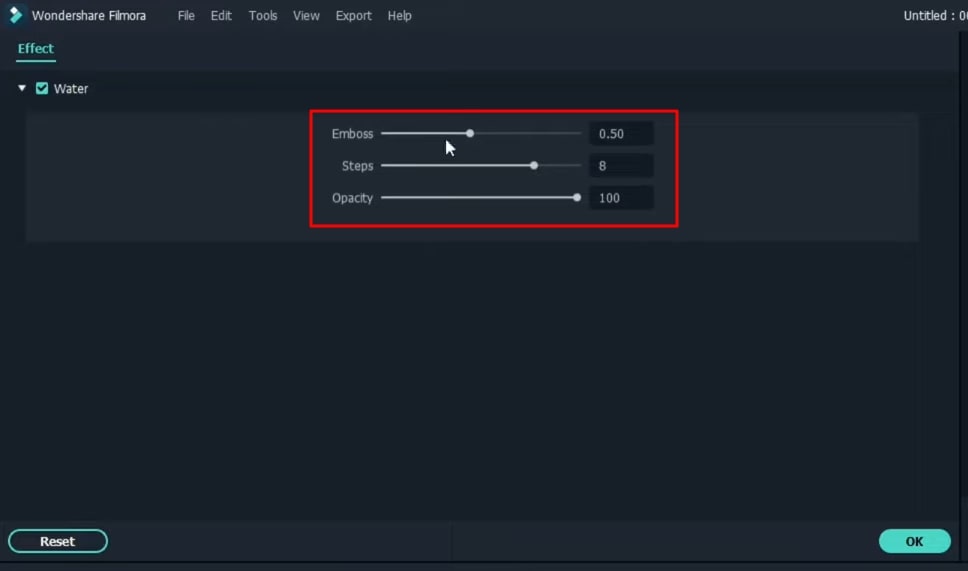
Double-click on the effect that you’ve dragged to your timeline, and you’ll see an editing window appearing at the top-left side of your screen. After this, adjust the layout, opacity, positioning, and many other parameters of individual effects as per requirements.
Preview and Save the Final Video
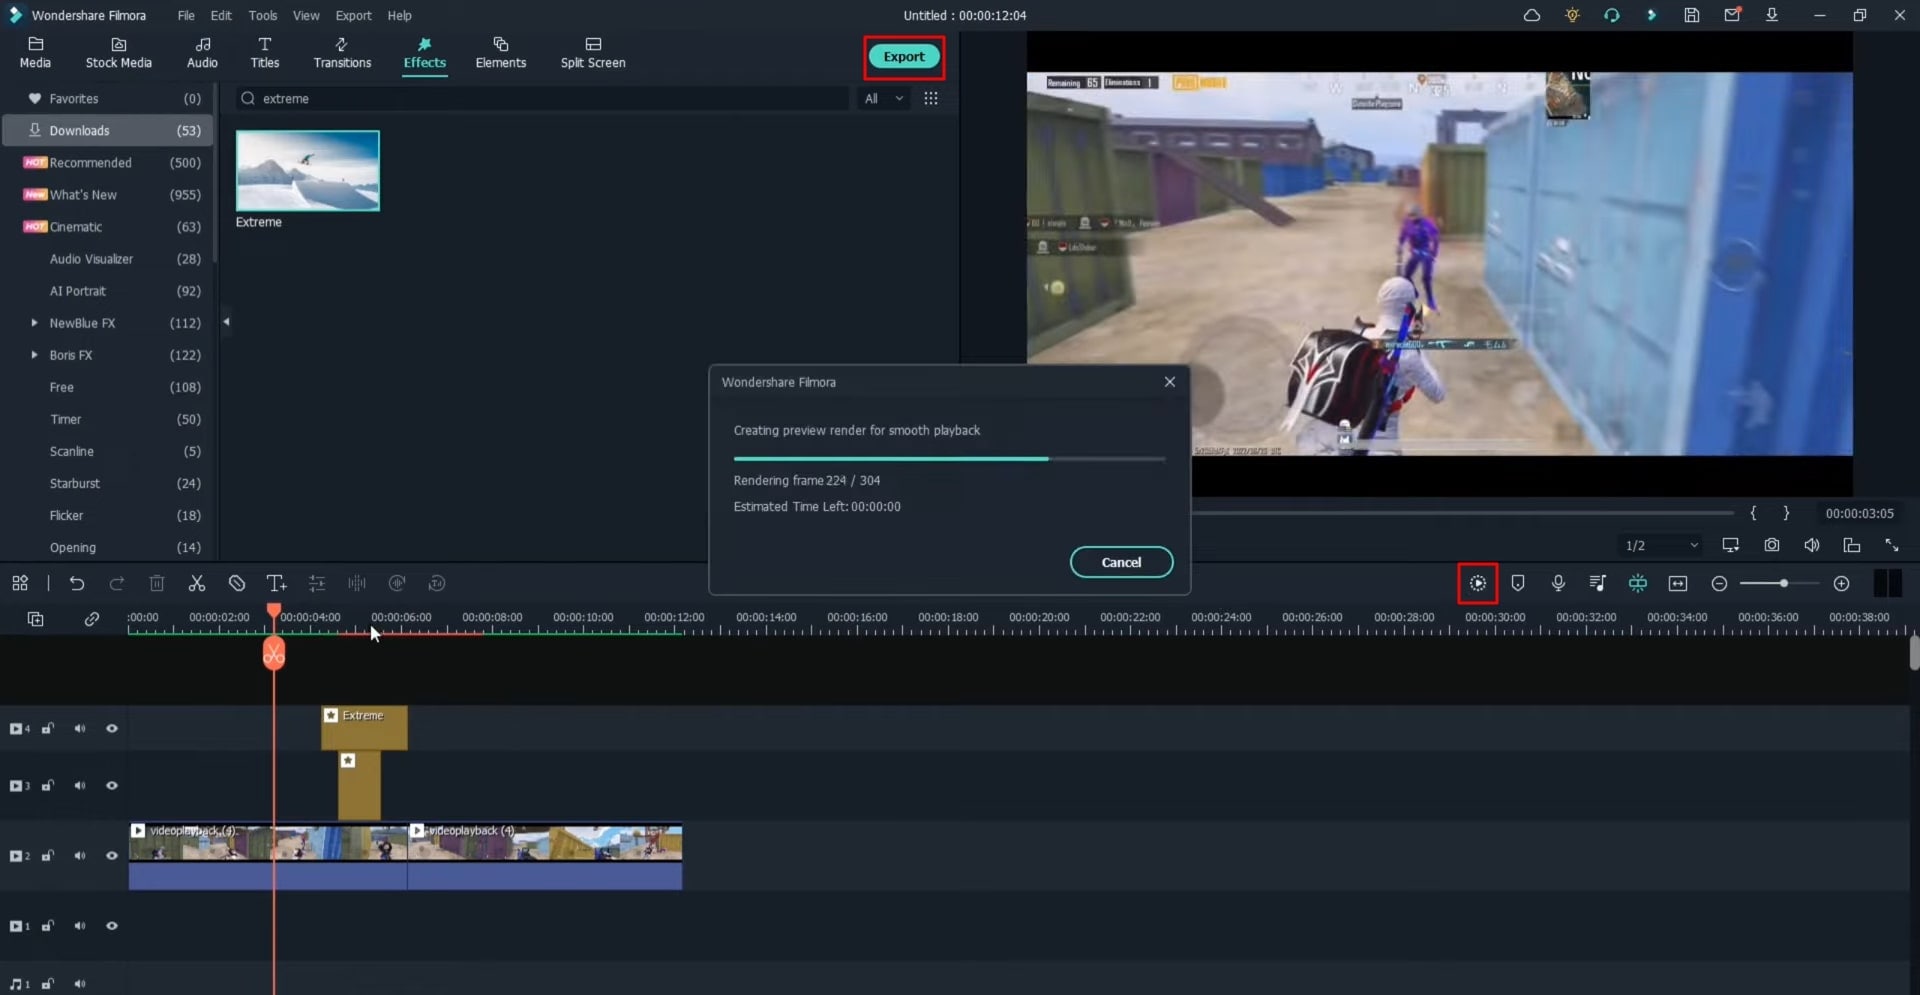
It’s always good to check your effort and rate it. Therefore, click on the “Render Preview” icon to ensure a smooth playback display of your project. Then proceed with saving this video in the desired location of this device which can be done by clicking on the "Export" button at the top.
Adding effects to your videos is like adding life to them. However, not many people know this type of art for improving the quality of their videos. This tutorial on Filmora briefly lists easy-to-follow steps that will make implementing effects in videos easy and smart.


Speak Your Mind