-
Mastering Video Aspect Ratios for Different Platforms
-
Elevate Your Videos: Color Correction Techniques in AVS Video Editor
-
Discovering the Ultimate Power of Premiere Pro Vectorscope
-
Premiere Pro Lumetri Color Guide + Alternative
-
Everything to Know about HSL and Color Grading
-
A Step-by-Step Guide to Mastering the After Effects Graph Editor
-
The Basics of Creating Typewriter Effect in Premiere Pro
-
Contextually Understanding All Techniques to Create Text Typing Animation
-
3D Text Animation Making Made Easy Finding the Best Solutions!
-
Guide On How To Create An Interesting Instagram Story In Filmora
-
Guide On How To Create Dr. Strange Effect In Video Through Filmora
-
Guide On How To Create Audio Visualizer in Filmora
-
Guide On How To Blur Background Of Vertical Video Using Filmora
-
Guide On How to Blur Background of Any Video In Filmora
-
Guide On How To Add Video Watermark Animation In Filmora
-
Guide On How to Add Smoke Effect in Filmora
-
Transition From A Sketch Or Drawing Into a Video In Wondershare Filmora
-
Text Animation Bar - Bottom of the Screen - Filmora - Tutorial
-
Tutorial On Smooth Blur Transition in Filmora
-
A Simple Photoslide Tutorial With Slideshow Effects In Filmora
-
How To Make Money On YouTube With Useful Copy Paste Content – Filmora Tutorial
-
Isolate Color Effect Or Selective Color Effect In Wondershare Filmora
-
Tutorial – How To Use Filmora Instant Mode
-
Guide on How to Place a Video inside Text using Filmora
-
Guide On How To Add Dr. Strange Effect In Video
-
Guide On How To Add a Video in Text Using Filmora
-
Guide On How To Add HDR, Color Grading & Sky Glow Using Filmora
-
Guide on How to Highlight Moving Object in Filmora
-
Guide On How To Add Cinematic Title Animation in Filmora
-
Guide On Applying New 8 Tips, Tricks & Updates In Filmora
-
How To Make Travel Maps Animation In Filmora | Step-By-Step Tutorial
-
How To Make Snap Video – Filmora Tutorial
-
Tutorial - How To Make Magnify Animation On Filmora
-
Guide On How To Add New Advance Text Customization In Filmora
-
Guide On How to Create A Spectacular Motion Tracking Video
-
Tutorial – How to Make Fast Speed Effect Like The Flash With Filmora
-
Guide on Making Cinematic Titles in Filmora
-
Guide On How To Edit Coin Magic Tricks With Filmora
-
How to Make Audio Spectrum in Filmora - Tutorial
-
How To Get Explosion Effect On Your Video Using Filmora
-
Tutorial | How to Fake Camera Movement with Filmora 12
-
Filmora Tutorial | How to Edit Beat Sync Instagram Reels Video
-
Tutorial on How to Crop or Zoom in a Video with Filmora
-
Guide On How To Edit An Audio Like A Pro In Filmora
-
Creating Seamless Typography Animation with Filmora 1202:11
-
A Guide to Creating Looping Text Animation With Wondershare Filmora02:11
-
Tutorial - Create 3D Photo Zoom Effect in Filmora02:11
-
Filmora Tutorial – Setting Up The New Dynamic Countdown Timers02:11
-
5 Essential Video Editing Tips You Must Know On Wondershare Filmora02:11
-
Performing Next-Level Editing With Ready-Made Templates on Filmora 1202:24
-
Audio Visualizer in Filmora02:24
-
Tutorial | Motion Tracking Using Text on Wondershare Filmora02:24
-
Guide On How To Add Lyrics And Animation To Song Using Filmora
Transcript
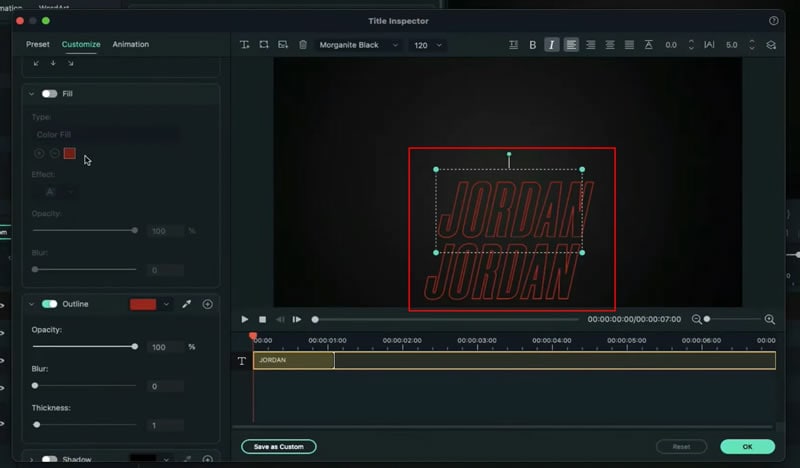
First, go to the “Track Manager,” add 9 tracks, click on “Import,” and import all these files. Then drop the background on track 1 and make it 7 seconds long. Go to the “Titles” and drop the default title on the timeline on track 4 and make it 7 seconds long. Double-click on it, change the font to “Morganite” and size 220, make it italic, and enter your word.
Then increase text spacing by 5 and change the font color. Click on “Advanced” and on the outline effect and select the same color as the font color, change the thickness to 1, and turn off the Text “Fill” effect. Now align its position. After that, copy and paste it on track 5. Double-click on it and align its position.
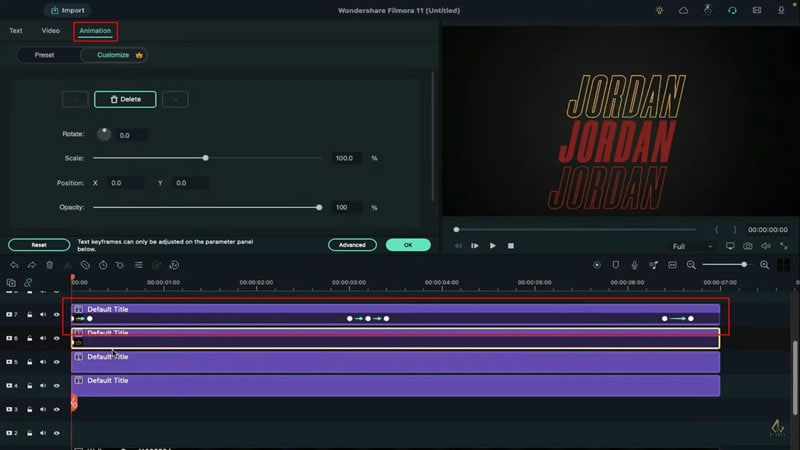
Then click on “Advanced” and on the text “Fill” effect and turn off the "Outline” effect. Now copy both these texts and paste them on tracks 6 and 7. Then align their position and change the color of the track 6th and 7th word. Then double-click on track 7, go to “Animation,” add a keyframe at the starting, then take the text out of the screen.
Then go 5 frames further and reset the position. Then place the playhead at 3 seconds, add a blank keyframe, go 5 frames further, and take the text out of the screen towards the opposite side. Then go 5 frames further and reset the position. Then place the playhead at 6 second-mark and 10th frame.
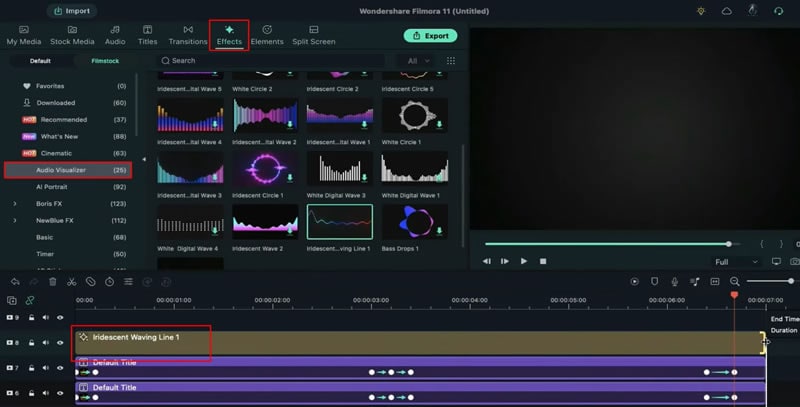
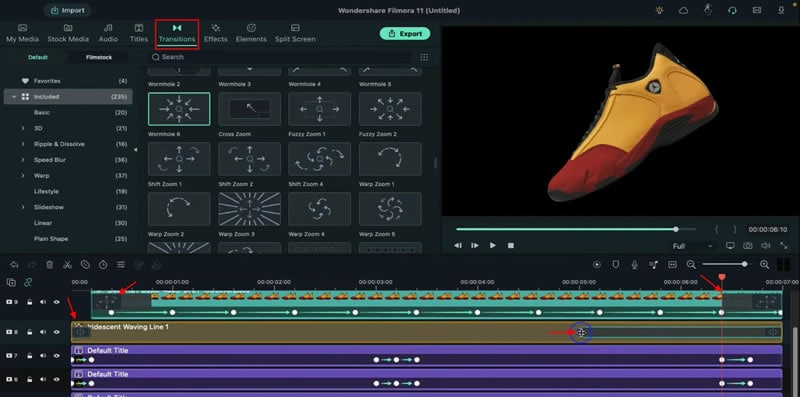
Add a blank keyframe, then place the playhead after 7 frames and reduce the “Opacity” to zero percent. Do the same with the rest of the text. Then go to “Effects," and under “Audio Visualizer,” add a “Waving Line 1” on track 8, and make it 7 seconds long. Then double-click on it and change the line color according to your choice, or you can use the same color as the product or text color.
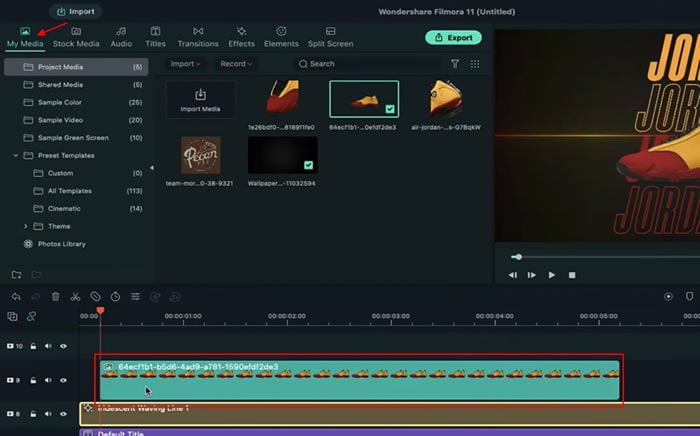
Then drop the shoe clip at the 5th frame on track 9 and make it 7 seconds long. Then double-click on it and set rotation at 327 degrees. Set “Scale” at 140% and set the y-axis at 40. Then slide the keyframe point and set it at the 10th frame, then go 15 frames further and reset the position. Then again, go 15 frames further and set the y-axis at 40.
Apply the same keyframes further. Now go to the “Transitions,” apply “Shift Zoom 1” at the starting point, and keep it 15 frames long. Then apply the same transition at the end and keep it 15 frames long. Then apply “Wormhole 6” on the waving line 1 effect, and keep it 5 frames long. Then apply it to the end, and keep it 15 frames long.
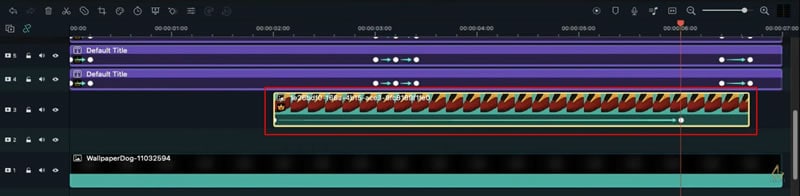
Scroll down, and on these 2 blank tracks, we will use other pictures of our product. Keep 2 seconds as a starting point, increase the “Scale” by 134, go to the “Video” under “Mask,” select “Double Line,” and increase “Blur Strength” to 21, set “Horizontal” at 39, and align its position.
Create a slide-in effect from top to bottom, decrease the “Opacity” to 30, and place the playhead at 2 second and 5th frame. Set the “Opacity” to 30%, and at the start, set the “Opacity” to 0 percent. Drop the second image on track 2 and do the same.
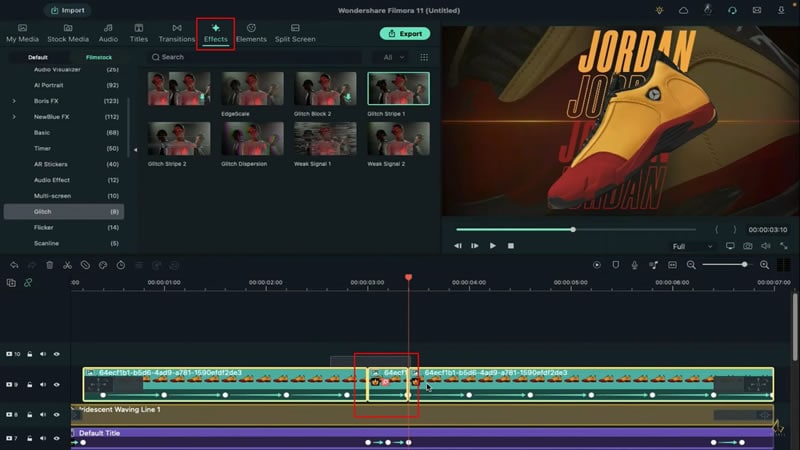
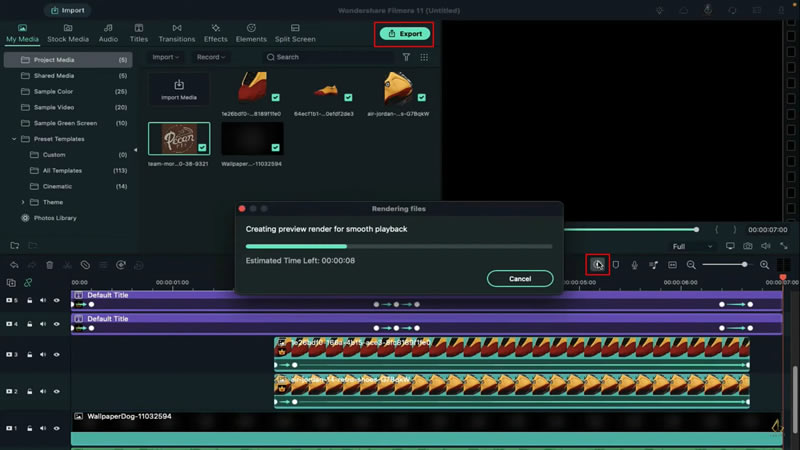
Scroll up and split the shoe clip at 3 seconds, and then split it after 10 frames. Then go to “Effects,” go to “Glitch,” and apply “Glitch Strip 1.” Shift the shoe clip on track 10. Now you can use track 9 to add different effects without impacting our product. Now, in the end, apply the sound effect. Now render it. Let’s see the final video.
How To Make Product Advertising Video in Filmora | Product Ads Editing in Filmora
What you need to prepare:
- A computer (Windows or macOS)
- Your video materials.
- Filmora video editor
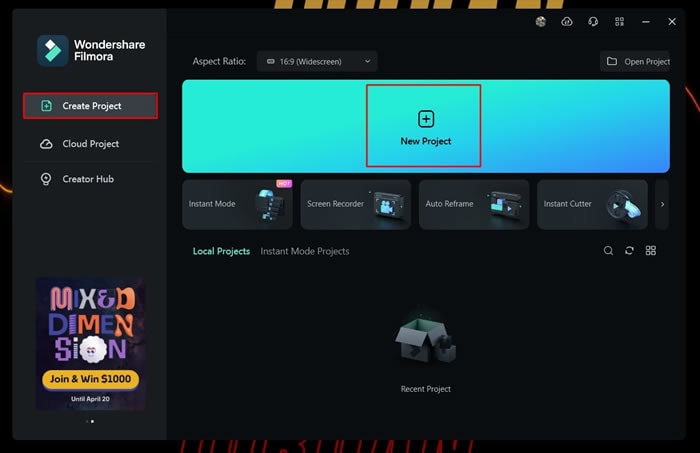
Launch New Project on Filmora
After downloading and installing Filmora, open it and interact with the user interface. At the top-left side of the bar, you’ll see 3 options: “Create Project,” “Cloud Project,” and “Creator Hub.” You’ve to click on “Create Project” and proceed to press the “New Project” button that takes you to the video editing environment of Filmora.
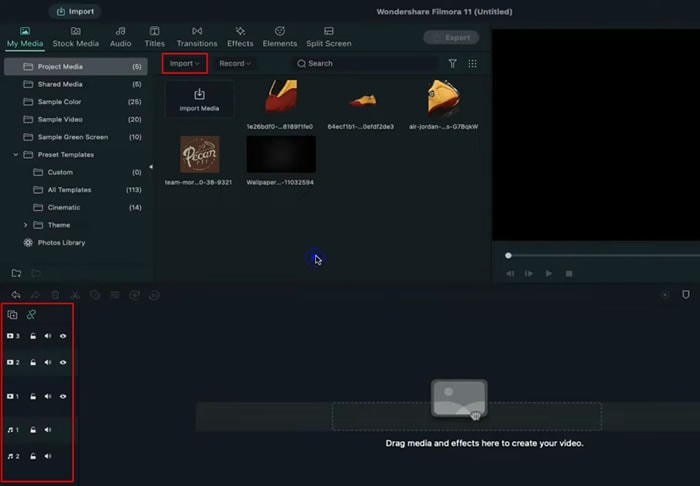
Set Tracks and Import Your Video
In this step, you must first visit the “Track Manager” and set a potential number of tracks for editing. Then press “Import” to upload all the media files that you need to implement in your video. All these files will be present in the Media panel.
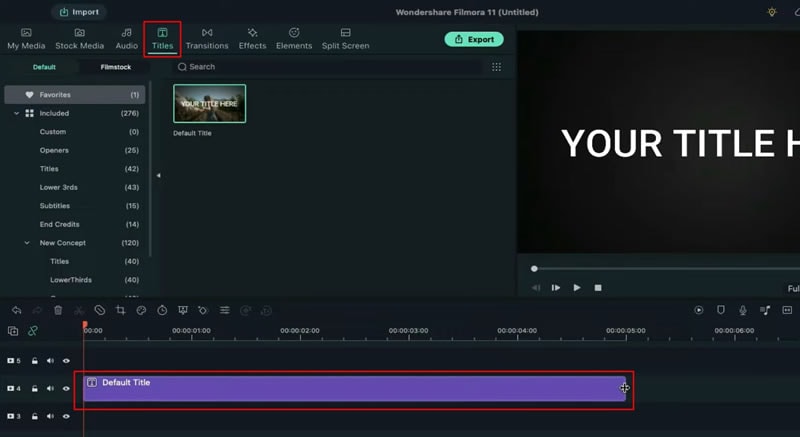
Customize the Title Layout Accordingly
First, you’re required to drop the background to the first track and then prolong it according to the required duration, for example, 7 seconds. You would have to press “Titles” and drop the “Default Title” on track 4 and keep its duration according to the background dropped in the first track.
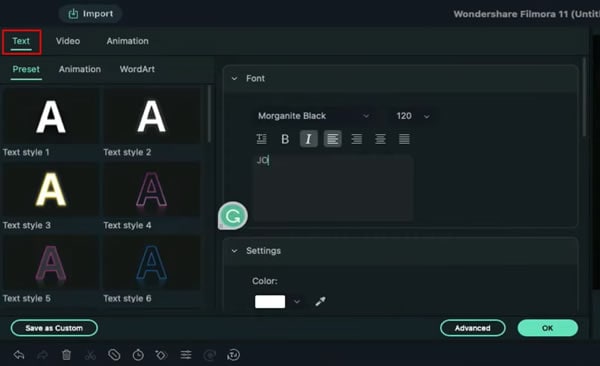
Set the Required Text Style
Double-click on track 4, press "Text," and ultimately set your desired font style, including size, type, etc. After this, you will need to enter your required word and adjust its spacing and color.
Align the Position of the Text
After all the required text styling, you have to copy track 4 and paste it onto track 5. On track 5, double-click and align the position of the text as required. After this, you need to copy and paste tracks 4 and 5 on tracks 6 and 7, where you can align their position through advanced settings and change the text color as required.
Set the Animations Margin
Double-click on track 7 and press "Animations," where you can add a keyframe right at the start and take the text out of the screen by adjusting position. Then go 5 frames further and reset the position while putting the playhead at 3 seconds. Add a keyframe by going 5 frames further and again take the text out of the screen from the opposite side.
The playhead would be then navigated on the 6th second and in the 10th frame. Add a blank keyframe, after which you’re required to place the playhead on the 7th frame and simultaneously adjust the “Opacity” to 0%. In fact, you're required to do the same with the rest of the text available.
Add Visual Effects
After setting up animation margins, you need to press "Effects" to add an interesting visual layout to your video. Then select your desired audio line by pressing "Audio Visualizer," available on the left side of the screen. The selected audio line would then be dragged on track 8, and its duration is prolonged to 7 seconds. You can also change the line color by double pressing on it.
Add Your Product Image
Now you’ve to add your actual product image, for which you need to click "My Media." The image would be then dragged to track 9 and again make it 7 seconds long. By double-clicking this track, you can change the layout or position of your image through the x-axis and y-axis margins.
Add Transitions for Quality Flow
To improve the flow of your video, you need to add transitions. For this, press "Transitions" from the top side of the screen and apply “Shift Zoom 1” at the start. You've to keep it 15 frames long, apply the same transition at the end, and again keep it 15 frames long.
After this, you have to add “Wormhole 6” at the start of waving line 1 and keep it 5 frames long. The wormhole 6 will again be added at the end while keeping it 15 frames longer.
Add More Project Media
To move ahead, you need to add more project media by clicking on "My Media," and these media files will be added on tracks 2 and 3. At 2 seconds, you'll keep the starting point and adjust the dimensions and layout as required by double-clicking on it.
Add the Glitch Effect
Now you can also add glitch effects on important media files. Navigate through "Effects" and press the "Glitch Strip 1" icon to add animated glitch effects to your video.
Enjoy the Video and Export
After the process, you’ve to add a sound effect on track 9. Finally, render the video and see your final video after the editing process. By pressing the “Export” button, you can easily save the video to your device in the desired location.
Product advertisement is important to develop brand identity and encourage customers to purchase products. With Filmora, business owners with minimal effort and even low editing knowledge can easily make exciting videos for their products without hassles.