How to Fake Camera Movement in Filmora

Jan 06, 2026• Proven solutions
 TL;DR:
You can fake camera movements in Filmora X to add dramatic zooms or adjust framing by using either the manual Keyframing method or the automated Auto Reframe tool.
● Keyframing requires defining start and end points on the timeline, then manually enlarging and centering the preview window frame around your focus object to simulate a zoom.
● The Auto Reframe feature requires the latest Filmora update and only functions if you select a different aspect ratio than the original footage, such as changing a 16:9 video to 9:16.
● Because the Auto Reframe tool may occasionally lose track of the subject, you might need to pause the video and manually adjust the frame position to ensure accurate tracking.
Ask AI for a summary
 ChatGPT
 Perplexity
 Gemini
 Claude
 Grok
Grok
Here's an edit tip that puts you in the director's chair. Occasionally, you can only wish that a static shot would have pushed in slowly on a character's face as a dramatic moment plays out. It seems your luck has run out, right? Certainly not.
This article will discuss how you can fake camera movements to make your videos more impactful. The majority of editors have to think outside the box when faking camera movement. It would help if you were not afraid to animate a resize or zoom when taking a picture.
The technological capability exists in all editing systems to accomplish this. A person should never assume they should do something just because they can. Let's explore some reasons for faking camera movement below.
- To Make Scenes More Emotional
- Eliminate or mitigate jump cuts
- Put together a comic effect
- Enhancing Clarity in Narratives
When it comes to faking camera movements in your videos, there is plenty of software out there to do the job for you. But in this article, we will show you how you can do it easily using Filmora X. We will discuss two different methods of faking camera movements that are:
- Keyframing Camera Movement.
- Auto Reframe
Method 1: Keyframing Camera Movement.
The first method to fake camera movements using Filmora is to keyframe the camera movements. Before we move forward, make sure that the latest version of Filmora is installed in your system. If it isn't already installed in your system, you can download and install it from the official website of Filmora.
Step1: First of all, import the video to Filmora by clicking on the file, then import media, and then clicking on import media files.

.Step2. Now drag the video from Filmora Library and drop it to the timeline.
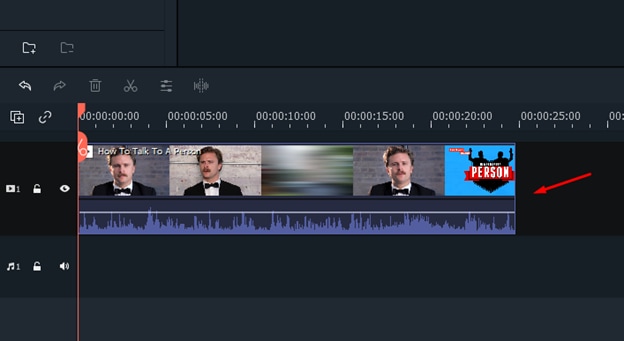
Ste3: Now click on the add keyframe option and define a starting point for your keyframe.

Step4: Now, drag the cursor to the point where you want to end your keyframe and click on the add button to define an ending point for the keyframe.
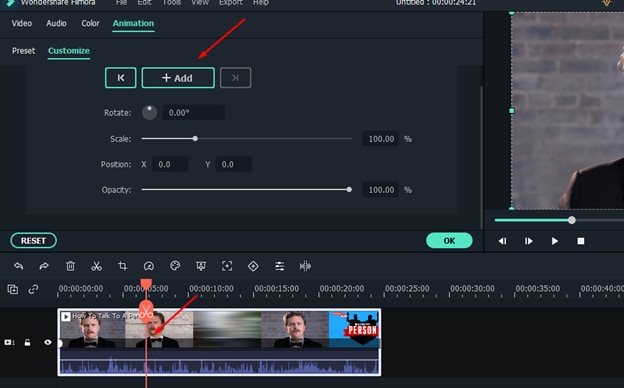
Step5: Now go to the preview window and enlarge the window frame by dragging it from the corners. Once it is enlarged, make adjustments so that your focus object is in the center. Then click Ok once all adjustments are made.
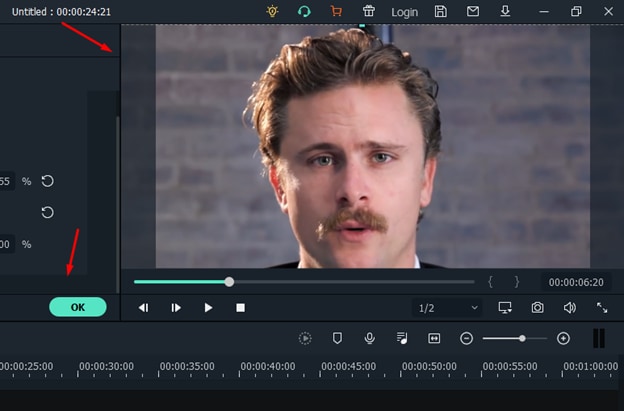
Step 6: Now play the video, and you will see that the zoom-in effect has been applied to the video, and you have easily faked the camera movements.
Method 2: Using Auto-Reframe
The second method that you can use to fake camera movements in Filmora is through the auto-reframe option. If you want to use this option in Filmora, you have to make sure that you have downloaded or updated the latest version of Filmora because this option has been recently introduced in the recent update. Now follow the steps given below one by one.
Step1: The first step is the same. You have to import the video to Filmora, in which you want to fake camera movements.
Step2: Once the video has been imported to the media library, right-click on the video file from the library, and from the menu, you need to select the auto-reframe option.

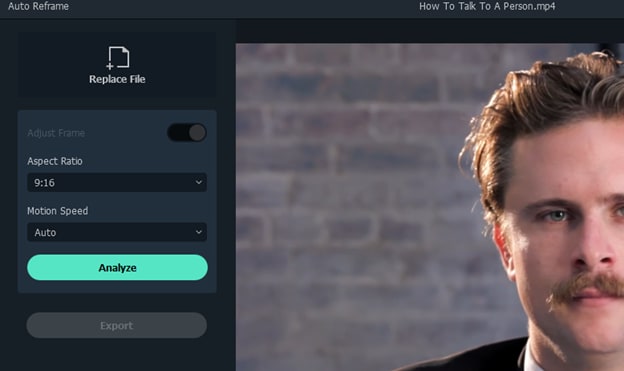
Step 3: Now, a new window will appear on your screen. It would help if you kept in mind that you need to change the aspect ratio when using the auto reframe. For example, if the original aspect ratio was 16:9, you have to select a different aspect ratio for the auto-reframe option to work. Suppose we are choosing 9:16 here, so select the desired aspect ratio and click on the analyze button.
Step 4: Once you click the analyze button, it will take some time until the processing is completed. Once the processing is done, play the video, and you will see how easily you have faked camera movements.
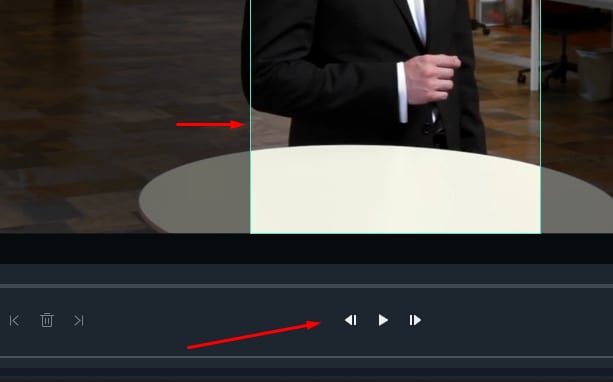
Step 5: Since this feature is considerably new, it may miss the frame sometimes, so what you can do here is, you can pause the video and adjust the structure manually using your cursor.
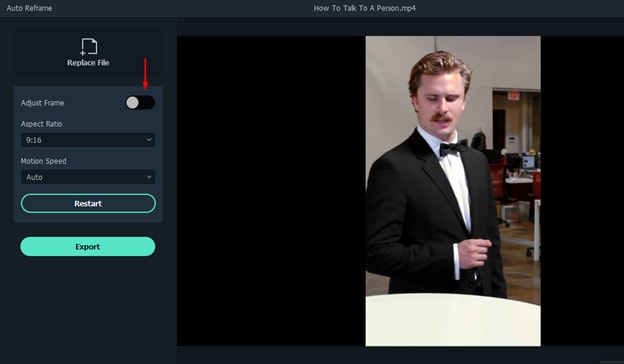
Step 6: If you want to see how the actual outcome of the video will look like, you can uncheck the adjust frame option. Once this option is unchecked, you will be able to view how your video will finally look like when it is saved.
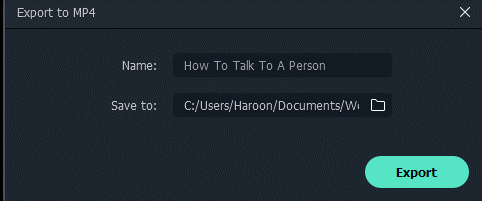
Step7: Once you are done with all the adjustments, click on the export button, and a new window will appear on your screen. Please enter the name you want to keep for the new video and select the location to export it.
Once the video is exported successfully, you can use it anywhere and share it with your friends across different social media platforms.
Conclusion:
These two methods you can use to fake Camera movements using Filmora X. Filmora have a quite simple and intuitive interface. This means that if you don't have any prior video editing experience, you can still edit your videos. It is suitable for both beginners and experienced video editors.


Learn how to create a loop animation with the best tools available now. Know how each one compares with the others and which one to choose.
by Liza Brown Jul 17, 2026 15:33 PM
Learn how to add keyframes in Alight Motion for smooth animations. Master easing, the graph editor, and pro tips to level up your mobile edits in 2026.
by Liza Brown Jul 17, 2026 15:31 PM
Master aperture vs shutter speed vs ISO and how to balance them together to nail the perfect exposure in any lighting, and use Filmora to polish the shots that don't go as planned.
by Liza Brown Jul 17, 2026 15:34 PM
Liza Brown
chief Editor
