
 100% Security Verified | No Subscription Required | No Malware


 ChatGPT
 Perplexity
 Gemini
 Claude
 Grok
Grok
Photoshop Liquify remains one of the most powerful and versatile features in Adobe Photoshop, even in 2025. Whether you're retouching portraits, reshaping elements of a design, or creating surreal digital art, Liquify gives you precise control over pixel manipulation without damaging the original image quality. From subtle facial adjustments to bold visual distortions, this tool opens up a world of creative possibilities.
In this ultimate guide, you’ll discover everything you need to know about using the Liquify tool Photoshop offers. We’ll break down how it works and share expert tips to help you achieve professional-level edits with confidence. Ready? Let’s begin!

In this article
Part 1: How Does the Photoshop Liquify Filter Work
The Adobe Photoshop Liquify tool is like a digital magic wand that helps you accentuate, smooth, reshape, or distort your picture while retaining its integrity and quality with controlled moves and precision. It does not take a truckload of knowledge and experience to get the hang of how this tool works and also learn cool tricks to achieve your optimum image without it looking fake or overly edited, as you will learn here.
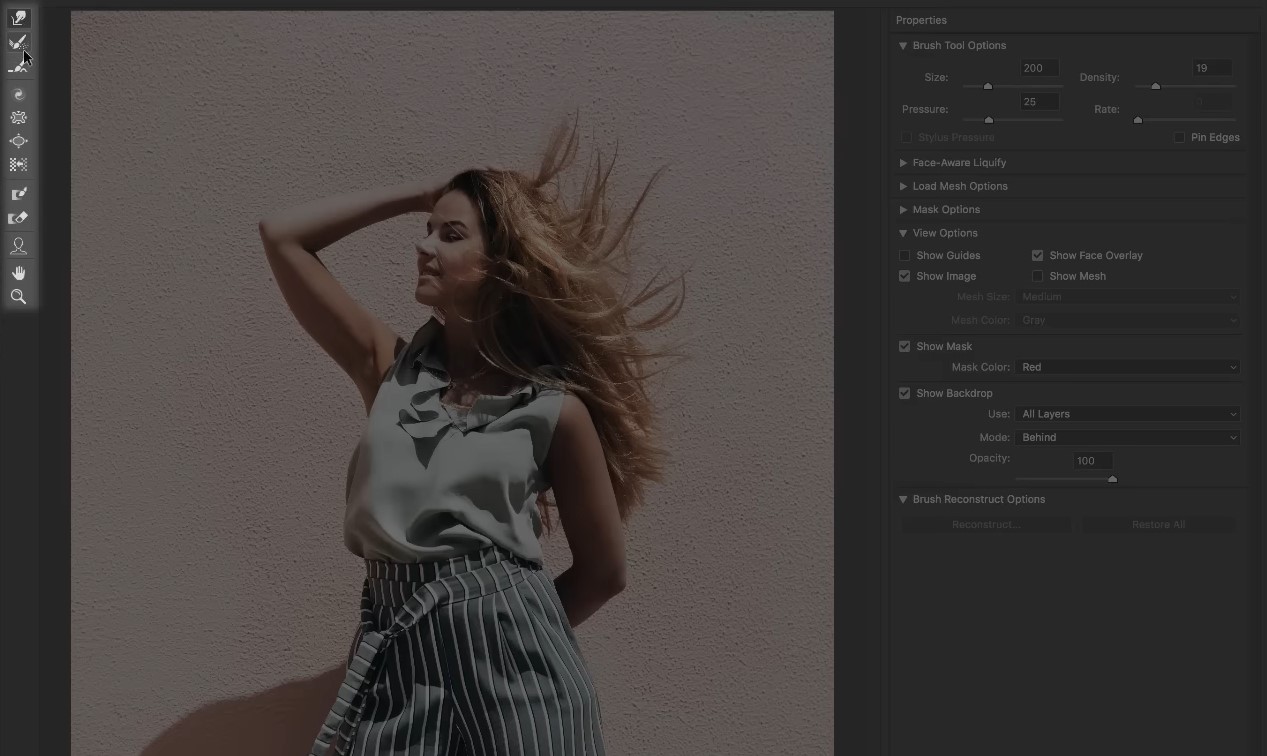
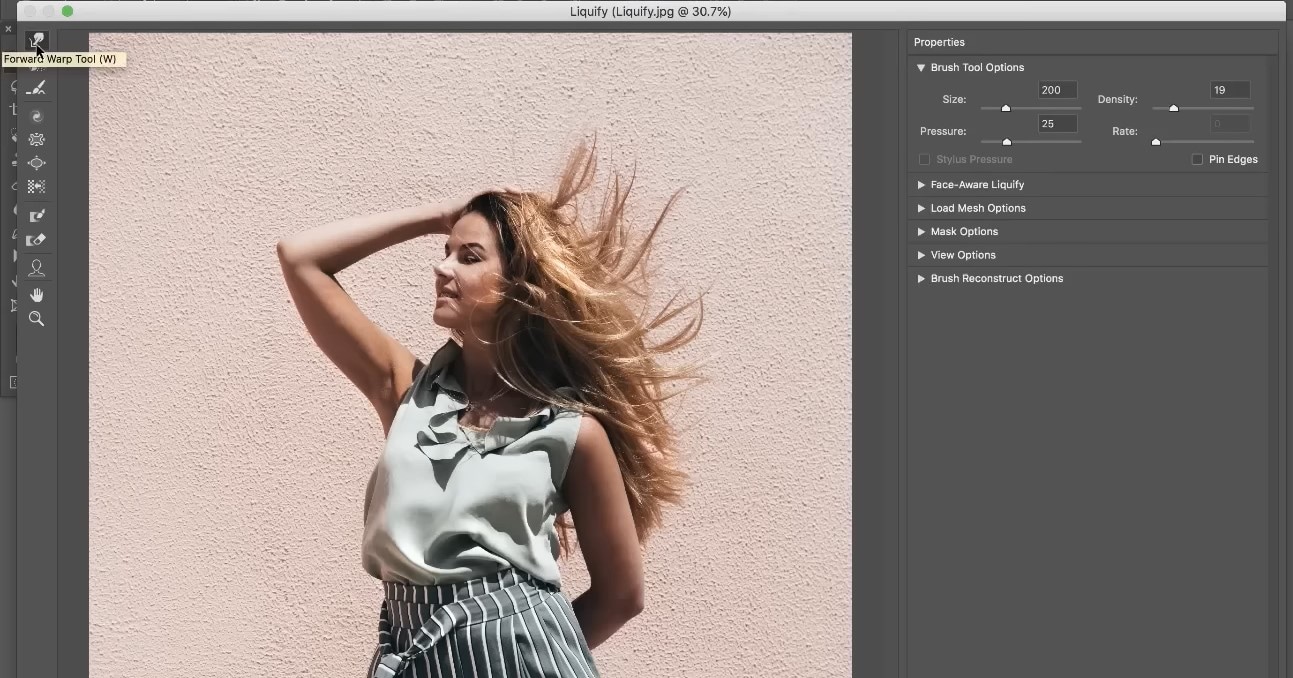
The Liquify effect in Photoshop is mostly used to retouch personal and fashion images from a photoshoot or video shoot, as well as in creative editing (e.g., for cartoon effects). Once you open the Liquify panel, you’ll find a set of sub-tools on the left-hand toolbar, each designed for specific types of manipulation. Here's a breakdown of the core sub-tools you’ll use most:
- Warp Tool (W): This tool lets you click and drag any part of the image to move pixels around freely. It is ideal for facial adjustments, clothing fixes, and creative warping.
- Reconstruct Tool (R): The Reconstruct tool gradually restores parts of the image to their original state. It’s great for fine-tuning and correcting over-edited spots.
- Smooth Tool (E): This tool softens any harsh transitions or jagged distortions caused by other Liquify tools. It helps refine your edits for a more natural, realistic finish.
- Twirl Clockwise Tool (C): Want to add a swirl effect? This tool rotates pixels in a circular motion, clockwise by default. It’s useful for creative effects like twisting hair, fabric, or abstract elements.
- Pucker Tool (S): This tool pulls pixels inward toward the center of the brush. It’s perfect for slimming features or creating tension in textures.
Part 2: How to Use the Photoshop Liquify Filter Tool
Want to reshape, retouch, or add bold effects to your images with precision? The filter Liquify in Photoshop is your secret weapon. Whether you're enhancing portraits or experimenting with creative edits, this tool can take your work to the next level. Follow the steps below to use this filter:
Step 1: Open Your Image in Photoshop
- Start by downloading and launching Adobe Photoshop.
- Open the image you want to edit.
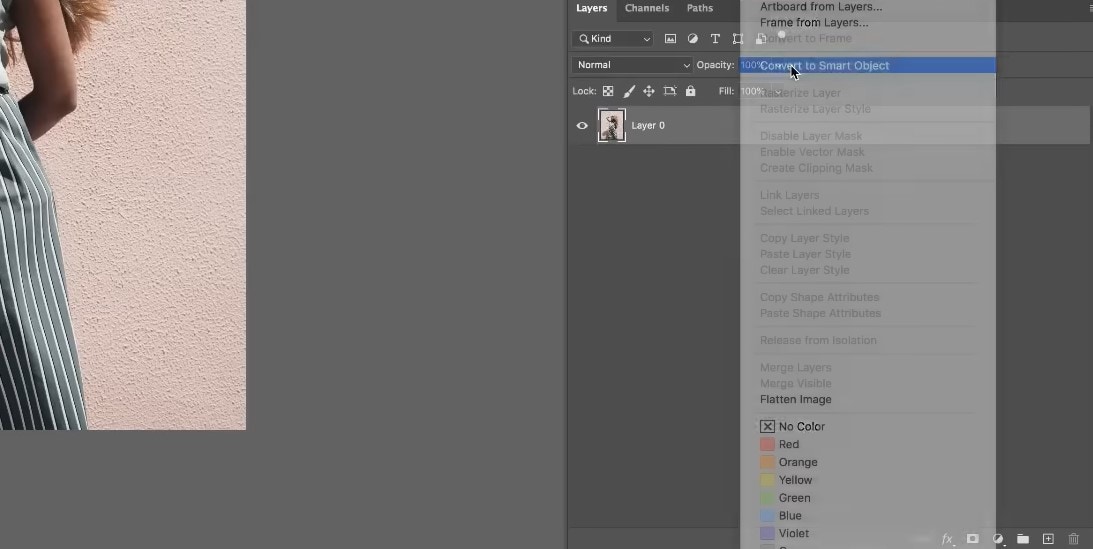
- For non-destructive editing, duplicate the layer or right-click and selectConvert to Smart Object before applying the filter.
Step 2: Access the Liquify Filter
- Go to the top menu and click Filter> Liquify.
- This opens a new workspace with the Liquify tools on the left-hand side.
Step 3: Choose a Sub-Tool
- For general reshaping, start with the Warp
- For subtle corrections or stylized effects, use the Twirl, Pucker, or Smooth tools depending on your needs.
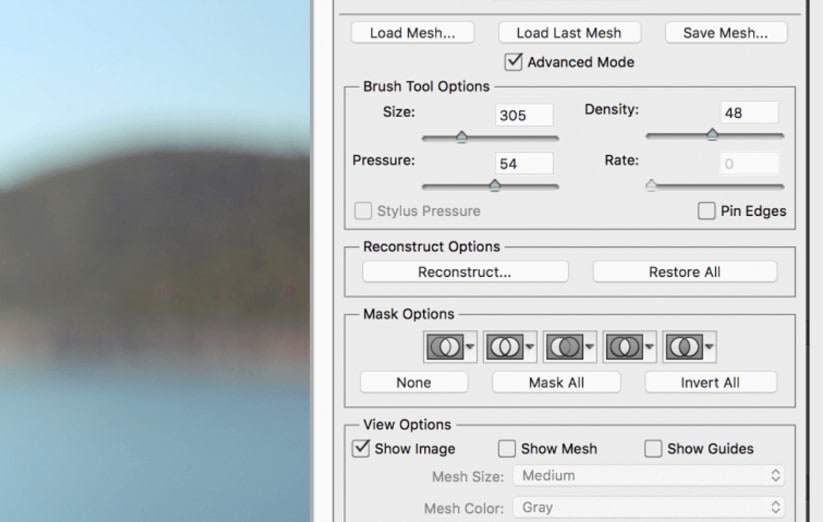
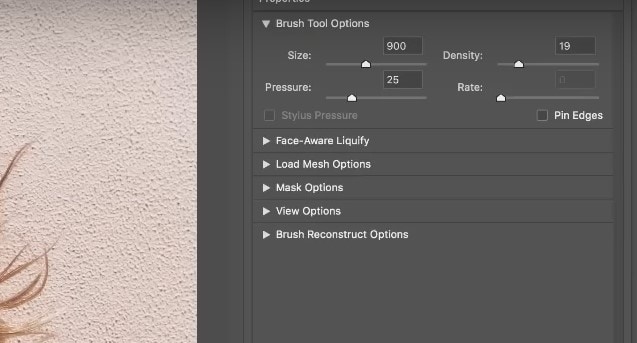
Step 4: Adjust Brush Settings
- On the right side of the panel, you can control the Brush Size, Density, Pressure, and Rate.
- Use the glider to increase or reduce brush size.
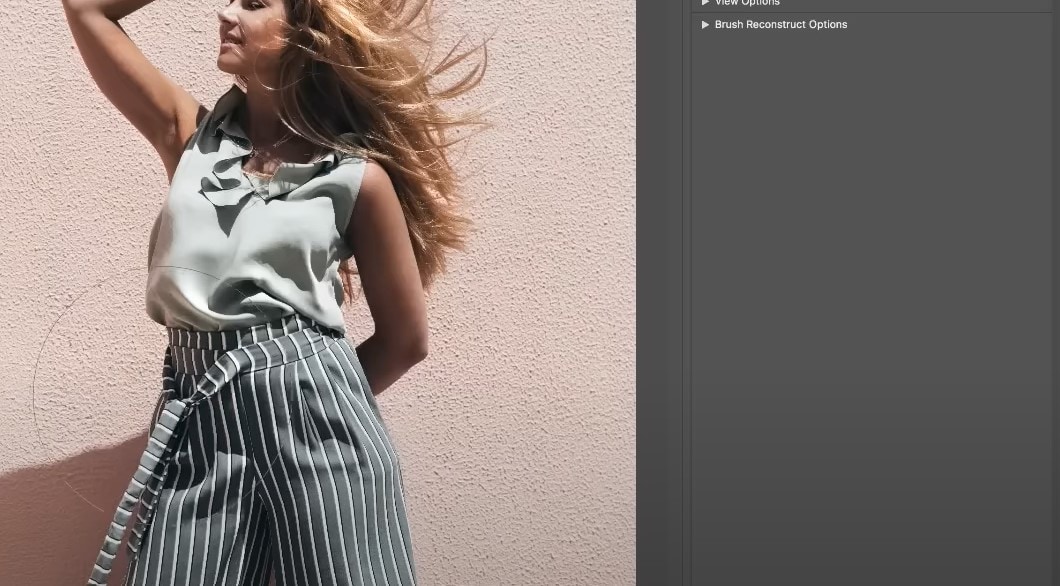
Step 5: Begin Editing
- Click and drag your mouse over the area you want to manipulate.
- If you make a mistake, use the Reconstruct tool to revert specific areas without starting over.
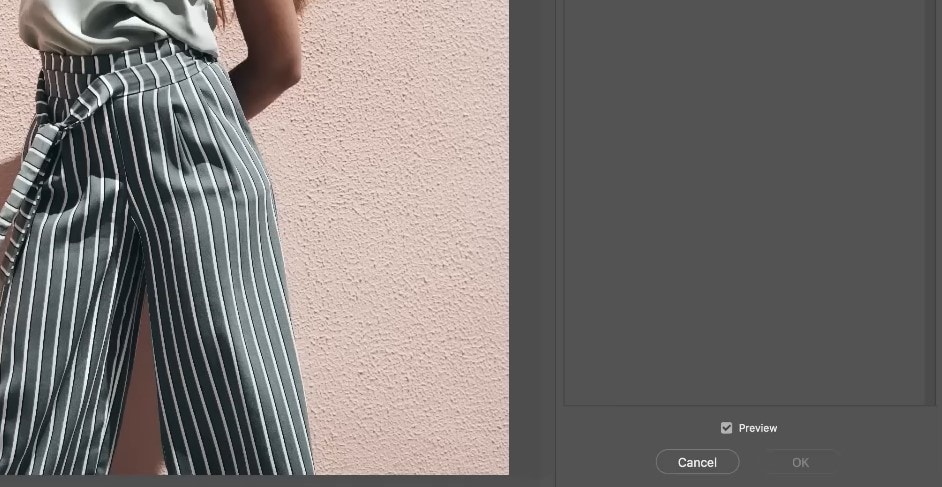
Step 6: Preview and export
- Check the Preview box on the right panel to toggle between the original and edited image.
- Tap OK to apply the Liquify filter.
- If you're working with a Smart Object, you can revisit and tweak your edits at any time.
Bonus: Achieve the Liquify Effect Easily Outside Adobe Photoshop
While Photoshop’s Liquify tool is powerful and precise, not everyone has access to Adobe’s software, especially since it comes with a subscription cost that may not suit every budget. Fortunately, there are user-friendly alternatives that can replicate similar effects without the learning curve or expense.
One of the best options is Wondershare Filmora, a creative video editor that offers flexible visual effects, including tools for warping and reshaping. So, if you’re looking to access the Liquify effect in Photoshop but can’t access the app, this is the best tool for you.

Creating the perfect liquify effect with Filmora is easy. Just download the official software for desktop and follow the steps below:
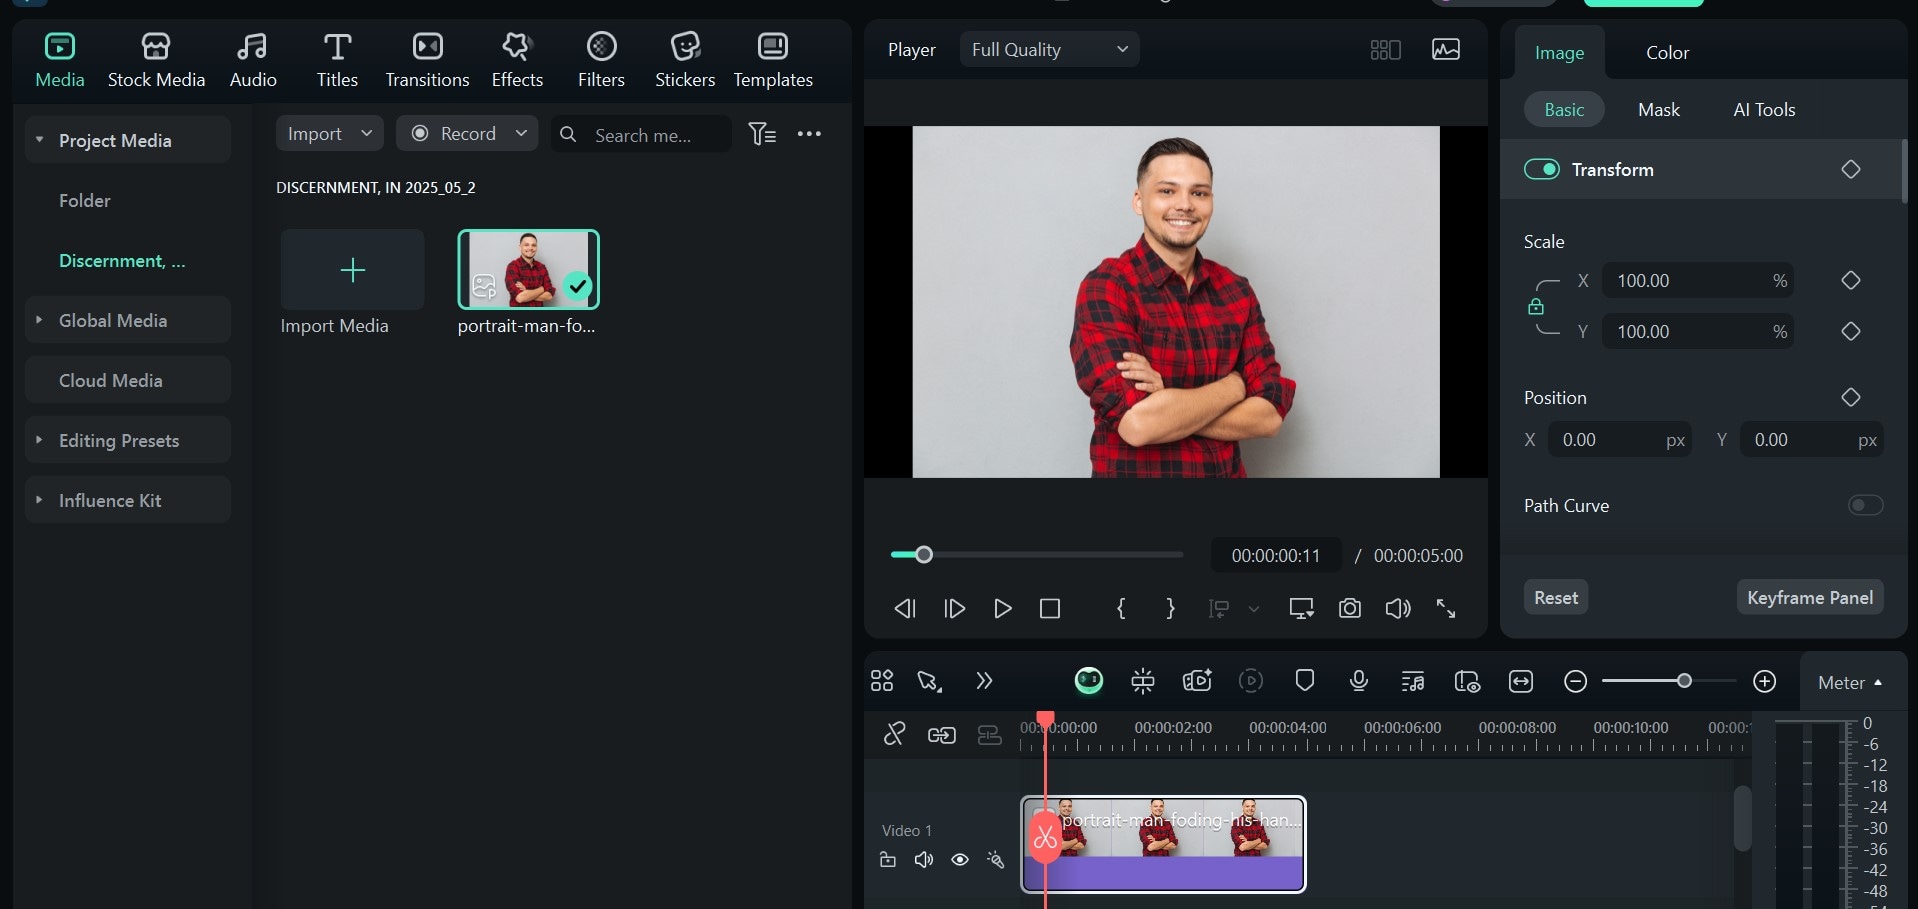
Step 1: Create a new project
- Launch Filmora and tap New Project.
- Import your media to Filmora.
- Drag and drop it on the timeline.
 secure download

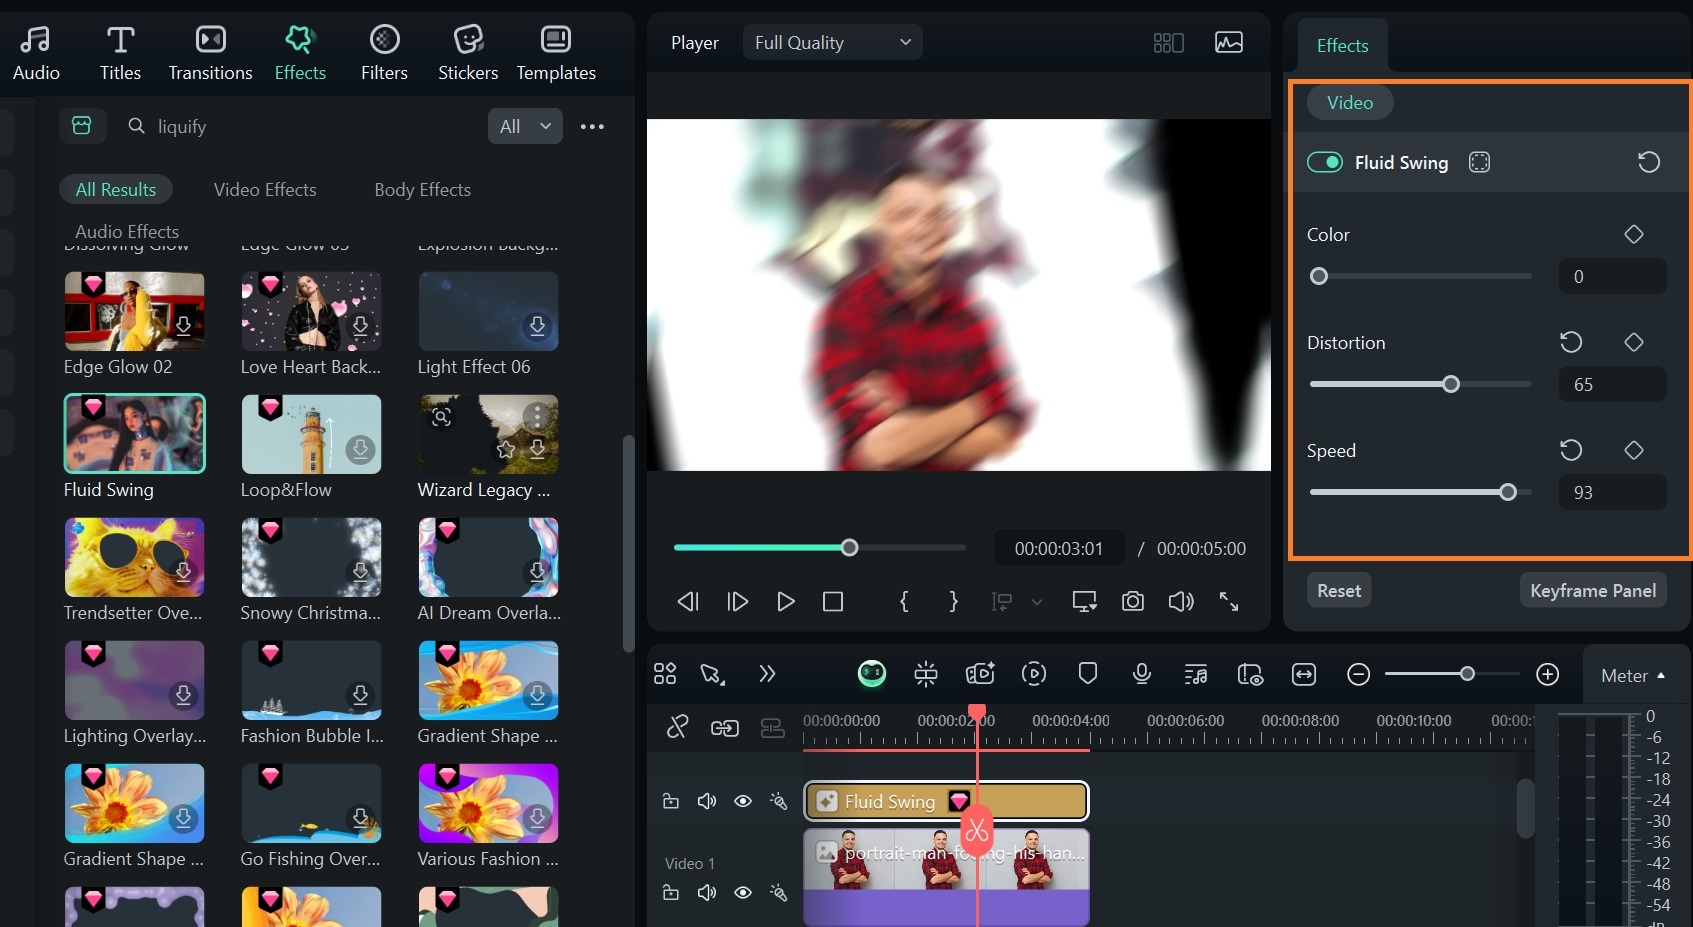
Step 2: Apply effects
- Go to the Effects
- Search for Liquify.
- You can select effects like Fluid Swingand Dissolve Glow from the library.
- You can also search Warp for whirly effects.
- Download the one you want and drag and drop it on the timeline to apply it to your image.
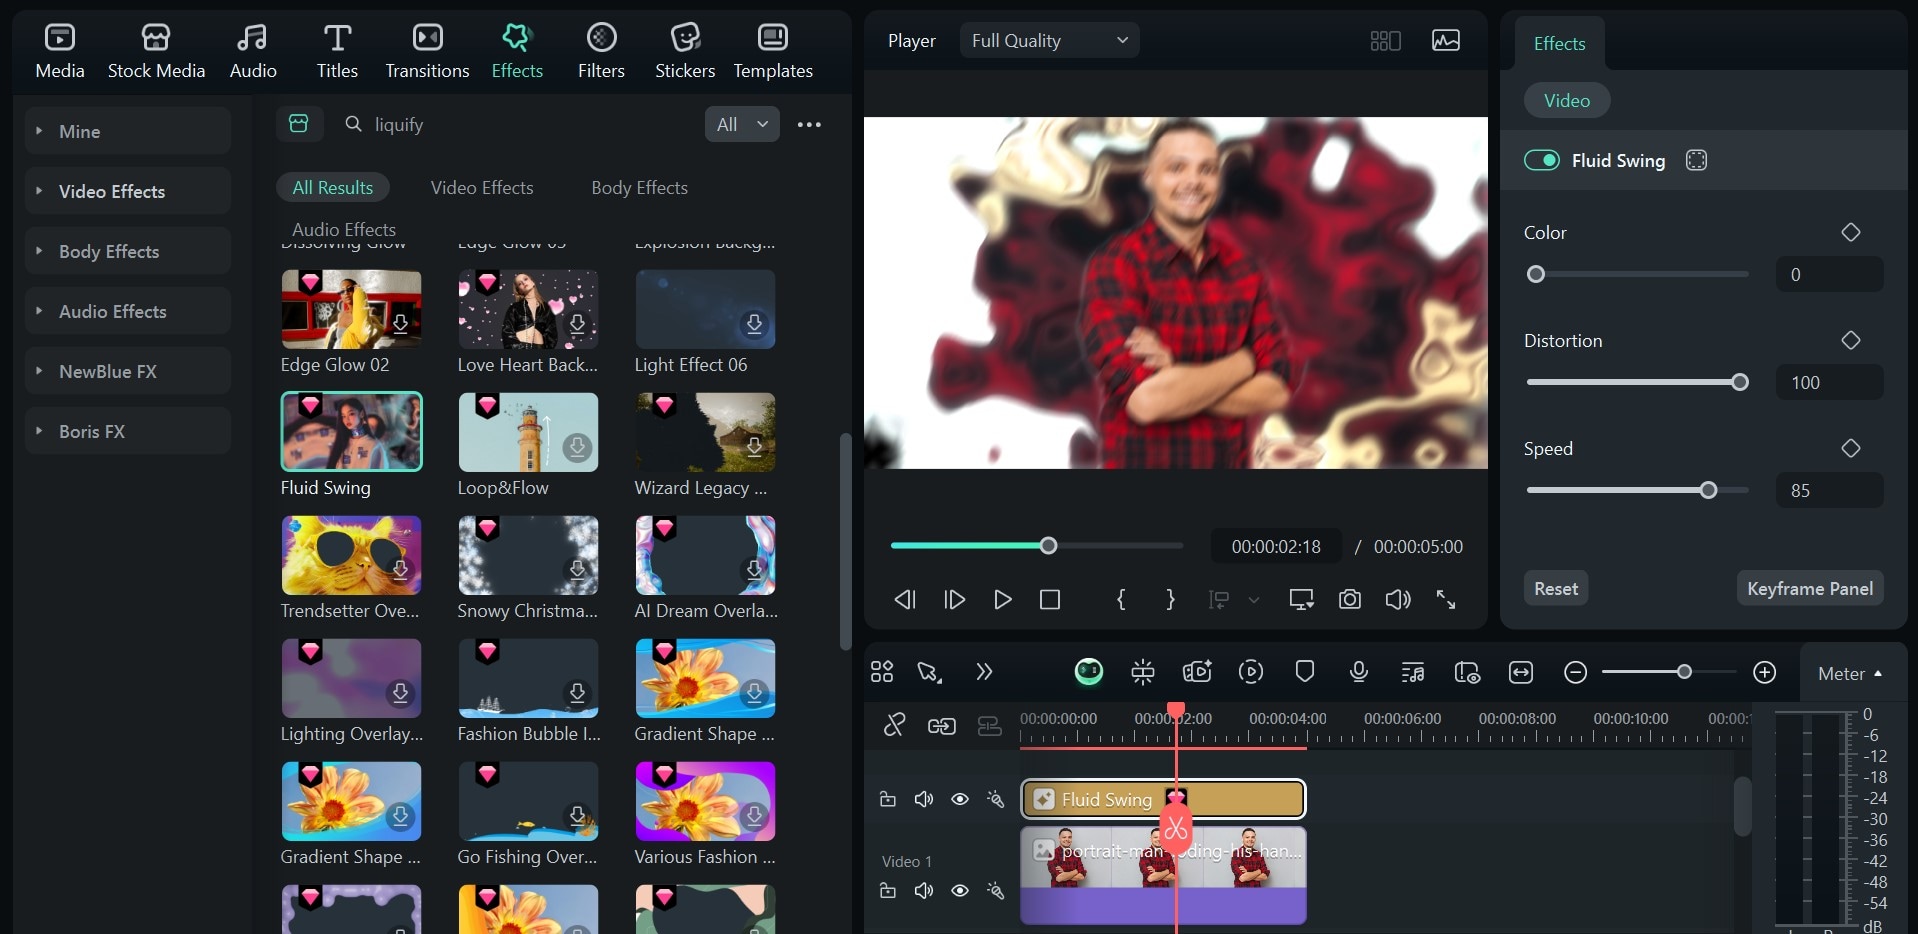
Step 3: Adjust the effect
- Tap the Preview
- From the left-hand panel that opens, adjust the position of the effect along the X and Y axes.
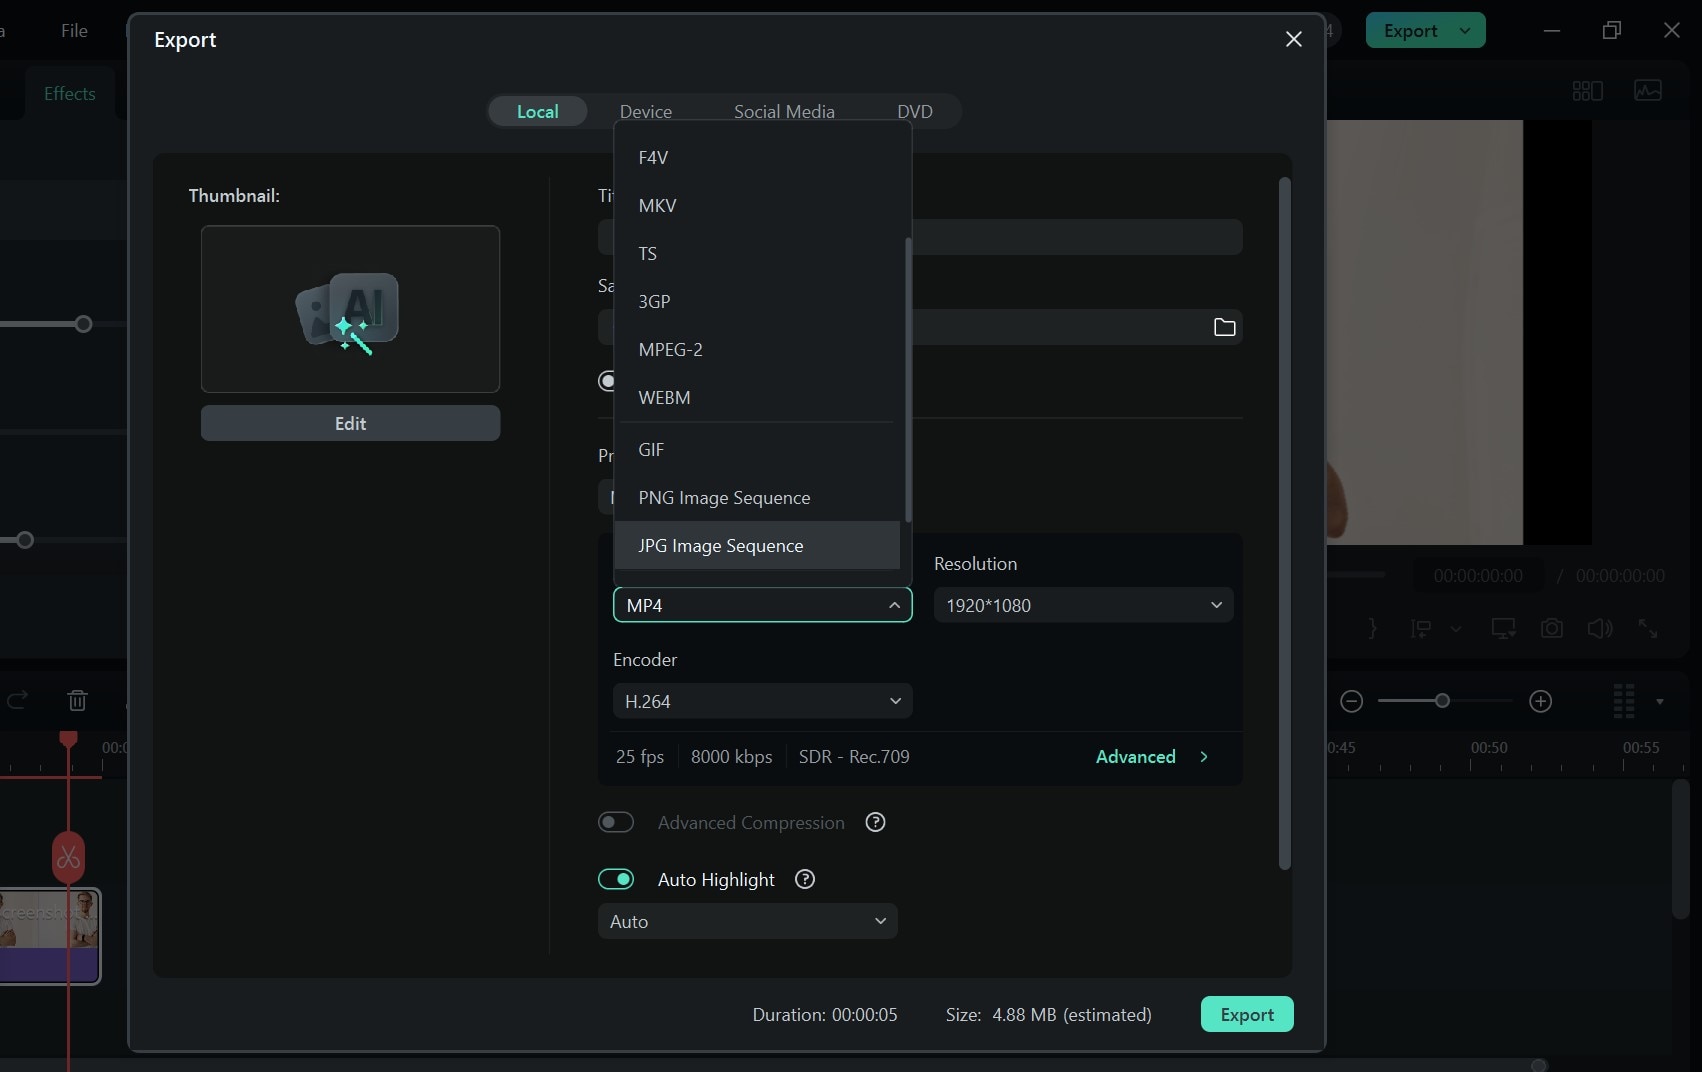
Step 4: Export the finished product
- From the top right, click Export.
- Set the resolution you want.
- Set the format to JPG or PNG Image Sequence for images and MP4for videos to get high quality.
- Tap on Export.
Here’s a before-and-after sample:

Conclusion
The Photoshop Liquify tool remains a top choice for detailed image manipulation, offering precise control for everything from subtle retouching to bold, artistic transformations. However, this tool can be inaccessible due to its high technicality and subscription requirements.
Luckily, Filmora offers an accessible option with effects like Fluid Swing, Whirl, and Dissolve Glow, to recreate liquify-style visuals in just a few clicks. Plus, it doesn’t require a steep learning curve. Simply select the effect and apply it to get professional-grade edits with less stress. Whether you’re a beginner or just need a quick, creative solution, Filmora makes advanced edits simple and fun. So why wait? Download Wondershare Filmora today to start your editing journey!
secure download
