
 100% Security Verified | No Subscription Required | No Malware


 ChatGPT
 Perplexity
 Gemini
 Claude
 Grok
Grok

In the world of making movies and videos, there are millions of ways to transition between scenes. A standard way is the fast cut, where you simply cut to a new scene instantly. This works most of the time, but sometimes, you need a slow transition that will ease the viewer into the next scene, and that’s exactly where the dissolve transition effect comes into play.
Let’s discuss the dissolve transition and learn as much as we can about it.
In this article
How Creators Use the Dissolve Effect

The dissolve transition effect is defined as a transition between two scenes where the former scene fades away while the new scene fades in. This all happens simultaneously, giving off a dissolve effect. It seems like the last scene dissolved into the next one. It is a very calm and collected way to transition between adjacent scenes.
There are many use cases for the dissolve effect, and it is really up to the video or movie director to make the creative choice. However, for now, we will give you a few examples.
Slow montages
A fast montage requires fast cuts, but if you are making a slow montage, you can use the dissolve effect to slowly transition between scenes. Accompanied by some heartful music, such montages can be really emotional.
Showing the passage of time
You can use the dissolve transition to show how time has passed. For example, imagine a portrait shot of a middle-aged man dissolving into a portrait shot of that same man twenty years later. It is a great way to convey this emotion.
Documentaries
People do not need action scenes when they watch documentaries unless they are about something that has a lot of action. The dissolve transition effect is almost omnipresent in documentaries, and you will notice it next time you watch one.
OK! That’s enough theory for one text. Let’s get into the specifics.
Adding the Dissolve Transition in Premiere Pro
If you have never heard about Premiere Pro, one of the most popular products by a large company named Adobe, then you are probably very new in the video editing world. Every video editor who wants to make it in this business has tried this software. People use it for anything from YouTube video editing to editing footage for Hollywood blockbusters.
One drawback is that Premiere Pro might be too difficult for newcomers. Luckily, sticking to the topic of the article, adding the dissolve transition in Premiere Pro is not that challenging. We will guide you through the process.
Before we begin, make sure that Premiere Pro is installed on your device. Let’s assume that you have opened the program, added two videos to the timeline, and now you want to add a transition between them.
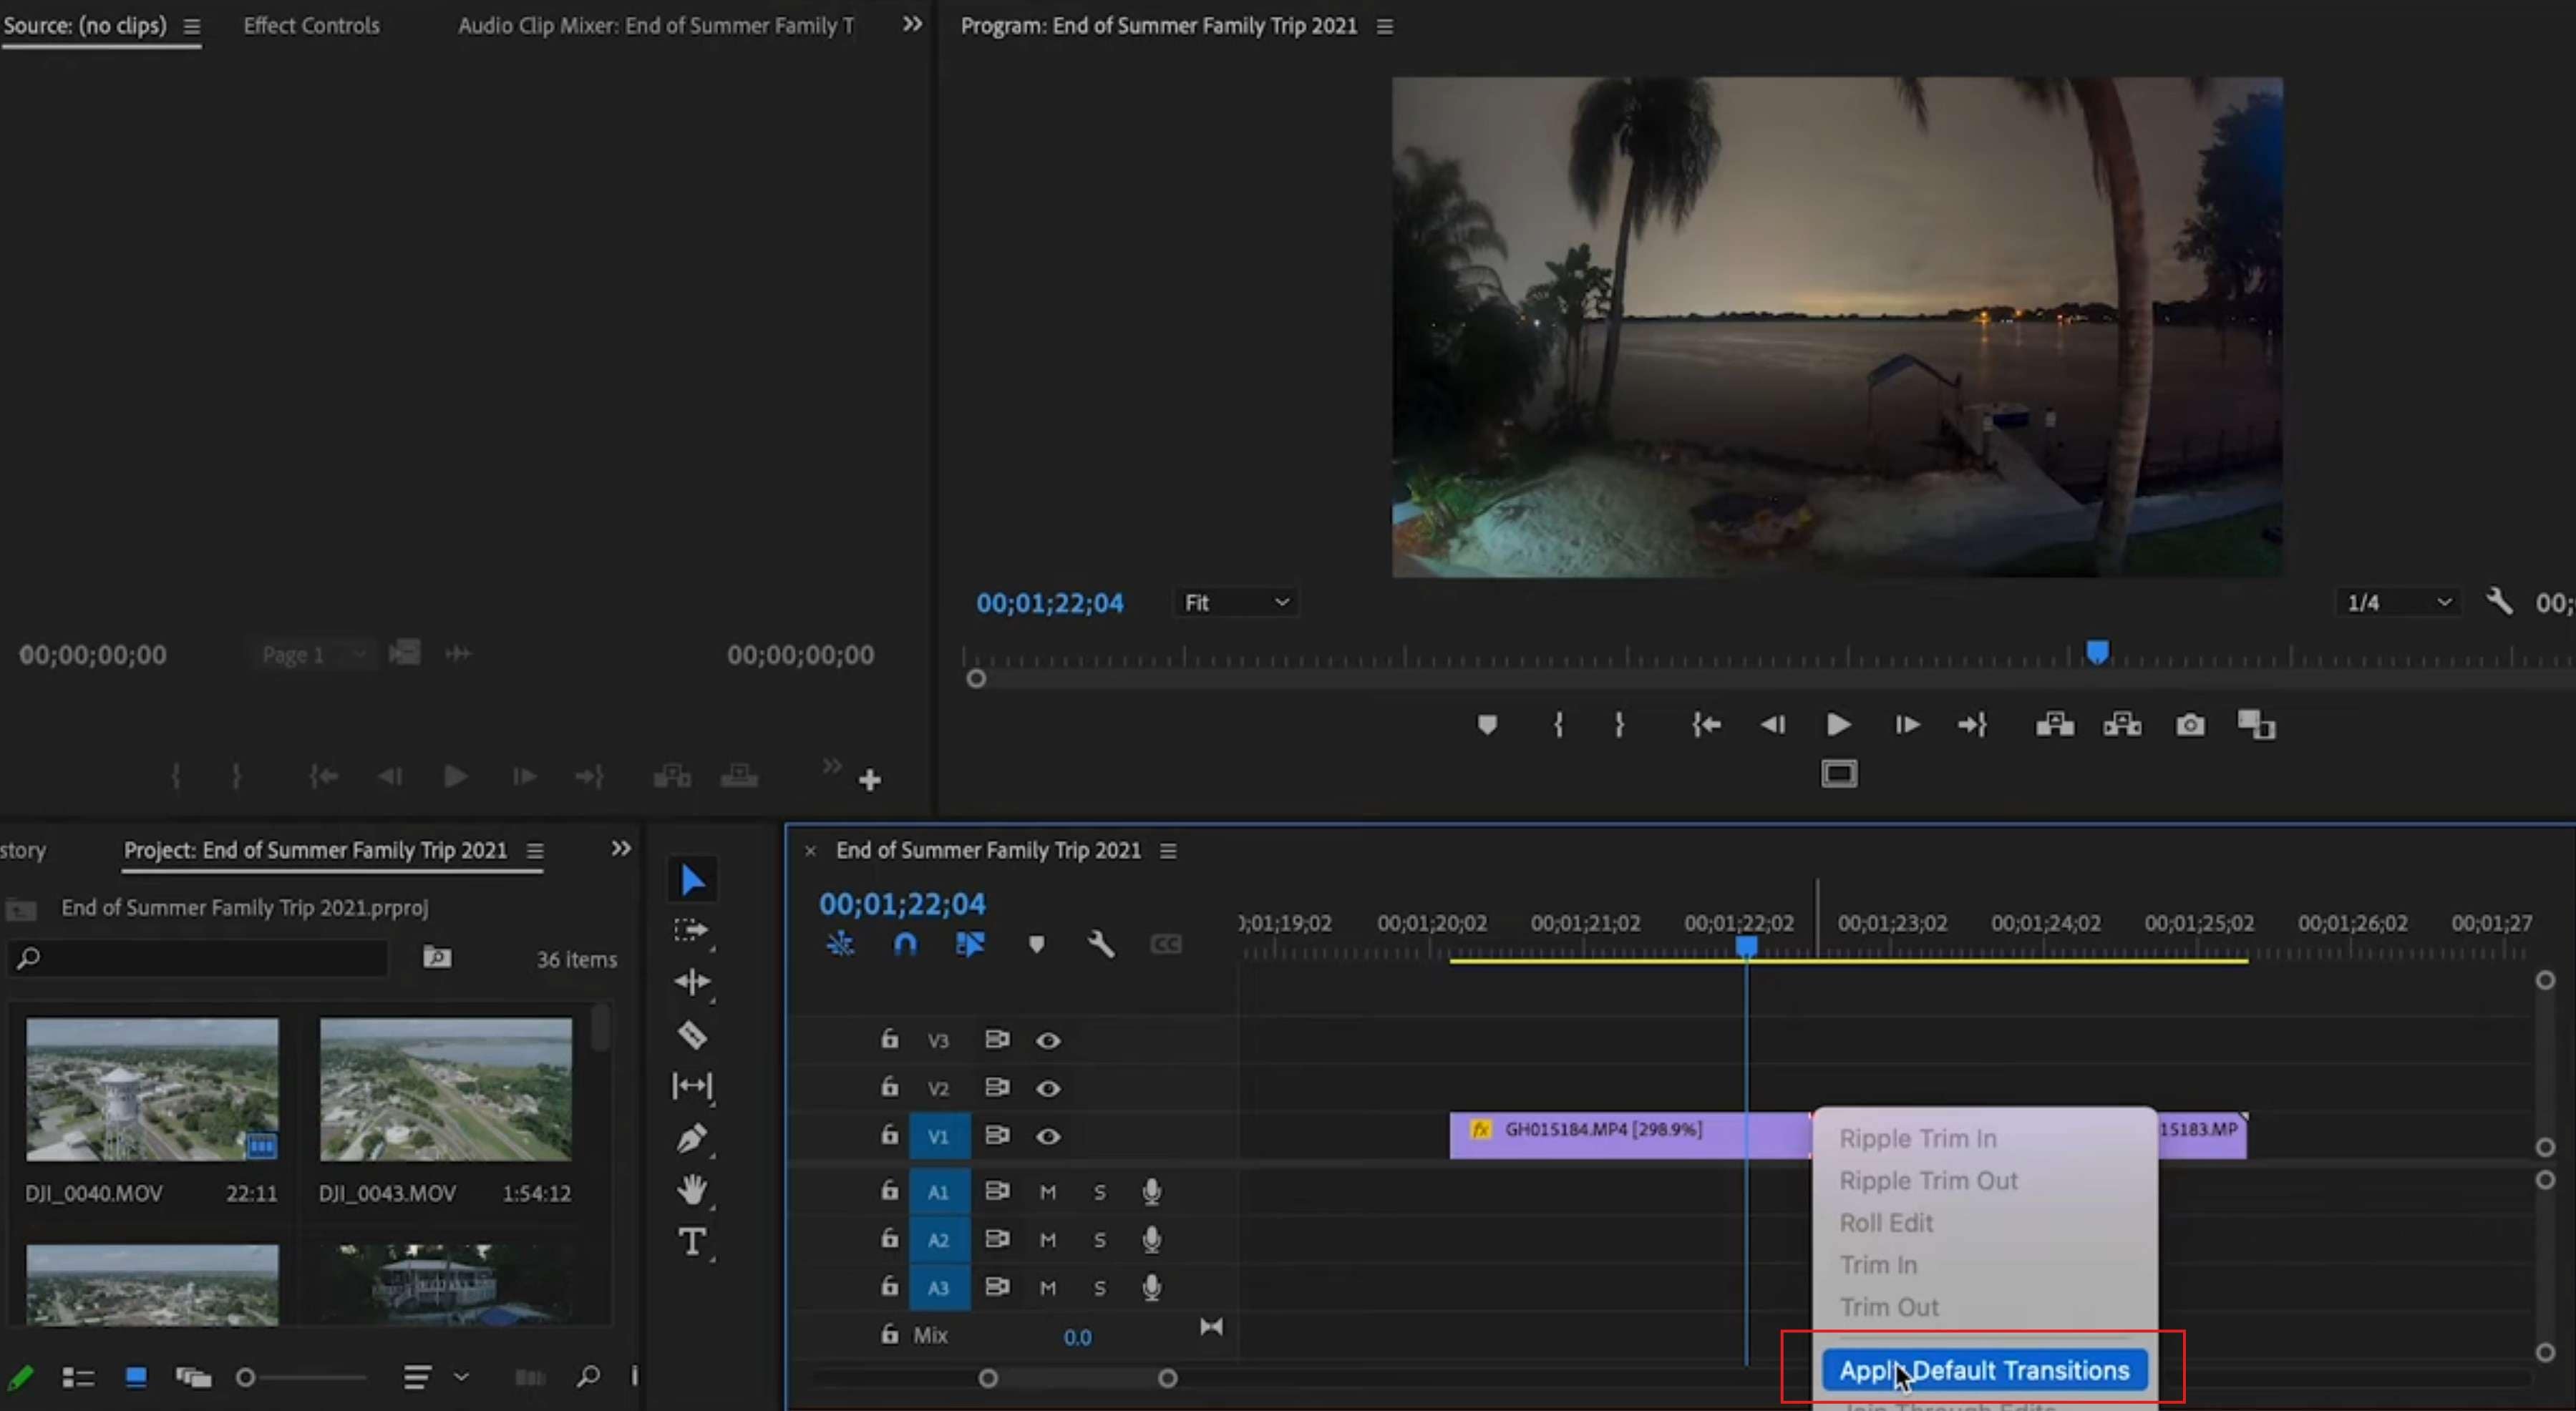
Step 1: Right-click between the two videos in the timeline, and then click on Apply Default Transition.
Step 2: Double-click on the transition in the timeline to adjust its duration.
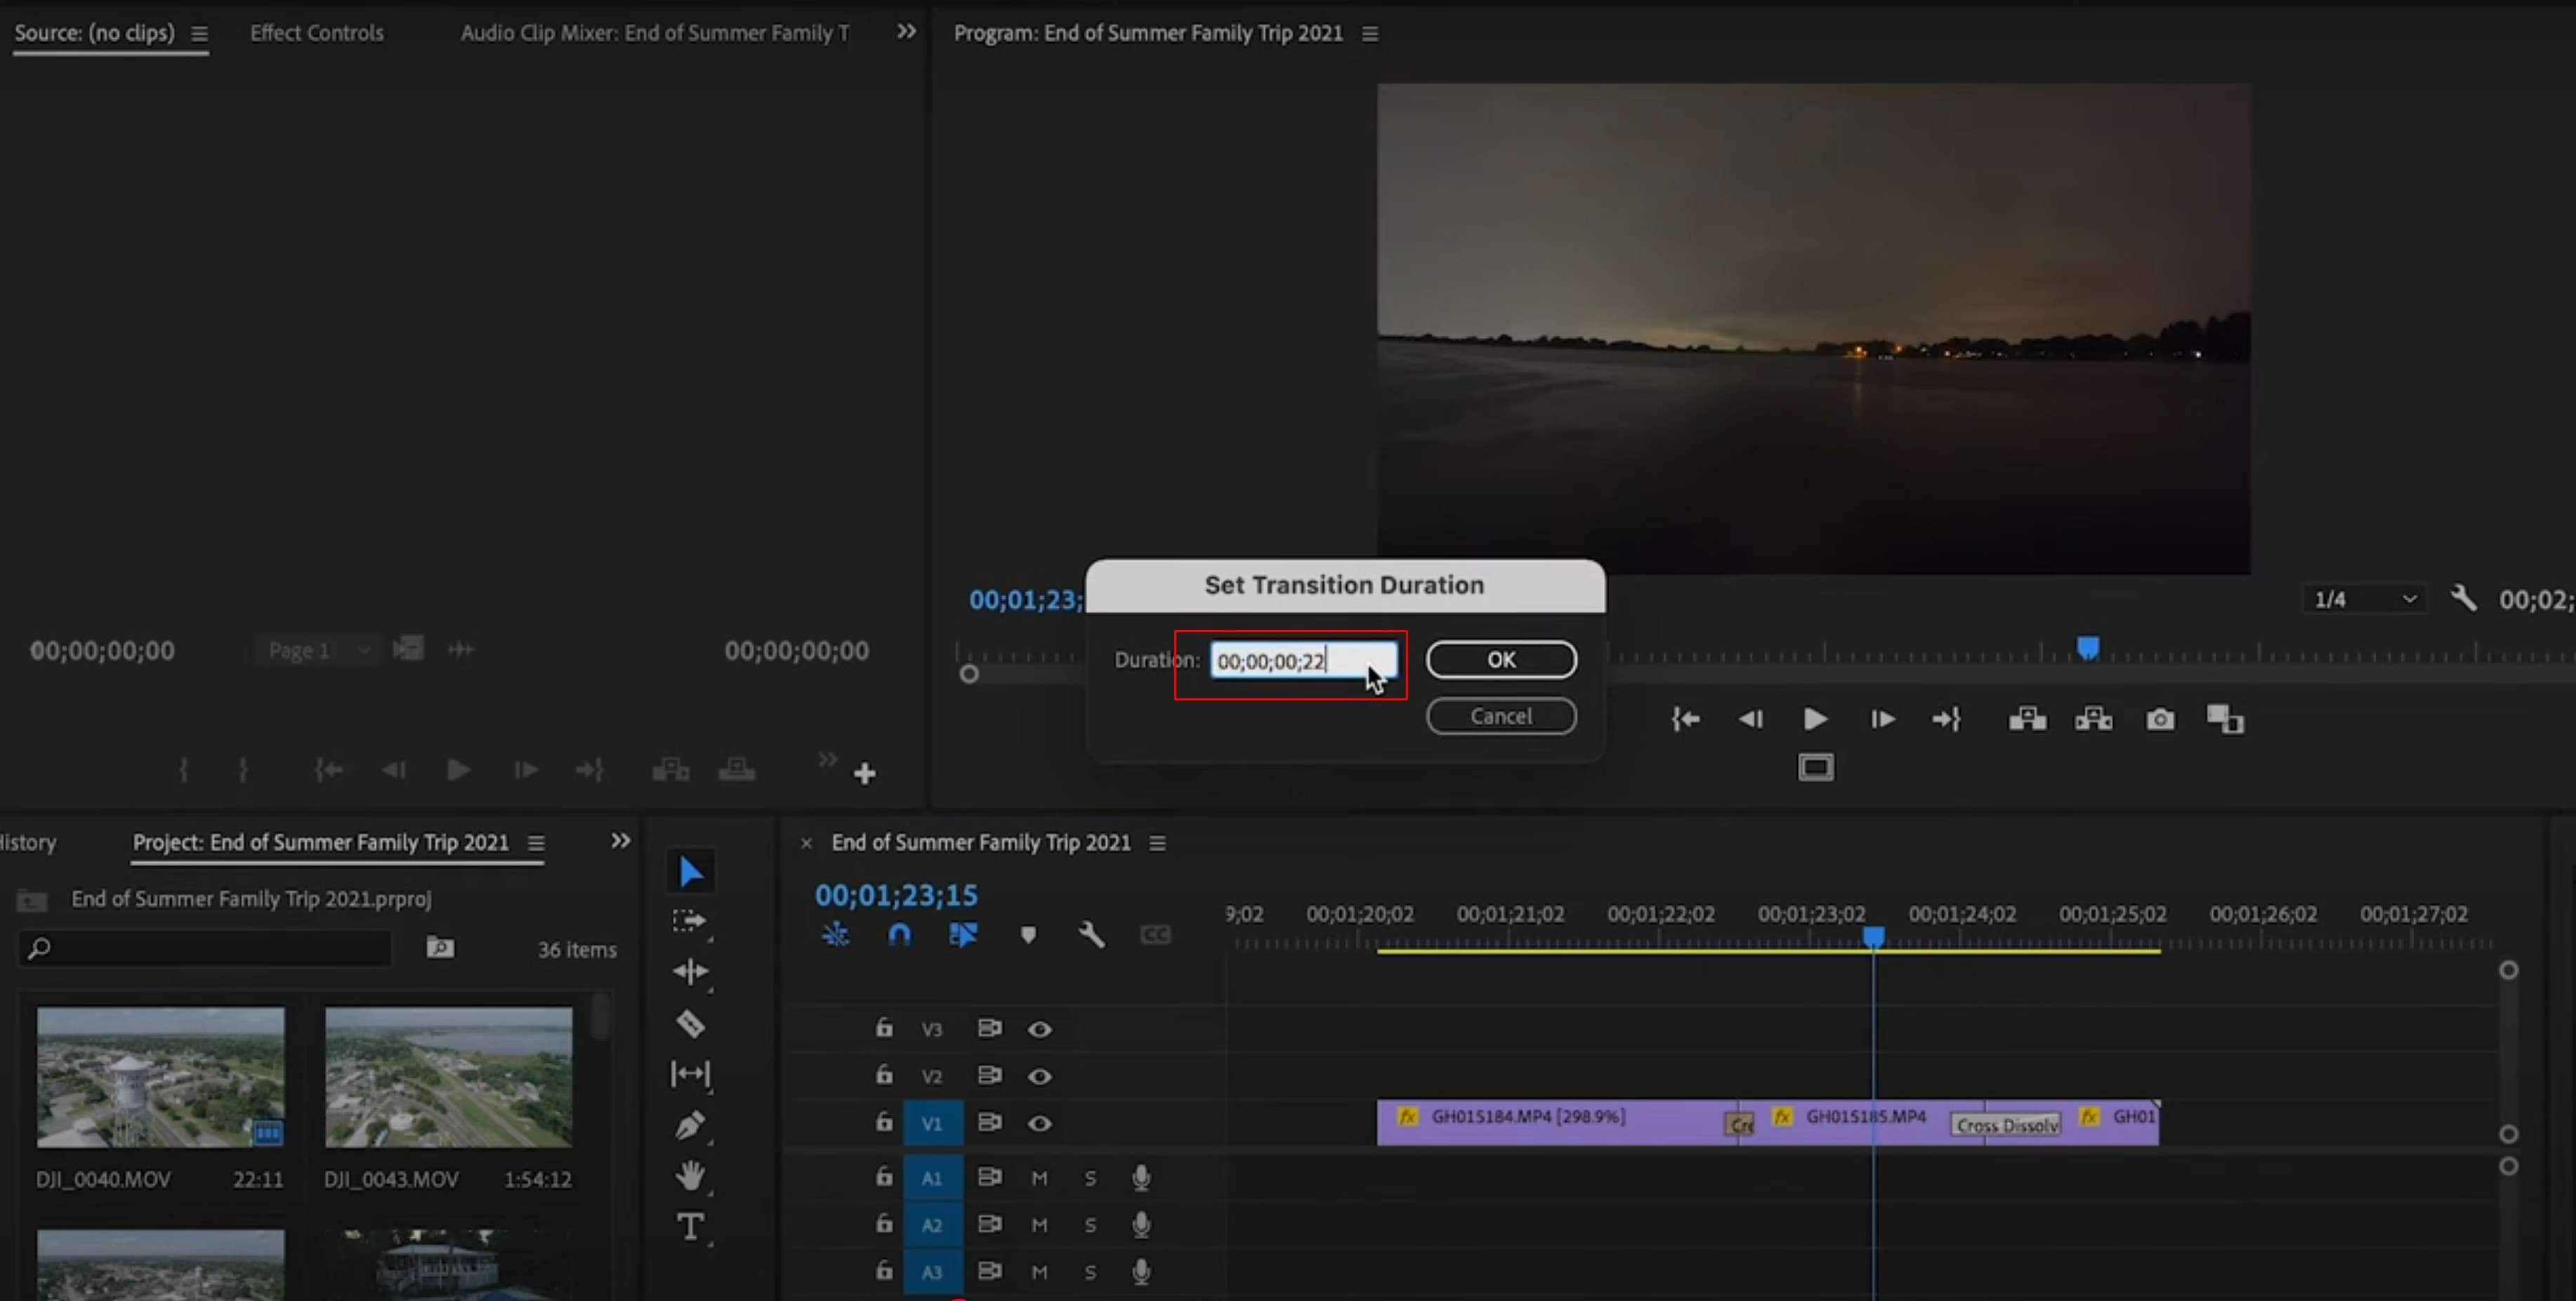
This should be it, and you should now know how to successfully add the Cross Dissolve transition between two videos.
That was easy! However, as we mentioned, if you want to continue developing your video editing skills in Premiere Pro, you might want to find a course and invest in your knowledge. On the other hand, if you want a solution that offers more or less the same functionalities as Premiere Pro but comes in a more intuitive package, then stick around.
How to Add the Dissolve Transition in Filmora

The team at Wondershare realized something. Many people want to edit videos, but they are stuck using unintuitive and complicated legacy software solutions intended only for professionals. That’s why they developed Filmora, a video editing powerhouse packed with AI features.
Filmora can do almost everything Premiere Pro can. You can manipulate videos, images, and audio, and you can add effects, transitions, animations, etc. The difference is the interface. We will showcase Filmora’s intuitive design by showing you how to apply the dissolve effect in Filmora.
At this point, you can download Filmora, install it on your device, open the program, create a new project, and add two videos to the timeline.
 secure download

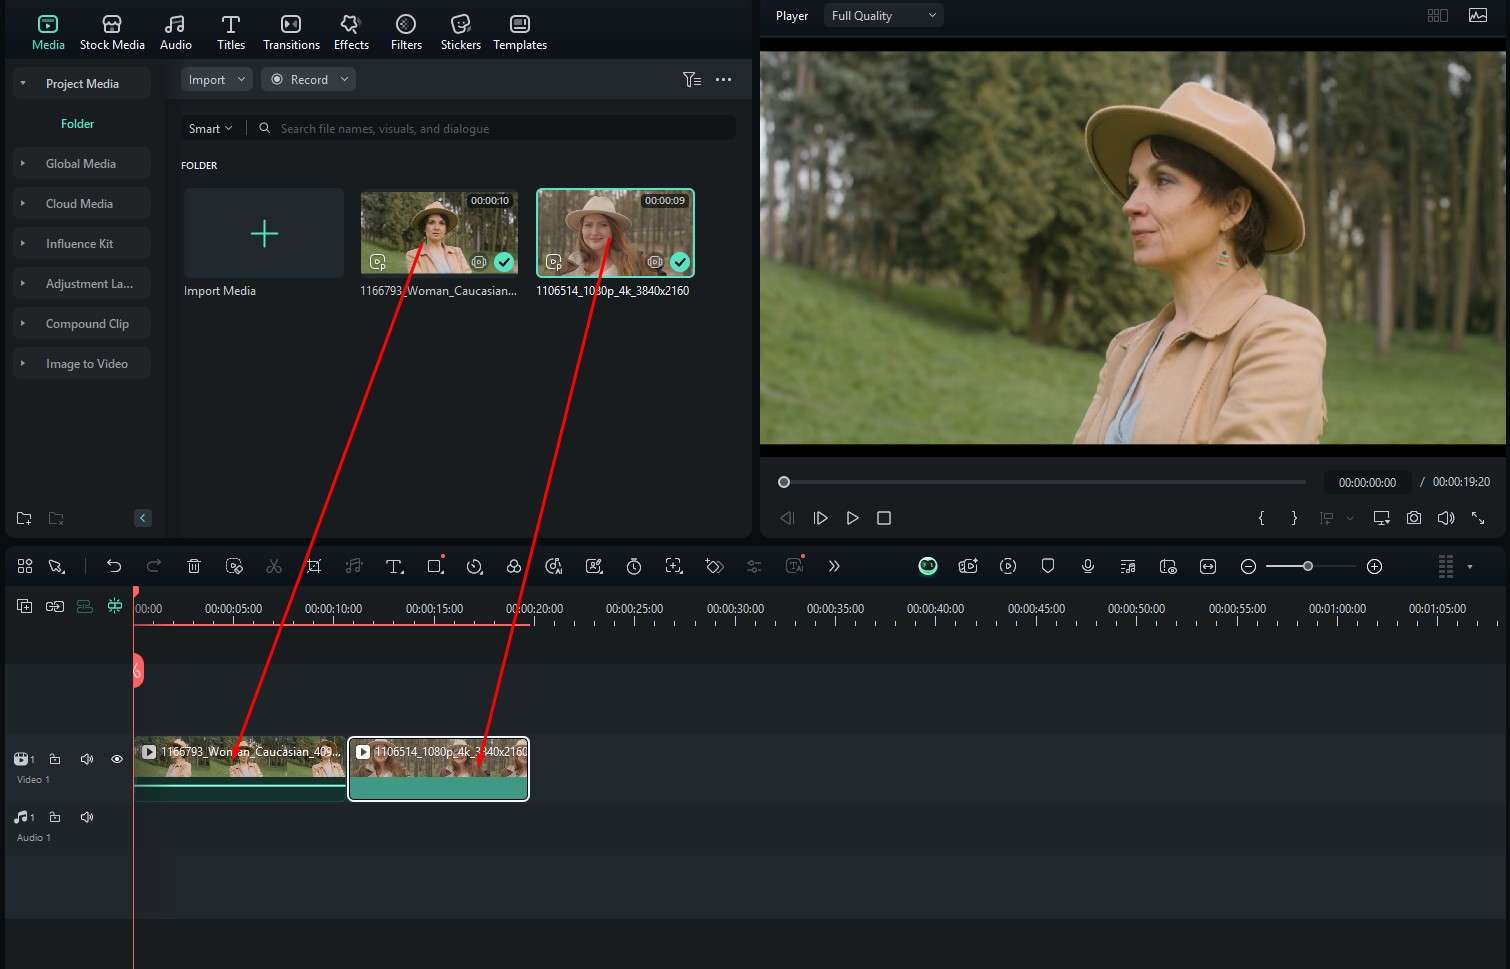
Step 1: Drag the videos to the timeline and place them in one channel, one after the other.
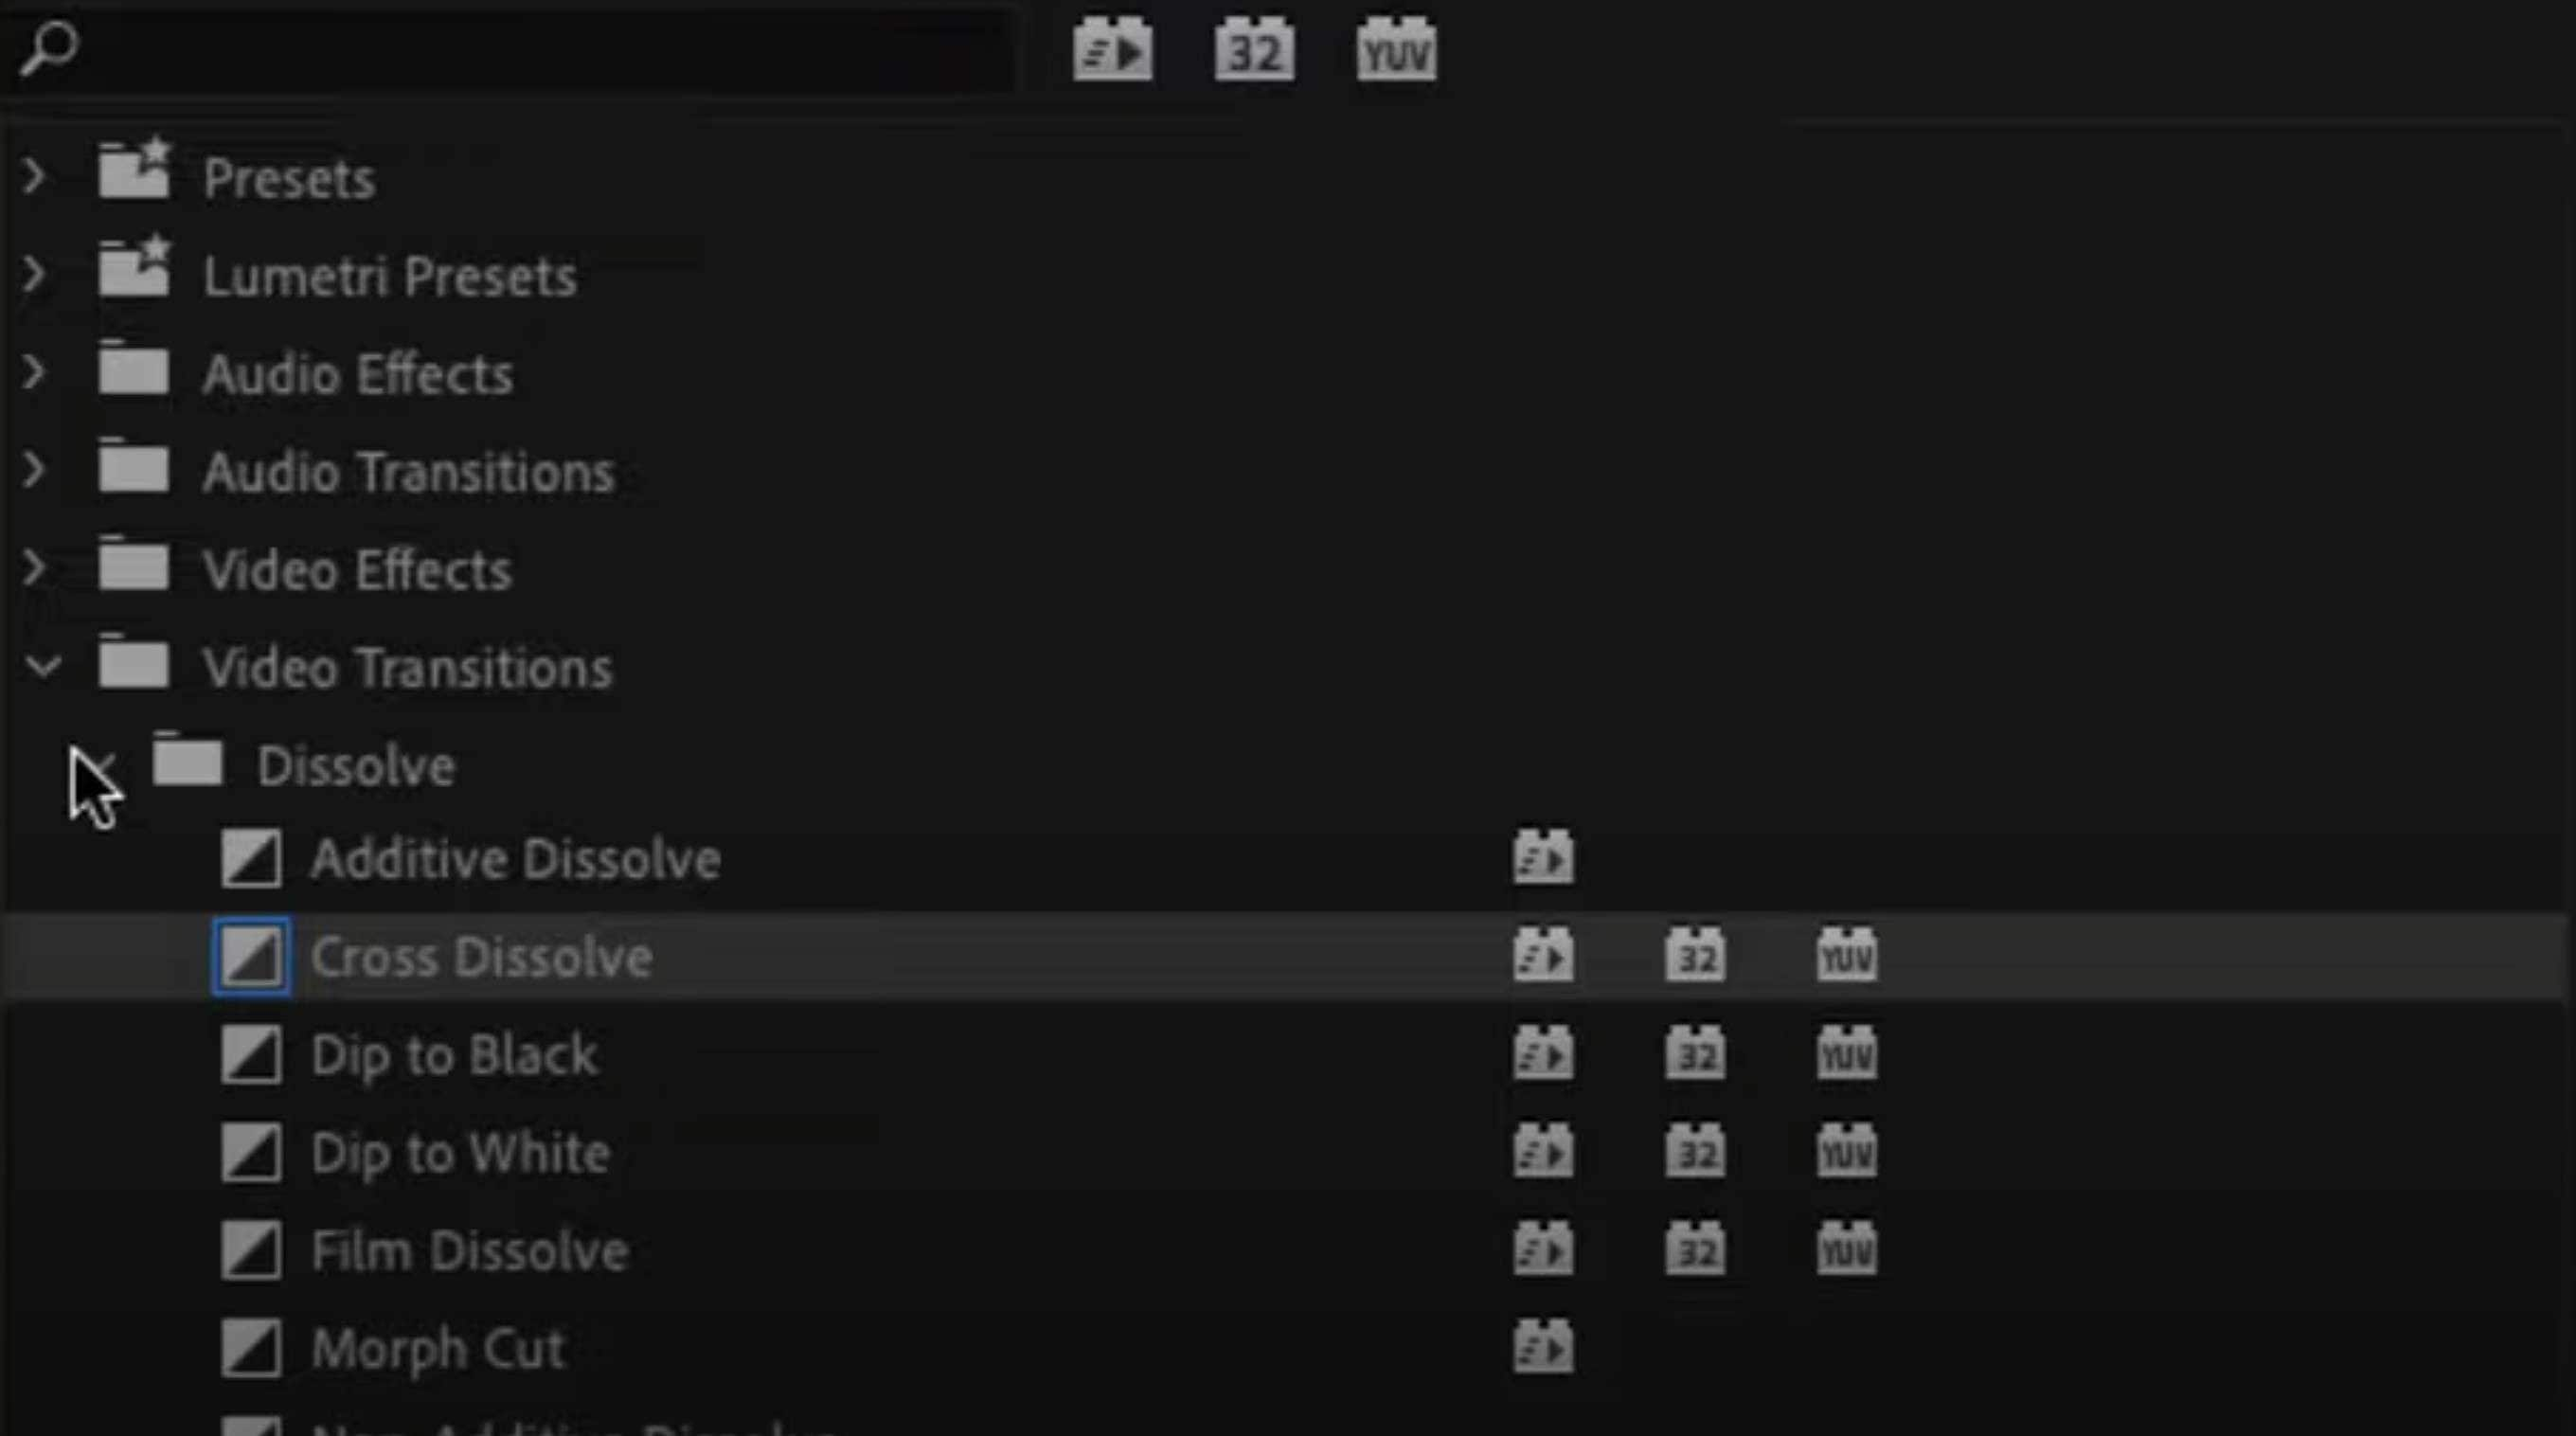
Step 2: Under Transitions, search for the Dissolve transition effect, click on it, and drag it to the timeline between the two videos, like this.
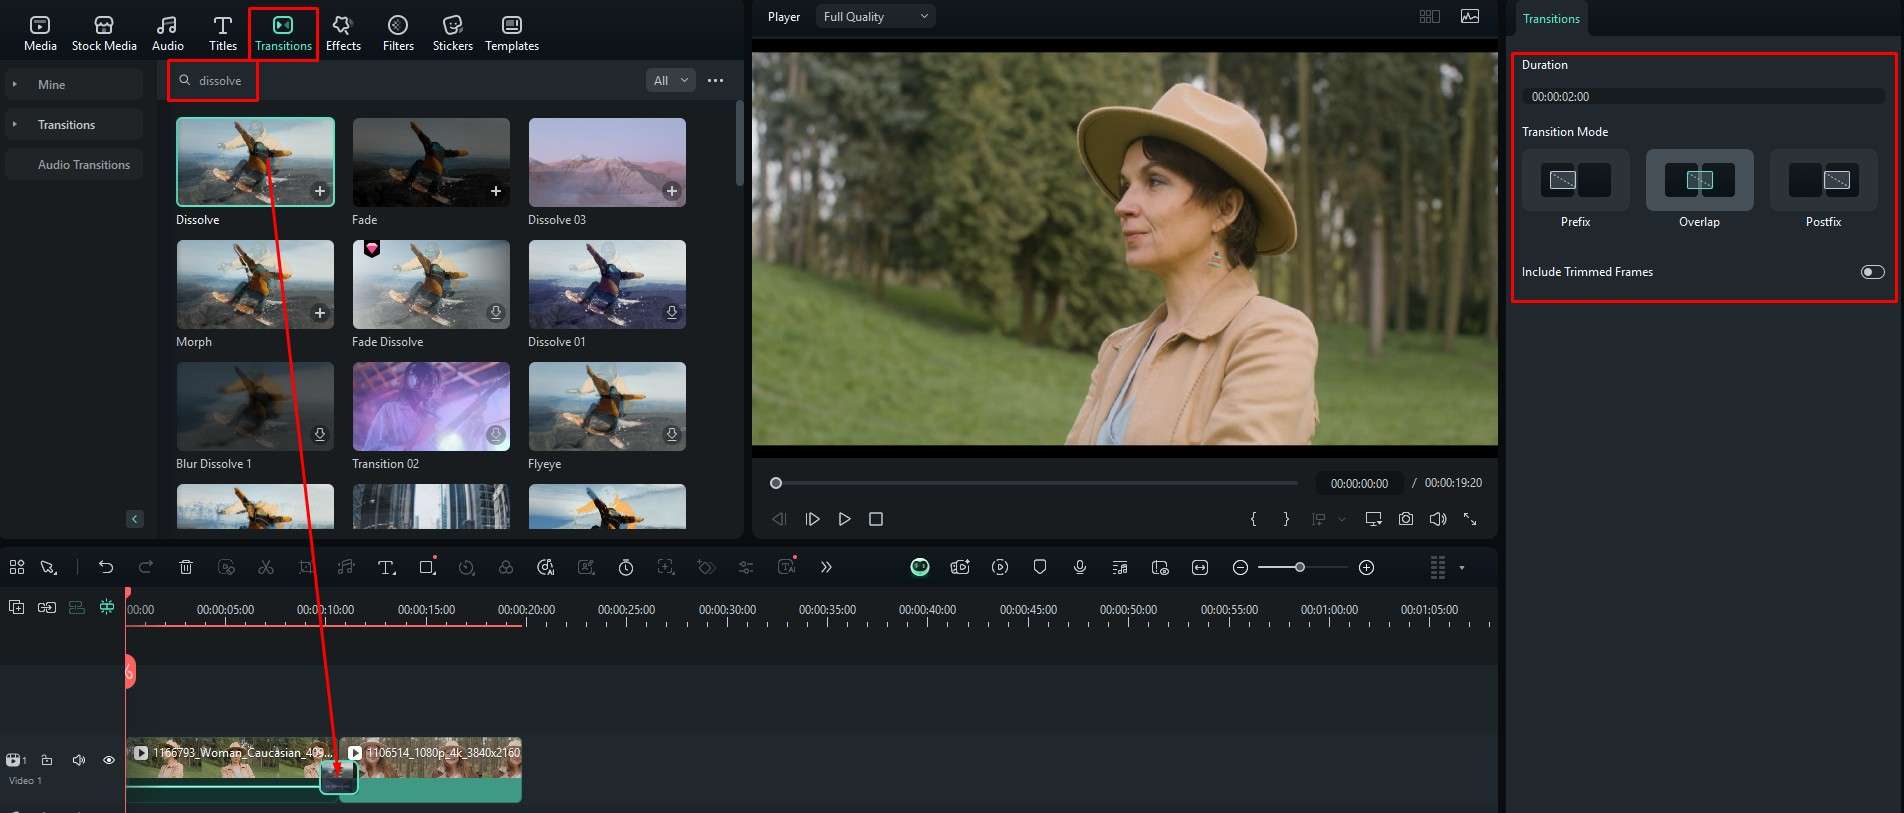
You can adjust the duration of the effect directly in the timeline by hovering over the edges of the effect, or you can set it on the right side of the screen, as you can see in the screenshot above.
You can see that finding the transitions library, as well as the effects, filters, and stickers library, is far more intuitive in Filmora than in Premiere Pro. This is a major advantage of Filmora because the faster you find your way around a program, the faster you will master it.
And, finally, before we conclude, we have a bonus section for you.
More Then Just Dissolve Transitions in Filmora, Try Some AI Video Editing Features
When you open Filmora for the first time, be sure to check the Toolbox section of the welcome screen.

Here, you will find more than two dozen AI features that are ready for you to explore. We will talk about five of them below, and we’ll explain what they can do.
- Image to Video: This feature can bring your photos to life. You have the option to add your photo and a photo of your loved one, and Filmora’s AI will make the two pictures come to life and make them kiss. You can also make them fight. It’s a lot of fun. Just click on the Image to Video feature in the toolbox and follow the prompts.
- AI Video Enhancer: Upscaling technology is becoming better and better, and now, AI tech is so advanced that you can use it to instantly make a video file better by improving the colors, resolution, frame rate, etc. That’s exactly what Filmora’s AI Video Enhancer does. Activate it, and your video will be better in minutes.
- AI Image: This feature uses a text prompt created by you, the user, to generate images from scratch. It is like these images get created from thin air. You just type a prompt, and Filmora will generate a number of images that fit that prompt. You can then pick the ones you like and continue your editing process with them.
- AI Object Remover: Imagine that you have the perfect photo or video, but someone or something in the background is ruining the scene. With the AI Object Remover feature, you can eliminate that obstacle. Highlight the unwanted object, and Filmora will make it disappear like magic.
- AI Musc: If you are working on a video, you need some music to accompany it. Sure, YouTube offers a library of free-to-use music, but everyone is using more or less the same tracks. With Filmora, you can generate original music for your video. Just explain what you want the music to sound like, and Filmora will do the job.
There are so many more fun and helpful AI features that are just waiting for you to try them out.
Conclusion
In this article, we have learned about the dissolve transition, we have seen a few examples of where to use it, and we know how to apply it in two different video editing tools. If you want to go with Premiere Pro, this is a good choice, but be prepared to spend time learning the ropes if you want to use advanced features. If you go with Filmora, you will advance more rapidly, and you will be able to master the entire program in a short while.
