
 100% Security Verified | No Subscription Required | No Malware


 ChatGPT
 Perplexity
 Gemini
 Claude
 Grok
Grok
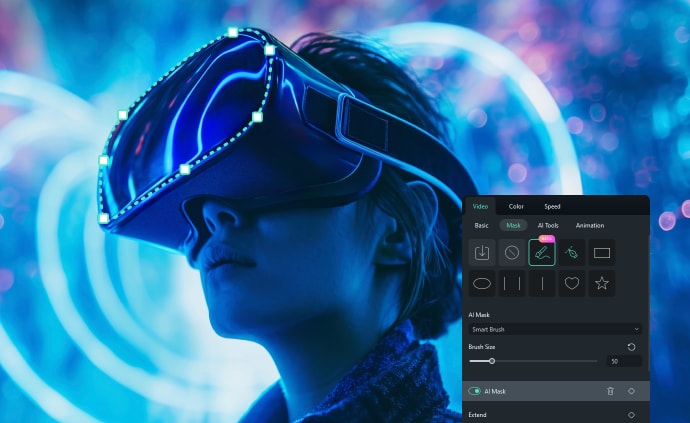
Have you ever noticed photos appearing in the shape of a heart, circle, star, or even custom designs? These eye-catching effects aren't just fun—they're created using a powerful technique called photo masking. Whether you want to frame your image in a creative shape or highlight certain parts of a picture, a photo masking tool is exactly what you need.
Curious how that works? In this guide, we'll show you the definition of image masks and how you can easily create stunning masked photos using the right tool.
In this article:
What Is Image Masking?
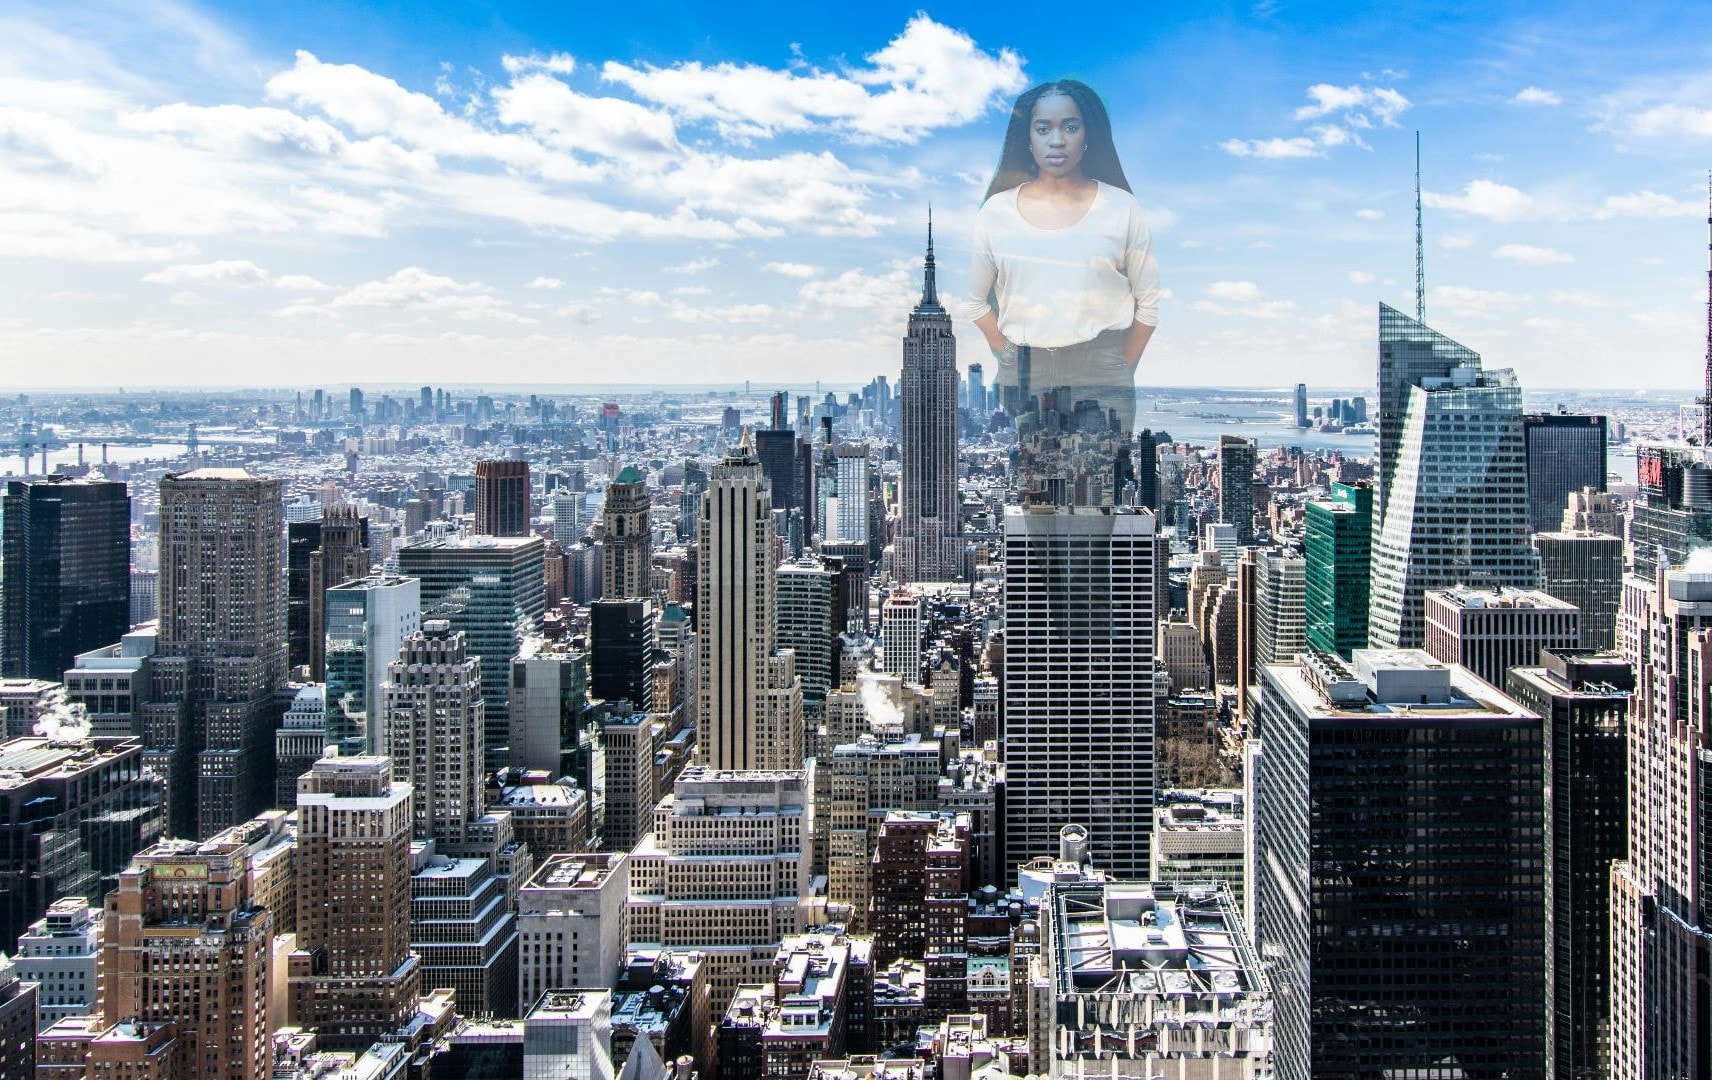
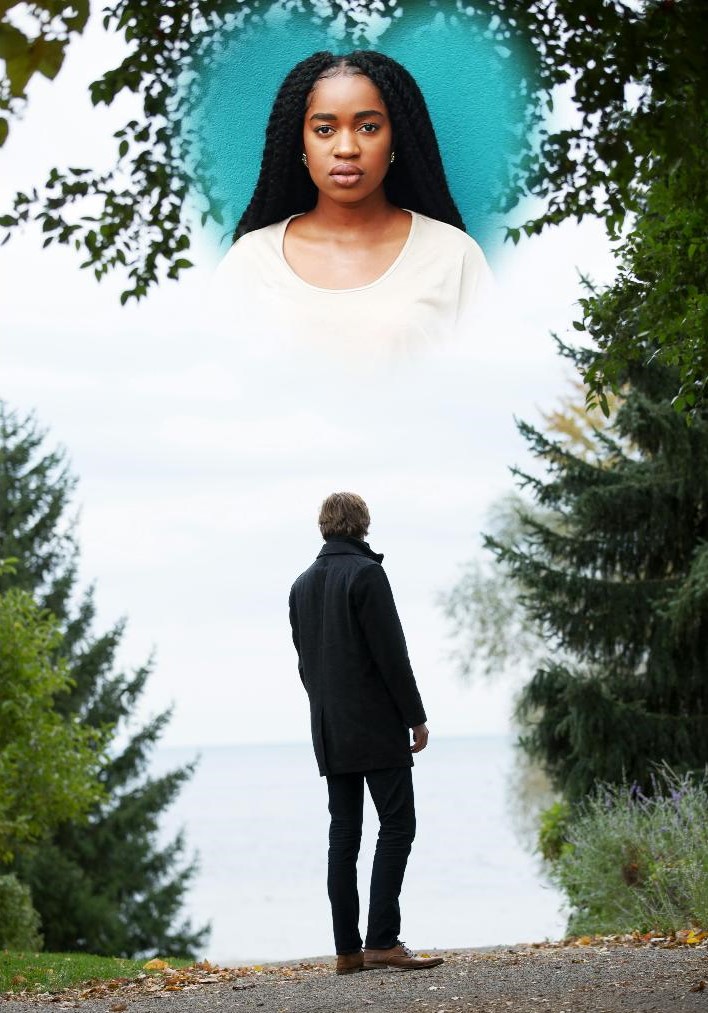
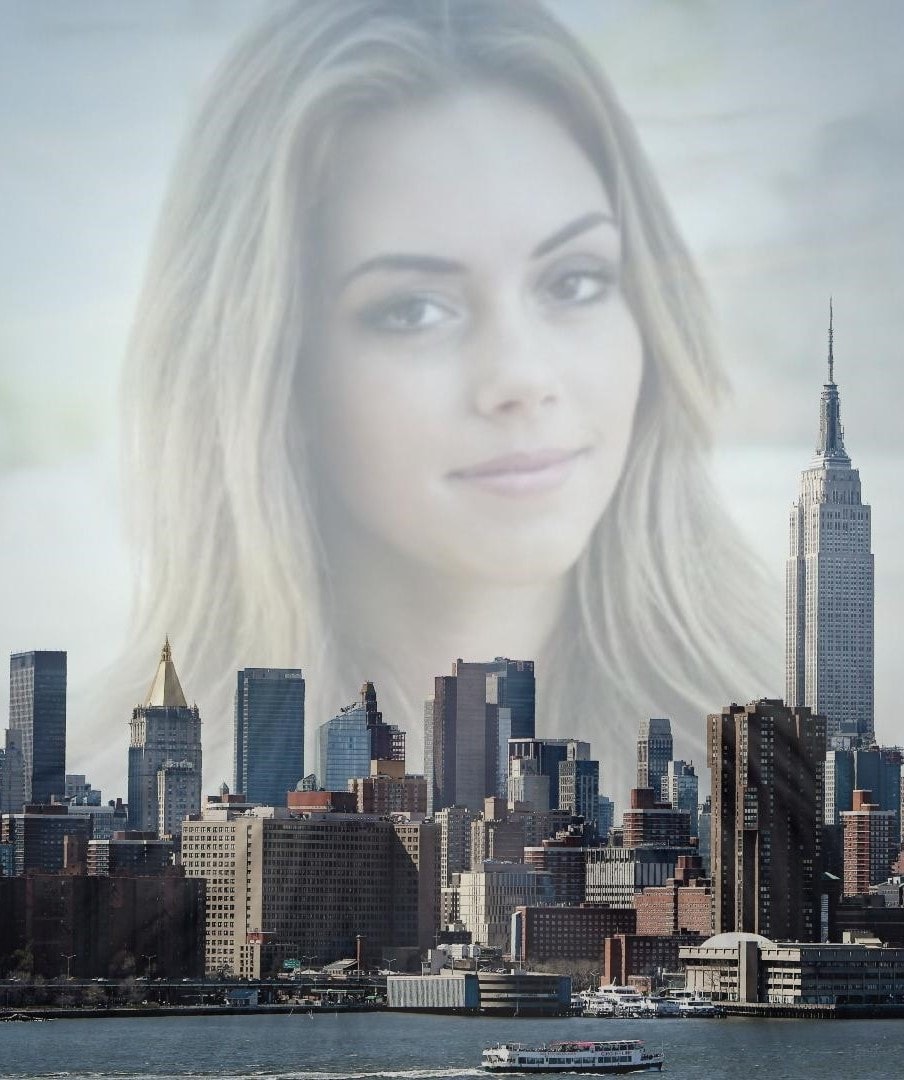
Image masking is an editing technique where you focus on certain parts of the image and exclude all the rest, while retaining the original quality. It's used to overlay a subject or object from one photo into another.
You can use it to isolate your subject, whether it be a person's face or a full silhouette, for example, from one image and add it to another background.
You can make it blend in more smoothly by adjusting some additional customization settings, like the Blur Strength. Below, we'll go over the different methods of using this technique.
How to Use an Image Masking Tool?
Wondershare Filmora is a capable video and photo editing tool that works on Windows, Mac, Android, and iOS. Being an image masking tool, Filmora provides several methods for masking photos.
- You can directly choose the image masks from the built-in masking shapes, such as circle, rectangle, linear, parallel lines, heart, and stars.
- You can draw the image masks by yourself.
- You can upload a mask shape picture from your local drive.
- You can also choose to use the AI masking feature directly.
Here is a step-by-step guide on how to use image masking to overlay one picture over another with Filmora's photo masking tool.
 secure download

Method 1: Mask Photos Instantly with AI
The fastest way to create an image mask is to let AI do all the hard work. Filmora's AI Masking tool allows you to isolate subjects and characters automatically and brush the objects easily.
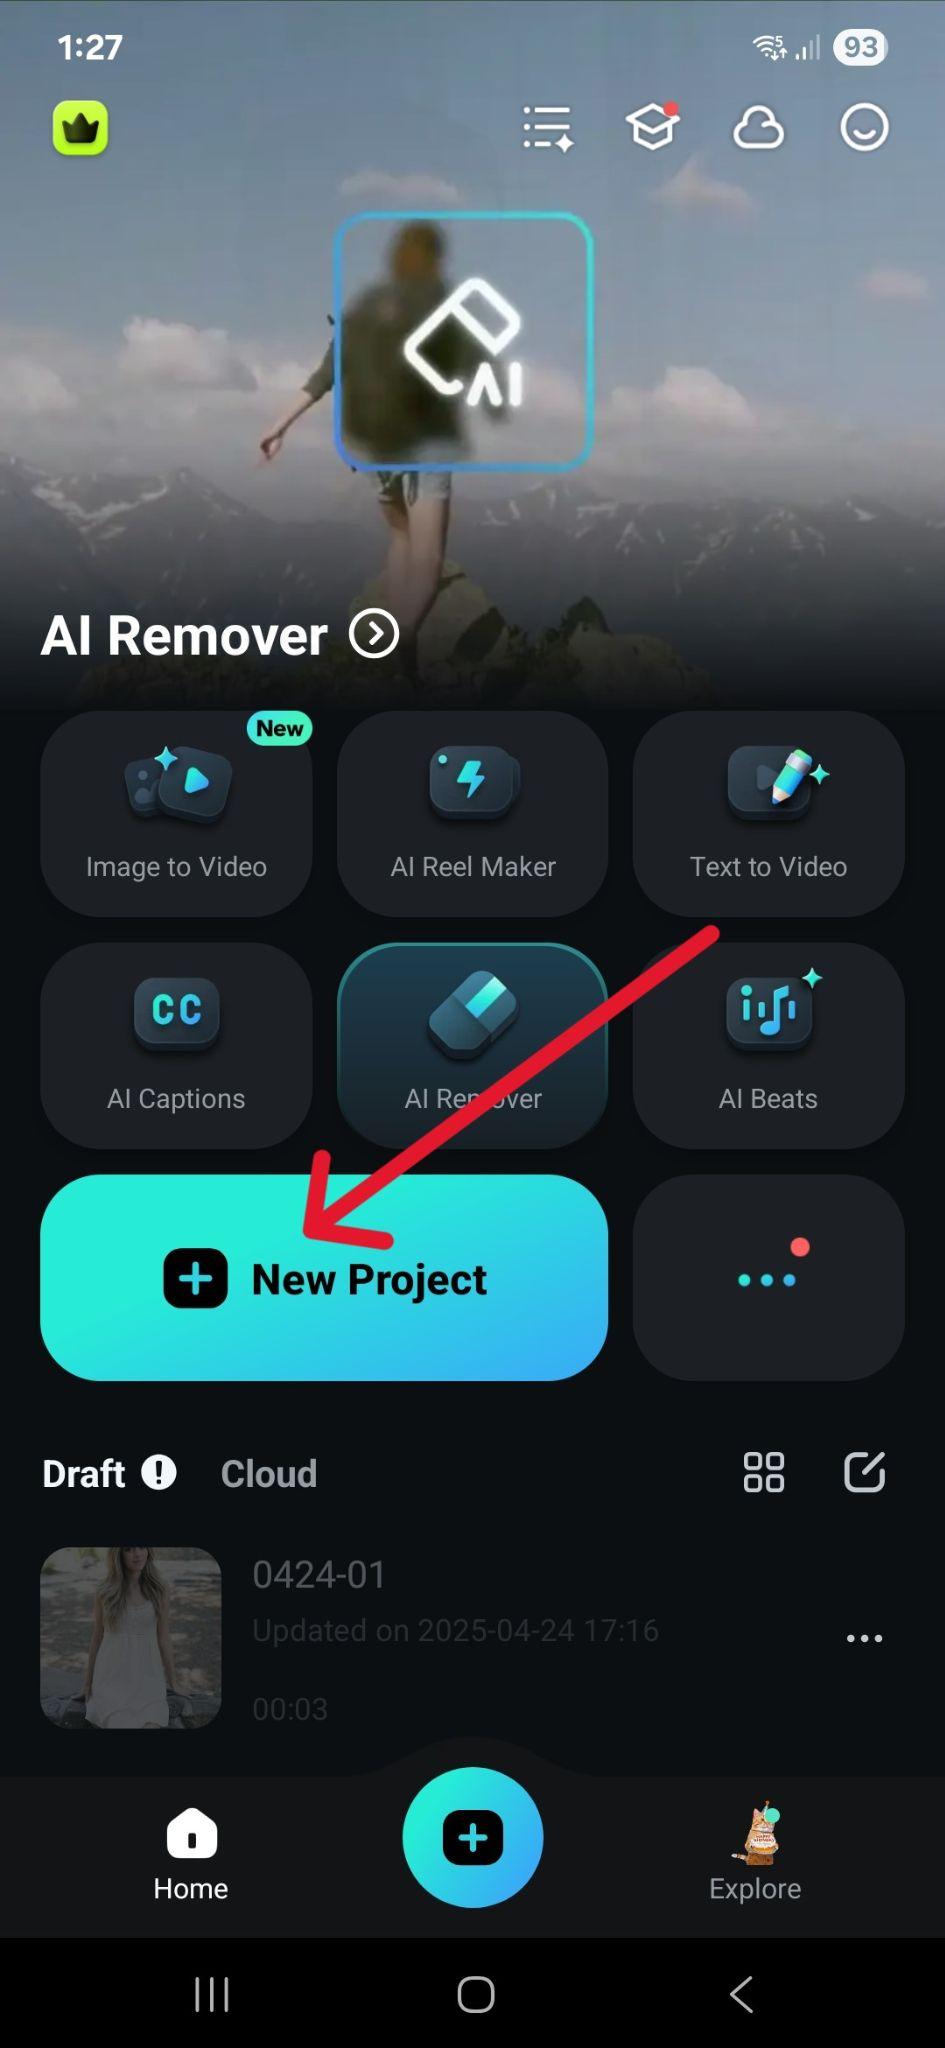
Step 1: Download and open Filmora, and click on New Project, then Import Media, to add the images you want to edit. Drag the images to the timeline, keeping the one you will apply the mask to on top.
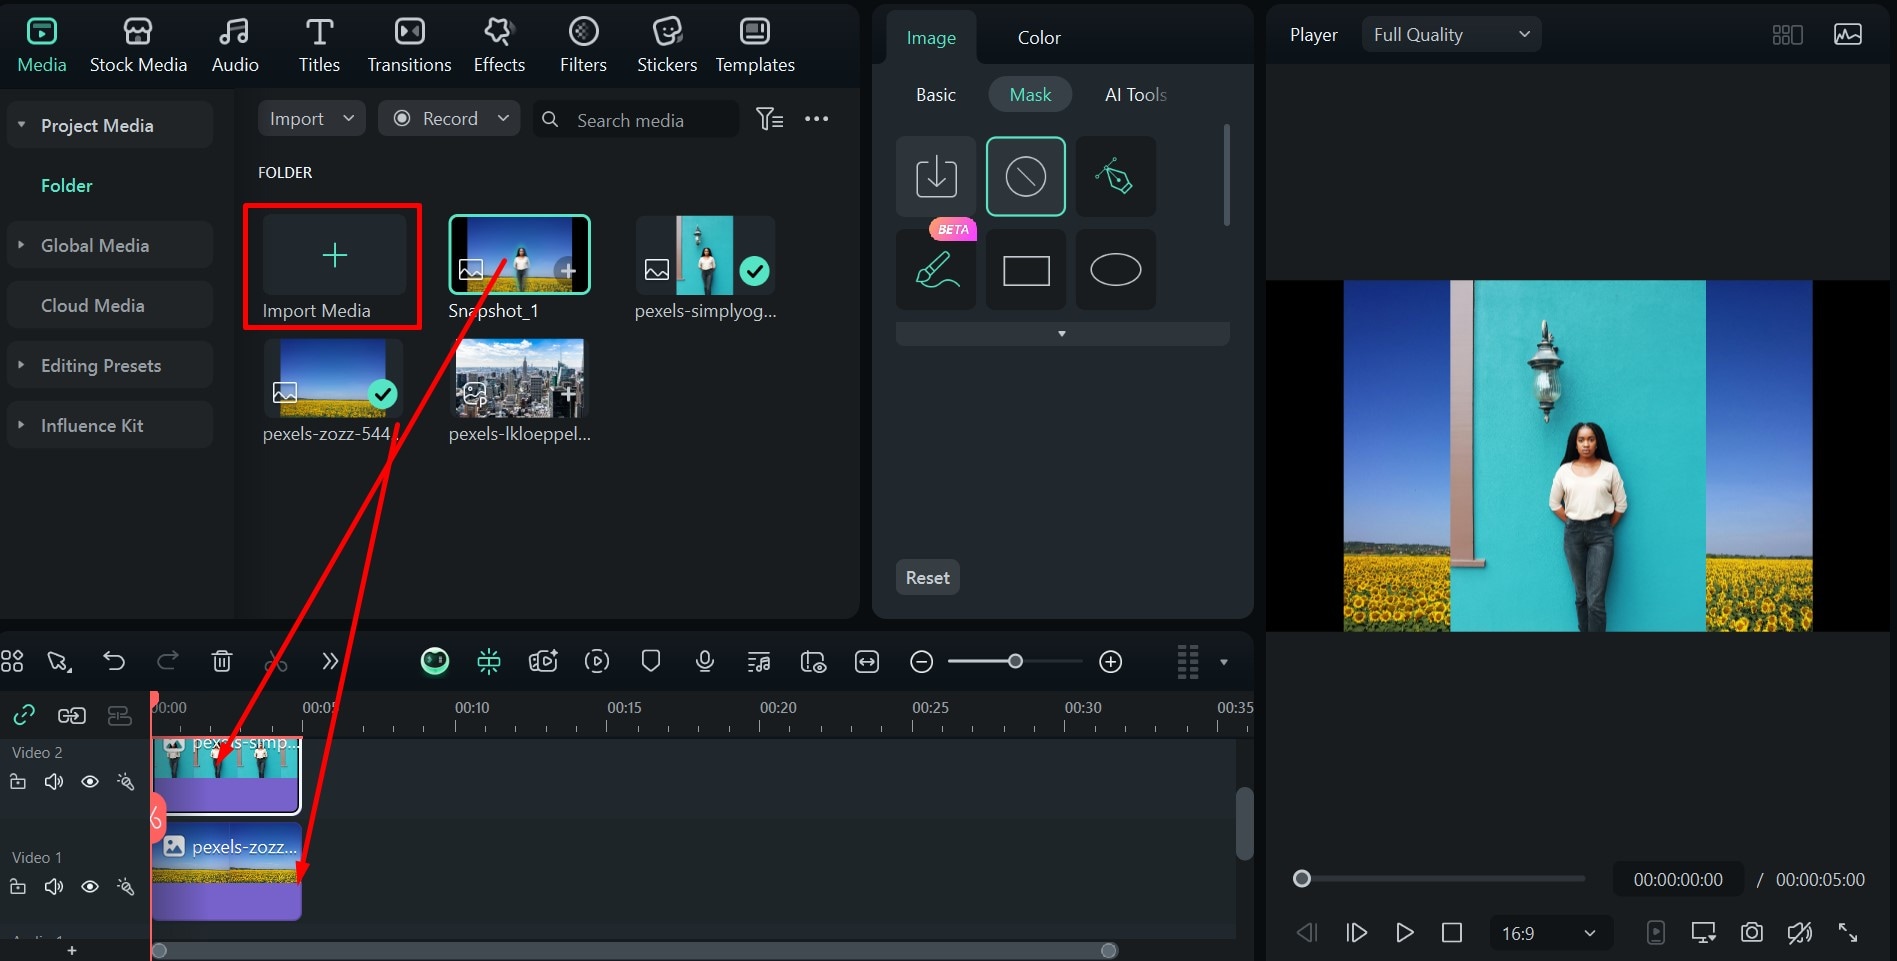
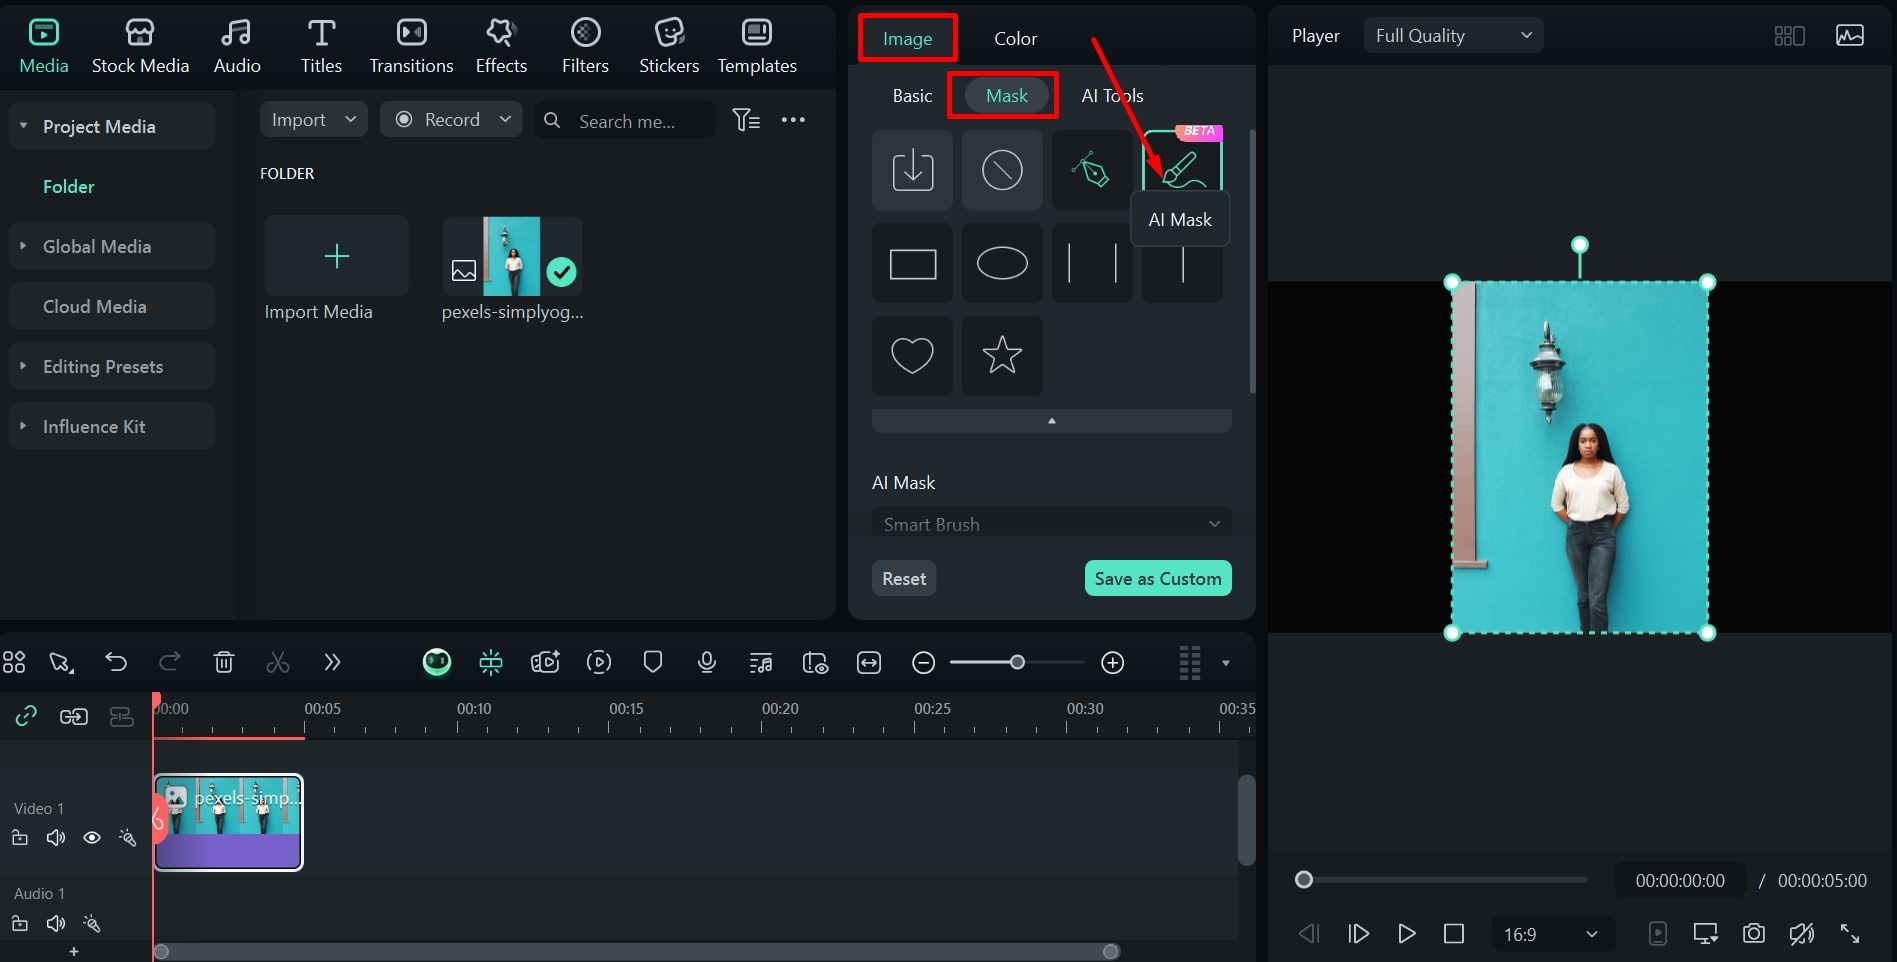
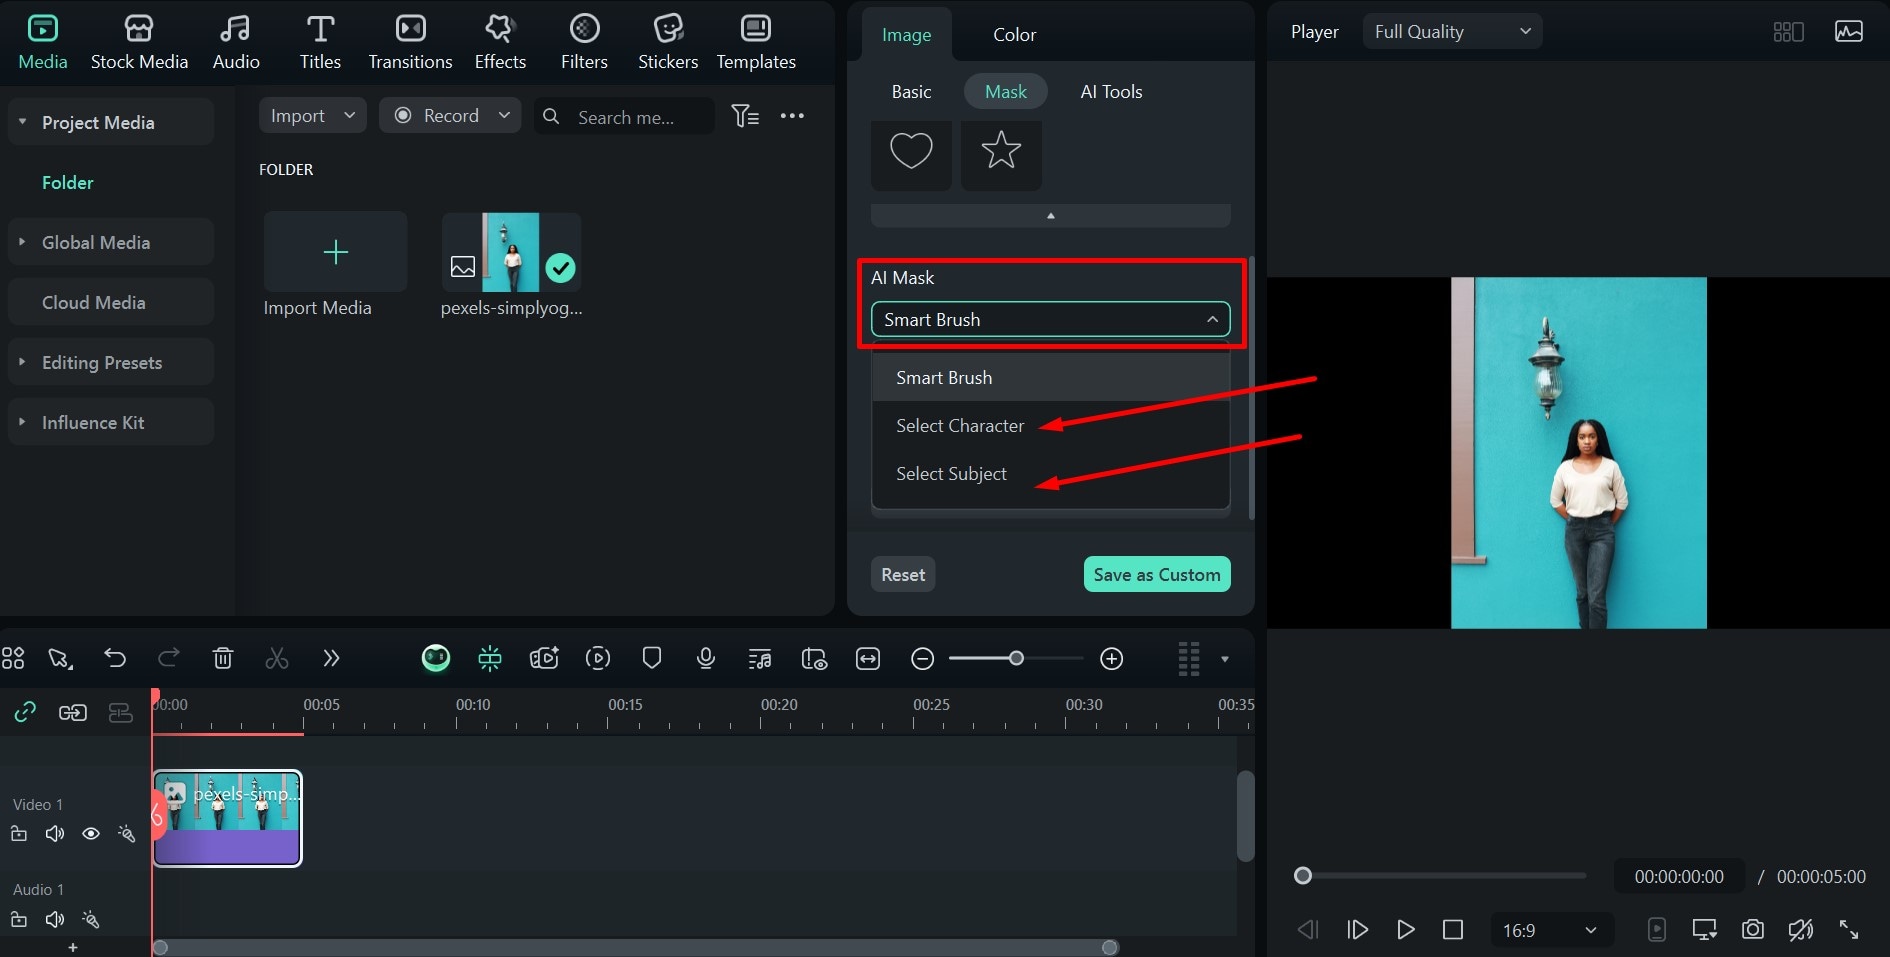
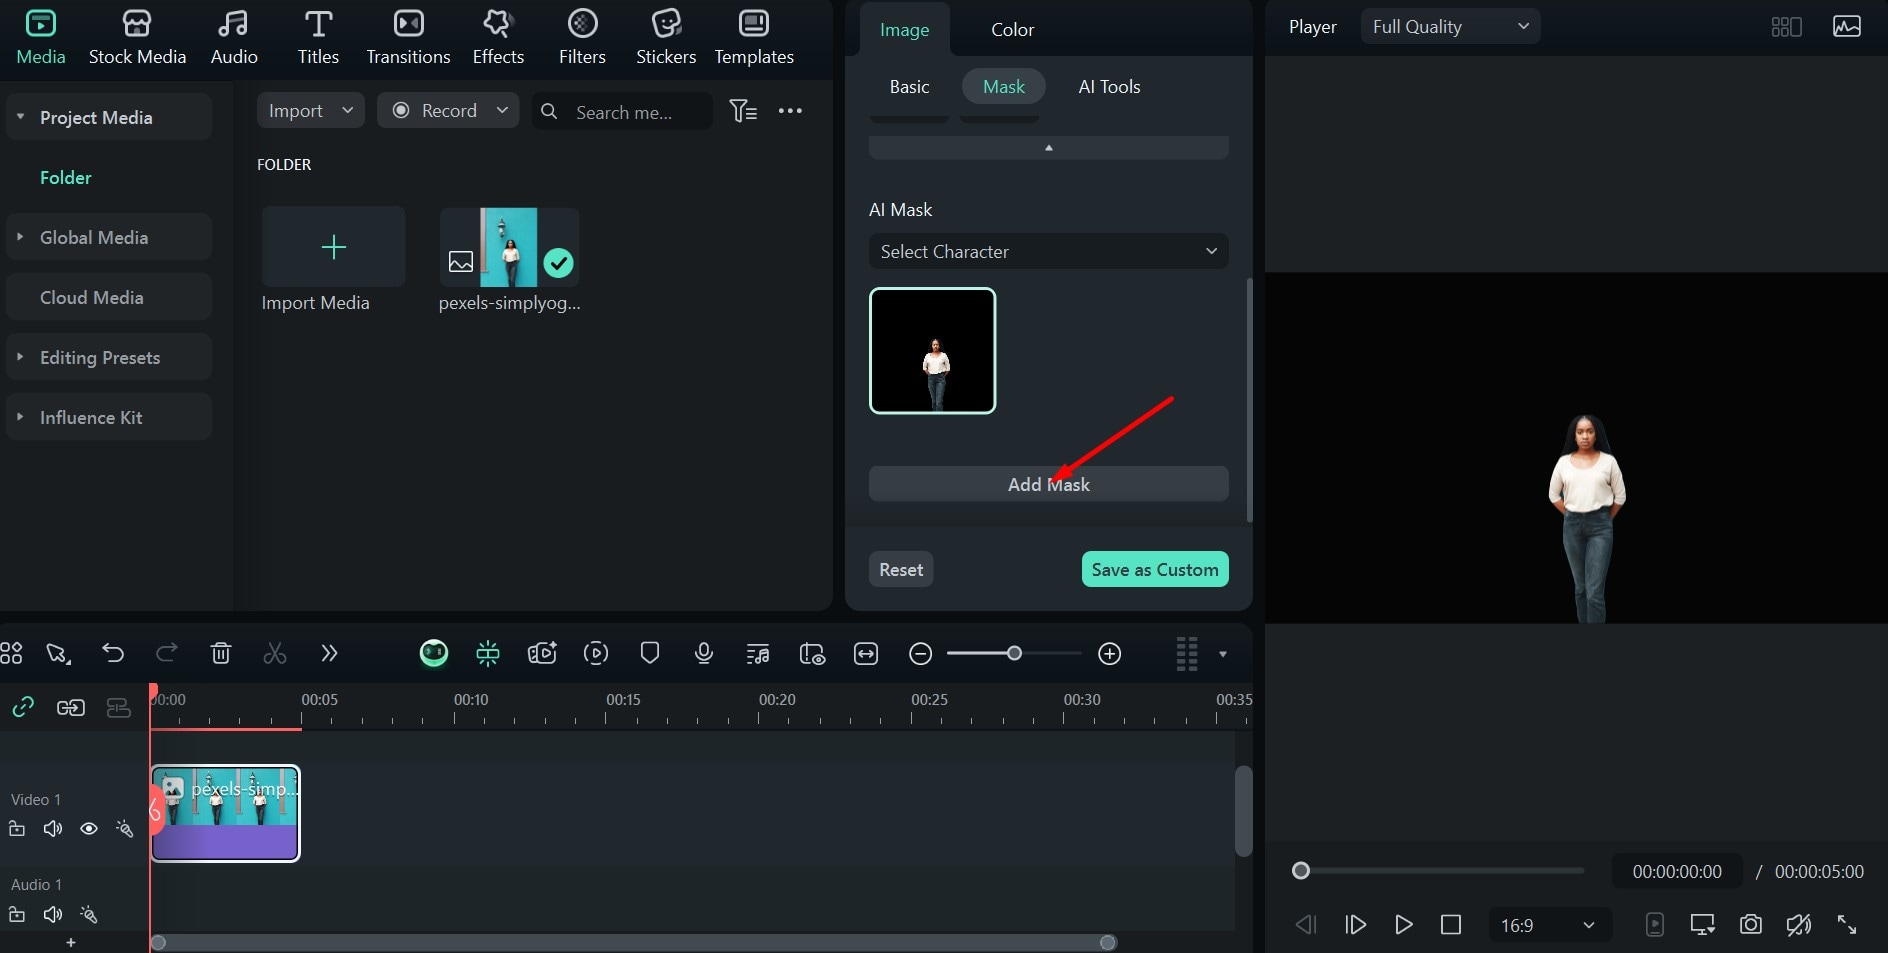
Step 2: Go to Image > Mask and click on the AI Mask icon. Use the Smart Brush to draw across the subject, and the AI will fill out the shape. You can also choose other settings, like Select Character or Select Subject. Click Add Mask and make your selection.
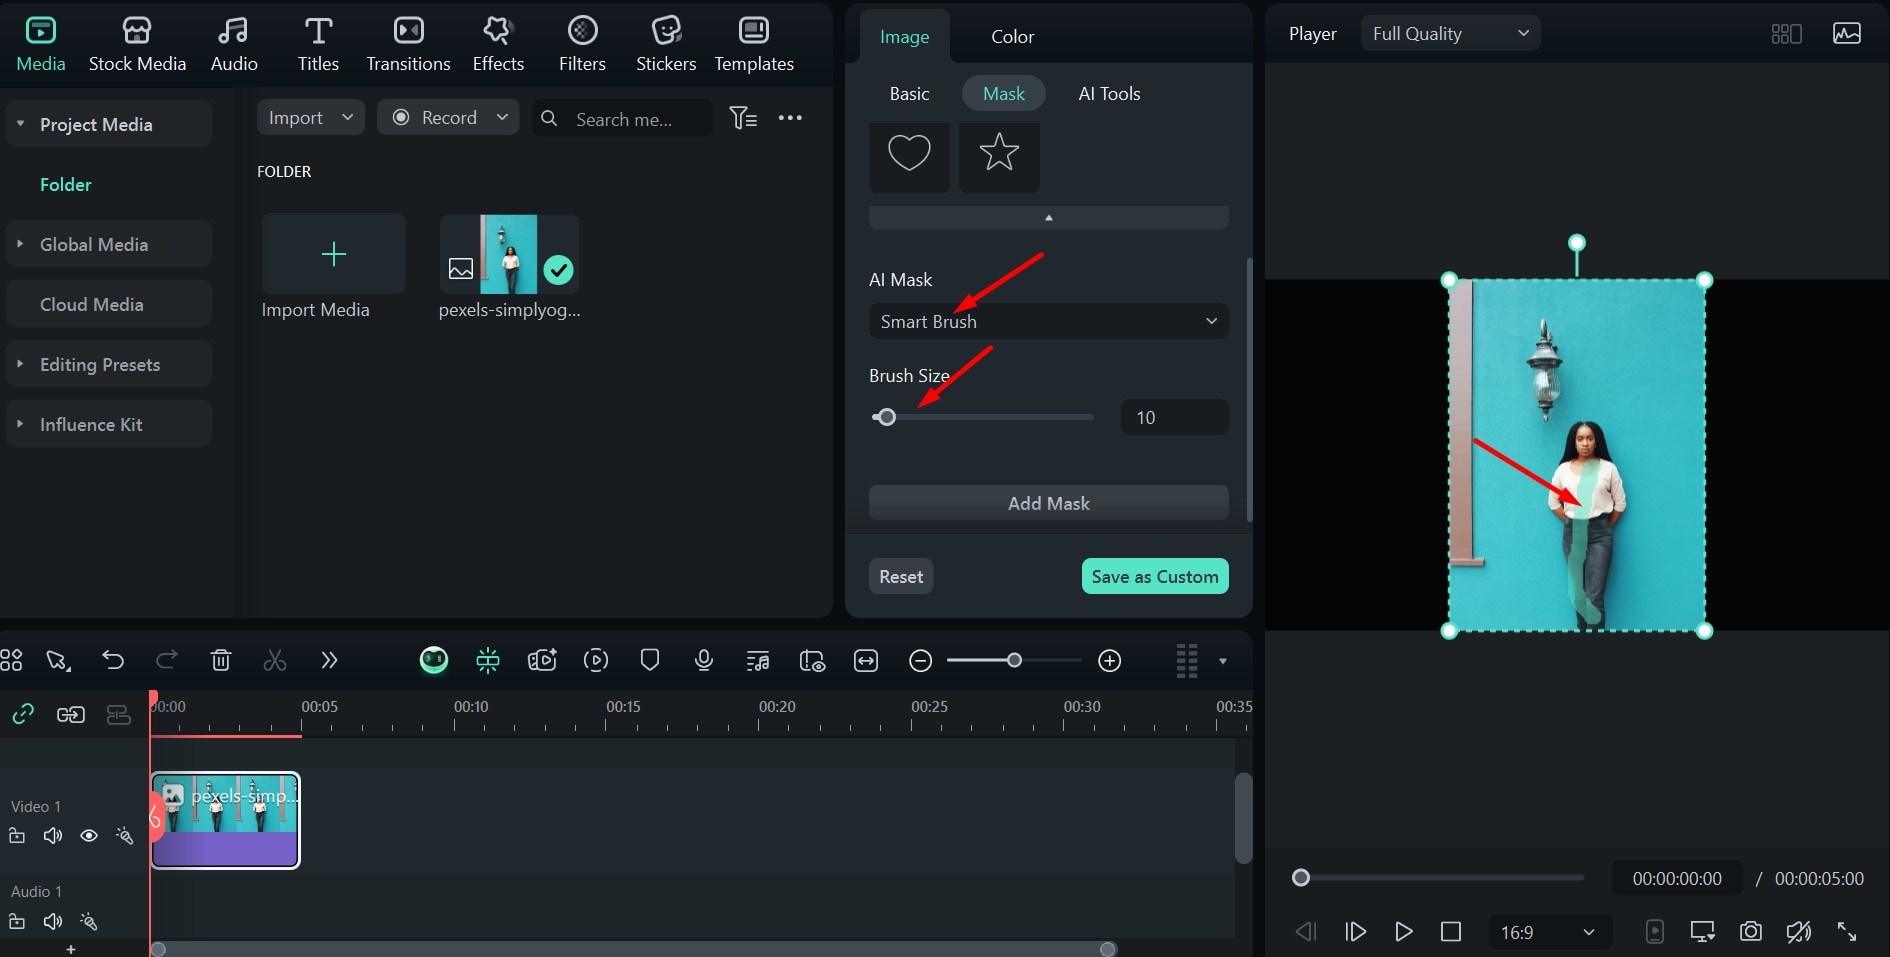
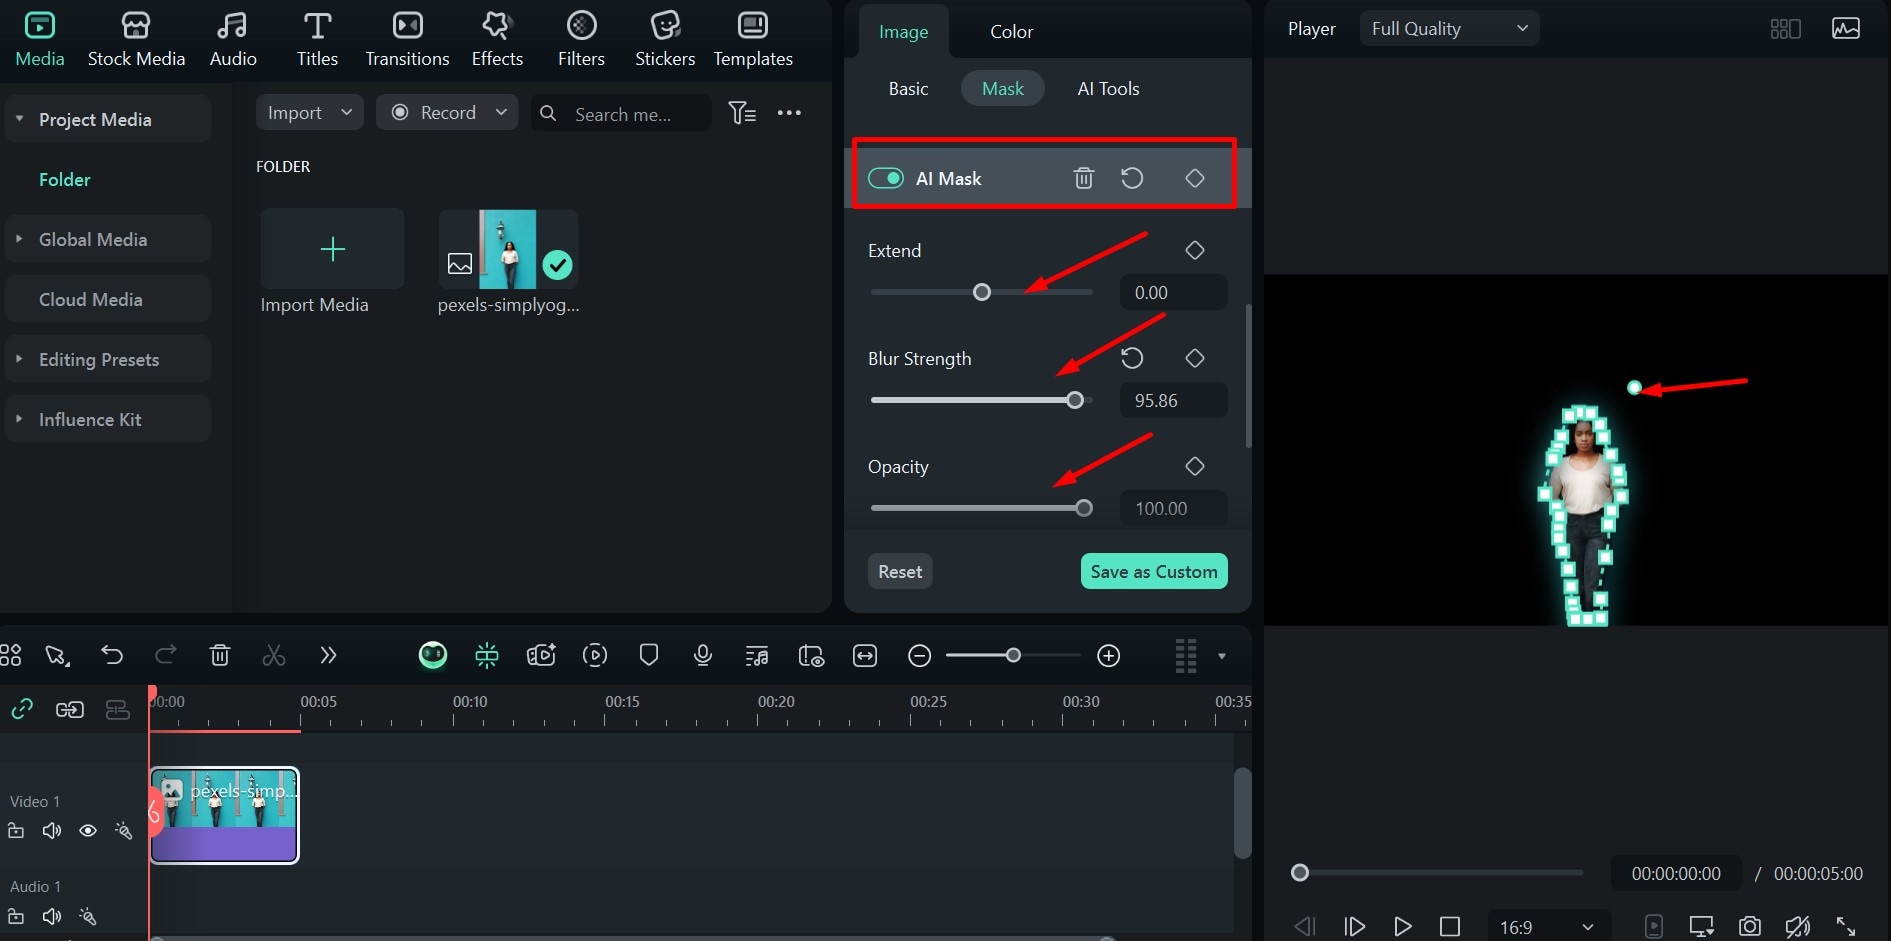
Step 3: You can modify the selection by moving around some of the points outlining your subject if you want, and adjust the Blur Strength and Opacity. When you are done, click the little camera icon at the bottom right to take a Snapshot.
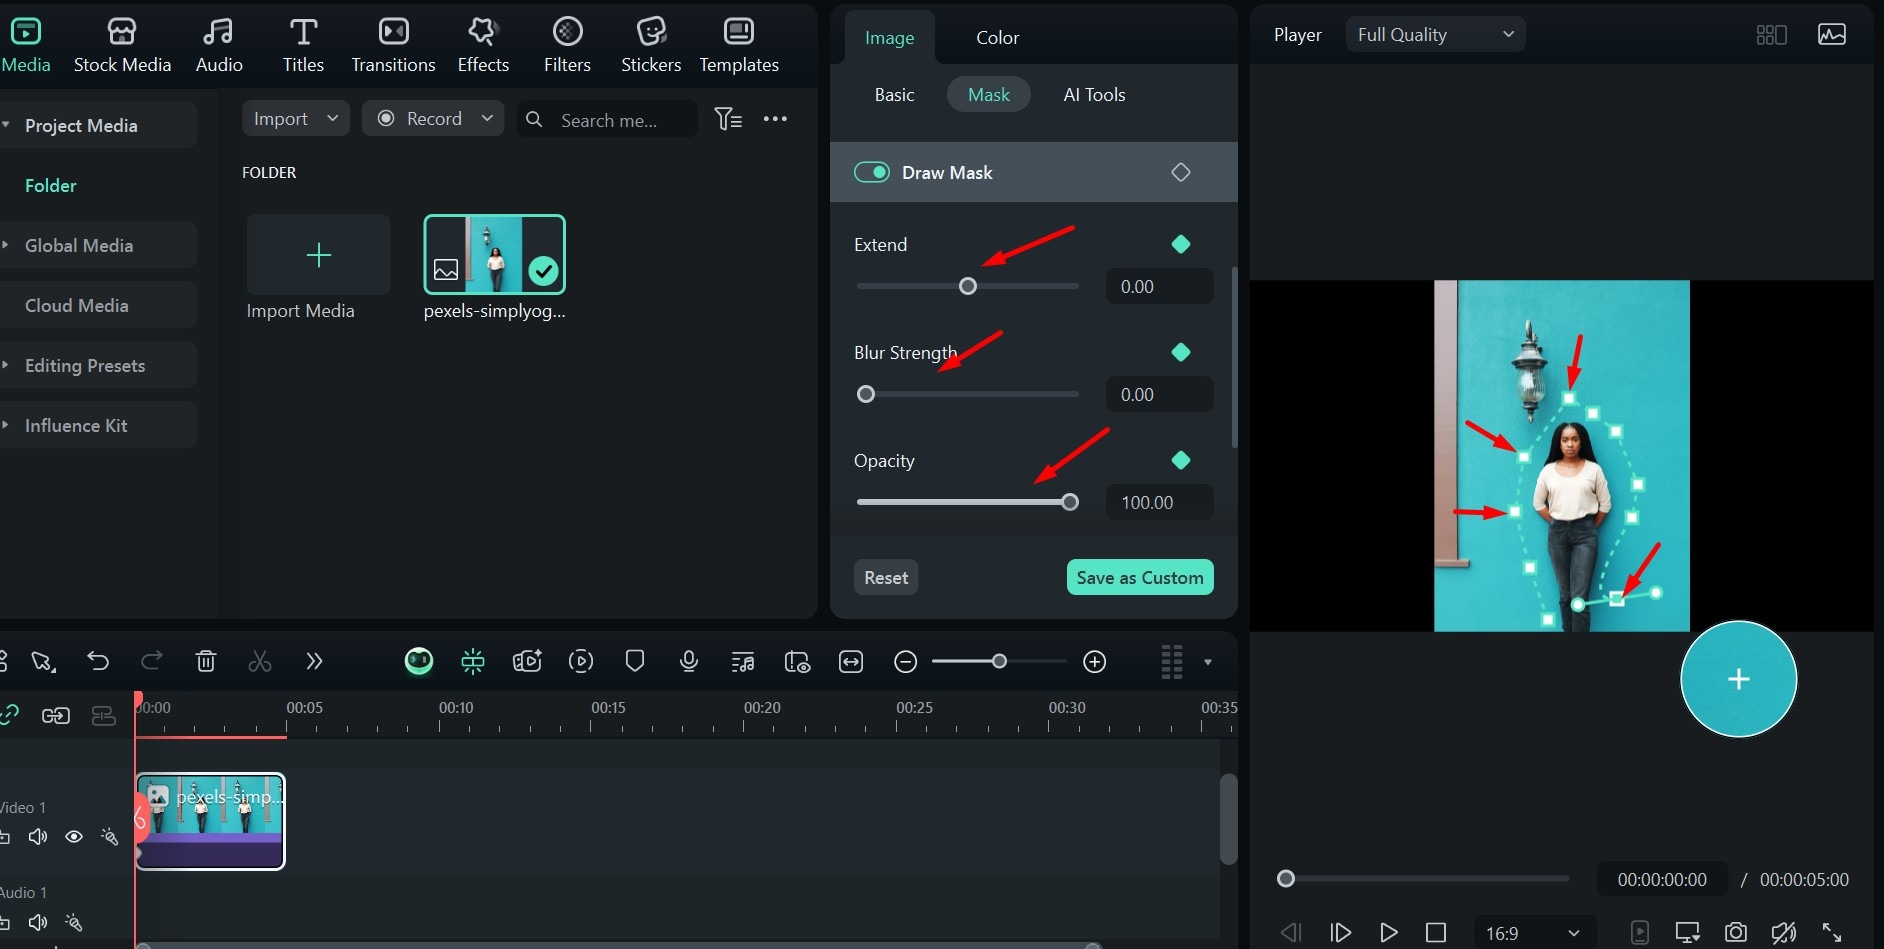
Method 2: Mask Photos Manually with Draw Masks
If you want more control over the process, you can always do it by hand. With Filmora's draw masks, you can fully control the image shapes by yourself. Just follow these steps:
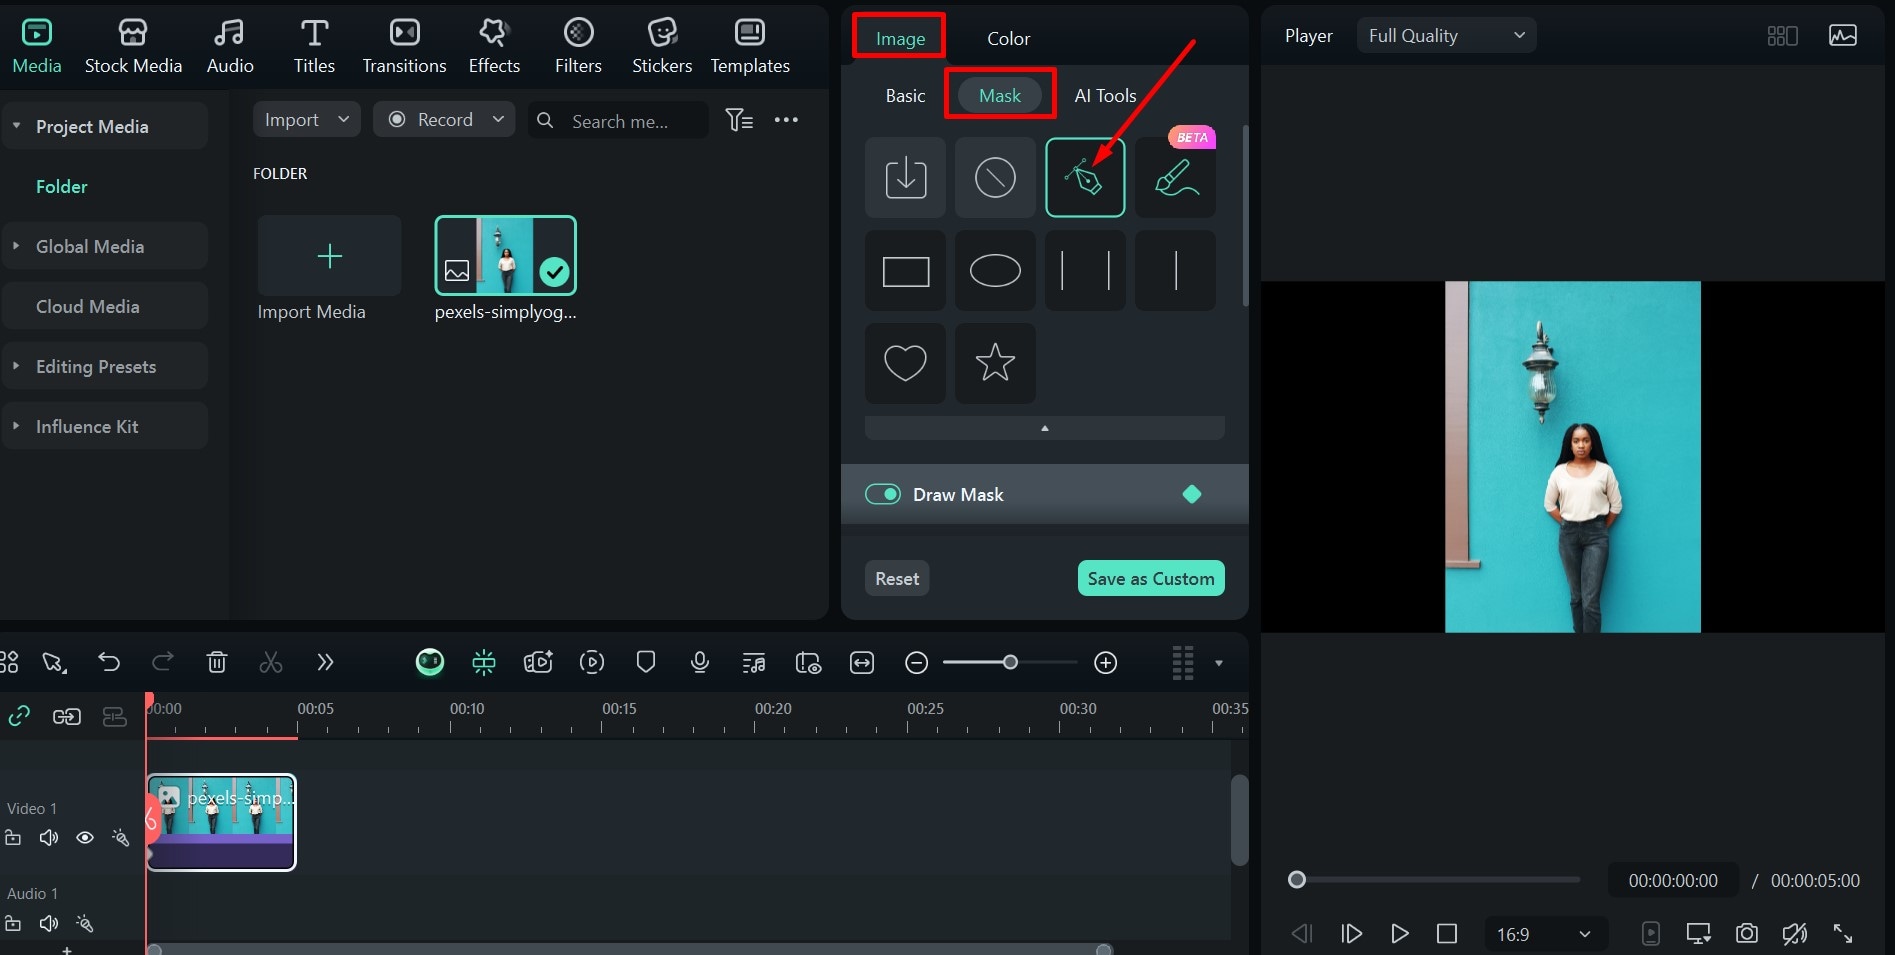
secure download Step 1: Go to Image > Mask and choose the Draw Mask option.
Step 2: Start clicking around your subject to add anchor points and finish by connecting the last point with the first one. You can click and hold any of the little squares on the outline, then move the cursor to add a bend between it and the last point. You can also play around with the Blur Strength and Opacity settings.
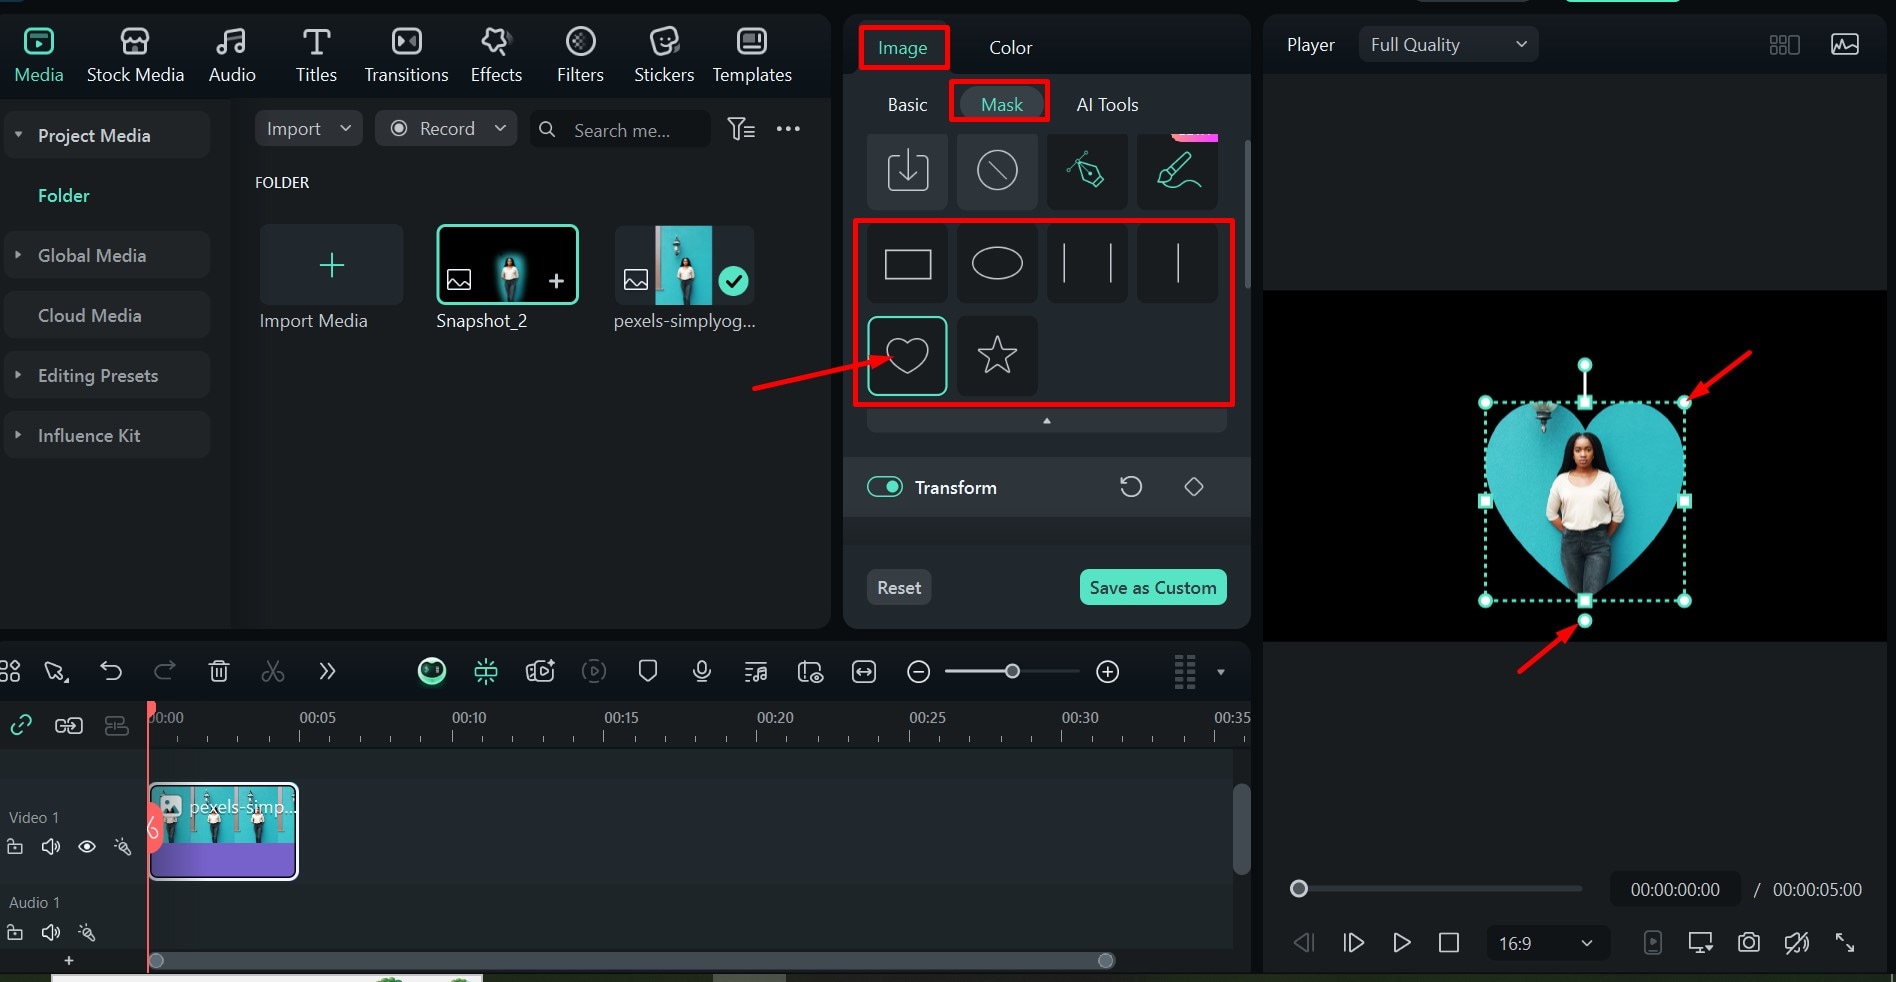
Method 3: Mask Photos with Mask Shapes
There are also several pre-cut shapes that you can use, including Rectangle, Circle, Linear, Parallel Lines, Star, and Love (heart). Here is an example using the heart shape.
Step 1: In the Mask menu, click on the shape you want. In this case, we went with Love.
Step 2: Adjust the size and positioning of the shape, and adjust the other settings as mentioned in the previous examples.
This method also works on the Filmora app. Here's how to do it:
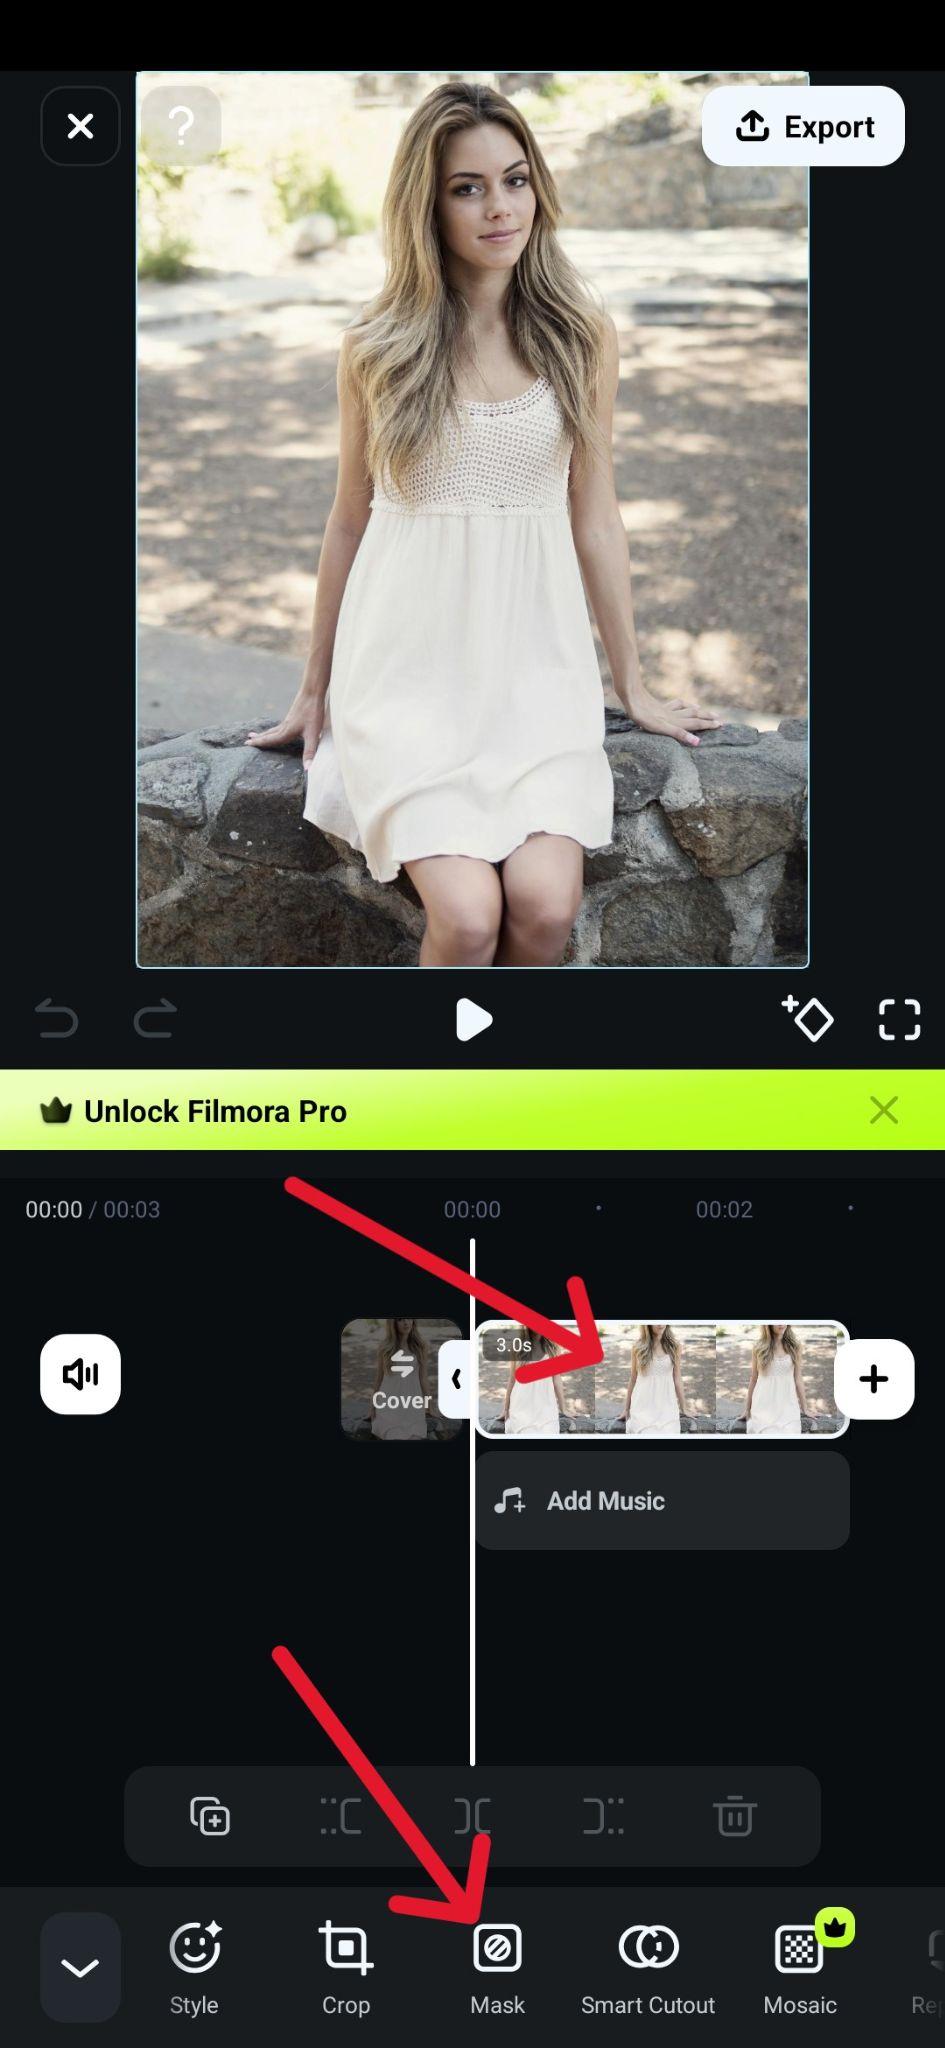
secure download Step 1: Download and run the app, then tap New Project.
Step 2: Tap the image in the timeline and then choose the Mask icon at the bottom of the screen.
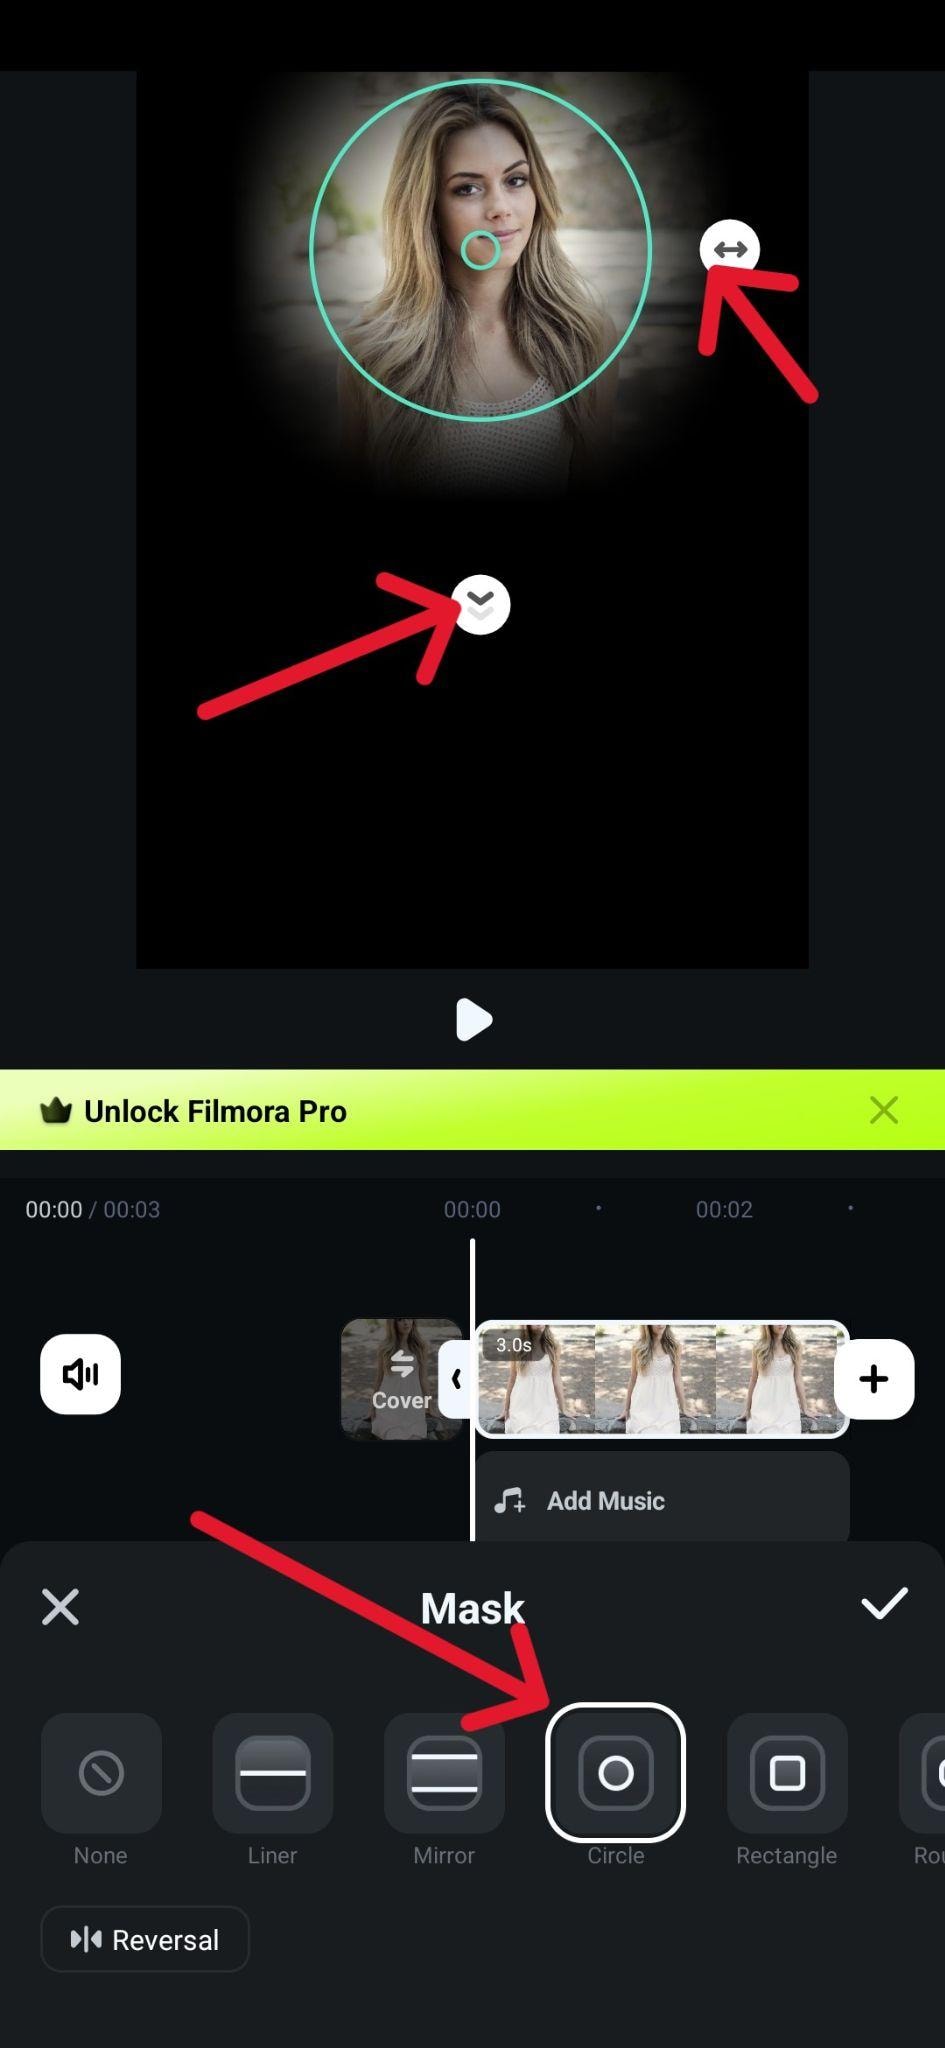
Step 3: Pick one of the available shapes (we used Circle in this example) and place it on the part of the subject you want to isolate. You can adjust the Blur Strength by swiping down, and change the size of the shape by tapping the left-right arrow icon and moving it in either direction.
Compare the Best Methods for Image Masking
All these different image masking techniques have their pros and cons, and each is best for a particular type of project. Let's briefly compare all of them to see where they truly shine and when you might need to use them.
| Methods | Pros | Best for |
| AI Mask | Fast. It uses advanced Machine Learning to identify subjects in any photo and quickly outline them. | Quick projects in which you need to remove an entire person, animal, or object from a complex background. |
| Draw Mask | Full controls. It works well for complex, non-standard shapes and images where the colors of the subject and background are similar and the AI can't properly separate them. | Projects where you want a very specific shape or fine-tune an AI mask to get it just right. |
| Mask Shapes | Very easy. The available shapes lend themselves well to creative graphic design projects or social media posts that require a stylized look. | Artistic projects like collages, ad design, or birthday and holiday cards, where achieving a certain aesthetic is the goal. |
Conclusion
An image masking tool can be useful in many different scenarios, from simple social media posts and birthday cards to big graphic design projects and art photography.
AI masking has definitely made things easier, even for beginners, but there are times when you'll need to hand-draw a mask or use a geometric shape – it all depends on the context. Whatever your needs are, Filmora has a full set of masking tools ready to take your project to the next level, so give it a shot.
secure download 