Compound Clip:
Combine Clips into a Single Unit for Better Control
- Merge multiple clips on your timeline into a single object.
- Edit and adjust the resulting merged clip easily.
- Reuse your compound clips throughout all your projects.
- Enjoy absolute flexibility and freedom with your Compound Clips.
 4.7
(15746 reviews)
4.7
(15746 reviews)
Win 11 /Win 10 / Win 8 / Win7 (64 bit OS) | System Requirements
macOS 10.15 - macOS 26 (10.14 or earlier? Click here) | Apple M1, M2, M3 & M4 compatible
- Merge multiple clips on your timeline into a single object.
- Edit and adjust the resulting merged clip easily.
- Reuse your compound clips throughout all your projects.
- Enjoy absolute flexibility and freedom with your Compound Clips.
What Is a Compound Clip
A Compound Clip in Filmora is a versatile tool that lets you group multiple video clips, audio tracks, images, or even other compound clips into one cohesive unit. It simplifies your timeline, organizes complex projects, and ensures consistent edits across grouped elements. For instance, group your B-roll clips with background music to create a seamless storytelling layer.
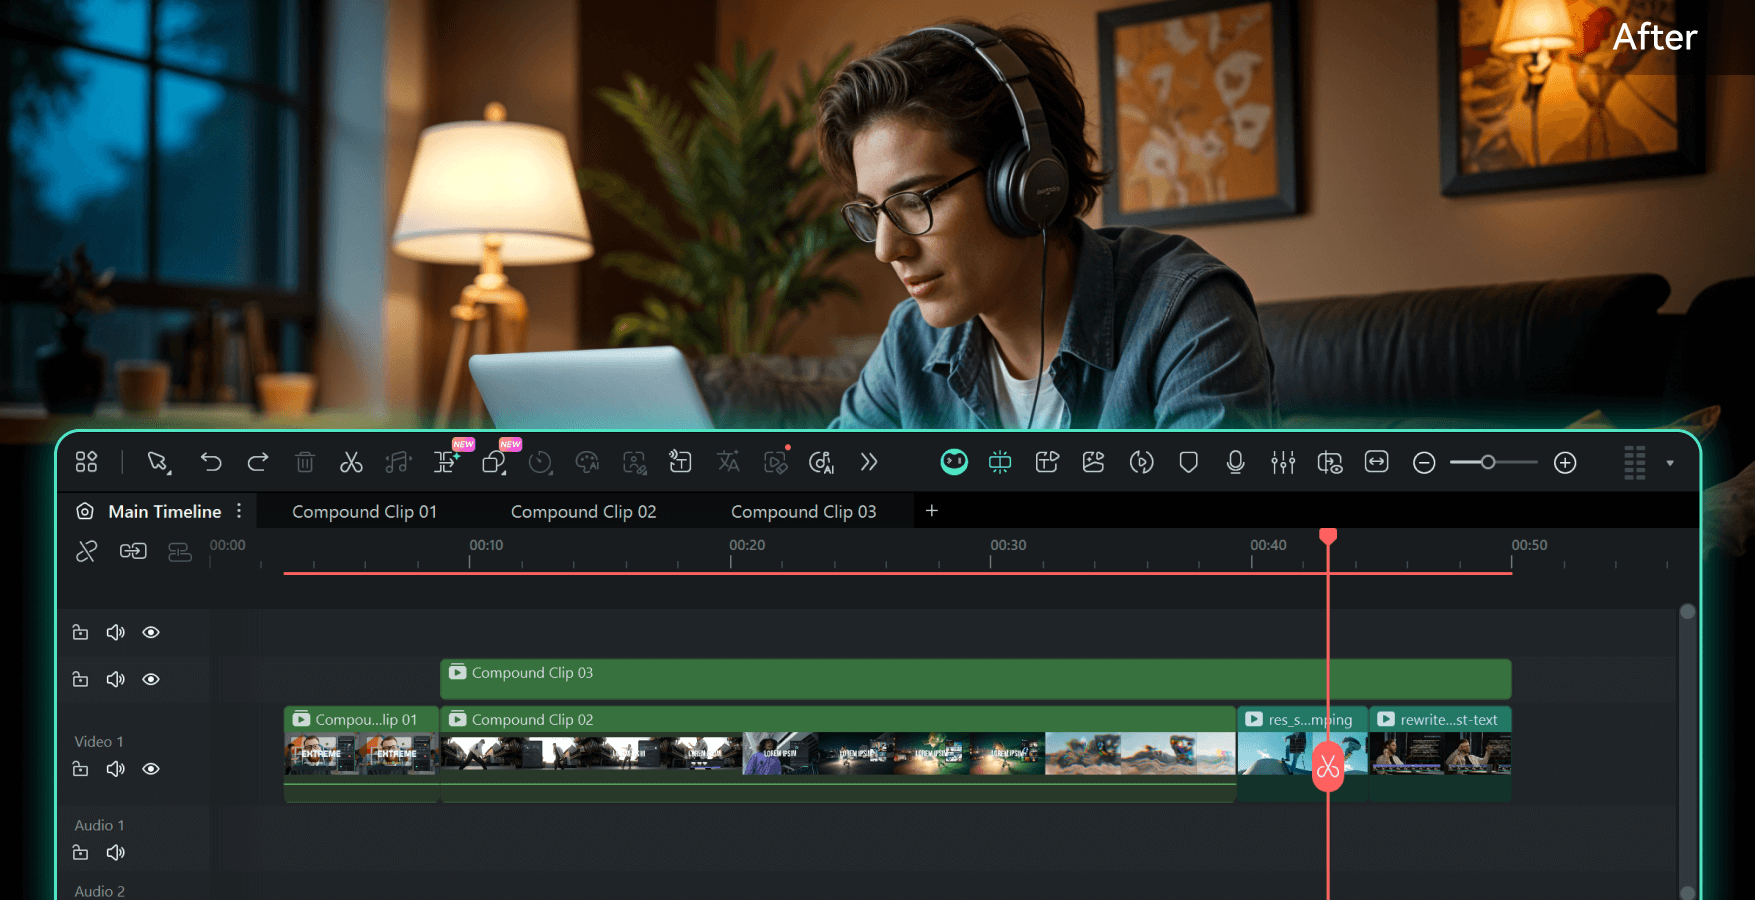

Think of it as a "mini project" inside your main timeline; compound clips have their own properties and can be edited independently while functioning like any other clip in your timeline. You can trim, retime, and apply effects or transitions to them, with changes reflecting wherever the clip is used. By consolidating multiple layers into a single unit, compound clips reduce visual clutter and make it easier to manage your timeline.
Key Features of Filmora Compound Clip
Tired of cluttered timelines? Use Filmora's Compound Clip to group multiple clips into a single unit. Keep your projects organized, edit faster, and work smarter — all while staying in control of your creative ideas.
Streamline Your Video Editing with Easy Clip Management
Turn multiple clips into a single unit to clean up your timeline and simplify complex projects. Filmora lets you combine up to 15 video clips, audio tracks, graphics, and more into a compound clip, applying edits and effects uniformly. This saves time, avoids repetitive editing, and helps you stay organized for a smoother workflow. If needed, you can easily break apart a compound clip to make individual adjustments.
Edit Freely and Switch Between Views
Double-click any compound clip to open and edit its contents. Make changes without affecting other parts of your timeline. Easily switch between the compound clip and the main timeline to test ideas, refine details, and ensure your project fits perfectly together.
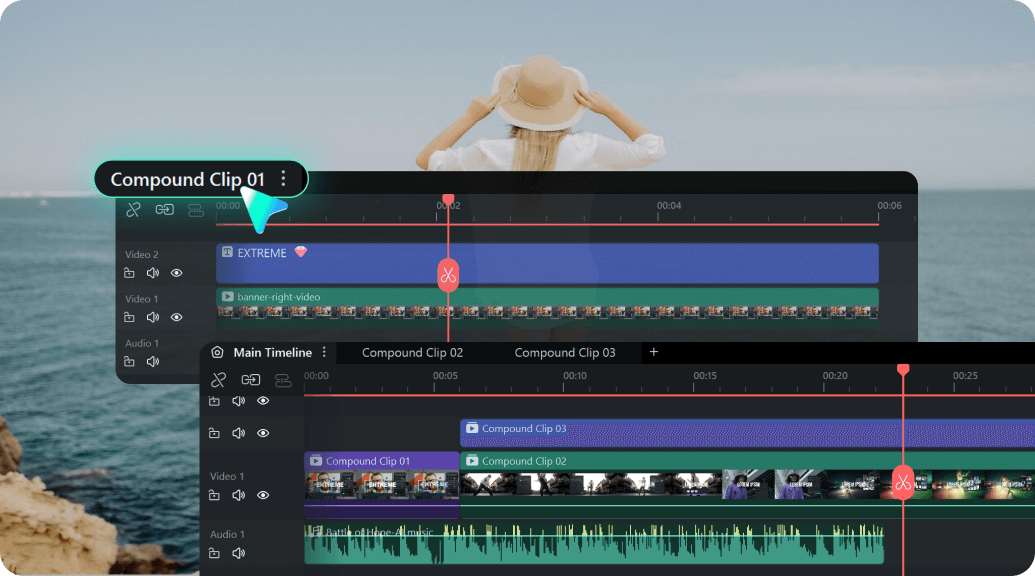
Seamlessly Switch Between Multiple Timelines
Filmora now supports dual timeline switching, allowing you to freely reuse clips across two timelines for faster, more organized editing. Effortlessly drag tabs to create or move timelines, and enjoy smoother workflow control in complex video projects.
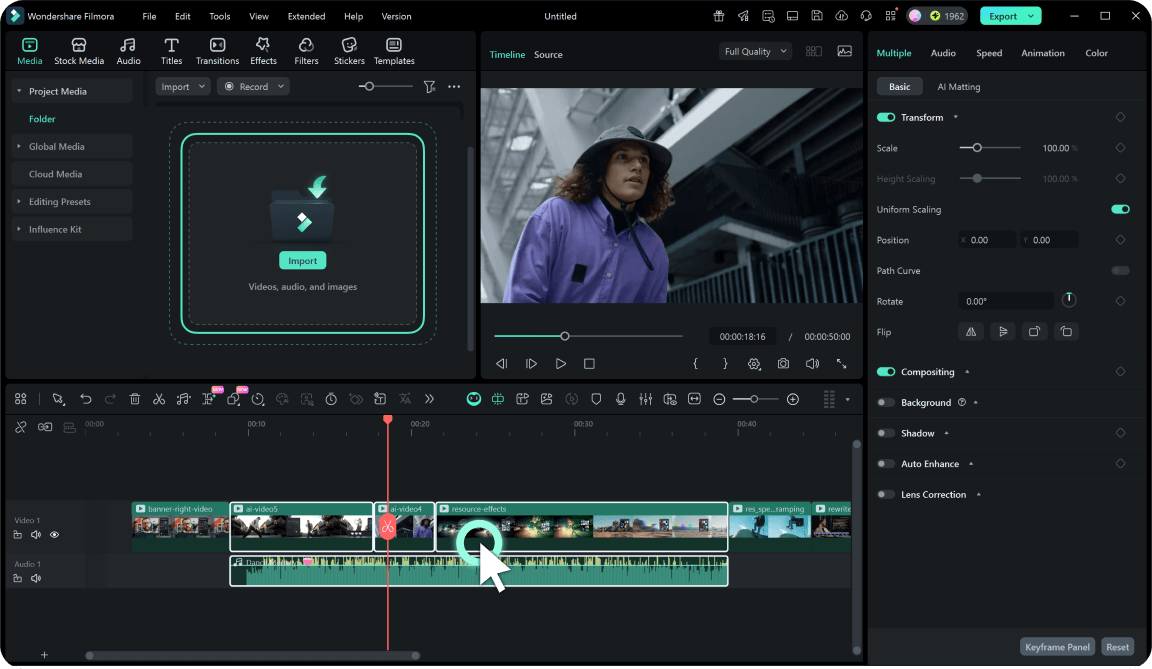
Apply Keyframes, Effects, and Adjustments in One Step
Add keyframes, transitions, effects, and color corrections to an entire compound clip with just a few clicks. Maintain a consistent look across grouped clips without editing each one individually. Whether you're animating a sequence or applying cohesive color grading, this feature delivers professional-quality results quickly.
Save and Reuse Compound Clips Across Projects
Save compound clips as Compound Clip Custom for use in other projects. Store them in the Media area for quick access to intros, outros, or recurring sequences. For example, wedding videographers can save commonly used montages to ensure consistency across projects.
How To Create a Compound Clip in Filmora
You can master Compound Clips in minutes — just follow these simple steps:
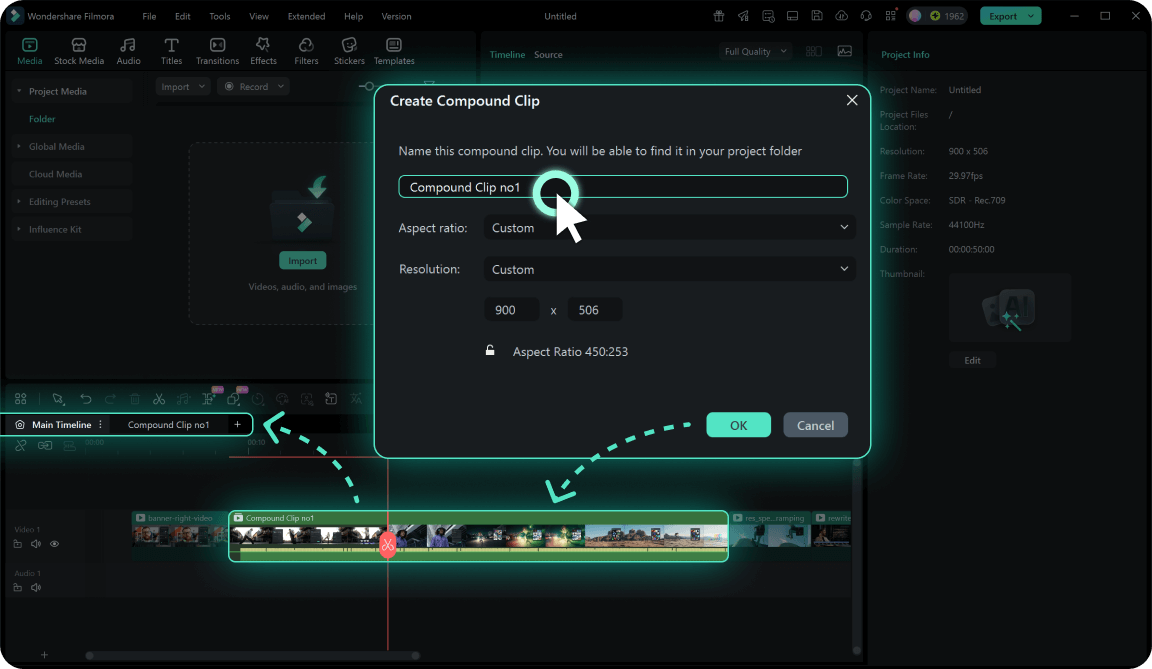
Step 1. Select Your Clips
Press Ctrl and select the video, audio, or image clips you want to group on the timeline.
Step 2. Create a Compound Clip
Right-click the selected clips and choose Create Compound Clip.
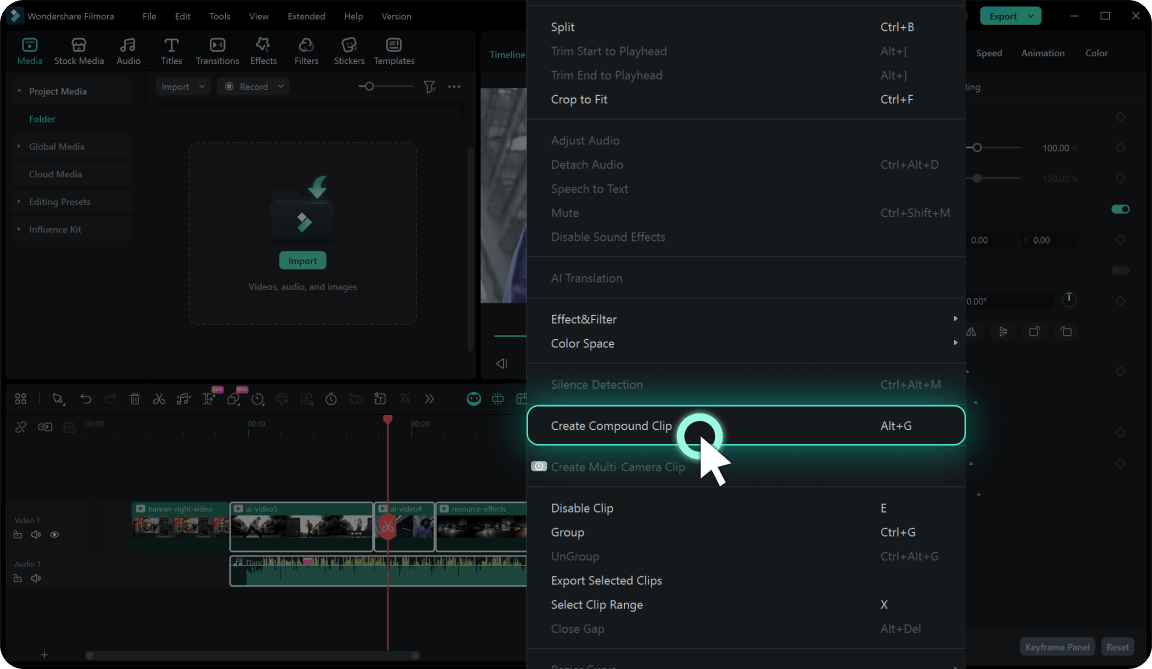
Step 3. Name Your Clip
Assign a clear name for better organization and click OK. A compound clip is created. You can double click the compound clip to make changes or add transitions, animations, or effects to enhance your video project.
-
Step 1: Select Your Clips
Press Ctrl and select the video, audio, or image clips you want to group on the timeline. -
Step 2: Create a Compound Clip
Right-click the selected clips and choose Create Compound Clip. -
Step 3: Name Your Clip
Assign a clear name for better organization and click OK. A compound clip is created. You can double click the compound clip to make changes or add transitions, animations, or effects to enhance your video project.
Creative Ways to Use Compound Clips
Discover new ways to edit with Filmora's Compound Clip. This flexible tool helps you do more than organize - it lets you build reusable templates, handle complex layers, and simplify your workflow. Try these ideas to get the best results from your Filmora projects.

Build Intro and Outro Templates
Create reusable intros and outros for consistent branding across your videos.

Manage Complex Layers Easily
Group text, overlays, and effects into one clip to keep everything organized and easy to adjust.

Simplify Scene Transitions
Combine scenes into compound clips and apply smooth transitions. Ideal for vloggers wanting seamless travel transitions.

Organize Audio Tracks
Group music, voiceovers, and sound effects into one compound clip to sync them effortlessly.

Create Custom Content Packs
Save titles, lower-thirds, or animations as compound clips and use them in future projects.
Learn More About Compound Clip in Our Blogs
Frequently Asked Questions
Can I edit a compound clip after creating it?
Yes. Double-click the compound clip to edit its contents without affecting the rest of your project.
Can I reuse compound clips in other projects?
Yes, you can save your compound clip as Compound Clip Custom, and it will appear in the Media area for future use.
Can I apply effects to a compound clip?
Yes. Add effects, transitions, or animations to the whole clip for a consistent style.
Does creating a compound clip change my original files?
No. Filmora keeps your original clips safe while letting you work with the grouped version.
Can I export a Compound Clip as a separate video file?
Yes, you can export a compound clip as a standalone video file. This is helpful when you want to reuse specific sections of your project in other videos.
Do compound clips affect the overall project performance or playback quality?
Compound clips are designed to improve project performance by simplifying the timeline. They generally have no negative impact on playback quality, making editing smoother.
Is the Compound Clip feature available in all versions of Filmora?
Compound Clip is available in Filmora 13 or later version. To check if your version supports this feature, refer to the version comparison or update your software to access this powerful organizational tool in your video editing workflow.
What advantages does the Compound Clip feature offer over traditional editing methods for complex projects?
The main advantage that the Compound Clip in Filmora offers is making a video editor’s job much easier, especially when they have to edit countless short clips and apply the same effects to each and every one.
What Creators Are Saying About Compound Clips

Alex
Video Creator
Compound Clips keep my timeline so clean! It’s a game-changer for complex edits.

Jennifer
YouTuber
I use compound clips for my intro templates. They save me hours of work every week!

Lisa
Content Creator
Being able to save and reuse compound clips is a lifesaver. I can’t imagine editing without it now!

Martin
Filmmaker
I love how easy it is to switch between the main timeline and compound clips. It makes my workflow so much smoother.
Discover More Powerful Video Editing Features


A video editor for all creators.