

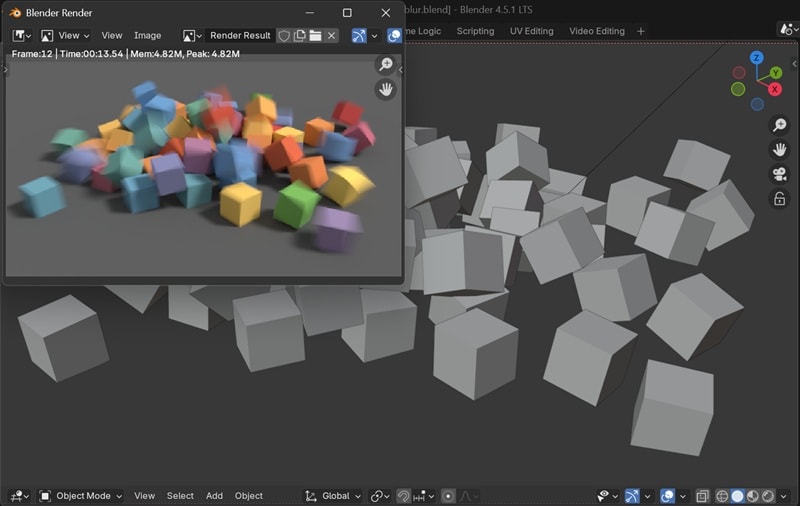
When you make animations in Blender, every frame comes out perfectly sharp by default. But that sharpness can look a little unnatural, especially when you're animating fast movement.
In real life, cameras capture a bit of blur when something moves quickly. That's why creating that motion blur in Blender will make your footage look more realistic and easier on the eyes. It can also add a cinematic feel to your project.
To do it, you don't need to dig through complicated manuals. This complete guide breaks down exactly how to add motion blur in Blender for both Cycles and Eevee in easy, clear step-by-step instructions and visuals, so you can achieve the perfect realistic blur effect without the stress.
Part 1. What is Motion Blur and Why Use It in Blender?
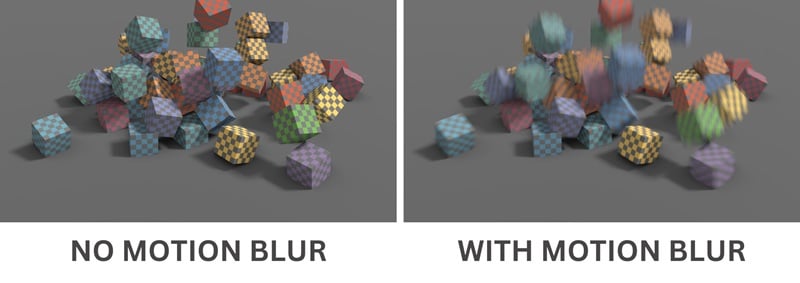
Motion blur is the streaking effect you see when objects move quickly in front of a camera. In filmmaking, it happens naturally because the camera's shutter stays open for a short period of time. As a result, it records the motion as a blur.
In 3D rendering, however, every frame is crystal clear by default, which can make the animation feel too rigid or artificial if you want to create a moving effect. Blender is a free 3D software that gives you the tools you need to fix this. The motion blur in Blender is actually built right in. You just need to know where to turn it on.
Key Benefits of the Motion Blur Effect
Motion blur is very common in fast-action shots, like fight scenes or chase sequences, characters moving quickly, and capturing dynamic camera moves. This effect is often necessary for:
- ✅ Making movement feel smooth and natural
- ✅ Adding a cinematic touch that makes your animation look more professional
- ✅ Reducing the "choppy" look that sometimes happens in fast scenes
- ✅ Guiding the viewer's attention to the main action instead of distracting details
- ✅ Recreating the way we see motion in real life, helping your project feel more realistic
Part 2. Step-by-Step Guide to Adding Motion Blur in Blender
Blender gives you two ways to render motion blur: Cycles and Eevee. Cycles aims for a physically accurate blur that looks like a real camera. Eevee focuses on speed and uses a smart mix of accumulation and post-process blur.
Note: The tutorial below will use Blender 4.5. Different may apply if you are using different version.
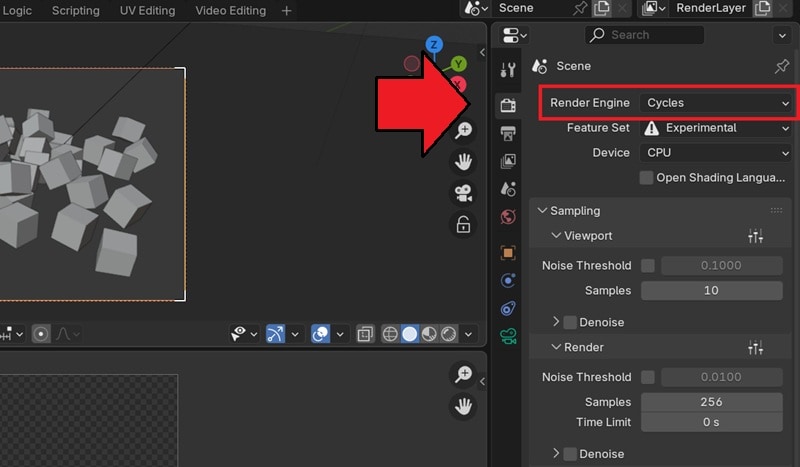
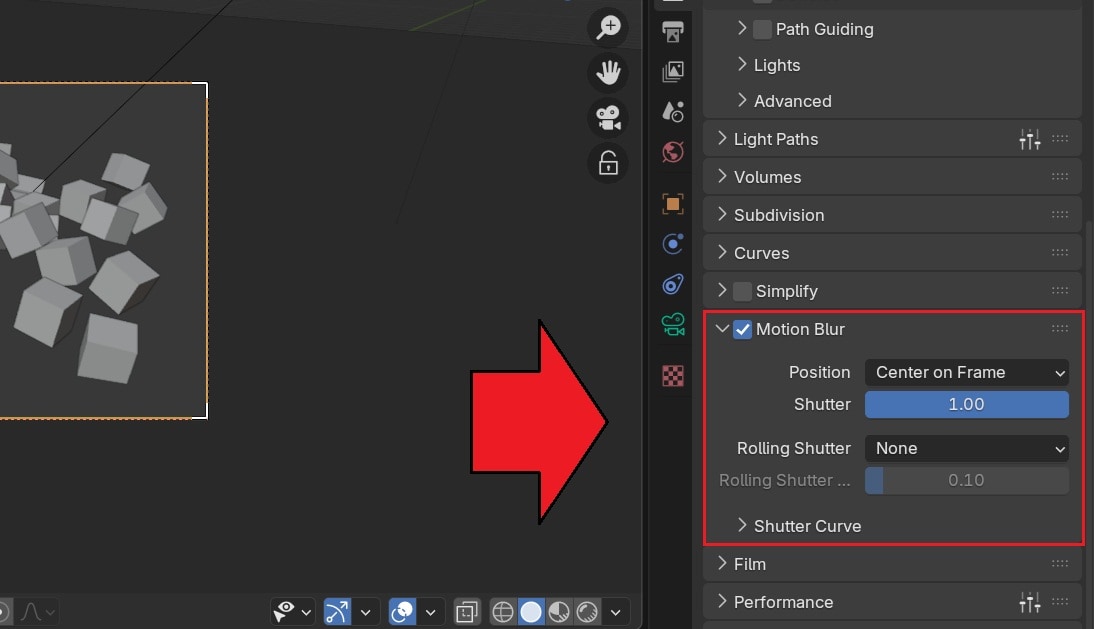
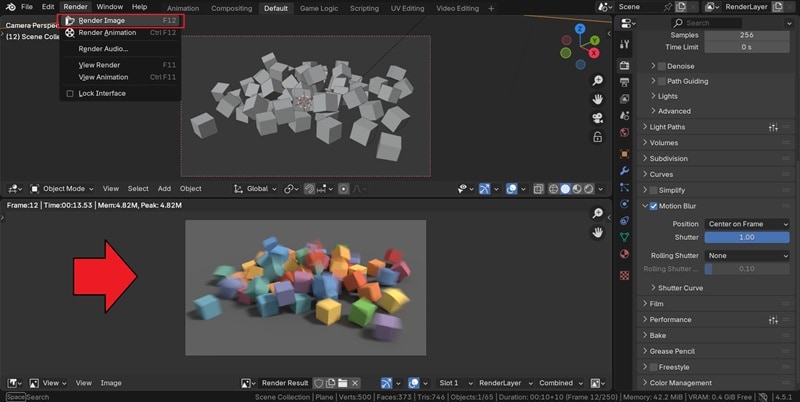
How to Add Motion Blur in Blender with Cycles
Position: Choose the position between Start on Frame, Center on Frame, or End on Frame to decide when the virtual shutter is open relative to the current frame.
- Start on Frame: Opens at this frame and records the motion that follows.
- Center on Frame: Fully open on this frame and captures motion before and after.
- End on Frame: Closes at this frame and favors motion leading into it.
Shutter: Increase or decrease how long the shutter stays open. A starting point of 0.5 often feels natural because it mimics the classic 180-degree shutter.
Rolling Shutter: Applies a rolling shutter style effect to the render, which creates distortions such as tilted verticals or wobbly shapes in fast motion.
- None: Disables the rolling shutter.
- Top to Bottom: Simulates rolling shutter by scanning the image starting from the top and moving downward.
Tip: If you use physics or particles, bake them. This helps Cycles calculate consistent blur for moving sims.
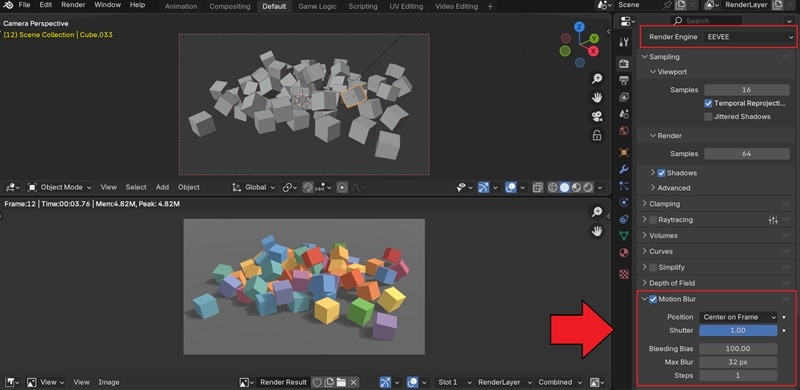
How to Add Motion Blur in Blender with Eevee
- Position and Shutter: Adjust to match scene timing and control blur strength.
- Bleeding Bias: Prevents background colors from bleeding onto foreground objects.
- Max Blur: Limits how far pixels smear; higher values increase blur but reduce quality.
- Steps: Adds accumulation passes for smoother results—raise gradually and preview changes.
Note: The above tutorial works on Blender 4.5. For Blender 2.8, motion blur in Eevee was limited to camera motion blur as a post-process effect, without object or deformation support. It's advisable to update your Blender to the latest version.
Key Takeaway:
- If you want the most realistic results, go with Cycles.
- If you're after speed and don't mind a few trade-offs in quality, try using Eevee.
Part 3. Blender Motion Blur Not Working? 4 Quick Fixes for Cycles and Eevee
Once you know how to add motion blur in Blender, you might still run into situations where the effect doesn't show up the way you expect. We've gathered the most common problems when applying motion blur in Blender and included simple solutions you can try to make it work.
Problem #1: Motion blur works in Blender Eevee but not in Cycles
If motion blur shows up fine in Eevee but not in Cycles, it's often related to how velocity is handled. One quick fix is to remove the velocity attribute and switch the velocity unit to Frame.
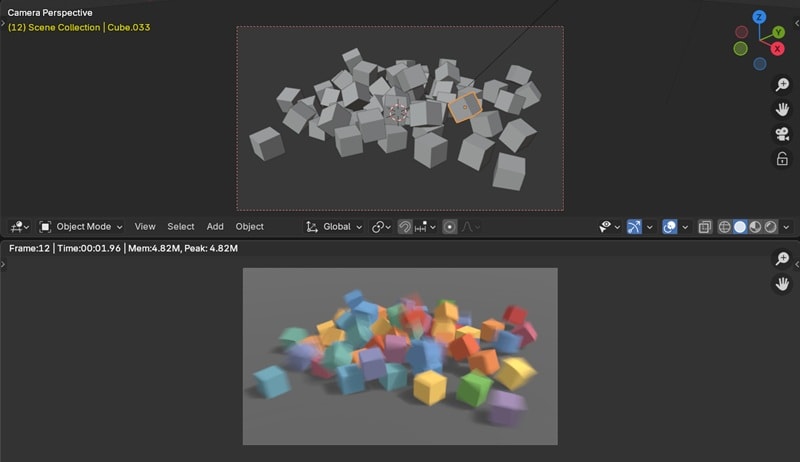
Also, keep in mind that motion blur doesn't display correctly in the viewport. To check if it's working, render an image or render the animation to disk, where the blur will actually appear.
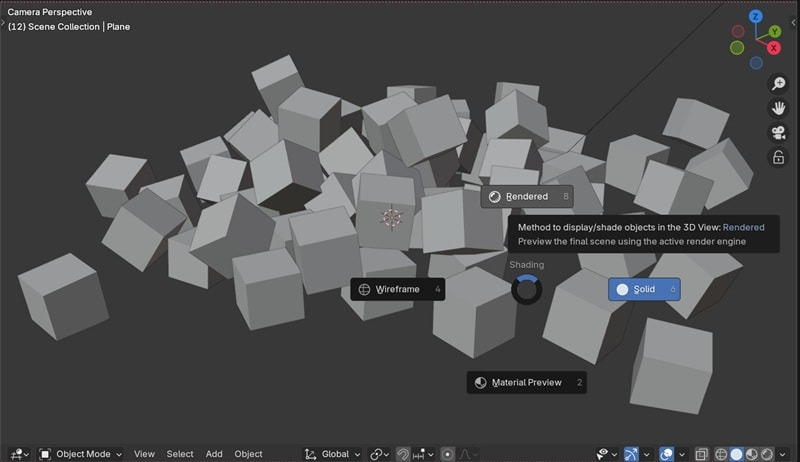
Problem #2: Motion blur is turned on, but nothing shows in the viewport
Motion blur in Blender is a rendering effect. It will not show up in the default Solid View or Material Preview modes. You must be in the Rendered Viewport Shading mode to see it. You can switch to it by pressing the Z key and selecting "Rendered" or by clicking the sphere icon in the top-right corner of the viewport.
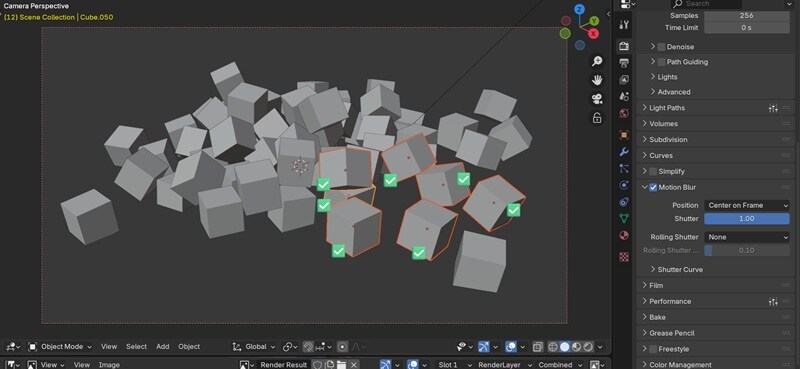
Problem #3: Only some objects are showing motion blur
The most likely reason for this is that motion blur has been disabled for specific objects. Blender gives you global control in the Render settings, but also per-object control. To fix this problem, you need to enable motion blur in the properties of each object you want to see the effect on.
Problem #4: Motion blur left some artifacts
Artifacts like ghosting, stepping, or jagged edges are usually a sign that the quality settings are too low for the speed of the motion. The solution for this problem depends on whether you are using Eevee or Cycles.
For Eevee, the solution is to increase the calculation steps. For Cycles, there are a couple of adjustments you can make:
- Object Deformation: If your artifacts are on a character or a deforming mesh, make sure you have enabled Deformation Motion Blur. Select the object, go to Object Properties > Motion Blur, and check the Deformation box.
- Increase Render Samples: Sometimes, what looks like an artifact is just render noise that is more noticeable in the blurred areas. Increasing the overall render samples in the Render Properties > Sampling panel will clean this up.
Bonus: Need a Simpler Motion Blur? Try Wondershare Filmora (Perfect for Video Editors)
As you can see, adding motion blur in Blender can deliver strong results, but the workflow often involves technical setup. Depending on your project, you may need to choose the right render engine, adjust settings such as shutter and position, and handle extra preparation before getting the look you want.
If you want a faster and more accessible way to create smoother motion, Wondershare Filmora now offers a built-in Motion Blur feature. It can automatically apply natural-looking motion blur to fast-moving elements, helping footage look smoother, more dynamic, and more realistic without a complex setup.
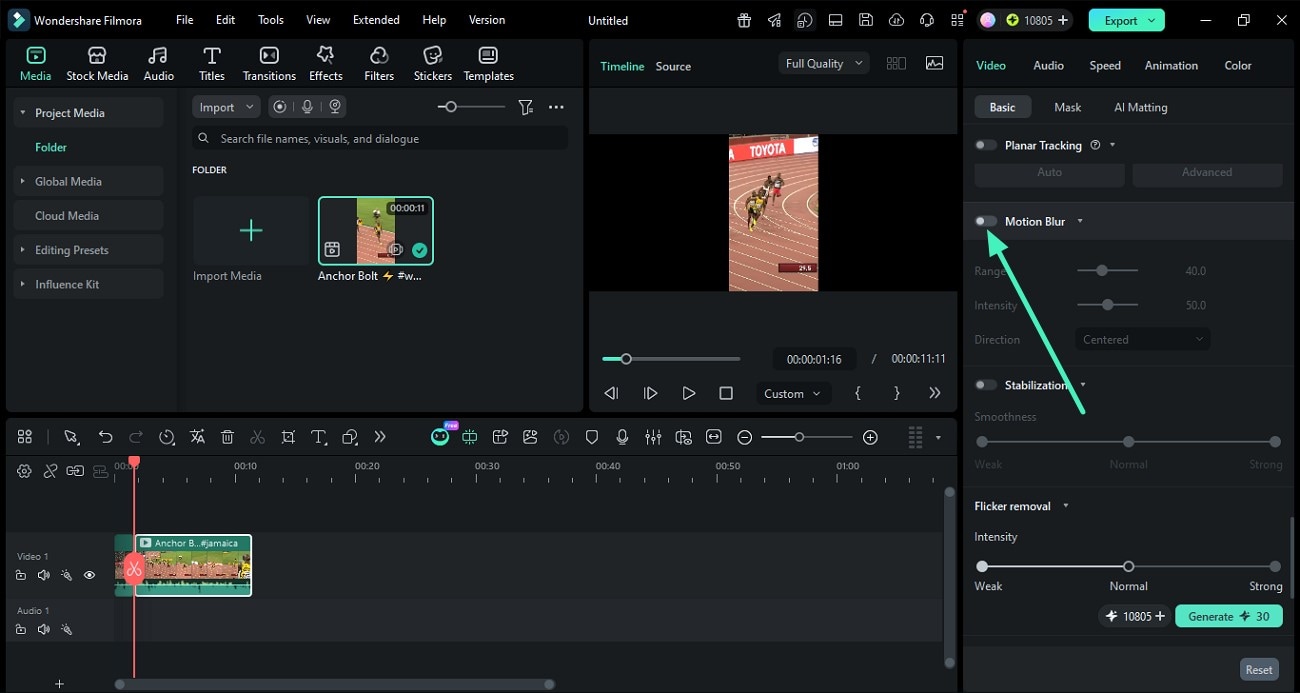
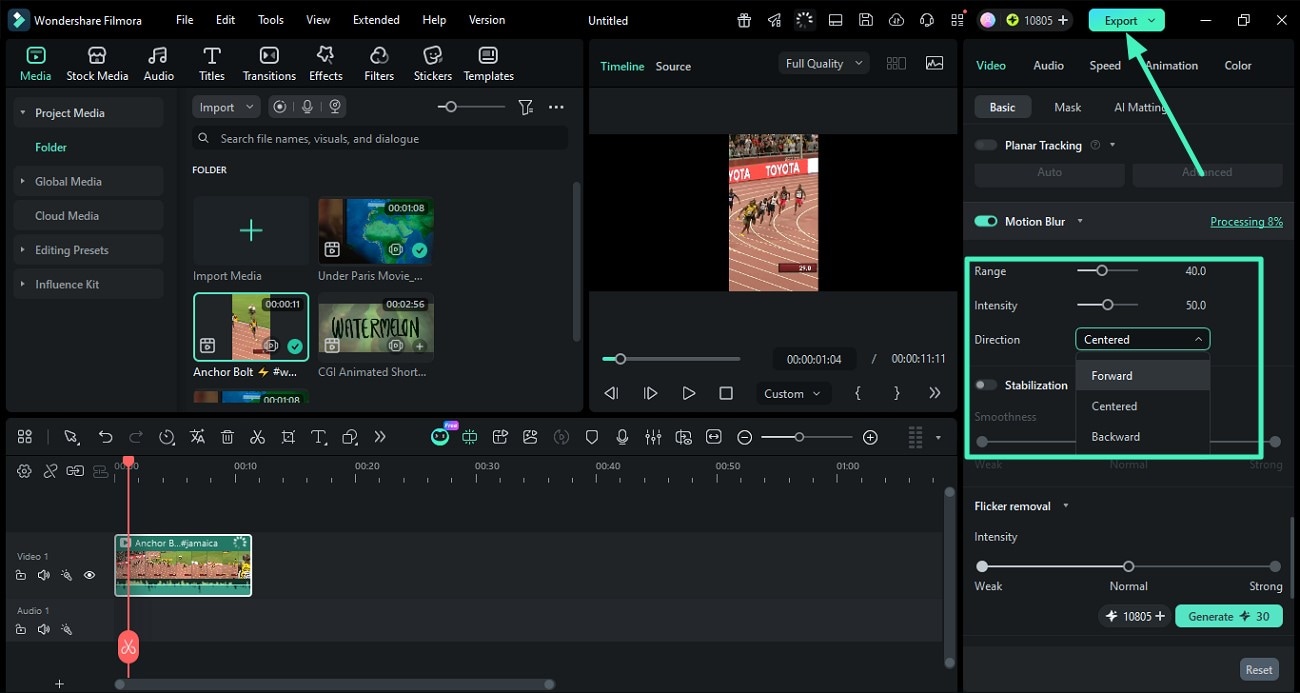
Filmora is a practical solution for creators who prefer a more straightforward workflow. Instead of relying on rendering logic or manual effect building, you can turn on AI Motion Blur in just a few steps, then adjust Range, Intensity, and Direction to match the style of your footage.
How to Add Motion Blur to a Video with Wondershare Filmora
Tip: You can try combining Filmora's features, such as AI Smart Cutout, AI Smart Masking, and Keyframing, to create smoother blur transitions, apply the effect on a certain area, and add more dynamic effects to your video.
Conclusion
To add motion blur in Blender, you can achieve it with Cycles for a realistic, film-like quality or Eevee for faster previews and quicker results. This small detail can change the way your animation feels.
If you'd rather skip the technical steps, you can also consider using Filmora to add motion blur to your video. With just a drag-and-drop effect, you can give your videos the same cinematic look without complicated settings.
